Winmate P Series Quick Start Manual
Ip69k stainless display with conduit pipe 15"/19"/21.5"/23.8"
Hide thumbs
Also See for P Series:
- Quick start manual (28 pages) ,
- Quick start manual (28 pages) ,
- User manual (72 pages)
Table of Contents
Advertisement
Quick Links
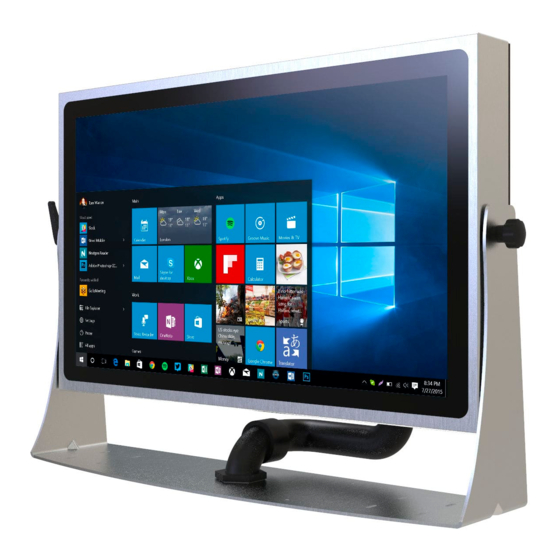
IP69K Stainless P-Series
Display with Conduit Pipe
Quick Start Guide
Document Version 1.0
Document Part No. 91521110104Q
Please read this instructions before operating the device and retain them for future reference.
15"/ 19"/ 21.5"/ 23.8"
Model No. R15L100-SPC369-P
R19L100-SPM169-P
W22L100-SPA369-P
W24L100-SPA269-P
Advertisement
Table of Contents

Related Manuals for Winmate P Series


Summary of Contents for Winmate P Series
- Page 1 IP69K Stainless P-Series Display with Conduit Pipe 15”/ 19”/ 21.5”/ 23.8” Model No. R15L100-SPC369-P R19L100-SPM169-P W22L100-SPA369-P W24L100-SPA269-P Quick Start Guide Document Version 1.0 Document Part No. 91521110104Q Please read this instructions before operating the device and retain them for future reference.
-
Page 2: Table Of Contents
IP69K Stainless P-Series Display Quick Start Guide Contents Chapter 1: Introduction 1.1 Overview 1.2 Features 1.3 Package Content 1.4 Product Overview 1.5 Physical Buttons and LED Indicators 1.6 LED Indicators 1.7 Connector Description Chapter 2: Installation 2.1 Mounting 2.1.1 VESA Mount 2.1.2 Yoke Mount 2.1.3 Panel Mount 2.2 I/O Cover and Conduit Pipe Installation... - Page 3 Chapter 1: Introduction FCC Statement This device complies with part 15 FCC rules. Operation is subject to the following two conditions: This device may not cause harmful interference. This device must accept any interference received including interference that cause undesired operation.
- Page 4 Warranty Winmate Inc. warranty guarantees that each of its products will be free from material and workmanship defects for a period of one year from the invoice date. If the customer discovers a defect, we will, at his/her option, repair or replace the defective product at no charge to the customer, provide it is returned during the warranty period of one year, with transportation charges prepaid.
- Page 5 Chapter 1: Introduction Advisory Conventions Four types of advisories are used throughout the user manual to provide helpful information or to alert you to the potential for hardware damage or personal injury. These are Notes, Important, Cautions, and Warnings. The following is an example of each type of advisory. Note: A note is used to emphasize helpful information Important:...
-
Page 6: Chapter 1: Introduction
Chapter 1: Introduction 1.1 Overview Congratulations on purchasing Winmate® IP69K Stainless P-Series Display. Winmate P- Series Display features with a waterproof conduit pipe for added cable protection. The IP69K series is built to withstand extensive wash downs with corrosion resistance against cleaning agents, especially against close-range high-pressure, high temperature wash downs. -
Page 7: Package Content
Chapter 1: Introduction 1.3 Package Content Carefully remove the box and unpack your device. Please check if all the items listed below are inside your package. If any of these items are missing or damaged contact us immediately. Factory shipment list: ... -
Page 8: Product Overview
IP69K Stainless P-Series Display Quick Start Guide 1.4 Product Overview This section contains mechanical drawing of the IP69K Stainless P-Series Display. Notice that this is a simplified drawing and some components are not marked in detail. Note 1: Yoke mount stand kit is an optional accessory. 15”, R15L100-SPC369-P Unit: mm Dimensions: 356 x 280 x 56 mm... - Page 9 Chapter 1: Introduction 21.5”, W22L100-SPA369-P Unit: mm Dimensions: 531 x 322 x 56 mm 23.8”, W24L100-SPA269-P Unit: mm Dimensions: 600 x 369 x 56 mm...
-
Page 10: Physical Buttons And Led Indicators
IP69K Stainless P-Series Display Quick Start Guide 1.5 Physical Buttons and LED Indicators Physical buttons are located on the OSD panel at the rear side of the display. Icon Button Description DOWN/ VOLUME Press to decrease the volume or volume DOWN down when without OSD menu. -
Page 11: Connector Description
Chapter 1: Introduction 1.7 Connector Description Terminal interfaces are located under the protection cover on rear side of the display. To access the I/O connectors, please open the protection cover first. Note: Notice that input and output connectors vary by product size and specifications. Connector description: Item Description... -
Page 12: Chapter 2: Installation
2.1.1 VESA Mount The Display has VESA mount holes on the rear side. Follow instructions below to mount the unit with VESA Mount bracket (not supplied by Winmate). Size VESA Plate Dimensions Screw Hole Diameter 15”, 19”... -
Page 13: Yoke Mount
2. Secure screws to fix the device upon the bracket stand. 3. Firmly secure the locking handle to the Display. Yoke Mount Stand Kit is available for order from Winmate. Please check mechanical drawing Appendix C of this quick start guide. - Page 14 IP69K Stainless P-Series Display Quick Start Guide Installation instruction ❶ Make a cutout on the fixture (ex. cabinet) ❷ Based on the drawing mark screw holes according to the cutout dimension of the on a rear side of the fixture. Place the display.
-
Page 15: I/O Cover And Conduit Pipe Installation
Chapter 2: Installation 2.2 I/O Cover and Conduit Pipe Installation The unit is available with I/O cover and waterproof conduit pipe for connectors and cable protection (required to maintain enclosure protection rating). Conduit pipe is a part of a complete assembly. The conduit pipe protects cables and gives users flexibility in selection of data, video, and power cables, depending on customer needs. -
Page 16: Conduit Pipe Removal
IP69K Stainless P-Series Display Quick Start Guide 4. Place the threaded 90-degree bends into the slip nut and then fasten it. To install I/O cover and Conduit Pipe 1. Connect cables to connectors. Conduit assembly may include all possible cables that might be needed. -
Page 17: Wiring Diagram
Chapter 2: Installation 2.5 Wiring Diagram This P-Series Display has waterproof conduit pipe and I/O cover to ensure protection rating. Please connect cables first, and then install I/O cover and conduit pipe. Wiring Diagram Note: Please use RJ45 to VGA Adapter to connect VGA cable to P-Series Display. -
Page 18: Connector Pin Assignments
IP69K Stainless P-Series Display Quick Start Guide 2.6 Connector Pin Assignments This P-Series Display is equipped with power connector, HDMI connector and USB connector for touch. The pin assignments of the connectors are described in this section. 2.6.1 Power Connector By default the P-Series Display has one 3-pin terminal block connector (phoenix type) power connector that accepts 12V DC or 9~36V DC power input based on your order. -
Page 19: Vga Connector
Chapter 2: Installation 2.6.3 VGA Connector The P-Series Display has one standard VGA 15pin D-sub connector for video. Use standard VGA cable to connect external PC system to the display. Pin assignment and signal name of VGA 15pin D-sub connector for optional touch. Pin №... -
Page 20: Chapter 3: Getting Started
IP69K Stainless P-Series Display Quick Start Guide Chapter 3: Getting Started 3.1 Connecting to Power Source By default the P-Series Display has one 3-pin terminal block connector (phoenix type) power connector that accepts 12V DC or 9~36V DC power input based on your order. Check your order specifications before connecting to power source. -
Page 21: Connecting To Dc Power Source (Optional)
Chapter 3: Getting Started 3.1.2 Connecting to DC Power Source (Optional) Follow the following steps to power on your device: 1. Connect the 3-pin terminal block. 2. Screw the Terminal block to fix the cable. 3. Connect terminal block to the display. + Connect to power supply until 0V -Connect to power supply until it get +12V DC or +9~36V DC (based you’re your specifications). -
Page 22: On-Screen Display (Osd) Menus
IP69K Stainless P-Series Display Quick Start Guide 3.3 On-Screen Display (OSD) Menus OSD Icon Sub-menu Settings Note BRIGHTNESS slider bar Default 50 Use to adjust the screen’s brightness. Range 0 to 100 CONTRAST slider bar Default 50 BRICONTRAST Use to adjust the screen’s contrast. Range 0 to 100 H POSITION slider bar Default 50... -
Page 23: Chapter 4: Troubleshooting
Chapter 4: Troubleshooting Chapter 4: Troubleshooting 4.1 Basic Troubleshooting Problem Solution There is a black dot or dead A missing pixel does not constitute an out of spec. pixel dot on the screen defective product Turn off the power supply, and check that the AC cord or Cannot turn power on DC cord are securely inserted. -
Page 24: Appendix
IP69K Stainless P-Series Display Quick Start Guide Appendix Appendix A: Hardware Specifications Model Name R15L100-SPC369-P R19L100-SPM169-P W22L100-SPA369-P W24L100-SPA269-P Display 15” 19” 21.5” 23.8” Size Resolution 1024 x 768 1280 x 1024 1920 x 1080 1920 x 1080 Brightness 250 nits (typ.) 350 nits 250 nits (typ.) 250 nits (typ.) -
Page 25: Appendix B: Frequency Table
Appendix Appendix B: Frequency Table Signal Name Vertical Frequency(Hz) HDMI ✔ ✔ 1024 x 768 ✔ ✔ ✔ 1280 x 1024 ✔ ✔ ✔ 1600 x 1200 ✔ ✔ ✔ 1920 x 1080 ✔... -
Page 26: Appendix C: Yoke Mount Stand Kit Dimensions
IP69K Stainless P-Series Display Quick Start Guide Appendix C: Yoke Mount Stand Kit Dimensions 15”, R15L100-SPC369-P Unit: mm Part No. 98K015A0000D 19”, R19L100-SPM169-P Unit: mm Part No. 98K019A00002... - Page 27 Appendix 21.5”, W22L100-SPA369-P Unit: mm Part No. 98K021A00001 23.8”, W24L100-SPA269-P Unit: mm Part No. 98K023A00001...
- Page 28 Winmate Inc. 9F, No.111-6, Shing-De Rd., San-Chung District, New Taipei City 24158, Taiwan, R.O.C www.winmate.com Copyright © Winmate Inc. All rights reserved.
Need help?
Do you have a question about the P Series and is the answer not in the manual?
Questions and answers