Advertisement
Available languages
Available languages
Quick Links
H-5066
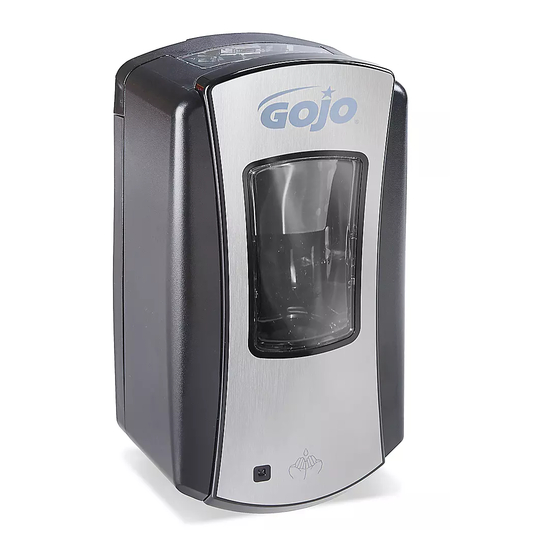
FOAM SOAP
DISPENSER
TOOL NEEDED
(FOR OPTIONAL FASTENER INSTALLATION)
Drill
Do not install in locations where dispenser may be
exposed to wet environments, such as showers or areas
where walls are washed down.
PREPARING FOR INSTALLATION
1. Open dispenser by pushing on
Figure 1
2. Install dispenser at least 6"
Figure 2
TAPE INSTALLATION
1. Peel paper off installation tape.
Figure 3
2. Press firmly on back plate
Figure 4
PAGE 1 OF 6
1-800-295-5510
uline.com
PARTS
(FOR OPTIONAL FASTENER INSTALLATION)
Type A
#10 x 1" Screw x 4
one of the dual side latches
until it releases. (See Figure 1)
above counter top.
(See Figure 2)
Clean installation surface with
an alcohol pad. Allow surface
to dry for 60 seconds.
(See Figure 3)
for 10 seconds. For maximum
adhesion, do not load refill for
24 hours. (See Figure 4)
#10 x 1" Anchor x 4
INSTALLATION
FASTENER INSTALLATION (NOT INCLUDED)
Figure 5
BATTERY INSTALLATION
Figure 6
Figure 7
Figure 8
Para Español, vea páginas 3-4.
Pour le français, consulter les pages 5-6.
1. Using back plate as a template,
press a pencil through the
installation tape to mark holes.
(See Figure 5)
2. Mark and drill holes using
#10 x 1" anchors and type A
#10 x 1" screws.
1. Open dispenser by pushing
one of dual side latches until it
releases. Use four high quality
D-Cell batteries (not included).
(See Figure 6)
2. Close dispenser. Battery
indicator light will initially
alternate blinking red and
green, and after a few
moments will consistently blink
green. (See Figure 7)
REFILL INSTALLATION
1. Remove cap from refill pump.
You will notice a colored knob
(E-key) protruding from the
black pump collar. DO NOT
REMOVE THE E-KEY. Removing
the E-key will prevent the refill
from dispensing. (See Figure 8)
2. With E-key facing the back plate,
push refill pump into pump
house. When refill is installed
correctly, indicator light will blink
green. (See Figure 8)
0421 IH-5066
Advertisement

Subscribe to Our Youtube Channel
Summary of Contents for U-Line GOJO LTX H-5066
- Page 1 Para Español, vea páginas 3-4. Pour le français, consulter les pages 5-6. H-5066 1-800-295-5510 uline.com FOAM SOAP DISPENSER TOOL NEEDED PARTS (FOR OPTIONAL FASTENER INSTALLATION) (FOR OPTIONAL FASTENER INSTALLATION) Type A #10 x 1" Anchor x 4 Drill #10 x 1" Screw x 4 INSTALLATION FASTENER INSTALLATION (NOT INCLUDED) Do not install in locations where dispenser may be...
- Page 2 INSTALLATION CONTINUED LOCK INSTALLATION LOCK UNINSTALLATION 1. The key to lock the dispenser 1. Open the locked dispenser Figure 12 Figure 9 is located in the key mount on by inserting the key into the the inside of the dispenser. keyhole on the top of dispenser.
-
Page 3: Herramienta Necesaria
H-5066 800-295-5510 uline.mx DESPACHADOR DE JABÓN EN ESPUMA HERRAMIENTA NECESARIA PARTES (PARA INSTALACIÓN OPCIONAL DE LOS (PARA INSTALACIÓN OPCIONAL DE LOS FIJADORES) FIJADORES) 4 Tornillos de Taladro 4 Anclajes de #10 x 1" #10 x 1" Tipo A INSTALACIÓN INSTALACIÓN DE LOS FIJADORES No lo instale en ubicaciones donde el despachador pueda estar expuesto a entornos húmedos, como (NO SE INCLUYEN) - Page 4 CONTINUACIÓN DE INSTALACIÓN COLOCACIÓN DEL REPUESTO DESINSTALACIÓN DEL CIERRE 1. Quite la tapa de la bomba de 1. Abra el despachador cerrado Diagrama 8 Diagrama 12 repuesto. Verá una perilla de insertando la llave en colores (Tecla E) que sobresale la cerradura ubicada en del cuello de la bomba negra.
-
Page 5: Installation
H-5066 1-800-295-5510 uline.ca DISTRIBUTEUR DE SAVON MOUSSE OUTIL REQUIS PIÈCES (POUR L'INSTALLATION OPTIONNELLE (POUR L'INSTALLATION OPTIONNELLE DES PIÈCES DE FIXATION) DES PIÈCES DE FIXATION) Vis n° 10 x 1 po Boulon d'ancrage Perceuse de type A x 4 n° 10 x 1 po x 4 INSTALLATION INSTALLATION DES PIÈCES DE FIXATION N'installez pas le distributeur où... - Page 6 INSTALLATION SUITE INSTALLATION DE LA RECHARGE DÉVERROUILLER LE DISTRIBUTEUR 1. Retirez le capuchon sur la 1. Ouvrez le distributeur verrouillé Figure 8 Figure 12 pompe de la recharge. Vous en insérant la clé dans la remarquerez un bouton coloré serrure située sur le dessus du (clé...


Need help?
Do you have a question about the GOJO LTX H-5066 and is the answer not in the manual?
Questions and answers