Table of Contents
Advertisement
Available languages
Available languages
Quick Links
π
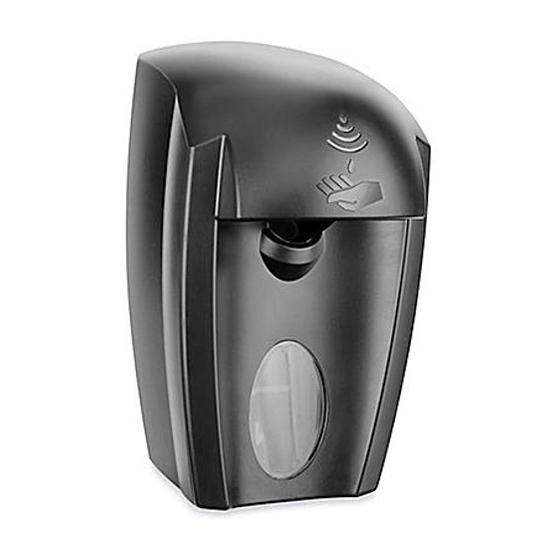
H-3415
AUTO FOAMING
SOAP DISPENSER
TOOLS NEEDED
Phillips Screwdriver
APPLYING DISPENSER LABEL
1.
Peel label from
backing. The
adhesive is on the
FRONT of the label.
(See Figure 1)
2. Open dispenser.
Place label sticky side
down on the INSIDE of
the clear oval window.
(See Figures 2-3)
3. Close front of
dispenser.
(See Figure 4)
PAGE 1 OF 12
1-800-295-5510
uline.com
Electric Drill
INSTALLATION
Figure 1
Figure 2
Adhesive Side
Dispenser Door
Dispenser Door
Opened
Opened
Figure 3
Label
Front
Figure 4
Pour le français, consulter les pages 9-12.
MOUNTING INSTRUCTIONS
For most applications, tape mounting is adequate.
For porous, textured or wallpapered surfaces, screw
mounting or a combination of screw and tape
mounting is recommended.
TAPE MOUNTING
1.
Important! Dispenser opens
to the front. For ideal
placement, the dispenser
should be mounted 3"
above any countertop,
fixture or obstruction, and 2"
below any cabinet, fixture or
obstruction. (See Figure 5)
2. Clean the mounting surface
thoroughly using any type
of general purpose cleaner
and a paper towel.
(See Figure 6)
NOTE: Be certain
surface is completely
dry before proceeding.
3. Remove the protective
backing from the tape
pad on the back of the
dispenser. Make certain
that the mounting surface
is clean and dry. Carefully
position the dispenser to the
desired location and press
firmly to the surface for 30
seconds. (See Figure 7)
Para Español, vea páginas 5-8.
Figure 5
2"
11"
7.5"
3"
Figure 6
Figure 7
0814 IH-3415
Advertisement
Table of Contents

Related Manuals for U-Line H-3415


Summary of Contents for U-Line H-3415
- Page 1 Para Español, vea páginas 5-8. Pour le français, consulter les pages 9-12. π H-3415 1-800-295-5510 uline.com AUTO FOAMING SOAP DISPENSER TOOLS NEEDED Phillips Screwdriver Electric Drill INSTALLATION APPLYING DISPENSER LABEL MOUNTING INSTRUCTIONS Peel label from For most applications, tape mounting is adequate.
-
Page 2: Screw Mounting
INSTALLATION CONTINUED MOUNTING INSTRUCTIONS CONTINUED 3. Open the dispenser by Figure 13 pushing up on the release TAPE MOUNTING latch. The latch is on the Figure 8 bottom back edge of the CONTINUED dispenser in the center. 4. Open the dispenser by (See Figure 13) pushing up on the release NOTE: See "Keyed... -
Page 3: Loading The Dispenser
INSTALLATION CONTINUED KEYED LOCKING OPTION CONTINUED LOADING THE DISPENSER 2. From the INSIDE of the 1. Open by pushing up on the release latch (use key dispenser, insert the key into if you have converted to the keyed locking mode). the back of the dispenser in The latch is on the bottom back edge in the center. -
Page 4: Maintenance
MAINTENANCE CHANGING THE BATTERIES 4. Unhook battery terminals and remove battery • 6 AA batteries required pack. Replace all 6 AA batteries with new • No screwdriver needed batteries. (See Figure 31) NOTE: Batteries need changing when sensor light flashes RED. 1. -
Page 5: Herramientas Necesarias
π H-3415 800-295-5510 uline.mx DESPACHADOR AUTOMÁTICO DE JABÓN DE ESPUMA HERRAMIENTAS NECESARIAS Desarmador Phillips Taladro Eléctrico INSTALACIÓN PONGA ETIQUETA EN DESPACHADOR INSTRUCCIONES PARA INSTALACIÓN Desprenda la La cinta para instalación es lo adecuado para la Diagrama 1 etiqueta del respaldo. - Page 6 CONTINUACIÓN DE INSTALACIÓN CONTINUACIÓN DE INSTRUCCIONES 3. Abra el despachador elevando Diagrama 13 el seguro para liberación. El PARA INSTALACIÓN seguro está en la parte de Diagrama 8 abajo al centro atrás del MONTAJE DE CINTA despachador. CONTINUA (Vea Diagrama 13) 4.
- Page 7 CONTINUACIÓN DE INSTALACIÓN CONTINUACIÓN DE OPCIÓN PARA CARGUE EL DESPACHADOR CERRAR CON "LLAVE" 1. Abra el despachador elevando el seguro para liberación (utilice la llave si está en la modalidad 2. Desde el INTERIOR del despachador, de cerrar con llave). El seguro está en la parte inserte la llave en la ranura de abajo al centro atrás del despachador.
-
Page 8: Mantenimiento
MANTENIMIENTO CAMBIE LAS BATERÍAS 4. Desconecte las terminales de las • 6 baterías AA baterías y retire el paquete de baterías. • No requiere desarmador. Reemplace las 6 baterías AA con las NOTA: Requiere cambio de baterías cuando la nuevas baterías. luz del sensor parpadee en ROJO. - Page 9 π H-3415 1-800-295-5510 uline.ca DISTRIBUTEUR AUTOMATIQUE DE SAVON MOUSSEUX OUTILS NÉCESSAIRES Tournevis cruciforme Perceuse électrique L'INSTALLATION L'APPLICATION DE L'ÉTIQUETTE DU INSTRUCTIONS DE MONTAGE DISTRIBUTEUR Pour la plupart des applications, il suffit d' utiliser du ruban adhésif pour le montage. Pour les surfaces...
- Page 10 L'INSTALLATION SUITE INSTRUCTIONS DE MONTAGE SUITE 3. Ouvrez le distributeur en Figure 13 pressant le loquet de MONTAGE À RUBAN ADHÉSIF SUITE déblocage vers le haut. Le loquet se trouve au centre 4. Ouvrez le distributeur en du bord inférieur de la partie Figure 8 pressant le loquet de arrière du distributeur.
- Page 11 L'INSTALLATION SUITE L'OPTION DE VERROUILLAGE À CLÉ SUITE CHARGEMENT DE LA DISTRIBUTRICE 2. À partir de l'INTÉRIEUR du 1. Ouvrez le distributeur en pressant le loquet de distributeur, insérez la clé à déblocage vers le haut (ou encore avec la clé si le l’arrière du distributeur dans la distributeur a été...
-
Page 12: Entretien
ENTRETIEN REMPLACEMENT DES PILES 4. Remettre le bloc-piles en place et rettacher les • Six piles AA. bornes. (Voir Figure 31) • Il n'est pas nécessaire d'utiliser un tournevis. REMARQUE : Le témoin rouge clignote pour signaler quand les piles doivent être remplacées.
Need help?
Do you have a question about the H-3415 and is the answer not in the manual?
Questions and answers