Advertisement
Quick Links
Advertisement

Related Manuals for fantastic furniture Vision Display Cabinet MK2


Summary of Contents for fantastic furniture Vision Display Cabinet MK2
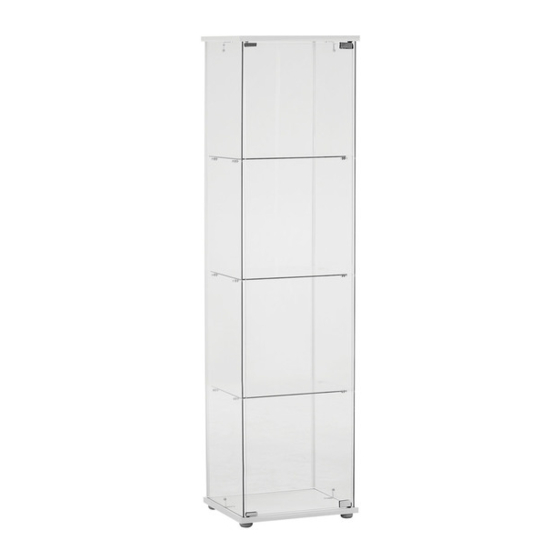
- Page 1 Version: 1.1 Vision Display Cabinet MK2 www.fantasticfurniture.com.au...
- Page 2 We’re thrilled you’ve chosen Fantastic Furniture to help create a home you’ll love Love it? Share it! Fantastic buy! Share how it looks at home on Instagram for your chance to win a $250 Fantastic Furniture Gift Card! @fantasticfurniture fantasticfurniture.com.au Page 2...
- Page 3 THIS PRODUCT MUST BE ASSEMBLED ON A SOFT SURFACE SUCH AS CARPET OR A RUG TO PREVENT ACCIDENTAL SHATTERING DURING ASSEMBLY. IF YOU DO NOT HAVE THESE IN YOUR HOME THEN LAY THE CARDBOARD PACKAGING FLAT AND ASSEMBLE ON TOP OF THE EMPTY PACKAGING. DO NOT ASSEMBLE ON A HARD SURFACE.
-
Page 4: Assembly Checklist
Assembly Checklist Read through the instructions carefully Make sure you have all the required tools. before you begin Never use power tools unless instructed. Identify and lay out all of the Unless instructed, do not fully tighten components before you begin assembly screws until the item is fully assembled. -
Page 5: What You Need
What you need panel (P5) to assemble the product Joining brackets Side Joining brackets panel Back (P4) panel (P2) Shelves (P7) Other tools you need Side Phillips Head Screwdriver panel (P4) Shelves (P7) Door panel Parts List: (P6) Base (P1); Shelves (P7) Back panel (P2);... - Page 6 THIS PRODUCT MUST BE ASSEMBLED ON A SOFT Step 1 SURFACE SUCH AS CARPET OR A RUG TO PREVENT ACCIDENTAL SHATTERING DURING ASSEMBLY. IF YOU DO NOT HAVE A SOFT SURFACE. LAY THE CARDBOARD You will need PACKAGING FLAT AND USE AS A BASE FOR ASSEMBLY. (H6) (H5) (H6)
- Page 7 Step 3 (P2) (P3) (P3) (P3) (P2) Slide the Joining Brackets (P3x2) onto each side of the Back Panel (P2) and into the Base (P1). Ensure that the shorter side of the Joining Brackets (P1) (P3x2) are attached to the Back Panel (P2) as shown. Push down on the Joining Brackets (P3x2) to ensure that they are firmly secured into the Base (P1).
- Page 8 Step 5 (P5) (P2) (P4) (P4) Align the grooves on the Top Panel (P5) with the top of Back & Side Panels (P2&P4x2) and then place securely. Step 6 (H2) (P5) You will need (H3) (H1) (H4) (H1) 4 x Metal (P4) 8 x Bolts (H1) (P4)
- Page 9 Step 7 (H7) (P5) You will need (H4) (H4) (H7) (P4) 12 x Shelf Supports 24 x Washers (H4) & Screws (H7) (H10) (P4) (H10) 2 x Magnetic Door Catches (H10) Note: the door can be fitted to open from the left or right side (P1) of the cabinet.
- Page 10 Step 9 (H9) You will need (P5) Phillips head 2x Hinge Sleeves (H9) Screwdriver (P6) Note: This step shows the door being fitted to open from the left side of the cabinet. If you wish to open from the right side, please ensure the Magnetic Door (P1) Catches are placed on the right side of the Top &...
- Page 11 Step 11 (P7) (P7) (P7) Carefully place each Shelf (P7x3) into the cabinet by resting gently on the Shelf Supports (H7) as shown. Ensure each Shelf is sitting securely on all four Shelf Supports. Step 12 (H13) We strongly advise that you use (H14) You will need the wall safety strap provided to...
-
Page 12: Job Complete
Step 13 (H13) You will need (H15) Wall 1x Wall strap Phillips head washer (H15) Screwdriver Seek advice from a qualified tradesperson on how to attach safety strap to the wall. Screw & wall plug are not provided. Please use appropriate fixtures for your wall.
Need help?
Do you have a question about the Vision Display Cabinet MK2 and is the answer not in the manual?
Questions and answers