
Related Manuals for Kargo Master 81002


Summary of Contents for Kargo Master 81002
- Page 1 Instruction Guide 81002 Kargo Master Rancho Cordova, CA 95742 800-343-7486 CustomerService@KargoMaster.com 20210728R1 DATE: ________________...
- Page 2 Step 6 – Adjust for Ladder ..........................6 Before You Begin Read all instructions prior to assembling or installing any Kargo Master product. Always locate your installation locations prior to performing any work. Have rack assembled prior to installation of clamp mechanism.
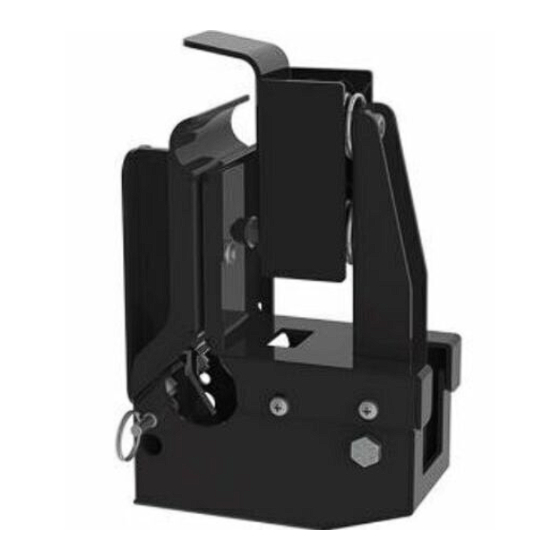
- Page 3 Instructions – 81002 Parts With the exception of the tape strip, the clamp comes preassembled. The following Parts are for identification during installation. For Technical Support Call: 800-343-7486, Monday-Friday, 7AM - 4 PM (PST) Page 2...
- Page 4 Instructions – 81002 Hardware With the exception of the tape strip, the clamp comes preassembled. The following hardware is for identification during installation. For Technical Support Call: 800-343-7486, Monday-Friday, 7AM - 4 PM (PST) Page 3...
- Page 5 Instructions – 81002 DO NOT EXCEED MANUFACTURERS WEIGHT CAPACITY FOR ROOF Step 1 – Disassemble Clamp Assembly Release ladder hook by pulling pin on side of swing arm. Pull handle outward. Remove 5/16” x 3/4” hex head bolts, 5/16” lock washers, and 5/16”...
- Page 6 Instructions – 81002 Step 4 – Attach Front Clamp Position the clamp mechanism in desired DO NOT TIGHTEN! position on the rack so the clamp is between two ladder rungs. Be sure handle is towards outside of vehicle. Using the 5/16” x 3/4” hex head bolts, 5/16”...
- Page 7 Instructions – 81002 TIGHTEN 5/16” hex head bolts from Step 3, THEN tighten remaining hardware. Step 6 – Adjust for Ladder Set ladder onto rack, firmly against side channel. Pull pin to release and then clamp ladder in position.
Need help?
Do you have a question about the 81002 and is the answer not in the manual?
Questions and answers