Advertisement
Quick Links
R3.5 WALL ASSEMBLY
INSTALLATION INSTRUCTIONS
IMPORTANT NOTES: Read First
(A) Use liquid thread lock (such as Loctite
curing) helps to eliminate the common problem of "thread seizure" in stainless steel hardware by serving as a
lubricant during assembly.
(B) Refer to Installation Manual for R3.5-09 Collars and R3.5-11 Socket Clamps installation instructions.
(C) All gaps created (e.g. between panels, between panel and deck, between panel and roof, etc.) must be less
than 3-1/2" [89mm] or greater than 9" [229mm].
(D) Collar heights will vary with different walls. Use wall to locate collar height.
(E) These instructions apply to all configurations of R3.5 Walls, Short Walls, Tall Walls and Upper Barrier Walls.
Figure 1.3
Figures 1.1 & 1.2
®
) with all threaded hardware. Important: Liquid thread lock (prior to
Manufactured by Krauss Craft, Inc.
www.playcraftsystems.com
R3.5-1301
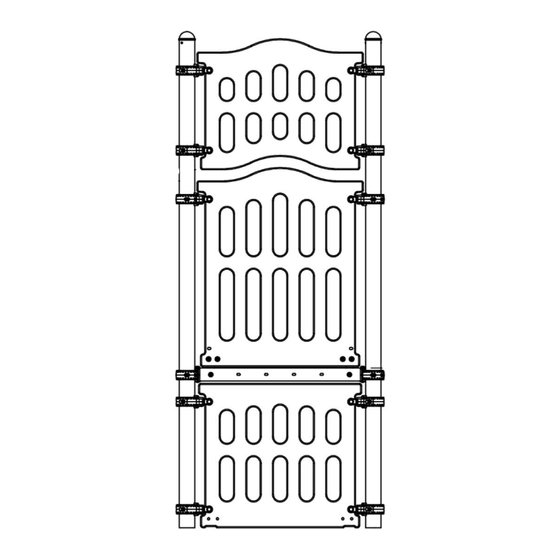
FIGURE 1
R3.5 Wall Assembly
See Installation Manual Sections
R3.5-09 Collars and R3.5-11 Clamps
Upper Barrier Wall
Deck Mount
Post Mount
For Customer Service Call
800.333.8519 (U.S.A.) or
541.955.9199 (International)
Page 1 of 4
Rev E
10/13/2014
Advertisement

Related Manuals for Playcraft R3.5-1301


Summary of Contents for Playcraft R3.5-1301
- Page 1 R3.5 WALL ASSEMBLY R3.5-1301 INSTALLATION INSTRUCTIONS Page 1 of 4 IMPORTANT NOTES: Read First ® (A) Use liquid thread lock (such as Loctite ) with all threaded hardware. Important: Liquid thread lock (prior to curing) helps to eliminate the common problem of "thread seizure" in stainless steel hardware by serving as a lubricant during assembly.
- Page 2 R3.5 WALL ASSEMBLY R3.5-1301 INSTALLATION INSTRUCTIONS Page 2 of 4 Step 1 Elevation View Referring to Elevation View use wall to locate and attach collars to posts. (See Notes B & C) *Height shown from top of deck to top of collar.
- Page 3 R3.5 WALL ASSEMBLY R3.5-1301 INSTALLATION INSTRUCTIONS Page 3 of 4 Step 3 For Deck Mount Walls Only Attach Panel Bracket to deck as shown in Figure 1.2. (See Note A) DECK 3/8" x 1-1/4" Button Head Bolt 3/8" x 1" O.D.
- Page 4 R3.5 WALL ASSEMBLY R3.5-1301 INSTALLATION INSTRUCTIONS Page 4 of 4 Parts List Specifications R3.5 WALL: DECK MOUNT WALL Shall be made from high-density, 3/4" thick, Part # DESCRIPTION QTY. hot extruded polyethylene sheet plastic specially BE-0361-L R35 Panel Bracket - Left...
Need help?
Do you have a question about the R3.5-1301 and is the answer not in the manual?
Questions and answers