Table of Contents
Advertisement
Advertisement
Table of Contents

Related Manuals for Ivoclar Vivadent Programat CS6


Summary of Contents for Ivoclar Vivadent Programat CS6
- Page 1 Programat ® Operating Instructions...
-
Page 3: Table Of Contents
Video player 2.2.6 Digital Shade Assistant (DSA) function 2.3. Practical use 2.3.1 Correctly loading the furnace 2.3.2 Firing with an Ivoclar Vivadent program 2.3.3 Firing using an individual program Maintenance, Cleaning, Diagnosis Monitoring and maintenance Cleaning Stand-by What If... Error messages... -
Page 4: List Of Parts
List of Parts Furnace head air vents Furnace head housing Warnings Object tray in cooling tray Housing shell Housing shell air vents 10 Touch screen Cooling tray 11 Membrane-sealed keys Recessed grip OSD Optical Status Display 12 Attachment screw for 17 Cover cooling tray 18 Sealing surface... - Page 5 List of Parts 20 Furnace head seal 21 Furnace head insulation 22 Thermocouple 23 Holder 31 Fan firing tongs/tweezers 24 Attachment screw for holder 32 Rating plate 25 Socket for vacuum pump Power socket 26 Vacuum pump power cord 34 On/Off switch 27 Vacuum pump fuse 28 Heater fuse Power cord...
-
Page 6: Introduction
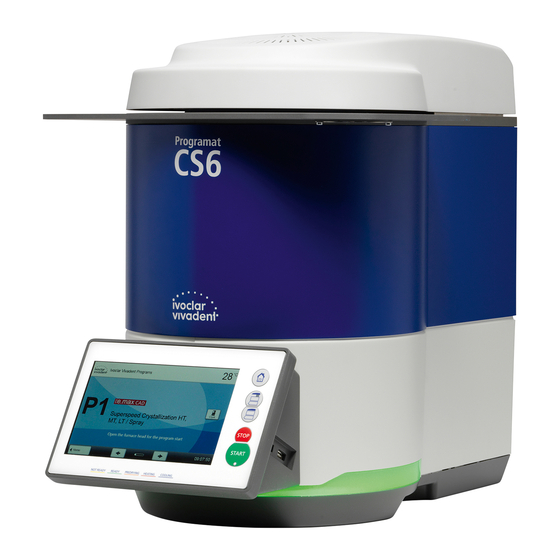
CS6. It is a ® state-of-the art sinter, crystallization and glaze furnace for dental applications. The Programat CS6 is suitable for the sintering and glazing of zirconium oxide materials such as IPS e.max ZirCAD as well as ® the crystallization and glazing of e.g. IPS e.max CAD. The furnace has been specifically developed for these purposes. -
Page 7: Indications
Use the Programat CS6 exclusively for the sintering, crystallization or glazing of dental ceramic materials. Other uses than the ones stipulated, e.g. cooking of food, firing of other materials, etc., are contraindicated. The manufacturer does not assume any liability for damage resulting from misuse. - Page 8 Serial number Date of manufacture This chapter is especially important for individuals who work with the Programat CS6 or who have to carry out maintenance or repair work. This chapter must be read and the corresponding instructions followed! Notes on the images in the Operating Instructions All images and illustrations in these Operating Instructions are used for exemplification and the details are not authoritative for the construction of the furnace.
-
Page 9: Application
Check the delivery for completeness (see delivery form in Chapter 8) and transportation damage. If parts are damaged or missing, contact your local Ivoclar Vivadent Service Centre. We recommend keeping the original packaging for future service and transportation purposes. - Page 10 – Vacuum pump connection Connect the vacuum pump plug (26) with the vacuum pump socket (25). We recommend using a vacuum pump from Ivoclar Vivadent, since these pumps are especially coordinated with the furnace. If other pumps are used, always observe and do not exceed the maximum power consumption specified on the rating plate at the rear of the device.
- Page 11 2. Application Step 3: Select the date format Select the desired date format using the [Arrow up/down] buttons. Confirm the entry with the green button. By pressing the [Continue] button, you will reach the next entry screen. Step 4: Enter the date Set the date (day, month, year).
- Page 12 2. Application Start screen and self-test Immediately after switching on, the display shows the start screen for a few seconds. Subsequently, the furnace conducts an automatic self-test. The performance of all furnace components is automatically checked. The following functions are checked: Function Furnace head test in progress Furnace head test...
- Page 13 2. Application Press the [Continue] button to acknowledge the self-test. Before the first firing, the firing chamber must be dehumidified using program 7 (sintering of IPS e.max ZirCAD MT Multi). The furnace should be regularly switched off and on again so that the automated tests can be performed during the self-test.
-
Page 14: Operation And Configuration
Control unit The Programat CS6 is equipped with a widescreen colour display. The furnace can be intuitively operated by means of the membrane-sealed keypad and the touch screen. The touch buttons can be actuated by slightly tapping the display with the fingertip. - Page 15 2. Application Explanation of the most important touch buttons Button Function Scroll left / Scroll right With these buttons, for example, you can scroll to the next page of the home screen. As an alternative, you can also swipe to the left or right with your finger on the display to scroll to the next page.
- Page 16 Description of the Home screen With the Home button, you can change to the home screen. All functions of the Programat CS6 can be selected from this screen. By pressing a selection button, you will reach the corresponding menu (e.g. programs, settings, calibration, etc.) The next page of the home screen can be accessed with the [Arrow] button, where additional functions are available.
-
Page 17: Firing Programs And Programming Options
When the furnace is delivered ex works, the Ivoclar Vivadent programs already contain the recommended material parameter settings and are write-protected. Consequently, it is not possible to accidentally overwrite the programs. In case of software updates, individually changed parameters in Ivoclar Vivadent programs might be reset to the factory settings or changed! b. -
Page 18: Program Selection
2. Application 2.2.2.2 Program selection After the furnace is switched on, the display first shows the program screen and the last selected program. The programs can be selected by pressing the [Arrow] buttons. In order to switch to an individual program, open the home screen by pressing the [Home] button. The program selection requires only few steps: Step 1: Select program type... -
Page 19: Editing Programs
For Ivoclar Vivadent programs, the write-protection must be deactivated first, before any parameters can be changed. Not all Ivoclar Vivadent programs can be edited. The following information is shown in program parameter screen: 1. Information bar: – Program designation –... - Page 20 A heating or cooling stage can be removed by pressing the Recycle bin button. Changed parameters in Ivoclar Vivadent programs are marked with a symbol. Pressing the button [Back] will take you back to the program parameter view. Pressing the button [Back] again,...
- Page 21 2. Application Changing program options Pressing the Options button opens the menu for advanced program options: Example 1: Deactivate the program write protection Step 1: Press the [Options] button. Step 2: Press the [Deactivate write-protection] button. Step 3: Press the [Close] button to leave the Options menu. Step 4: The write protection was successfully deactivated.
-
Page 22: Adjustable Parameters In The Program Screen
Press the [Close] button to leave the Options menu. Predrying is always required for crystallization programs! Changing or incorrectly selecting the predrying program for Ivoclar Vivadent programs may lead to poor results. 2.2.2.5 Adjustable parameters in the program screen t – Temperature increase rate The temperature increase rate defines by how many degrees per minute the furnace is to heat up / cool down. -
Page 23: Adjustable Parameters In The Options Menu
2. Application H – Holding time The holding time indicates how long an object is fired at the holding temperature. In multi-stage programs H1, H2, H3, H4 or H5, depending on the stage. Value range: H1: 00 – 60:00 (mm:ss) H2: 00 –... -
Page 24: Managing Programs
2. Application 2.2.3 Managing programs Press the button [Admin] in the program view to open the Manage programs menu. The following functions are available: – Reset program to factory settings – Select product logo – Rename program Reset program to factory settings This function is used to reset a changed program to factory settings. -
Page 25: Advanced Functions Of The Furnace
2. Application Select product logo The product logo for the current program can be selected. Step 1: Press the [Product logo] button in the Admin menu. Step 2: Select the desired product logo using the [Arrow up/down] buttons. Confirm the entry with the green button. Rename program The current program can be renamed. - Page 26 2. Application Step 2: Open display brightness The [Arrow] buttons are used to scroll through the Settings menu. Press the button until the setting "Display brightness" appears in the display. Press the touch button in the line "Display brightness". Step 3: Change the brightness of the display Select the desired display brightness in percent and confirm the entry with the green button or cancel the entry by pressing the red button.
- Page 27 2. Application Melody Select the desired melody for the acoustic signal. Setting option: Melody 1 to 20 Individual tune This function is used to load an individual tune in mp3 format. This tune will then be used as the speaker sound.
- Page 28 2. Application Resetting heating muffle firing hours to zero If this function is executed, the heating muffle firing hours are set to "zero". This function can only be executed by entering the user code. Setting option: execute Resetting the vacuum pump hours to zero If this function is executed, the vacuum pump hours are set to "zero".
-
Page 29: Information
2. Application Step 3: Select the desired network with the [Arrow up/down] but- tons. Step 4: Enter the WLAN password and confirm with the green button or abort the entry with the red button. Step 5: The WLAN connection was successfully set-up. Only 2.4 GHz networks with the following security standards are supported: –... - Page 30 2. Application Step 2: Reading the information The information is displayed on several pages. The [Arrow] buttons are used to scroll to the next information page. To return to the home screen, press either the [Home] button in the navigation bar or the Home button on the membrane-sealed keypad.
-
Page 31: Temperature Calibration
2. Application 2.2.4.3 Temperature calibration The thermocouple and firing chamber of the furnace may be subject to changes which affect the furnace temperature, depending on the mode of operation and the frequency of use. Conduct the temperature calibration at least once every six months. - Page 32 2. Application Step 4: Start temperature calibration program Press the [Start] button to start the calibration program. The remaining time is shown on the display. Step 5: Remove temperature control ring After the end of the program, carefully remove the sintered temperature control ring and leave it on the cooling tray to cool to room temperature.
-
Page 33: Data Backup
2. Application Step 8: Enter the correction value If the correction value is greater than 5°C, then the correction value is entered into the furnace by adding or subtracting accordingly to the current value in the furnace. If the correction value is lower than 5°C, then no correction is needed. -
Page 34: Software Update
Back-up your data before performing a software update. Important information Please note that modified Ivoclar Vivadent programs may be overwritten during a software update. Individual programs are not affected and will not be overwritten. A software update requires only few steps:... -
Page 35: Diagnosis
2. Application Step 2: Conduct software update If the USB flash drive with the software file is already connected, the furnace automatically searches for a valid software file. If the USB flash drive has not yet been connected with the furnace, do so now. Press the [Execute] button. - Page 36 2. Application Tests (test programs) – Vacuum test With the vacuum pump test program, the vacuum performance and tightness of the furnace vacuum system can be automatically tested. For that purpose, the achieved (minimum) pressure in mbar is measured and indicated. If the pressure value is below 80 mbar (hPa), the vacuum performance of the system is adequate.
- Page 37 2. Application Step 2: Generate a diagnosis file Connect a USB stick with the furnace. Press the [Execute] button. Step 3: One of the following messages is being displayed Diagnosis data backup complete Diagnosis data backup failed Step 4: Forward or analyze the diagnosis file Connect the USB flash drive with a PC.
-
Page 38: Maintenance Programs
2. Application 2.2.4.7 Maintenance programs Scroll to page 3 in the home screen and press the [Maintenance programs] button. You have the following program options: – Cleaning program – Service position Cleaning program The firing chamber is "cleaned" with the cleaning program. After a cleaning program, it is recommended to calibrate the furnace. - Page 39 2. Application Step 3: Swivelling the furnace head Swivel the furnace head by 90° to the left until it stops. The furnace head snaps into place in this position. Step 4: Cleaning the firing chamber Now the object plate can be moved with the buttons [Open furnace head] and [Close furnace head].
-
Page 40: Multimedia Functions
2.2.5 Multimedia functions The Programat CS6 is equipped with multimedia functions such as photo display, MP3 and video player. The furnace is also equipped with an internal memory. Images can be saved in this memory with the help of the "PrograBase X10"... -
Page 41: Mp3 Player
2. Application 6. Full screen view In the full screen view, you can scroll through the available image files. The image can be rotated by pressing the corresponding buttons and the full screen view can be ended. 7. Zooming image sections In the full screen view, the image can be enlarged or downsized. -
Page 42: Video Player
2. Application 3. Playback elements The corresponding buttons are used to change to the next or previous title, as well as to start or stop (or pause) the playback. At the end of a title, the next title is automatically played. 4. - Page 43 2. Application 3. Playback elements The corresponding buttons are used to change to the next or previous video, as well as to start or stop (or pause) the video. At the end of a video, the next one is automatically played. 4.
-
Page 44: Digital Shade Assistant (Dsa) Function
2.2.6 Digital Shade Assistant (DSA) function The Programat CS6 is equipped with a function to determine the tooth shade based on three selected reference teeth. The process of shade determination is divided into two parts: – Determining the reference teeth and imaging involving the patient (clinical part) –... - Page 45 2. Application 3. Automatic analysis is conducted This screen is shown during the automatic analysis. 4. Result of the automatic analysis The tooth to be analyzed (green frame) and the three shade guide teeth as well as their orientation (incisal edge to cervical edge or incisal edge to incisal edge) are automatically recognized.
- Page 46 2. Application 7. Verifying the designations (correcting) If the designations of the shade guide teeth cannot be clearly recognized, this screen is shown. The recognized designations are shown in the three buttons below the image. If necessary, this designation can be corrected by pressing the corresponding button. Finally, the analysis can be conducted by pressing the green button.
- Page 47 2. Application 10. Log function The current shade analysis can be saved as a log file by tapping the [Disk] button. The log file can be printed via the PrograBase X10 software or stored as a PDF file. The DSA results greatly depend on the determination of the three reference teeth and optimum picture taking. The designation of the reference tooth that is most similar to the tooth to be analyzed is shown as the result.
-
Page 48: Practical Use
2. Application 2.3. Practical use The operating procedure will be explained with the help of two examples: one Ivoclar Vivadent program and one individual program. The correct loading of the firing chamber is described beforehand. If a restoration has fallen into the firing chamber, make sure to remove it by means of the service position before starting the next program. -
Page 49: Firing With An Ivoclar Vivadent Program
Remove the IPS Speed Tray from the furnace at the end of the glaze or crystallization program and place it on the cooling tray for cooling. 2.3.2 Firing with an Ivoclar Vivadent program Step 1: Switch the furnace on Switch on the furnace with the mains switch at the rear of the furnace. - Page 50 2. Application Predrying For locked Ivoclar Vivadent programs, the predrying program can be changed by pressing the [Predrying] button. For zirconia: – "Off" for dry machining or "ZrO wet" for wet machining For the crystallization program: – "Cryst." for crystallization alone or in conjunction with the glaze spray –...
-
Page 51: Firing Using An Individual Program
2. Application With the furnace head open, the temperature in the firing chamber is higher than indicated on the touch screen. Depending on the program, it may take up to 20 minutes or more until the firing chamber has cooled sufficiently so that the next program can be started. - Page 52 Enter the individual parameters and create the desired program (see Chapter 2.2.2.4 for details). Predrying For locked Ivoclar Vivadent programs, the predrying program can be changed by pressing the [Predrying] button. For zirconia: – "Off" for dry machining or "ZrO wet"...
- Page 53 2. Application Step 8: Program end The furnace head opens automatically at the end of the program. Remove the zirconia restoration only after it is no longer red hot using the supplied special tweezers and place it on the object tray in the cooling area.
-
Page 54: Maintenance, Cleaning, Diagnosis
3 Maintenance, Cleaning, Diagnosis This chapter describes the user maintenance and cleaning procedures for the Programat CS6. Only the tasks listed may be carried out by qualified dental technicians or dental laboratory professionals. All other tasks must be performed by qualified service personnel at a certified Ivoclar Vivadent Service Centre. -
Page 55: Cleaning
3. Maintenance, Cleaning, Diagnosis 3.2 Cleaning The furnace may only be cleaned when it is cool, since there is a burn hazard. If the furnace head is closed, the temperature in the firing chamber is indicated on the touch screen. Do not use any cleaning solutions. For cleaning activities in the firing chamber or visual inspection of the heating elements, the service position must be assumed (Care Programs menu / Service Position, see Chapter 2.2.4.7). -
Page 56: Stand-By
3. Maintenance, Cleaning, Diagnosis Cleaning of the heating elements The cleaning program (see Chapter 2.2.4.7) restores the chipped off oxide / protective layer on the heating elements. If no even protective layer on the heating elements is noticeable after the cleaning firing, it may be necessary to run the cleaning program several times in a row. -
Page 57: What If
Error in the heating system Check the heater plug. Check the heater fuse. If the fuse is O.K., contact **,*** your local Ivoclar Vivadent Service Centre. Heating muffle very old The heating muffle is very old. It is recommended replacing it by a new one. - Page 58 4. What If... The vacuum is not released The vaccum cannot be released. The vacuum valve might be stuck or dirty. Contact a Service Technician. Necessary vacuum (xxxmbar) is The vacuum cannot be built-up. Check the seal of the firing chamber, not reached within 1 min.
- Page 59 4. What If... 2201 WLAN error. Please restart the furnace. 2749 An error occurred while checking the infrared camera 2754 Error self-test An error occurred while checking the infrared camera 2755 Error self-test An error occurred while checking the infrared camera 2756 Error self-test An error occurred while checking the infrared camera...
- Page 60 4. What If... 4050 The furnace head cannot be moved to its end position. The furnace head **,*** might be blocked by external mechanical influences! If this is not the case, please contact your Service Centre! "4051 The maximum heating time with the furnace head open was exceeded. The **"...
- Page 61 *** Error cannot be acknowledged – programs cannot be started Please contact the Ivoclar Vivadent After Sales Service, if one of the following error numbers is being displayed: 25, 29, 43, 44, 45, 46, 47, 48, 56, 103, 107, 108, 143, 144, 145, 146, 147, 148, 530, 531, 532, 700, 701, 707, 1010,...
-
Page 62: Technical Malfunctions
4. What If... 4.2 Technical malfunctions These malfunctions may occur without an error message being displayed: Error Double-Check Action Vacuum is not or only slowly released Is the vacuum released within approx. Wait until the vacuum has been released and 30 seconds? remove object. -
Page 63: Repairs
4. What If... 4.3 Repairs Repairs may only be carried out by a certified Service Centre. Please refer to the addresses on the last page of these Operating Instructions. If repairs during the warranty period are not carried out by a certified Ivoclar Service Centre, the warranty will expire immediately. -
Page 64: Reset To Factory Settings
4. What If... 4.4 Reset to factory settings If the furnace has to be reset to its original settings, the factory settings can be loaded. In this process, all programs, melodies and volume adjustments are irrevocably reset to the factory settings. For this purpose, proceed as follows: Step 1: Open Settings... -
Page 65: Safety Notes
5 Safety Notes Risks and dangers Make sure that no liquids or other foreign substances enter the furnace. Burn hazard: Never place objects in the firing chamber by hand, since there is a burn hazard. Always use the special tweezers (accessories) supplied for this purpose. - Page 66 5. Safety Notes Contraindications The IPS Speed Tray must not be placed outside of the object tray in the firing chamber. Place the IPS Speed Tray near the outside margin of the cooling tray. Otherwise, the closing process of the furnace head will be obstructed.
- Page 67 5. Safety Notes The insulation contains polycrystalline wools and may release fibre dust. Do not use compressed air, as this will distribute the dust in the environment, and observe the additional notes on page 68. Do not cover the furnace head with a cloth. There is a fire hazard! Do not place any objects in the vicinity of the firing chamber when the furnace is open.
- Page 68 – In order to ensure the product reliability and warranty services, the device must be exclusively operated with the original accessories, in particular the original power adapter, from Ivoclar Vivadent. – The user bears the risk when using non-approved accessories.
- Page 69 – Before leaving the factory, the furnace functions were tested for several hours. It is therefore possible that these tests have caused slight discolouration of the insulation. Nevertheless, your Programat CS6 is still a brand new furnace. Any disruption of the protective conductor either inside or outside the furnace or any loosening of the protective conductor may lead to danger for the user in case of malfunction.
-
Page 70: Notes On Storage And Transportation
6 Notes on Storage and Transportation The furnace may only be transported as described in these Operating Instructions. In order to avoid corrosion on the device and subsequent damage to the device, transport and store the furnace only within the permissible temperature range and ambient conditions. Acceptable operating conditions Acceptable ambient temperature range: +5 °C to +40 °C (41°F to 104°F) -
Page 71: Technical Data
Technical Data Power supply 110 – 240 V~ / 50/60 Hz Overvoltage category Safety class I (The device requires a ground connection via the mains connection) Contamination level Acceptable voltage fluctuations ± 10 % Max. power consumption 1650 W Max. current consumption (informative) 16 A at 110–130 V~ 9 A at 200–240 V~ Acceptable data for pumps of other manufacturers:... -
Page 72: Delivery Form
– Programat WLAN Kit – A–D shade guide – DSA Holder Kit – Various accessories Recommended accessories: – IPS Speed Tray – Programat CS6 object tray – Temperature Checking Set UTH – Temperature Checking Set MTH – Vacuum pump VP5, VP3 easy... -
Page 73: Ce Declaration Of Conformity
9 CE Declaration of Conformity... - Page 74 Fax +91 22 2673 0301 www.ivoclarvivadent.co.nz Leicester LE19 4SD www.ivoclarvivadent.in United Kingdom Ivoclar Vivadent Ltda. Ivoclar Vivadent Polska Sp. z o.o. Tel. +44 116 284 7880 Ivoclar Vivadent Marketing Ltd. Alameda Caiapós, 723 Al. Jana Pawła II 78 Fax +44 116 284 7881 Centro Empresarial Tamboré...
Need help?
Do you have a question about the Programat CS6 and is the answer not in the manual?
Questions and answers
What is the sirona zirconia mono+ firing mapping numbers