Baroness LM315GC Assembly And Installation Manual
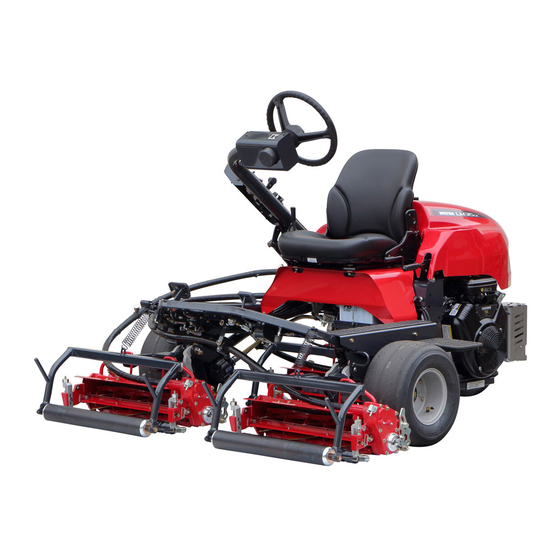
Triple greens mower
Hide thumbs
Also See for LM315GC:
- Service manual (199 pages) ,
- Owner's operating manual (115 pages) ,
- Assembly and installation manual (19 pages)

Related Manuals for Baroness LM315GC


Summary of Contents for Baroness LM315GC
- Page 1 Triple Greens Mower LM315GC [GROOMER KIT] Assembly and installation manual 乗用3連グリーンモア LM315GC [グルーマキットGC]取扱要領書 Vol.1.1 Serial No.#30001~...
- Page 2 The information described in this manual is subject to change without prior notice for improvement. When replacing parts, be sure to use genuine Baroness parts or parts designated by Kyoeisha. Note that the Baroness product warranty may not apply to defects caused by the use of parts from other companies.
- Page 3 This symbol is accompanied by the word "Danger," "Warning," or "Caution." All labels with this symbol describe important safety precautions, so please read such labels carefully and only operate the machine after you have understood them completely. Failure to adequately follow these safety precautions may cause an accident.
- Page 4 If necessary, use appropriate chain blocks, hoists, or a jack. If the machine is lifted up, ensure that it is supported by jack stands or appropriate blocks. When replacing parts or installing accessory parts, use genuine BARONESS parts. Never start the engine in a closed room. Doing so could cause carbon monoxide poisoning.
- Page 5 Installing Optional Equipment for the LM315GC LM315GC オプション取付要領 GROOMER KIT グルーマキット GC Intended use: Corrects the grain of greens and lifts flattened grass. 用途;グリーン表面の芝目の矯正や、寝た芝を起こします。 Check that all parts are included. The following parts are included in the package. Should any part be missing or damaged, please contact the dealer you purchased it from.
- Page 6 2C5191P 座金 8.522 O リング G45 K1000000309 K5090000250 K0882045000 Qty:1 Qty:1 Qty:1 BOLT, FLAT HEAD WITH GROOMER ASSY, 315-77 WASHER, SPCC 0.5 HEX. HOLE M8-20 8 六角穴付皿ボルト 20 315 グルーマ 77Assy 0.5SPCC 調節座金 K0053080202 LM315GB2108Z0 K5090000673 Qty:1 Qty:1 Qty:5 LM315GC-AM02GBA...
- Page 7 PLATE, RETAINING HOUSING ハウジング押え板 ローラーブラケット左 Comp ローラーブラケット右 Comp LM315GC8403Z2 Qty:1 Qty:1 Qty:1 GREASE NIPPLE, A TYPE BOLT, MOUNTING MOWER (L) BOLT, MOUNTING MOWER (R) モア取付ボルト左 モア取付ボルト右 グリスニップル LM315GA1835Z0 LM315GA1836Z0 K1440000010 Qty:1 Qty:1 Qty:2 WASHER, C5191P 0.3-10-14 0.3C5191P 座金 1014 K5050310140 Qty:2 LM315GC-AM02GBA...
- Page 8 61.96~79.66 ○ 14~19 142.76~193.74 123.91~168.17 ○ 29~38 295.71~387.49 256.68~336.34 ― 52~67 530.24~683.20 450.25~593.02 When tightening bolts, refer to the above table. We will not be held responsible for any damage resulting from improper or excessive tightening, etc. 締付けトルク一覧を参照してください。異常な締付け、オーバートルクでの締付け等で生じた不具合については、弊社 では責任を負いかねます。 LM315GC-AM02GBA...
- Page 9 (B), then the slotted roller together with the roller bracket. 溝付ローラー(A)を持ち、角根丸頭ボルト (B)を取外し て、 ローラーブラケットと共に溝付ローラーを取外して ください。 Using a hex key (C), loosen the hollow set screw M6 (B), and then remove the roller bracket (D) from the slotted roller (A). 六角レンチ(C)で 6 ホロセット(B)を緩め、 溝付ローラー (A)から、ローラーブラケット(D)を取外してください。 LM315GC-AM02GBA...
- Page 10 5, into the roller adjuster (A), and then install it with the round-head square-root bolt. ローラー調節金(A)に、手順 5 で溝付ローラーに取付け られたローラーブラケット左(B)を差込み、角根丸頭ボ ルトで取付けてください。 Insert the washer (B) onto the slotted roller (A), and then align the roller shaft with the hole in the roller bracket Comp (R) (18). 溝付ローラー(A)に座金(B)を入れ、 ローラーブラケット 右(18)の穴にローラー軸を合わせてください。 LM315GC-AM02GBA...
- Page 11 (22), and adjust it so that the hole (A) for installing the grease nipple is positioned as shown by the arrow. After checking the hole position, tighten the mower mounting bolt (L) (19), and then install the grease nipple (21). モア取付ボルト左(19) をローラーブラケット左のロー ラー軸に差込み、グリスニップル取付用の穴(A)が、矢 印の位置になるように C5191P 座金(22)を入れて調整 してください。 穴位置の確認後、モア取付ボルト左(19)を締付け、グリ スニップル(21)を取付けてください。 LM315GC-AM02GBA...
- Page 12 B,C,D Tighten the hex socket countersunk bolt (13) in the bolt hole (B) of the reel housing (A). リールハウジング(A)のボルト穴(B)に、 六角穴付き皿ボ ルト(13)を締付けてください。 Insert the adjuster (6) onto the left frame (A). Repeat this operation with the right frame. 左フレーム(A)に調節受け金(6)を差込みます。 同様の手順で右フレームも行ってください。 LM315GC-AM02GBA...
- Page 13 M6 (A) and the conical spring washers (B). Check that the vertical fulcrum metal (C) lightly moves up and down (direction of the white arrow). Fully lift up (direction of the black arrow) the vertical fulcrum metal (C). ハウジング押さえ板(16)を付け、6 穴付きボルト(A)お よび皿バネ座金(B)を取付けてください。 バーチカル支点メタル(C)が、軽く上下(白矢印方向) に動く事を確認してください。 バーチカル支点メタル(C)を上(黒矢印方向) にいっぱい に上げてください。 LM315GC-AM02GBA...
- Page 14 Insert the gear case of the groomer Assy (14) onto the 20-tooth reel gear (A). グルーマ Assy(14)のギヤケースを、 20 丁リールギヤ (A) に差込みます。 Danger Danger Since the installation procedure is performed near the reel, perform the operations with care. 取付け作業はリールの近くの作業になりますので慎重 に作業してください。 LM315GC-AM02GBA...
- Page 15 (R) case (9), the compression spring (10) and the washer C5191P (11). Fully hand-tighten the stepped pin for fixing (R) case (9). グルーマギヤケースとリールハウジングの接合部(A)に 隙間が無いことを確認し、右ケース止めボルト(9)、圧 縮バネ (10)および C5191P 座金 (11)を取付てくださ い。 右ケース止めボルト(9)は、止まるところまで手で締め てください。 LM315GC-AM02GBA...
- Page 16 0.5SPCC (15). If two or more washers 0.5SPCC(15) are required, insert them alternately from the diagonally opposite side. 「フロントグルーマの調整」 グルーマを本機に取付けてください。前ローラー(A)の溝に、 サッチング刃(B)が2枚ずつ入っていることを確認します。 サッチング刃(B)全体が右または左に寄っている場合は、左 右の 17 特殊ナット(C)で調整します。前ローラー(A)の山と サッチング刃(B)の隙間がせまいまたは干渉している場合 は、0.5SPCC 調節座金(15)を入れて調整してください。 2 枚以上の 0.5SPCC 座金(15)が必要な場合は、交互に対角 線上の反対側から入れてください。 LM315GC-AM02GBA...
- Page 17 Tighten the 17 special nut, secure it with the hollow set, and lock it with the lock nut, and recheck the spacing of the thatching blades with the front roller. Do not tighten the 17 special nut too much power. (Torque=5~10 N/m) 17特殊ナットを締付け、 ホーローセットで固定しロッ クナットでロックしてください。 そして前ローラーで サッチング刃の隙間を再度確認してください。 17特殊ナットを締めすぎないでください。(締付トル クは5~10N/m) LM315GC-AM02GBA...
- Page 20 Head Office 1-26, Miyuki-cho, Toyokawa, Tel : (0533) 84 - 1390 Fax : (0533) 89 - 3623 Aichi-Pref. 442-8530 Japan. 442 - 8530 TEL (0533) 84 - 1221 1 - 26 FAX (0533) 84 - 1220 LM315GC-AM02GBA/16F-00-KES...