Table of Contents
Advertisement
Quick Links
Advertisement
Table of Contents

Related Manuals for ADJ Magnetic Dance MDF2-9SYS


Summary of Contents for ADJ Magnetic Dance MDF2-9SYS
- Page 1 MDF2-9SYS User Manual...
- Page 2 Products, LLC brands and product names are trademarks or registered trademarks of their respective companies. ADJ Products, LLC and all affiliated companies hereby disclaim any and all liabilities for property, equipment, building, and electrical damages, injuries to any persons, and direct or indirect economic...
-
Page 3: Table Of Contents
TABLE OF CONTENTS General Information Limited Warranty (USA Only) Safety Instructions and Guidelines Maintenance Guidelines Overview Installation Instructions System Menu DMX Values and Functions DMX Addressing Color Macros Large Dance Floor Set Ups Trouble Shooting Tips | Frequently Asked Questions Removal Instructions Technical Specifications Dimensional Drawings... -
Page 4: General Information
You may obtain an R.A. number by contacting customer support. CUSTOMER SUPPORT Contact ADJ Service for any product related service and support needs. forums.adj.com Please visit with questions, comments or suggestions. -
Page 5: Limited Warranty (Usa Only)
The sole responsibility of ADJ Products, LLC under this warranty shall be limited to the repair of the product, or replacement thereof, including parts, at the sole discretion of ADJ Products, LLC. All products covered by this warranty were manufactured after August 15, 2012, and bear identifying marks to that effect. -
Page 6: Safety Instructions And Guidelines
To guarantee smooth operation, it is important to follow all instructions and guidelines in this manual. ADJ PRODUCTS LLC is not responsible for injury and/or damages resulting from the misuse of these devices due to the disregard of the information printed in this manual. Only qualified and/or certified personnel should perform installation of these devices and only the original rigging parts included with these devices should be used for installation. - Page 7 SAFETY INSTRUCTIONS AND GUIDELINES • DO NOT position Panels or Power Supplies close to any FLAMMABLE MATERIALS while oper- ating. • DO NOT attempt installation and/or operation without knowledge of how to do so. • DO NOT permit operation by persons who are not qualified to operate these types of devices. • DO NOT shake Panels or Power Supplies, and avoid brute force when installing and/or operat- ing.
-
Page 8: Maintenance Guidelines
Regular inspections are recommended to ensure proper function and extended life. There are no user serviceable parts inside these devices. Please refer all service issues to an authorized ADJ ser- vice technician. Should you need any spare parts, please order genuine parts from your local ADJ dealer. -
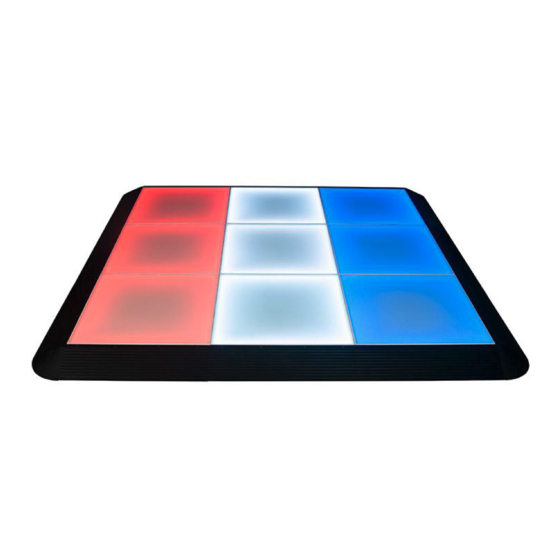
Page 9: Overview
OVERVIEW Note: Directional arrows are marked on the side of the panels to assist with orientation during assembly. Please see the Installation Instructions section of this manual. Note: Refer to the Control Panel section of this manual for details regarding the Menu Display and the associated control buttons. - Page 10 OVERVIEW DOCKING MAGNETS Each panel has built-in docking magnets to assist in assembly and to hold the panels in place once installed. LIGHTING CIRCUIT PORTS Each panel has built-in circuit ports that connect together with the assistance of the docking mag- nets.
-
Page 11: Installation Instructions
INSTALLATION INSTRUCTIONS IP RATING The panels are IP55 rated. This rating signifies that dust cannot enter in sufficient quantity to inter- fere with the satisfactory operation of the device, and that water projected by a nozzle against the enclosure from any direction shall have no harmful effects. PLEASE NOTE THAT THIS RATING APPLIES ONLY TO THE PANELS, AND THAT ANY ASSOCIATED POWER CABLES AND ACCES- SORIES ARE RATED FOR USE ONLY IN DRY, INDOOR ENVIRONMENTS. - Page 12 INSTALLATION INSTRUCTIONS PANEL SET UP INSTRUCTIONS 1. Start by setting up the Panel Power Ramps. Connect all Panel Power Ramps to each other by stringing together both the DMX connections and the power cable connections. NOTE: One Panel Power Ramp is required for each column of panels. 2.
- Page 13 INSTALLATION INSTRUCTIONS PANEL SET UP INSTRUCTIONS 3. Connect your row of Panel Power Ramps to both the DMX console and the Power Supply. Plug in the Power Supply and switch it on.
- Page 14 INSTALLATION INSTRUCTIONS PANEL SET UP INSTRUCTIONS 4. Lay out a grid of Panel Floor Brackets, noting that one Panel Floor Bracket is required for each corner where a panel or a ramp come into contact with each other. Panel Floor Brackets should be spaced approximately 19.3 inches (490mm) apart from edge to edge in both left-to-right and front-to-back directions.
- Page 15 INSTALLATION INSTRUCTIONS PANEL SET UP INSTRUCTIONS 5. Connect a panel to any of the power supply ramps using the docking magnets, making sure that each foot on the panel slots into the holes in the Connection Brackets. Adjust the position of the Connection Brackets as needed to align them with the panel feet.
- Page 16 INSTALLATION INSTRUCTIONS PANEL SET UP INSTRUCTIONS 7. If desired, use the Menu Display screen to configure the settings of the individual panel.(see System Menu section on page 20). NOTE: Due to panel orientation requirements, the Menu Display screen may not be accessible after additional panels have been installed.
- Page 17 INSTALLATION INSTRUCTIONS PANEL SET UP INSTRUCTIONS 9. Once all panels have been placed, install the unpowered edge ramps around the remaining edges of the panel assembly using the docking magnets and the connection brackets. 10. Slot the corner ramps in place at each corner of the panel assembly. It can be helpful to lift both adjacent edge ramps slightly in order to align the corner ramp, the edge ramps, and the connec- tion bracket.
- Page 18 INSTALLATION INSTRUCTIONS Panel 1 > Panel 2: Correct. Both panels receive both power and DMX data. Panel 3 > Panel 4: Incorrect. The top panel is rotated, and connections do not line up with the ramp, and therefore the panel will not receive a signal from the ramp. Any panel(s) installed below the top row will not receive a signal regardless of orientation.
- Page 19 INSTALLATION INSTRUCTIONS The completed installation should resemble the diagram shown below. A four-panel system is depicted as an example, but your system may differ in number of panels.
-
Page 20: System Menu
SYSTEM MENU Menu Option Function A001 - A512 Addr Starting DMX address channel. 001 - 512 CH03 CH05 NodE Select DMX channel mode. CH07 CH10 blAC Blackout when DMX signal is lost. Intr Defaults to internal programs when DMX signal is lost. nodn SEtt Defaults to manual settings when DMX signal is lost. - Page 21 SYSTEM MENU SAVING SYSTEM MENU SETTINGS: After completing the steps below to configure any of the System Menu settings, press MENU to return to the main menu selection, then continue to press the MENU button until you have completed a full cycle through the menu options (return to Address set- ting).
- Page 22 SYSTEM MENU Manual Color Mode: Used to manually control the tone of each individual color. 1. Press the MENU button to cycle through the available color options, which are displayed as “X000” – “X255” where “X” represents the color (R, G, or B) and 000-255 represents the current tone for that color.
- Page 23 SYSTEM MENU Reset: Resets the unit to factory settings. 1. Press the MENU button until “REST” is displayed. Press the ENTER button to begin the reset process. 2. Long press the ENTER button to confirm the reset and restore the unit to factory settings. Usage Time: Press the MENU button until “TinE”...
-
Page 24: Dmx Values And Functions
DMX VALUES AND FUNCTIONS MODES The MDF2 has 4 selectable DMX channel modes: 3, 5, 7, or 10 channels. Channel Value Function CH03 CH05 CH07 CH10 000 - 255 Red LEDs, 0% - 100% 000 - 255 Green LEDs, 0% - 100% 000 - 255 Blue LEDs, 0% - 100% Color Macros No effect... -
Page 25: Dmx Addressing
DMX ADDRESSING All devices should be given a DMX starting address when operating with a DMX controller, in order to ensure that the correct device responds to the correct control signal. This digital starting address is the channel number from which the device starts to “listen” to the digital control signal sent out from the DMX controller. -
Page 26: Color Macros
COLOR MACROS COLOR DMX VALUES GREEN BLUE R02 Bastard Amber 001 - 007 R04 Medium Amber 008 - 015 R09 Pale Amber Gold 016 - 023 R316 Gallo Gold 024 - 031 R21 Golden Amber 032 - 039 R26 Light Red 040 - 047 R27 Medium Red 048 - 055... -
Page 27: Large Dance Floor Set Ups
LARGE DANCE FLOOR SET UPS Additional panels, hardware, and power supplies are available to create larger dance floor sizes. See example below and refer to the Optional Accessories section of this manual for details. NOTE: Each model power supply supports a specific number of panels. Multiple power supply units are required to support larger dance floor sizes. -
Page 28: Trouble Shooting Tips | Frequently Asked Questions
Is there a fuse that can be replaced on the panel? No. The panels do not have a replaceable fuse. However, there is a replaceable fuse located on the Power Supply(s). If the fuse is intact and the system still does not operate, please contact ADJ cus- tomer service. -
Page 29: Removal Instructions
REMOVAL INSTRUCTIONS PANEL REMOVAL TOOL OVERVIEW To facilitate the disassembly process, ADJ offers a Panel Removal Tool (part number MDF368) as an optional accessory. (not included) CAUTION: DURING ASSEMBLY OR DISASSEMBLY, DO NOT SLIDE PANELS INTO OR OUT OF POSITION! THIS MAY RESULT IN EXTENSIVE DAMAGE TO... - Page 30 REMOVAL INSTRUCTIONS PANEL REMOVAL TOOL USAGE INSTRUCTIONS For the sake of clarity, the images that follow depict the use of a single panel removal tool. However, it is recommended to use two (2) panel removal tools in order to minimize the risk of droppage or electronic damage due to the sliding of panels during removal or installation.
- Page 31 REMOVAL INSTRUCTIONS PANEL REMOVAL TOOL USAGE INSTRUCTIONS 3. Use the Panel Removal Tool to lift the Magnetic Dance Floor Panel out of its installed position. CAUTION: DO NOT SLIDE PANELS INTO OR OUT OF POSITION! THIS MAY RESULT IN EXTENSIVE DAMAGE TO PANEL ELECTRONICS! INSTEAD, PANELS MUST BE LIFTED VERTICALLY INTO OR OUT OF POSITION.
- Page 32 REMOVAL INSTRUCTIONS PANEL REMOVAL TOOL USAGE INSTRUCTIONS 5. The Panel Removal Tool can now be removed from the Magnetic Dance Floor Panel. NOTE: AFTER DISASSEMBLY HAS BEEN COMPLETED, THE FEET OF EACH PANEL SHOULD BE RETURNED TO THE LOWEST HEIGHT POSITION. FAILING TO DO SO CAN RESULT IN DAMAGE TO THE FEET WHEN THE PANEL IS PLACED BACK INTO THE FLIGHT CASE.
-
Page 33: Technical Specifications
TECHNICAL SPECIFICATIONS MDF2 DANCE FLOOR PANEL Input Voltage DC 24V Max Power Consumption 15 W Input Signal DMX512 (3-pin XLR) Control Mode DMX512, Manual, Auto Programs, Sound Active DMX Channel Mode 3, 5, 7, & 10 Channel Modes Light Source RGB 3-in-1 Visual Angle 160 Degrees... -
Page 34: Dimensional Drawings
DIMENSIONAL DRAWINGS Drawings may not be shown to scale. -
Page 35: Optional Accessories
OPTIONAL ACCESSORIES Order Code Description MDF200 Magnetic Dance Floor Panel MDF232 x9 Panel Power Supply MDF248 x15 Panel Power Supply MDF264 x20 Panel Power Supply MDF281 x40 Panel Power Supply MDF297 16ft (4.9m) Power Cable to Ramp MDF313 20ft (6.0m) Power Cable to Ramp MDF320 25ft (7.6m) Power Cable to Ramp MDF336...
Need help?
Do you have a question about the Magnetic Dance MDF2-9SYS and is the answer not in the manual?
Questions and answers