Table of Contents
Advertisement
Quick Links
Advertisement
Table of Contents

Related Manuals for Sensata MAGNUM ENERGY MM Series


Summary of Contents for Sensata MAGNUM ENERGY MM Series
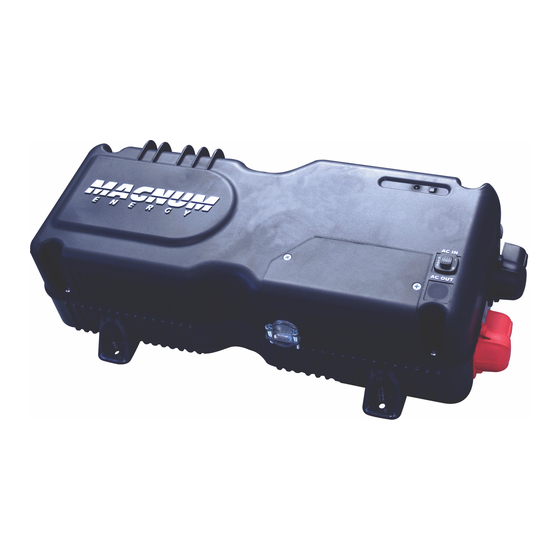
- Page 1 MM Series Inverters Owner’s Manual...
- Page 2 Thank you from all of us at Sensata Technologies for purchasing this MM Series inverter. The MM Series is a product under the Magnum Energy brand from Sensata. We understand there are many purchasing options in the marketplace, and are pleased that you have decided on a Magnum product.
- Page 3 • No overcurrent protection for the AC output wiring is provided as an integral part of this inverter. Overcurrent protection of the AC output wiring must be provided as part of the system installation. © 2016 Sensata Technologies...
- Page 4 In the event of accidental exposure to battery acid, wash thoroughly with soap and water. In the event of exposure to the eyes, fl ood them for at least 15 minutes with running water and seek immediate medical attention. • Recycle old batteries. SAVE THESE INSTRUCTIONS © 2016 Sensata Technologies...
-
Page 5: Table Of Contents
Appendix A – Remotes and Optional Equipment ......29 Remote Controls ..............29 Optional Equipment and Accessories ........29 Appendix B – Battery Information ..........30 Battery Bank Sizing ............. 30 Battery Types ..............30 Battery Confi guration ............30 © 2016 Sensata Technologies... - Page 6 Table 3, Minimum Wire Size to Circuit-breaker Size ......16 Table 4, Inverter Battery Turn On/Off Levels ........24 Table 5, Inverter Default Settings ............26 Table 6, Troubleshooting Guide ............27 Table 7, MM Series Specifi cations ............28 © 2016 Sensata Technologies...
-
Page 7: Introduction
Introduction Introduction Congratulations on your purchase of an MM Series inverter from Sensata Technologies. This product is designed to be powerful, yet simple to use, and engineered to provide you with years of trouble-free use. Please read this chapter to familiarize yourself with the features and benefi ts of your particular MM Series model. -
Page 8: What Appliances Run From A Modifi Ed Sine Inverter
True RMS output voltage regulation to ensure the inverter will deliver the correct amount of power—within the DC input voltage range and the continuous output power level • Quick connection accessory and remote ports—easily accepts several optional remote controls and the Battery Temperature Sensor © 2016 Sensata Technologies... -
Page 9: Figure 1-2, Top Side Features
13. Exhaust Vent – ventilation openings that allow heated air to be removed by the internal cooling fan. 14. Model/Serial Number Label – includes model/serial number and provides specifi cations and information on the inverter and charger. See the Specifi cations on page 28 for more information. © 2016 Sensata Technologies... -
Page 10: Battery Temperature Sensor (Mm1212 & Mm1212-G)
NOT installed and the batteries are subjected to large temperature changes, battery life may be shortened. ~2" ~1" (5.1 cm) (2.6 cm) FRONT VIEW ~¾” (~2 cm) 0.375" diameter Cable (~1 cm) ~½” SIDE VIEW (~1.3 cm) Figure 1-5, Battery Temperature Sensor © 2016 Sensata Technologies... -
Page 11: Installation
MM Series Owner’s Manual If items appear to be missing or damaged, contact your authorized Magnum Energy dealer or Sensata Technologies. If at all possible, keep your shipping box. It will help protect your inverter from damage if it ever needs to be returned for service. - Page 12 After determining your mounting position, use the base of the inverter’s chassis as a template to mark your mounting screw locations. Remove the inverter, and then drill pilot holes into the mounting surface. © 2016 Sensata Technologies...
-
Page 13: Figure 2-1, Approved Mounting Orientations
Wall Mounted (right-side up) Wall Mounted (up-side down) Shelf Mounted (right-side up) Shelf Mounted (up-side down) Figure 2-1, Approved Mounting Orientations ~4¾” ~6¾” (17.1 cm) (12.1 cm) ~7½” (19.1 cm) ~8½” (21.6 cm) Figure 2-2, MM Series Inverter Dimensions © 2016 Sensata Technologies... -
Page 14: Figure 2-3, Basic Installation Diagram (Mm612/Mm1212)
Installation AC IN Ground Disconnect Overcurrent Device Main Panel Battery Bank Sub-Panel Tools Loads Outlet Figure 2-3, Basic Installation Diagram (MM612/MM1212) © 2016 Sensata Technologies... -
Page 15: Figure 2-4, Basic Installation Diagram (Mm1212-G)
Installation Ground AC IN Disconnect Overcurrent Device AC Loads Tools Battery Bank Figure 2-4, Basic Installation Diagram (MM1212-G) © 2016 Sensata Technologies... -
Page 16: Wiring Guidelines
Info: The DC wires must be color coded with colored tape or heat shrink tubing; RED for positive (+), BLACK for negative (–), and GREEN for DC ground. © 2016 Sensata Technologies... -
Page 17: Table 1, Recommended Dc Wire/Overcurrent Device
Electrical systems in mobile installations typically do not require using a DC disconnect, although an overcurrent protection device is still required. Because the DC disconnect is not required, a fuse is usually used as the overcurrent device in these installations. These installations also do not normally use © 2016 Sensata Technologies... -
Page 18: Dc Grounding
BATTERY battery terminal flat washer Verify the DC cable lugs are bolt flush with battery terminals. battery post Torque the battery terminals from 10 to 12 ft-lbs. Figure 2-5, DC Cable to Battery Terminals © 2016 Sensata Technologies... -
Page 19: Battery Bank Wiring
Batteries should be of the same size, type, rating, and age. CAUTION: Install batteries in a well ventilated area. Batteries can produce explosive gasses. For compartment or enclosure installations, always vent batteries to the outside. © 2016 Sensata Technologies... -
Page 20: Inverter To Battery Bank Wiring
fl ush on the surface of the DC terminals and the hardware (lock washer and nut) used to hold these connections are stacked correctly (see Figures 2-5 & 2-6). Verify all DC connections are torqued from 10 to 12 ft-lbs (13.6 to 16.3 N-m). © 2016 Sensata Technologies... -
Page 21: Ac Wiring (Mm612 & Mm1212 Models)
Wire Connection Black (HOT IN) Hot In AC IN White (NEUT IN) Neutral In Red (HOT OUT) Hot Out AC OUT White w/ Black Stripe Neutral Out AC GROUND Green (GROUND) AC IN & AC OUT Ground © 2016 Sensata Technologies... -
Page 22: Ac Wire Size And Overcurrent Protection
Size Size #14 AWG #14 AWG MM612 7 amps 10 amps 8 amps 10 amps (2.1 mm (2.1 mm #12 AWG #14 AWG MM1212 20 amps 20 amps 12 amps 15 amps (3.3 mm (2.1 mm © 2016 Sensata Technologies... -
Page 23: Ac Input Wiring
When hardwiring the output of the inverter, a cable must be routed from the inverter’s output to an AC distribution panel (sub-panel) that provides overcurrent protection to the loads powered by the inverter. Connect the AC output to this distribution panel using the following instructions (Figure 2-7): © 2016 Sensata Technologies... -
Page 24: Ground-Fault Circuit Interruption (Gfci) Breakers
If installing this inverter in the wiring system of a mobile application (RV/ marine/truck), a GFCI may be installed to protect some branch circuits powered by this inverter. In compliance with UL standards, Sensata has tested the following GFCIs and has found that they function properly when connected to the inverter’s AC output (there are others on the market that will work just... -
Page 25: Functional Test
If the inverter passes all the steps, the inverter is ready for use. If the inverter fails any of the steps, refer to the Troubleshooting section. © 2016 Sensata Technologies... -
Page 26: Operation
This transfer relay passes the incoming AC power through the inverter to power the AC loads on the inverter’s output. This incoming power is also used to activate a powerful internal battery charger to keep the battery bank charged in case of a power failure. © 2016 Sensata Technologies... -
Page 27: Figure 3-1, Automatic 4-Stage Charging Graph
Goes to Full Charge after 4 ‘Adj Charge hours in Float Rate’ Setting Current Charge Absorb Time (per the ‘Adj Batt AmpHrs’ setting) Constant Current Reduced Current Monitored Current No Current Figure 3-1, Automatic 4-Stage Charging Graph © 2016 Sensata Technologies... - Page 28 ** – The MM Series uses changeable settings (see Table 5, Inverter Default Settings) that are adequate for most installations. However, if you determine that some of your operating parameters need to be changed, the ME-RC50 remote control can be purchased to allow changes to those settings. © 2016 Sensata Technologies...
-
Page 29: Battery Temperature Sensor Operation
AC loads. If there is a condition that causes the inverter to shut down, it may be one of the conditions listed below. Refer also to the Troubleshooting section to diagnose and clear the fault. © 2016 Sensata Technologies... -
Page 30: Table 4, Inverter Battery Turn On/Off Levels
16.0 VDC 16.0 VDC HBCI 15.5 VDC 15.5 VDC LBCI ≥12.5 VDC ≥12.5 VDC LBCO 10.0 VDC 10.0 VDC (one minute delay) (9.0 - 12.2 VDC) (9.0 - 12.2 VDC) LBCO 8.5 VDC 8.5 VDC (immediate) © 2016 Sensata Technologies... -
Page 31: Inverter Startup
Blinks Off (once every four seconds) – The unit is charging the batteries connected to the inverter. The external AC power (shorepower or generator) connected to the inverter’s input is passing through the inverter and is powering the AC loads connected to the inverter’s output. © 2016 Sensata Technologies... -
Page 32: Factory Default Settings
• VAC Dropout: Sets the minimum AC voltage that can be present on the AC input before the unit transfers from Transfer mode to Invert mode. This protects the AC loads from utility outages and brown-outs. © 2016 Sensata Technologies... -
Page 33: Troubleshooting
While charging, If the Battery Temperature This is normal. DC charge Sensor is installed, it will increase voltage is higher or decrease the DC voltage or lower than level depending on temperature expected around the battery sensor. © 2016 Sensata Technologies... -
Page 34: Specifi Cations
Shelf or wall (top or bottom up) Weight 14 lbs. (6.4 kg) 20 lbs. (9 kg) Shipping weight 18 lbs. (8.2 kg) 23 lbs. (10.5 kg) Specifi cations @ 25°C (77°F) – Subject to change without notice © 2016 Sensata Technologies... -
Page 35: Appendix A - Remotes And Optional Equipment
DISABLE the inverter function when a 12-volt DC signal is removed. Ignition Switch Activate The MM-ISA (Ignition Switch Activate) is a pigtail adapter is designed to automatically ENABLE the inverter function when a 12-volt DC signal is supplied. © 2016 Sensata Technologies... -
Page 36: Appendix B - Battery Information
(Figure B-1), two 6 VDC/200 AHr batteries are combined into a single string—resulting in a 12 VDC/200 AHr bank. overcurrent protection 6 volts 6 volts 12 VDC (200 AHrs) (200 AHrs) inverter 12 volt battery bank (total capacity = 200 AHrs) Figure B-1, Series Battery Wiring © 2016 Sensata Technologies... -
Page 37: Figure B-2, Parallel Battery Wiring
6 volts 6 volts overcurrent String protection (200 AHrs) (200 AHrs) 6 volts 6 volts 12 VDC String (200 AHrs) (200 AHrs) inverter 12 volt battery bank (total capacity = 400 AHrs) Figure B-3, Series-Parallel Battery Wiring © 2016 Sensata Technologies... -
Page 38: Appendix C - Preventive Maintenance
Once the rapid fl ashing has begun, release the Power ON/OFF switch. The Status LED will go off after the pushbutton is released. After the inverter reset is completed, press the Power ON/OFF switch to turn the inverter on. © 2016 Sensata Technologies... -
Page 39: C-3.2 Performing A Power Reset (I.e., Hard Reset)
Info: If DC disconnects are not used, there may be a momentary spark when the positive battery cable is connected to the inverter’s terminal. This is normal and indicates that the inverter’s internal capacitors are being charged. © 2016 Sensata Technologies Learn more about RV electrical and lighting we have.
Need help?
Do you have a question about the MAGNUM ENERGY MM Series and is the answer not in the manual?
Questions and answers