
Related Manuals for Netech EXPMT 2000


Summary of Contents for Netech EXPMT 2000
- Page 1 EXPMT 2000 External Pacemaker Analyzer Operating Manual 110 Toledo Street Farmingdale, NY 11735 Phone: 631-531-0100 Fax: 631-531-0101 www.netech.org EXPMT 2000 User Manual...
- Page 2 Netech Corporation. This warranty does not apply if the product has been damaged by accident or misuse or as the result of service or modification by other than Netech Corporation, or if its serial number is defaced or removed.
-
Page 3: Table Of Contents
2.7.1 Printing Without a Header --------------------- 21 2.7.2 Printing With a Header ------------------------- 21 2.8 Automatic Pacer Testing --------------------------------- 22 2.9 Printer Functions ----------------------------------------- 23 2.10 Auxiliary Functions -------------------------------------- 24 2.10.1 AV Pacer Test Function -----------------------25 EXPMT 2000 User Manual... - Page 4 3.3 Receiving and Saving Data ---------------------- 28 4. Troubleshooting EXPMT 2000--------------------------- 5. Appendix ------------------------------------------------------- 31 This Manual is provided to explain the operation of the EXPMT 2000, External Pacemaker Analyzer. It is intended for the biomedical engineering or clinical engineering technician involved in the testing of external pacemakers.
- Page 5 4. Do not connect transthoracic and transvenous pacemakers simultaneously. Test only one type at a time. 5. Do not connect the pacer input before the EXPMT 2000 is turned ON. 6. Do not change the variable pacer test load while a transthoracic pacemaker is turned on.
-
Page 6: General Overview
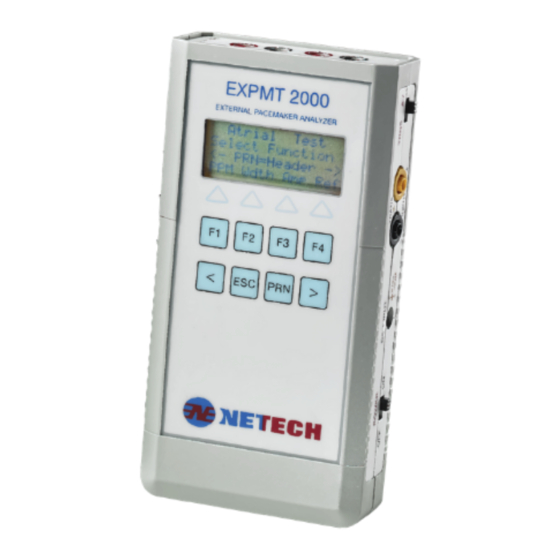
LCD display. Resulting measurements of the tests performed are simultaneously shown on the LCD display. The EXPMT 2000 is compact, lightweight, and rugged. It may be operated with one 9 volt battery or with an optional AC adapter. A standard RS232 serial port allows for printing and storage of results with optional printers and PDAs. -
Page 7: Specifications
A computer interface is available to print test results or to save them on a PC. The test results can be saved directly to a Palm Pilot using Netech’s optional palm software. 1.3.3 Power Requirements One 9 Volt Alkaline Battery or optional AC adapter. EXPMT 2000 User Manual... -
Page 8: Accessories
Unterminated Banana Plug (set of 2) 6383-02 1.4.2 Optional Accessories Printer DPM 441 Serial Printer Interface Cable Transthoracic Cable Adapters: 951-HP Zoll 951-Zoll PhysioControl 951-Physio Marquette 951-MARQ Universal A/V Pacer Adapter Cable Pacemaker Battery Test Adapter 652-BATT EXPMT 2000 User Manual... -
Page 9: Operating Instructions
If no damage is found to the shipping box, open the box and perform a visual inspection of the EXPMT 2000. If any damage to the unit is observed please contact Netech Customer Service. The Netech warranty statement is listed in the warranty section of this manual. -
Page 10: Power Up And Initialization
5 seconds. 2.3.1 RS 232 Setup The EXPMT 2000 can be connected to a printer / PC or a Palm Pilot via the RS 232C SERIAL PORT located on the side of the instrument. -
Page 11: Testing Transthoracic Pacers
The EXPMT 2000 provides a choice of utilizing either a fixed 50 Ohm test load or a variable test load (using the plug in adapter) for testing transthoracic pacemakers. -
Page 12: Selecting Pacer Manufacturer
E. Select the desired parameter to be measured (PPM, Wdth, Amp, Ref) using ‘F1’, ‘F2’, ‘F3’, or ‘F4’ keys. F. The EXPMT 2000 will now display the measured parameters. G. Press either the ‘ ←’ or ‘ →’ key to reach Level 2 and Level 3 menus. -
Page 13: Selecting Variable Test Loads
B. Press the Wdth ‘F2’ key to measure the Width. C. Press the Amp ‘F3’ key to measure the Amplitude. Note: The EXPMT 2000 pacer will continuously measure the parameters and update the display with the new values. Pressing the ‘F1’,‘F2’, or ‘F3’ key will select the measurement priority. The parameter selected will be updated first followed by the others. -
Page 14: Demand Sensitivity Tests
(Tri) triangle, or (SSQ) waveform. E. Press the ‘F2’ key to select a different sensitivity. 100, 200, 10, 25, and 40 msec are available. F. ‘STBY’ will flash on the top line until a measurement is made. EXPMT 2000 User Manual... -
Page 15: Immunity Tests
E. Press the 50Hz ‘F4’ key for a sine wave of 50Hz. G. The peak amplitude is displayed from 0 to 10 mV and may be increased or decreased. The default setting is 5.7 mV. Each EXPMT 2000 User Manual... -
Page 16: Measuring Energy
E. Press the ‘ESC’ key to return to the previous (Level 2) menu. 2.6 Testing External Transvenous Pacers (AV) The EXPMT 2000 will test both atrial and ventricular transvenous pacemakers. Before performing any tests connect the pacemaker to be tested to either the ATR (Atrial) or VENT (Ventricular) A-V INPUT connectors on the top of the instrument. -
Page 17: Measuring Refractory Periods
B. Press the Wdth Key ‘F2’ to measure the Width. C. Press the Amp Key ‘F3’ to measure the Amplitude. Note: The EXPMT 2000 pacer will continuously measure the parameters and update the display with the new values. Press the ‘F1’, ‘F2’, or ‘F3’... -
Page 18: Demand Sensitivity Tests
This may produce an erroneous reading. Hence, the maximum pacer rate must be set using the table below. EXPMT 2000 User Manual... -
Page 19: Immunity Tests
The default setting is 54.3 mV. Each time the ‘ ’ key is pressed the amplitude increases by 6.8 mV. Each time the ‘ ’ key is pressed the amplitude decreases by 6.8 EXPMT 2000 User Manual... -
Page 20: Measuring Av Interval
Note: The select switch must be in the A-V position and inputs must be connected to both the ATR and VENT input jacks on the EXPMT 2000. The amplitude values for both atrial and ventricular output on the pacemaker must be set to 0.1mA or higher. -
Page 21: Printing Pacer Measurements
A. Press the ‘PRN’ key on the Keypad to print the measured test data from the EXPMT 2000 in the Pacer Test mode. B. The EXPMT 2000 will send data to the printer port each time the display updates with current parameter measurements. -
Page 22: Automatic Pacer Testing
User modified values, may be saved for use in subsequent tests as long as the EXPMT 2000 is not turned off. The user can leave the modified value unsaved so that the original default values will be output during subsequent tests. -
Page 23: Printer Functions
(online LED lights up). Now the printer is ready to receive data from the EXPMT 2000. Select PRI in the main menu of the EXPMT 2000 and press the ‘F1’ key. The ‘Select Printer’ menu is now displayed showing the printer options. -
Page 24: Auxiliary Functions
3 Once the above selections have been made press ‘PRI’ in the main menu of the EXPMT 2000 and press the PC ‘F2 ‘key for the results to be stored in the given file name. -
Page 25: Av Pacer Test Function
2.10.1 AV Pacer Test Function In the AV Pacer Test Mode, the EXPMT 2000 inputs a DC output voltage of 100 millivolts ± 5 and displays both the input and the measured values. A. Select the AV Pacer Mode. B. Select the Level 2 Main Menu. -
Page 26: Calibration Check
± 5% of the selected reading the EXPMT 2000 should be recalibrated. 2.10.3 Calibration Check The EXPMT 2000 can be configured as a DC voltmeter and used to check the amplitude calibration. A. Select Level 2 in the Main Menu. -
Page 27: Printer Format Selection
Left margin set Print 16 characters 2.10.5 Pacemaker Battery Current Test The EXPMT 2000 will measure the battery current of the pacemaker to be tested. The Netech 652-Battery Adapter is required to perform this measurement. A. Connect the battery adapter to the pacemaker and a 9 Volt battery. -
Page 28: Palm Pilot Interface
Equipment files may be entered and edited. 3.12 Netech PalmSoft Set Up Procedure D. Load the Netech PalmSoft software into the Palm Pilot. Connect the Palm Pilot to the EXPMT 2000 using the Netech serial interface cable, 650-Palm-Cable. Activate the Netech PalmSoft software. -
Page 29: Troubleshooting Expmt 2000
PC. TROUBLESHOOTING Section 5 5.1 Troubleshooting Chart The following chart is provided for basic troubleshooting. Problems other than those listed should be addressed to the Netech Technical Service Department at 631-531-0100. Description Cause Action On Power up the... - Page 30 The display shows Memory corruption Turn Unit off and non ASCI Characters then turn it On. Low battery warning Battery is low Replace battery EXPMT 2000 User Manual...
-
Page 31: Appendix
Appendix A Section 6 This Page is left blank intentionally for future updates. EXPMT 2000 User Manual...
Need help?
Do you have a question about the EXPMT 2000 and is the answer not in the manual?
Questions and answers