SleepSafe Beds SleepSafe BASIC Product Assembly Manual
Manual articulation foundation
Hide thumbs
Also See for SleepSafe BASIC:
- Product assembly manual (20 pages) ,
- Assembly manual (20 pages) ,
- Manual (20 pages)
Advertisement
Quick Links
PRODUCT & ASSEMBLY GUIDE
Manual Articulation
Manual Articulation
Manual Articulation
ELECTRIC
ARTICULATION
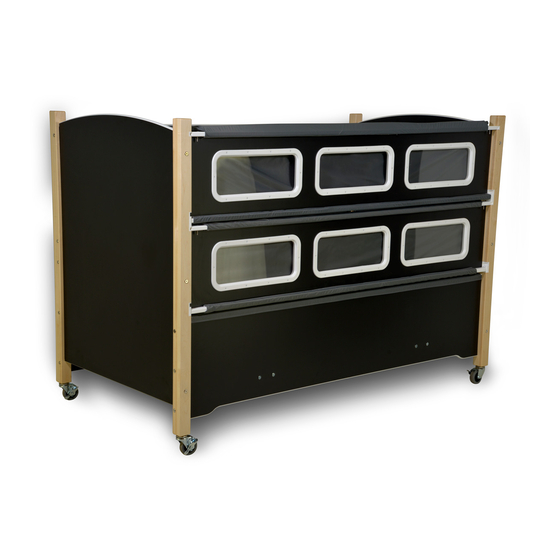
The Manual Articulation foundation elevates the head and knee sections of the bed.
Operates by turning two manual cranks, one for each section.
SleepSafeBed.com | 866.852.2337
3629 Reed Creek Drive | Bassett, VA 24055 | FDA Registered
F O U N D A T I O N
HI-LO
SleepSafe
SleepSafe
SleepSafe II
SleepSafer
Dual View
SleepSafer
Dual View with Topper
FIXED
(BASIC)
(Low Bed)
(Medium Bed)
(Tall Bed)
with Extension
MANUAL
Advertisement

Related Manuals for SleepSafe Beds SleepSafe BASIC


Summary of Contents for SleepSafe Beds SleepSafe BASIC
- Page 1 PRODUCT & ASSEMBLY GUIDE Manual Articulation Manual Articulation Manual Articulation F O U N D A T I O N ELECTRIC ARTICULATION HI-LO FIXED MANUAL The Manual Articulation foundation elevates the head and knee sections of the bed. Operates by turning two manual cranks, one for each section. ...
-
Page 2: Table Of Contents
Tools Needed Pre-Assembly Information Component Chart #1 Assembly Component Chart #2 Assembly Guide: SleepSafe BASIC & Low SleepSafe II Medium Bed Assembly Guide: SleepSafer Tall Bed SleepSafer Tall Bed Dual View Allen and Torx Wrenches Assembly Guide: SleepSafer Tall Bed... - Page 3 Note! Read Before Assembly • • KEEP THIS PRODUCT & ASSEMBLY GUIDE. NEVER SUBSTITUTE OR ALTER PARTS, THE IT CONTAINS THE SERIAL NUMBER PRODUCT INCLUDING SIDE RAILS, MUST ------------------------------------- BE FULLY INSTALLED PRIOR TO USE. • CAREFULLY REMOVE AND LAY OUT ALL ------------------------------------- •...
- Page 4 Included Components Assembly Cardboard Lifts 90 mm Allen Bolt 3/4” Hex Bolt Barrel Nut (If the bed is unpadded) Tw-12 Tw-12 40 mm Fu-18 Fu-18 Allen Bolt Qu-18 Qu-18 Allen / Torx Wrench Set (Various sizes) Square Bit Driver Casters (Attached) Extension Safety Latch...
- Page 5 Included Components Assembly Manual Articulation Frame Crank Set: Extension, Crank, Bolt, Plugs (2 sets) Mattress Headboard Footboard Side Panel Front Panel Back Panel Safety Rail Extension End Panel Extension Side Panel Extension Topper...
-
Page 6: Sleepsafe Ii Medium Bed
SleepSafe (BASIC & Low) Assembly Guide SleepSafe II (Medium Bed) After unpacking bed and checking the contents Set Manual HEAD Articulation Foundation FOOT on 4 provided cardboard lifts. Reference Only. IMPORTANT! Cranks installed in later step. CHECK THE BED ORDER FOR THE DESIRED LOCATION OF THE CRANK. - Page 7 Attach Headboard and Footboards to Side Panels. (Use 4mm Allen Wrench to fasten 90mm Allen Bolts to Side Panels) Once headboard and footboards are attached, remove SleepSafe Bed (Low Bed) uses (8) 90mm Bolts Casters cardboard lifts. SleepSafe II (Medium Bed) uses (12) 90mm Bolts are pre-installed Save for future use.
- Page 8 SleepSafer (Tall Bed) Assembly Guide SleepSafer (Dual View) After unpacking bed and checking the contents HEAD Set Manual Articulation Foundation on FOOT 4 provided cardboard lifts. Reference Only. IMPORTANT! Cranks installed in later step. CHECK THE BED ORDER FOR THE DESIRED LOCATION OF THE CRANK.
- Page 9 Attach Headboard and Footboards to Panels. Fasten (6) 90mm Allen Bolts to each panel with 4mm Allen Wrench. Install Back Panel. Set in place Once headboard and with alignment footboards are attached, pins, then fasten with Casters are remove cardboard lifts.
- Page 10 SleepSafer (Tall Bed) Assembly Guide Open & Closed Extensions After unpacking bed and checking the contents Set Extension Side Rails Upside Down Legs are upside down. and on their Legs. Assemble this with two people, otherwise one person can assemble one panel at a time after the the rest of the bed is assembled.
- Page 11 This SleepSafer® Tall Bed Extension installation step is based on ordering it with the SleepSafer® Tall Bed. Retrofitting this Extension requires Loosen top additional instruction. bolts on all 4 bed posts. This allows play in the frame to fit the Extension. Set the â...
- Page 12 Up and Down Safety Rail Adjustment Does the Safety Rail Additional Tools Needed: POST Hammer or Mallet need adjustment? Portable Electric Drill For proper operation the pin should be centered in the strike. If not centered, follow the following steps to center the pin in the strike.
-
Page 13: Padding Information
SleepSafe Bed Padding Information Materials: • 70 Denier Nylon Fabric Cover with a Fluid Resistant Healthcare Coating • 3/4” High Density Foam Padding Padding Features: The safety rail pads extend up and over the rails and attach to the outside of the safety rails. The headboard and footboard pads extend to the top and to the edges of the legs of headboard and footboard. -
Page 14: Mattress Information
SleepSafe Bed Mattress Information SleepSafe Bed® – Our Specialized Memory Foam Mattress Matttress Cover with Gel Technology SleepSafe® Bed mattress support surfaces provides optimized pressure redistribution, rapid heat dissipation, and increases in breathability compared to standard foam. • Reduced incidence of pressure ulcers by channeling heat away from the body much faster than standard foam, virtually ridding... -
Page 15: Final Installation Checklist
The mattress should always fit snugly against the sides. If not, contact the DME or Customer Service at SleepSafe Beds. Check Bed Operation with the Hand Cranks. This foundation uses manual cranks to control the elevation of the head and knee sections. -
Page 16: Operator's Guide
Operator’s Guide: Manual Articulation Operating the Manual Articulation Foundation This foundation uses a manual crank in the front of the bed to control the head and knee sections. To raise the head section, turn the Crank CLOCKWISE. To lower the head section, turn the Crank COUNTERCLOCKWISE. - Page 17 Frequently Asked Questions How do I get replacement parts? What should I do if I have a repair problem? Please call your local dealer that helped you purchase the bed. They should be able to help with any problem you may have. If your original dealer cannot help you with replacement parts or repair, please contact us directly so we may assist you at 866-852-2337.
-
Page 18: Warranty Information
United States. Limited Five Year SleepSafe® Bed Warranty During the second through fifth years from the date of purchase, SleepSafe Beds, LLC will replace any part found to be defective. Purchaser shall pay all service and shipping costs related to the replacement of the defective part. -
Page 19: Dme Provider / Technical Support
Durable Medical Equipment Provider Bed Serial # ___________________________________ Installation Date ___________________________________ DME Provider ___________________________________ DME Contact ___________________________________ DME Address ____________________________________ DME Phone ____________________________________ DME Email ____________________________________ Installed by ____________________________________ Customer Service & Technical Support SleepSafe Bed Support DME Provider Support Hours: 8 AM to 5 PM / M-F / EST DME: ________________________ Toll Free: 866.852.2337... - Page 20 SleepSafeBed.com | 866.852.2337 3629 Reed Creek Drive | Bassett, VA 24055 | FDA Registered WI-820.120-2 Manual Articulation [2] Rev. 02...
Need help?
Do you have a question about the SleepSafe BASIC and is the answer not in the manual?
Questions and answers