Table of Contents

Related Manuals for enorossi G4V-3P


Summary of Contents for enorossi G4V-3P
- Page 1 Important: read carefully the use and maintenance instructions in this manual before you attempt any type of operation on the machine (Machine Directive 2006/42/EC). HAY TEDDER G4V-G4VL-G4VEL 3P-PT USE AND MAINTENANCE MANUAL rev. 0 – 08/14...
- Page 2 All rights reserved. Reproduction of any part of this manual, in any form without the web: http://www.enorossi.it - http://www.enoagricolarossi.com express written permission of ENOROSSI, is prohibited. The contents of this manual can be modified only by the manufacturer and without notice to the Client.
-
Page 3: Table Of Contents
manuale di uso e manutenzione INDEX INTRODUCTION ..................................5 A1 E ............................... 5 QUIPMENT DETAILS A2 M ..............................5 ANUAL DETAILS A3 I ........................ 6 DENTIFICATION AND CERTIFICATIONS A4 M ....................... 7 AIN COMPONENTS AND TECHNICAL DATA A5 W ................................8 ARRANTY SAFETY ..................................... - Page 4 Manual use and maintenance...
-
Page 5: Introduction
PTO. A2 Manual details ENOROSSI (hereinafter named "Manufacturer") has designed and built the equipment in compliance with the safety regulations and with the precise intent of protecting both the personnel at work and the entire operating system. -
Page 6: A3 Identification And Ec Certifications
Manual use and maintenance Warnings in this manual: IMPORTANT To indicate that the information must be absolutely known by the operator; DANGER To indicate a possible hazardous situation which concerns the operator and others' safety (minor accidents or injuries), or concerns the hay tedder efficiency; Note: indicates that the topic can facilitate the operator’s work. -
Page 7: A4 Main Components And Technical Data
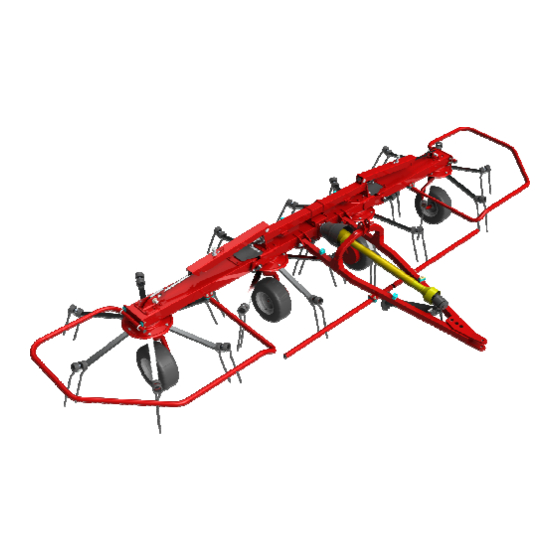
Manual use and maintenance A4 Main components and technical data Three-point universal hitch Technical specifications G4VL- G4VL- G4VEL- G4VEL- G4V-3P G4V-PT Cardanic shaft coupling Transport mechanical unit 4,70 4,70 5,20 5,20 5,70 5,70 Working width Protective lateral screens Transport width... -
Page 8: A5 Warranty
8 days from the machinery delivery. Within the warranty period Enorossi will replace, free of charge and at its headquarters, all the components that due to defects in workmanship or materials, give rise to incorrect operation. In the impossibility of replacement at its headquarters, the Manufacturer agrees to send to the Client headquarters the defective parts. On these replacements, Enorossi does not extend the warranty period for the time during which the hay tedder remains stationary, nor recognizes any compensation or indemnity to the Client for any direct or indirect expenses or damages. - Page 9 Manual use and maintenance • Client modifying the hay tedder or tampering with the components without the Manufacturer written permission; • usage of non-original spare parts or parts not in accordance with those recommended by the Manufacturer. However, the warranty period recognized for the hay tedder is not valid for all the components not manufactured by the Manufacturer and for which remains valid what written in the respective purchase notes.
-
Page 10: Safety
manuale di uso e manutenzione SAFETY B1 General rules This manual describes the safety standards to be observed when operating the hay tedder. Since most accidents occur because basic safety norms are not respected, is mandatory before activating any function, to read this manual and carefully follow the instructions contained therein. The use of the machinery must be entrusted to staff of age, qualified and trained for deployment. - Page 11 Manual use and maintenance For long distances travels the machinery is dismantled and lies within a wooden casing. Detailed instructions allow the Client, upon receiving the parts, to assemble the hay tedder with ease and speed. So if the machinery is to be sold or transferred to another user, for disassemble operations just follow the instructions in reverse order.
- Page 12 Manual use and maintenance warning light: the tractor must obligatory have the beacon warning light (yellow or orange) always activated. In addition, if the hay tedder bulk hides the visual signalling and lighting devices on the tractor, they must be duplicated, applying a special bar at the back of the machinery; weight: the total weight of the operating machine (tractor with hay tedder) must not exceed 30% of the tractor’s weight on its own as reported on the registration certificate.
-
Page 13: B3 Intended Use And Handling Precautions
Manual use and maintenance DETTAGLIO A WORKING POSITION B3 Intended use and handling precautions The hay tedder is an agricultural equipment used to spread, aerate and turn over any type of previously cut forage, so as to allow an early and uniform drying of the product which ensures a high-quality forage. - Page 14 Manual use and maintenance The rotating working groups, which may vary depending on the model from 4 to 6 units, consist all of six arms on which working tools or teeth are mounted. The groups rotate, one in opposition to the other, with a pronounced tilt toward the front (7 ÷ 10°), so that the product is collected from the teeth and thrown up in the back spreading on the land.
-
Page 15: B4 Reasonably Foreseeable Misuses And Use Limitations
Manual use and maintenance verify that there are no people or animals near any of the machinery dangerous areas (shown in the figure), as they may not be aware of possible zona pericolosa zona pericolosa dangers; machinery operations are allowed in good visibility conditions. -
Page 16: B5 Operators Liability
Manual use and maintenance Visibility: in conditions of poor visibility (fog, dust, smoke or other): it is recommended to stop the working operations and wait until the fog, dust, smoke or other subsides. Behave similarly in the case of wind and/or rain. Dangerous areas: if, during the working operations, a person or an animal enters a danger zones (see previous paragraph), the operator must immediately disengaged the PTO, stop the tractor and remove the intruder. -
Page 17: B6 Pictograms
Manual use and maintenance has used non-original or non-specific spare parts for the hay tedder. B6 Pictograms In addition to the indications contained in this manual, adhesive labels or pictograms that illustrate the safety regulations to be respected are applied in various parts of the machinery to help operators. -
Page 18: B7 Noise Level
Manual use and maintenance IMPORTANT Pictograms and warning labels must be replaced before they become unreadable. In this event, the operator cannot use the hay tedder until a new label is applied. In the same way it is absolutely forbidden to remove pictograms or labels from the machinery. In the event that this occurs, the Manufacturer is not liable for what this may cause, since the hay tedder would no longer have the safety requirements with which it was designed and built. -
Page 19: Installation
manuale di uso e manutenzione INSTALLATION C1 Getting started The pulled hay tedder can be installed on any tractor equipped with a long hitch and rear auxiliary hydraulic valves, while the mounted type can be installed on any tractor equipped with a rear universal three-point hydraulic hitch. For the installation arrange a specific area with a flat surface. The operator who performs the installation must be aware of safety standards relating to the operation and must operate with the utmost care and caution. - Page 20 Manual use and maintenance lower hole coincides with the one on the machinery frame the operator will fasten the foot reinserting the corresponding R pin. Cardanic shaft: for installation and adaptation instructions, please refer to what described in its use and maintenance manual.
-
Page 21: C3 Cardan Shaft Adaptation And Installation
Manual use and maintenance C3 Cardan shaft adaptation and installation • Installation: follow thoroughly the installation instructions reported on its own use and maintenance manual. IMPORTANT Before installing the cardanic shaft make sure that it suits the requirements concerning the type and the power to be transmitted depending on the tractor’s PTO speed. -
Page 22: C4 Hydraulic And Electrical Connections
Manual use and maintenance At this point, without activating the tractor’s PTO, the machinery can be transported to the place of use. Note: if the machinery is used with a different using the tractor, the cardanic shaft may need a readjustment. Proceed with the instructions described in this paragraph. -
Page 23: Use And Operation
manuale di uso e manutenzione USE AND OPERATION D1 Getting started An appropriate and optimal use of the hay tedder serves not only to prevent damage and/or injury, but is the only way to get the same high performance and to discover its true potential and performance. - Page 24 Manual use and maintenance DETTAGLIO A WORKING POSITION for the G4 mounted type: lower the hydraulic lifter until the groups front teeth skim the soil. For any adjustments refer to section D2.3; for G4 pulled types verify the groups inclination in respect to the ground and, previously, the teeth positioning. For any adjustments refer to section D2.3; make sure the support foot (or feet) is in a safe position.
-
Page 25: D2.2 Working Process
Manual use and maintenance D2.2 Working process With the tractor proceeding and the working rotary group’s rotation and therefore of the teeth, the hay aeration process begins. The teeth skims and scrapes the surface and collects the cut crop pushing it the rear in order to spread it evenly (Fig. D4). For best results rotary groups must operate at an angle to the ground, which can vary from 7 to 10°, as shown in Fig. -
Page 26: D2.3 Rotating Groups Tilt Adjustment
Manual use and maintenance D2.3 Rotating groups tilt adjustment • Mounted type (G4): to modify the rotary groups inclination in respect to the ground operate fig. D7 on the tie rod placed between the tractor and the hay tedder third point (Fig. D7) screwing or unscrewing the body with the lever, as shown in Figure. Turning the lever counter clockwise (direction A) the rod extends, pushing the machinery frame downwards and reducing the inclination. -
Page 27: D2.5 Transport Configuration
Manual use and maintenance D2.5 Transport configuration • G4 (both mounted and pulled) - fig.D13: acting on the corresponding lever in the cabin, give completely retract the two rams and raise the two external sections until the two mechanical locking devices (one for each side) attach to their corresponding stops placed on them;... -
Page 28: D2.6 End Of Word
Manual use and maintenance D2.6 End of word At the end of work, if a tractor has to go back in its usual parking place, make the hay tedder assume the transport configuration before moving. Therefore: • switch off the PTO; •... -
Page 29: Maintenance
manuale di uso e manutenzione MAINTENANCE E1 Precautions during maintenance The hay tedder is agricultural equipment that does not require special maintenance, nor relative programs. However, there is a regular intervention, described below, which, if done with care by the Client, will keep unchanged the efficiency and the working capacity of the machinery avoiding any operating damage. The operator, which must be of age, qualified and trained to perform such interventions must necessarily observe what follows: DANGER... -
Page 30: E3 Teeth Replacement
Manual use and maintenance verify that the structural integrity of all the machinery parts especially those more subject to wear such as wheels tires; for pulled types: check all of the hydraulic system components for air or fluid leaks; check the integrity of the rotary groups and also check that the transmission transfer case does not present any oil leakage. Note: all types of hay tedders have a grease lubricated transmission transfer case which means that all internal components can only operate if they are immersed in the lubricant. -
Page 31: E4 Troubleshooting
Manual use and maintenance E4 Troubleshooting CAUSES DAMAGES or FAILURES SOLUTIONS For pulled types – Rams move jerkily Air in hydraulic several minutes to bleed the air remaining the hydraulic circuit circuit Run the hay tedder vacuum for CAUSES DAMAGES or FAILURES SOLUTIONS Also check the oil level in the tractor's hydraulic tank... - Page 32 Manual use and maintenance 32 - MAINTENANCE...
- Page 33 ENOAGRICOLA ROSSI s.r.l. 06018 Calzolaro di Umbertide Perugia Italia Tel. (39) 075-9302222 - Telefax (39) 075-9302328 e-mail: enorossi@enorossi.it – info@enorossi.it web: http://www.enorossi.it - http://www.enoagricolarossi.com...
Need help?
Do you have a question about the G4V-3P and is the answer not in the manual?
Questions and answers