
Related Manuals for EOS 94 00 Series


Summary of Contents for EOS 94 00 Series
- Page 1 EOS Compact DC/HC Control Unit for Sauna Cabins Installation and Operating Instructions Made in Germany Druck-Nr.: 2902 5162 Stand: 17.2021...
-
Page 2: Documentation
Cross-reference to a page Read instructions Result of a step Table title Title of figure Revision history Date Version Description 1 May 2021 01.00 First version EN-2 Installation and Operating Instructions - EOS Compact DC/HC... -
Page 3: Table Of Contents
Mounting the cabin lighting ............. EN-36 Mounting the fan .................. EN-37 4 Connecting the lines..................EN-38 Circuit board assignment for EOS Compact HC......EN-40 Circuit board assignment for EOS Compact DC......EN-41 Connecting the sensor cables ............EN-42 Connecting optional modules............EN-44 Connecting the consumer lines............ - Page 4 6.7.11 Retrieving temperature/humidity values .....EN-76 6.7.12 Switching the PFC on/off manually ........EN-77 6.7.13 Switching the fan on/off manually........EN-77 Advanced settings.................EN-78 6.8.1 Runtime for ECO mode............EN-78 6.8.2 Runtime for HOT mode ............EN-79 EN-4 Installation and Operating Instructions - EOS Compact DC/HC...
- Page 5 Display of connected modules............EN-84 Display of contact information............EN-84 8 Troubleshooting .................... EN-85 Error messages ..................EN-85 Malfunction ..................... EN-87 9 General terms and conditions of service ........... EN-88 10 Disposal ......................EN-91 EOS Compact DC/HC - Installation and Operating Instructions EN-5...
-
Page 6: General Safety Instructions
These installation instructions are intended for quali- fied personnel familiar with the laws and regulations applicable to electrical installations at the installation site. Observe the following general safety instructions during mounting, configuration and commissioning of the product. EN-6 Installation and Operating Instructions - EOS Compact DC/HC... - Page 7 Corrosive or heavy saline atmospheres damage the contacts in the control panel, in the relay box and in the sensors. The control panel and sensors should not be installed in a cor- rosive or heavy saline atmosphere. EOS Compact DC/HC - Installation and Operating Instructions EN-7...
- Page 8 Similarly, excessive cold and extreme exposure to sunlight must be prevented. Protect the unit accordingly if there is an increased risk of me- chanical damage. EN-8 Installation and Operating Instructions - EOS Compact DC/HC...
-
Page 9: Operator Instruction
EOS Compact DC/HC - Installation and Operating Instructions EN-9... - Page 10 If the heating does not switch off automatically after a defined heating period, cabin use must be supervised at all times. Inspect the cabin before each use. EN-10 Installation and Operating Instructions - EOS Compact DC/HC...
-
Page 11: Standards And Regulations
For an overview of the standards that were observed during design and construction of the sauna heaters, please refer to the individual product's technical data sheet that can be downloaded from www.eos-sauna.com. Local regulations also apply to the installation and operation of heating, sauna, and steam room systems. -
Page 12: Identification
Identification Identification The scope of delivery of the EOS Compact control unit includes a control unit, a heater sensor with connecting cables for the sensor, and safety tem- perature limiter. The unit is used to operate a sauna cabin. EOS Compact is available in two models: ... -
Page 13: Nameplate
The heater sensor has a safety temperature limiter, which ensures that the temperature does not exceed 140°C. A Temperature sensor B Safety temperature limiter Internal view of heater sensor EOS Compact DC/HC - Installation and Operating Instructions EN-13... -
Page 14: Technical Data
Approx. 1.2 kg Power supply 400 V 3N AC 50 Hz Switching output 10 kW Protection class IPx4 splash-proof Temperature control Finnish sauna mode: 30–115°C range Steamy hot air bath (Bi-O): 30–70°C EN-14 Installation and Operating Instructions - EOS Compact DC/HC... - Page 15 Temperature display for Current value at bench sensor, multisensor bench sensor, multisen- Display for humidity Current value at multisensor multisensor Heating period limita- 6 hrs (factory setting), 12 hrs, 18 hrs, infinite tion EOS Compact DC/HC - Installation and Operating Instructions EN-15...
-
Page 16: Accessories
Multisensor (beige) 94.7441 Multisensor (anthracite) 94.7442 Connecting cables for add-on modules Item no. Connecting cable 6P6PC 10 m 94.5861 Connecting cable 6P6PC 25 m 94.4647 Connecting cable 6P6PC 50 m 94.4648 EN-16 Installation and Operating Instructions - EOS Compact DC/HC... -
Page 17: Intended Use
Sauna bus Intended use In conjunction with a suitable sauna heater, the EOS Compact control unit is intended to be used only to heat sauna cabins. It is suitable for cabins used in private and commercial settings. The control unit must be mounted on a wall. -
Page 18: Installation
65°C. If the data lines are installed outside on the wall, they should be protected by a cable duct. Data line(s) routing EN-18 Installation and Operating Instructions - EOS Compact DC/HC... -
Page 19: Installation Site
Risk to life and limb from electric shock and fire in the event of im- proper or faulty electrical connection. This risk also applies follow- ing completion of the installation work. Do not mount the control unit in enclosed cabinets or wood panelling. EOS Compact DC/HC - Installation and Operating Instructions EN-19... - Page 20 Installation Proper and improper mounting of the control unit EN-20 Installation and Operating Instructions - EOS Compact DC/HC...
- Page 21 Mount the control unit inside the building. We recommend mounting the control unit on the cabin’s exterior wall. ca. 350 mm A Eye level Mounting on the cabin’s exterior wall EOS Compact DC/HC - Installation and Operating Instructions EN-21...
-
Page 22: Mounting The Control Unit
Removing the front cover, EN-23 Preparing the air inlets, EN-24 Mounting the control unit on the wall, EN-25 Mounting the control unit in the wall, EN-28 EN-22 Installation and Operating Instructions - EOS Compact DC/HC... - Page 23 Unscrew the screw on the top of the housing. b) Swivel the front cover and remove it downward. Remove the protective film from the panel after mounting is completed. EOS Compact DC/HC - Installation and Operating Instructions EN-23...
- Page 24 Specifying the line openings in the housing. A Openings: sensor line(s) B Openings: mains supply line, heater output, vaporiser supply line, light, fan, load expansion (optional) C Openings: sauna bus line(s) EN-24 Installation and Operating Instructions - EOS Compact DC/HC...
- Page 25 Break the plates from out of the openings. b) Insert the bushings. A Plates B Bushings Mounting the control unit on the wall Drill one (1) hole above and two (2) holes below. EOS Compact DC/HC - Installation and Operating Instructions EN-25...
- Page 26 Allow the screw to protrude approx. 3 mm so you can hook in the housing. Pull the lines through the openings in the housing. See Preparing the air inlets, EN-24. EN-26 Installation and Operating Instructions - EOS Compact DC/HC...
- Page 27 Securely tighten the housing in the two lower (B). clearance holes A Upper mounting hole for screw B Lower mounting holes for screws Next step: 4 Connecting the lines, EN-38. EOS Compact DC/HC - Installation and Operating Instructions EN-27...
- Page 28 Installation Mounting the control unit in the wall Prepare a wall cut-out: Height x width: 198 x 215 mm, mounting depth: min. 35 mm. EN-28 Installation and Operating Instructions - EOS Compact DC/HC...
- Page 29 Remove the housing. d) Drill four holes. A Tabs with mounting holes for screws Pull the lines through the openings in the housing. See Preparing the air inlets, EN-24. EOS Compact DC/HC - Installation and Operating Instructions EN-29...
-
Page 30: Mounting The Heater Sensor
Hardware + tools: Heater sensor and connecting cables Drill used to drill a hole in the cabin ceiling Screwdriver Taut wire, as needed EN-30 Installation and Operating Instructions - EOS Compact DC/HC... - Page 31 Ensure that there are no heater-specific requirements that ap- ply to installing the sensor. Observe the installation and operating instructions for the sau- na heater. EOS Compact DC/HC - Installation and Operating Instructions EN-31...
- Page 32 Distance from wall 35 cm Drill a hole in the cabin ceiling for the cable. Route the sensor cable through the hole. Attach a taught wire to the cable as needed. EN-32 Installation and Operating Instructions - EOS Compact DC/HC...
- Page 33 If multiple sauna heaters are installed in a sauna cabin, it may be necessary to install additional safety temperature limiters and connect them in series. Insert the receiving disk in the bottom of the housing. EOS Compact DC/HC - Installation and Operating Instructions EN-33...
-
Page 34: Mounting The Multisensor (Optional
Attach the top of the housing. Mounting the multisensor (optional) Hardware + tools: Multisensor and connecting cables Drill for drilling a hole in the cabin wall Screwdriver Taut wire, as needed EN-34 Installation and Operating Instructions - EOS Compact DC/HC... - Page 35 A White (sensor bus) B Green (sensor bus) C Brown (sensor bus) Screw the sensor plate to the cabin wall and close the housing. 4.3 Connecting the sensor cables, EN-42 EOS Compact DC/HC - Installation and Operating Instructions EN-35...
-
Page 36: Mounting The Bench Sensor (Optional
Minimal output 5 W Resistive loads max. 100 W Dimmable energy-saving bulbs max. 35 W Light sources with conventional transformers max. 60 VA Dimmable LED bulbs max. 60 W EN-36 Installation and Operating Instructions - EOS Compact DC/HC... -
Page 37: Mounting The Fan
The fan is not included in the scope of delivery. Observe the separate installation instructions for the fan. Fan requirements Minimal output 5 W Maximum output 100 W Voltage 230 V 1N AC Suitable for use in sauna cabins EOS Compact DC/HC - Installation and Operating Instructions EN-37... -
Page 38: Connecting The Lines
Electrical installation must only be carried out by a qualified and licensed electrician. The unit must be connected to the power supply according to the circuit diagram and the terminal scheme. EN-38 Installation and Operating Instructions - EOS Compact DC/HC... - Page 39 EOS Compact DC: Finnish sauna heater EOS Compact HC: Finnish sauna heater or Bi-O sauna heater Both types of sauna heaters are referred to as sauna heaters in the follow- ing section. However, in instances where different settings must be made, they will be referred to specifically by name.
-
Page 40: Circuit Board Assignment For Eos Compact Hc
L Cabin lighting F Safety temperature limiter M Fan connection N Vaporiser G Heater sensor with safety O Sauna heater temperature limiter Schematic view of connections for EOS Compact HC EN-40 Installation and Operating Instructions - EOS Compact DC/HC... -
Page 41: Circuit Board Assignment For Eos Compact Dc
J Heating period limitation jog dial E Safety temperature limiter connec- K Cabin lighting tion L Fan F Heater sensor with safety M Sauna heater temperature limiter Schematic view of connections for EOS Compact DC EOS Compact DC/HC - Installation and Operating Instructions EN-41... -
Page 42: Connecting The Sensor Cables
When the cables are connected, the plugs are plugged in again to the respective terminals on the circuit board. S T B A Terminal plug for safety B Sensor for safety temperature limiter temperature limiter EN-42 Installation and Operating Instructions - EOS Compact DC/HC... - Page 43 Plug the white cable on the left (A) into Multi Sens.. a) Plug the green cable on the right (B) into Multi Sens.. a) Plug the brown cable on the left (C) into Bench Sens.. EOS Compact DC/HC - Installation and Operating Instructions EN-43...
-
Page 44: Connecting Optional Modules
Plug the terminal plug into the circuit board again as assigned. Connecting optional modules The EOS Compact control unit has a jack for sauna bus cables, which can be connected via the optional modules. Add-on modules... -
Page 45: Connecting The Consumer Lines
Ensure that the control unit has no power. Required tools: Flathead screwdriver The front cover must be removed for the following steps. See: Removing the front cover, EN-23. EOS Compact DC/HC - Installation and Operating Instructions EN-45... - Page 46 W V U N WB 3 4 N V1 S1 WM FN F1 F2 LN LL O V E N P F C L S G M A I N S V A P. EN-46 Installation and Operating Instructions - EOS Compact DC/HC...
- Page 47 (full power) and the lower fan phase to F2 (lower power). If a single-phase fan is connected or fan phase 1 is set, only output F1 is supplied with power. See 5.1 Setup, EN-55. 5.4 Fan function, EN-59. EOS Compact DC/HC - Installation and Operating Instructions EN-47...
- Page 48 The heating period is restricted to 6 hours, irrespective of the set jog dial position for heating period limitation. Commercial sauna operation without safety system Commercial sauna operation with safety system EN-48 Installation and Operating Instructions - EOS Compact DC/HC...
- Page 49 In Bi-O mode, a max. of 17:30 hrs can be set, since 0:30 hrs are included for the drying program. Infinite runtime (24 hrs/7 days): commercial operation and if the cabin is continuously supervised, e.g. in public saunas EOS Compact DC/HC - Installation and Operating Instructions EN-49...
- Page 50 You can connect more than one vaporiser. If correctly connected, each vaporiser can report a water shortage separately. For the connection diagram, please contact EOS Service ( Service address, EN-92). Two vaporisers can be operated only in combination with LSG18H or LSG36H.
- Page 51 L S G M A I N S V A P. See the installation instructions for the corresponding LSG for information about how to connect the other cables for the optional LSG. EOS Compact DC/HC - Installation and Operating Instructions EN-51...
- Page 52 As a rule, only a fixed connection may be connected to the mains supply, whereby a configuration is provided that makes it possible to separate the system from the mains supply with a contact opening width of at least 3 mm (all poles). EN-52 Installation and Operating Instructions - EOS Compact DC/HC...
-
Page 53: Potential-Free Contact
Direct current Up to 30 V DC max. 10 A (300 W) Up to 110 V DC max. 0.3 A (33 W) Up to 220 V DC max. 0.12 A (26.4 W) EOS Compact DC/HC - Installation and Operating Instructions EN-53... -
Page 54: Checking For Proper Installation Of The Vaporiser
If installed properly, the vaporiser will switch on and off according to the humidity setting. If the Wb and Wm connections on the vaporiser are swapped, the vaporiser will not switch off and continue to run uninterrupted. EN-54 Installation and Operating Instructions - EOS Compact DC/HC... -
Page 55: Commissioning
Ensure that the rocker switch is set to Position I. Menu navigation Setting set-point values Reset value Next step Previous step Setup Set the time with Hours are changed by setting the minutes. 00:00 ... 23:59 EOS Compact DC/HC - Installation and Operating Instructions EN-55... - Page 56 Adjustable only if Modbus is selected. 1 1200 Bd MODBUS 2 2400 Bd Baudrate 3 4800 Bd 4 9600 Bd 5 19200 Bd 6 38400 Bd 7 57400 Bd 8 115200 Bd EN-56 Installation and Operating Instructions - EOS Compact DC/HC...
-
Page 57: Defining The Light Source
2 Non-dimmable light source at the light output, dimming at the control output for the ballast Mean Well PWM-60-24 for LEDs 24 V 60 W 3 Phase control fixer, LED ballasts EOS Compact DC/HC - Installation and Operating Instructions EN-57... -
Page 58: Pfc Function
PFC switches off: with sauna or if target temperature is reached PFC switches on: if malfunction present PFC switches off: no malfunction PFC switches on: if malfunction or warning present PFC switches off: no malfunction or warning EN-58 Installation and Operating Instructions - EOS Compact DC/HC... -
Page 59: Fan Function
If a fan function is set, it is interrupted when the fan is manually switched on or off. The fan is always switched on automatically for 30 min. for post-heating. EOS Compact DC/HC - Installation and Operating Instructions EN-59... - Page 60 Fan switched on to Stage 2 in heater intermission Fan switched on to Stage 2 in heater heat-up phase Fan switched on to Stage 2 in heater intermission and heater heat-up phase EN-60 Installation and Operating Instructions - EOS Compact DC/HC...
-
Page 61: Operation
Control unit is switched off. Parts of the circuit board are still energised. Switch on light only Cabin light is switched on, control unit, and sauna heater are switched off. Setting for cleaning and maintenance. EOS Compact DC/HC - Installation and Operating Instructions EN-61... -
Page 62: Buttons And Screen
If the sauna cabin is switched off and no button is pushed: After 1 hr Screen saver is activated After 2 hrs Sleep mode is activated (screen is off ) Screen saver and sleep mode are ended by pressing any button. EN-62 Installation and Operating Instructions - EOS Compact DC/HC... -
Page 63: Instructions For Operation
If 5 seconds pass and no button is pressed, the dis- play returns automatically to the main menu. Press the function soft key or the menu item again. Navigate back with the arrow keys: EOS Compact DC/HC - Installation and Operating Instructions EN-63... -
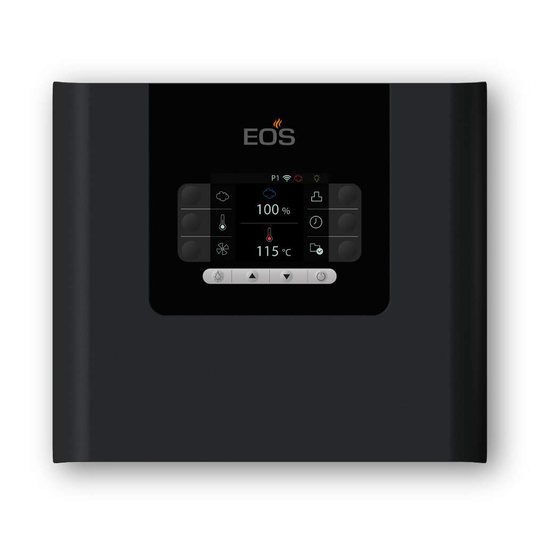
Page 64: Main Menu
L Autostop for heating period Example of overview of functions/menu items on main menu The displayed functions or menu items can vary, depending on the control unit model and its configuration. EN-64 Installation and Operating Instructions - EOS Compact DC/HC... -
Page 65: Status Bar
00:07:13 Time remaining for ECO mode 05:47:13 Function, mode active Cabin light is on Keypad lock is active Remote control: sauna cabin Holiday cottage mode is active can be activated remotely EOS Compact DC/HC - Installation and Operating Instructions EN-65... -
Page 66: Keypad Lock
Status bar display during active keypad lock: Display settings 6.5.1 Time Setting the time Open the Time menu. Set the time with Hours are changed by setting the minutes. 00:00 ... 23:59 EN-66 Installation and Operating Instructions - EOS Compact DC/HC... -
Page 67: Display Brightness
Press the following 2 soft keys simultaneously when the logo is dis- played. 10:32 70 °C The Setup menu opens. For information on settings in the Setup/ Reset menu, see: 5.1 Setup, EN-55. EOS Compact DC/HC - Installation and Operating Instructions EN-67... -
Page 68: Sauna Controls
If the cabin is operated in Bi-O mode, the drying program starts once humidity mode is switched off. This program continues to run the sauna heater for up to 30 minutes. : press again to cancel the drying program. EN-68 Installation and Operating Instructions - EOS Compact DC/HC... -
Page 69: Dimming Or Switching The Light On/Off
The rocker switch is located on the top of the control unit (6.1.1 Rocker switch (on, off, light only), EN-61). Sauna heater and control unit remain switched off. EOS Compact DC/HC - Installation and Operating Instructions EN-69... -
Page 70: Selecting Finnish/Bi-O Mode
Setting the temperature Choose the Temperature function. Set the temperature with 30–115°C in Finnish mode 30–70°C in Bi-O mode During the heat-up phase, the temperature icon flashes in the main menu display. EN-70 Installation and Operating Instructions - EOS Compact DC/HC... -
Page 71: Setting The Humidity For Bi-O Mode
Icon that indicates when Icon for cycle a humidity sensor is set The humidity sensor regulates the humidity according to the following indicated characteristic curve: [°C] Characteristics curve for temperature/humidity EOS Compact DC/HC - Installation and Operating Instructions EN-71... -
Page 72: Heating Period - Auto Stop
The heating period cannot be set in the holiday resort or remote modes. See: 6.8.3 Modes – holiday cottage, holiday resort, remote, EN-79. EN-72 Installation and Operating Instructions - EOS Compact DC/HC... -
Page 73: Timer
See: 5.1 Setup, EN-55. The timer cannot be set in the holiday resort or remote modes. See: 6.8.3 Modes – holiday cottage, holiday resort, remote, EN-79. EOS Compact DC/HC - Installation and Operating Instructions EN-73... - Page 74 Press the On/Off button for 2 seconds. Pressing to start the system again reactivates the timer. Deactivating the timer Choose the Timer function. Set the following values with --:-- (timer is deactivated) EN-74 Installation and Operating Instructions - EOS Compact DC/HC...
-
Page 75: Profiles
(HOT module), see: 2.5 Accessories, EN-16. Switching HOT mode on/off Choose the HOT mode function. After switching on the system, the time remaining for HOT mode is 00:07:13 displayed in the status bar: EOS Compact DC/HC - Installation and Operating Instructions EN-75... -
Page 76: Eco Mode (Temperature Decrease
We therefore recommend that you make adjustments to find the tempera- ture/humidity values that work best for you. EN-76 Installation and Operating Instructions - EOS Compact DC/HC... -
Page 77: 6.7.12 Switching The Pfc On/Off Manually
See: 5.4 Fan function, EN-59. The fan cannot be switched on/off manually in the holiday resort or remote modes. See: 6.8.3 Modes – holiday cottage, holiday resort, remote, EN-79. EOS Compact DC/HC - Installation and Operating Instructions EN-77... -
Page 78: Advanced Settings
ECO is active until the function is manually ended or the sauna heater is switched off. 30 min. 60 min. 90 min. 120 120 min. 150 150 min. 180 180 min. 210 210 min. 240 240 min. EN-78 Installation and Operating Instructions - EOS Compact DC/HC... -
Page 79: Runtime For Hot Mode
Switch off sauna Light on/off, dim light Switch on only If the sauna heater is switched off, the light switches off automatically after 30 min. Temperature setting Finnish or Bi-O operating mode EOS Compact DC/HC - Installation and Operating Instructions EN-79... - Page 80 Restart the control unit: switch off and switch on again. Press the following 2 buttons simultaneously when the logo is dis- played. Activating/deactivating the remote mode Restart the control unit: switch off and switch on again. EN-80 Installation and Operating Instructions - EOS Compact DC/HC...
-
Page 81: Temperature Control
Open the Temperature Control menu. Setting the temperature control -5 K -4 K -3 K -2 K -1 K +1 K +2 K +3 K 10 +4 K 11 +5 K EOS Compact DC/HC - Installation and Operating Instructions EN-81... -
Page 82: Remote Control
See: Setting the safety system, EN-48. If a remote control module or a different unit for controlling the sys- tem remotely is installed, the Wi-Fi icon is displayed in the status bar: EN-82 Installation and Operating Instructions - EOS Compact DC/HC... -
Page 83: Maintenance
4000 hours until the next servicing 5000 hours until the next servicing 6000 hours until the next servicing 8000 hours until the next servicing 10 10000 hours until the next servicing EOS Compact DC/HC - Installation and Operating Instructions EN-83... -
Page 84: Maintenance
4.4 Connecting optional modules, EN-44. Display of contact information Displaying contact information Open the Contact menu item. The contact information of the contact person for service inquiries is displayed. EN-84 Installation and Operating Instructions - EOS Compact DC/HC... -
Page 85: Troubleshooting
E0001. The icons indicate the currently applicable error category. For errors that are not listed here, please contact EOS Service and provide the error code. See Service address, EN-92. Water shortage warning... - Page 86 The same module address is Check the module address. assigned to multiple bus modules on the control unit. Hardware error Reason Solution E.g. over/under voltage Contact EOS Service. See Service address, EN-92 EN-86 Installation and Operating Instructions - EOS Compact DC/HC...
-
Page 87: Malfunction
EN-61 No heat. No connection. Check the cable and con- nections (broken cable, loose connection, etc.). Other errors Software error. Restart the control unit. ContactEOS Service. See Service address, EN-92. EOS Compact DC/HC - Installation and Operating Instructions EN-87... -
Page 88: General Terms And Conditions Of Service
In the case of a warranty claim, the manufacturer shall provide spare parts necessary for servicing free of charge. IV. Service visit by the manufacturer Services rendered on site by an employee of the manufacturer must be agreed in advance. EN-88 Installation and Operating Instructions - EOS Compact DC/HC... - Page 89 This warranty shall cover defective equipment parts, with the exception of normal wear parts. Wear parts shall include, for example, light sources, glass elements, tubular heating elements and sauna heater stones. EOS Compact DC/HC - Installation and Operating Instructions EN-89...
- Page 90 Complaints in respect of our products shall be reported to the responsible distributor and shall be handled exclusively by said distributor. The manufacturer's General Terms and Conditions of Business, in the ver- sion available at www.eos-sauna.com/agb, shall apply in addition to the foregoing terms and conditions of service. EN-90...
-
Page 91: 10 Disposal
Used paper, cardboard Plastic foil Foam material Electronic waste Electronic waste must be disposed of at the designated local collection point for electronic waste. EOS Compact DC/HC - Installation and Operating Instructions EN-91... - Page 92 Store this address with the Installation and Operating Instructions in a safe place. Please always provide us with nameplate data, such as model, item num- ber and serial number so we can provide fast and efficient support. Date of sale Stamp/retailer signature: © EOS Saunatechnik GmbH - All rights reserved.
Need help?
Do you have a question about the 94 00 Series and is the answer not in the manual?
Questions and answers