Table of Contents
Advertisement
Quick Links
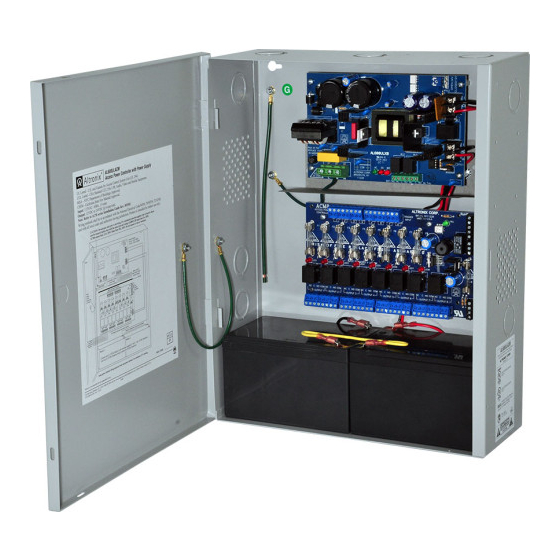
ACM220 Series
Access Power Controllers
with Power Supplies
Models Include:
AL400ACM220
- 12VDC @ 4A or 24VDC @ 3A.
- Fused Outputs
AL600ACM220
- 12VDC or 24VDC @ 6A.
- Fused Outputs
For a red enclosure add an "R" suffix to the part #, e.g. AL1024ACMR220
Installation Guide
Rev. 010213
Installing Company: _______________ Service Rep. Name: __________________________________
Address: _____________________________________________ Phone #: __________________
AL1012ACM220
- 12VDC @ 10A.
- Fused Outputs
AL1024ACM220
- 24VDC @ 10A.
- Fused Outputs
More than just power.
TM
Advertisement
Table of Contents


Need help?
Do you have a question about the ACM220 Series and is the answer not in the manual?
Questions and answers