Table of Contents
Advertisement
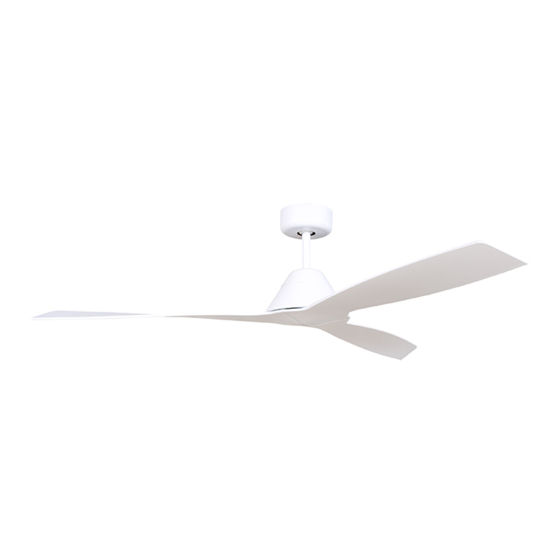
ECO BREEZE 52" DC CEILING FAN
YOUR FANCO ECO BREEZE 52" DC CEILING FAN
Congratulations on purchasing your new Fanco Eco Breeze 52" DC Ceiling Fan. Before attempting to install
your appliance it is important to read the instructions in this Installation Manual, even if you are a qualified
installer already familiar with this type of product.
Find a safe place to keep this Installation Manual handy for future reference.
The Installation Manual can also be downloaded from www.fanco.com.au
THIS PRODUCT MUST BE INSTALLED BY A QUALIFIED ELECTRICIAN
Installation Manual
CFFCEB3XXX – No Light
Remote control included
CFFCEB3LXXX – With Light
Remote control included
THIS IS NOT A DIY PRODUCT.
Advertisement
Table of Contents

Subscribe to Our Youtube Channel
Summary of Contents for Fanco CFFCEB3 Series
- Page 1 YOUR FANCO ECO BREEZE 52” DC CEILING FAN Congratulations on purchasing your new Fanco Eco Breeze 52” DC Ceiling Fan. Before attempting to install your appliance it is important to read the instructions in this Installation Manual, even if you are a qualified installer already familiar with this type of product.
-
Page 2: Important Safeguards
IMPORTANT SAFEGUARDS: Read all instructions carefully, even if you feel you are quite familiar with this type of appliance. When using electrical appliances, in order to reduce the risk of fire, electric shock, and/or injury, these basic safety precautions should always be followed: All wiring must be done by a licenced Electrician as on-site warranty may be voided if proof cannot be provided. -
Page 3: Fault Finder
FAULT FINDER: • Always check the “Trouble Shooting Checklist” included in this booklet before seeking warranty claim. • Mechanical noise may be noticed on installation. Allow at least 8 hours settling-in period. • Some fans may wobble more than others, even if they are identical. This does not necessarily indicate a fault. -
Page 4: Installation And Assembly
) according to the markings on the Terminal Block. For your convenience, and to assist in easy installation & cleaning, your ceiling fan is connected with Fanco’s easy connect system. Simply connect the male and female couplings, and then ensure excess wiring is retained inside the upper canopy. -
Page 5: Installation Steps
DISASSEMBLY OF ROD AND BALL STEP 1: From one end of the downrod (A), unscrew the holding screw (B), slide the ball down (C) remove the ball-pin (D). STEP 2: Slide the ball up and totally off the downrod. Keep all pieces to reassemble later. STEP 3: From the other end of the downrod , remove the cotter-pin (F), and slide out the cross-pin (G). - Page 6 Note: When installing the canopy be careful not to press down the antenna or other wires as these may break easily or short-circuit...
- Page 7 REVERSE FUNCTION: The “Summer / Winter” reverse function is included in the remote control to make the fan rotate in an anti-clockwise direction during summer. In winter, this can be reversed, so that the blades now move in a clockwise direction. CARE &...
- Page 8 Pairing the remote 1. Connect power to the fan; the receiver will beep after 2 - 20 seconds. 2. Press and keep pressed the on/off button (on remote) for 5 - 30 seconds until it beeps again. 3. The second beep indicates the remote is now talking to the fan. 4.
-
Page 9: Functions Of Transmitter
When pairing the remote control with the receiver for the very first time you generally only need to press and hold the fan ON/OFF button for 5 seconds before it responds. This is the correct procedure to add a new remote control to a receiver BUT it does not cause the receiver to “forget” previously paired remote controls. -
Page 10: Technical Data
TECHNICAL DATA MODEL NUMBER RATED RATED POWER FOR RATED LIGHT DIMMABLE VOLATGE DC MOTOR POWER CFFCEB3WH 240VAC CFFCEB3BLB 240VAC CFFCEB3BLK 240VAC CFFCEB3KO 240VAC CFFCEB3LWH 240VAC CFFCEB3LBLB 240VAC CFFCEB3LBLK 240VAC CFFCEB3LKO 240VAC... - Page 11 Ceiling Fan must be installed for in home warranty to apply – The Fanco Ceiling fan must have been installed by a qualified electrician and must remain installed for the in home warranty service to apply. If there is an issue with the wiring, the fan should be left installed without the wiring connected.
- Page 12 If a Fanco Service Agent determines a problem with the product is due to incorrect installation or misuse of the product, the product will not be replaced or repaired under warranty, the remainder of the warranty will be terminated and the client will be liable for a $95 inc GST call out fee.


Need help?
Do you have a question about the CFFCEB3 Series and is the answer not in the manual?
Questions and answers