Advertisement
Advertisement

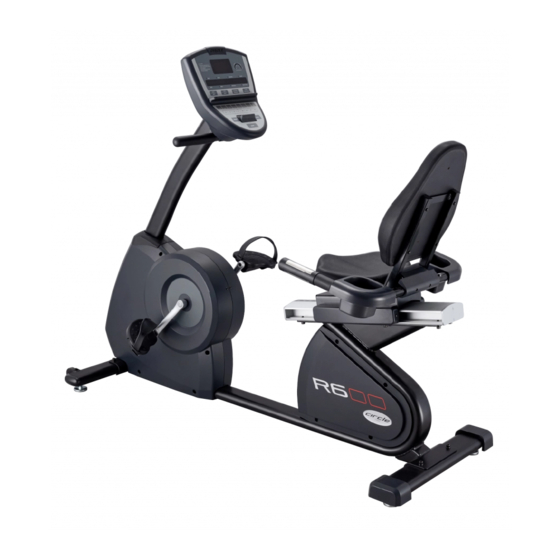
Related Manuals for CIRCLE FITNESS R6


Summary of Contents for CIRCLE FITNESS R6
-
Page 2: Table Of Contents
TABLE OF CONTENTS SAFETY INSTRUCTIONS ------------------------------------------------------------------------ 2-3 TECHNICAL SPECIFICATIONS ---------------------------------------------------------------- 4 UNPACKING & ASSEMBLY ------------------------------------------------------------------- 5-20 WARM UP & COOL DOWN ---------------------------------------------------------------------- 21 OPERATION------------------------------------------------------------------------------------------ 22 PANEL CONTROL ------------------------------------------------------------------------------ 23-24 PROGRAM ---------------------------------------------------------------------------------------- 25-29 PREVENTATIVE MAINTENANCE---------------------------------------------------------- 30-31... -
Page 3: Safety Instructions
SAFETY PRECAUTIONS Dear Customer, Thank you for your purchasing our products. This product has been designed and manufactured for studio use, even though we go to great efforts to ensure the quality of each product, occasional error, and/or omissions do occur. In any event should you find this product to be defective or missing parts please contact us. - Page 4 SAFETY PRECAUTIONS CONSULT A PHYSICIAN IMMEDIATELY Warning: before starting any exercise program consult your physician. This is especially important for individuals over the age of 35 or persons with preexisting health problems. Read all instructions before using any fitness equipment. We assume no responsibility for personal injury damage sustained by or through the use of this product.
-
Page 5: Technical Specifications
TECHNICAL SPECIFICATIONS SPECIFICATIONS: Length: 155 cm Width: 62.5cm Weight of product: 69.5kgs (152.9 Ibs) Program:Manual, 6 preset programs, Fitness Test, HRC*4 Standard features: 8*16 dot matrix HR receive Resistance System:PMS (Permanent Magnet System) Power source:Built-in generator & rechargeable battery 12V-1.2AH... -
Page 6: Unpacking & Assembly
UNPACKING & ASSEMBLY Parts (Main frame) #4-1 #4-2 #4-32 Rear stabilizer X 1pc Front stabilizer X 1pc Console set X 1pc Main frame X 1pc #4-7 #4-8 #4-9 #4-5 #4-6 Handle bar post X 1pc Front cover X 1 set Pedal set X 1set... - Page 7 UNPACKING & ASSEMBLY Parts (seat set) #4-19 #4-16 #4-25 #4-13 Backrest frame X Seat, Backrest Backrest frame front Seat X 1pc X 1pc cover X 1pc #4-26 #4-28 #4-27 #4-20 #4-22 Backrest frame rear Left/ Right track cover Lower hand pulse X Water bottle holder cover X 1pc X 1pc...
- Page 8 UNPACKING & ASSEMBLY Hardware kit #4-17 #4-18 (seat) (seat) #4-17 #4-18 (backrest) (backrest) #4-24 (water bottle holder) #1-7 #4-29、#4-30 (Adjust lever, seat) (adjust pad)
- Page 9 UNPACKING & ASSEMBLY Unpacking your recumbent bike where will be using it. Being careful not to damage. Place your recumbent bike on a level flat surface. It is recommended that you place a protective covering on your floor. NOTE: Because of heavy weight, please assemble this recumbent bike more than two people. Step1: Assembling the Front and Rear Stabilizers to the main frame.
- Page 10 UNPACKING & ASSEMBLY Step2: Assembling the pedal set to the crank. 1).Using wrench, fixing pedal set with crank set. #4-5 #4-6...
- Page 11 UNPACKING & ASSEMBLY Step3: Assembling the main frame and handle bar post. 1). Take the console wire and heart rate wire through handle bar post. 2). Put handle bar post into main frame and fasten 4 x M8*20mm screws, 4 x M8 Spring washers, 4 x M8 flat washers and 1 x M4*10mm screw on handle bar post.
- Page 12 UNPACKING & ASSEMBLY Step4: Assembling the console with handle bar post 1). Put the console into handle bar post,connected upper console wire with lower console wire. 2). Tighten 4pcs M5*15mm screws. #4-32 Upper console wire Upper handle pulse wire #4-12 Lower console wire Lower handle pulse wire...
- Page 13 UNPACKING & ASSEMBLY Step5: Assembling backrest frame and main frame. 1).Take out the backrest frame from carton box. 2).Set the backrest frame on main frame, then fasten backrest frame by 6 x M10*25mm screws and 6 xM10 spring washers. #4-13 #4-14 #4-15...
- Page 14 UNPACKING & ASSEMBLY Step6: Assembling the lower hand pulse and backrest frame. 1).Take out lower hand pulse from carton. 2).Take hand pulse wire through the hole and connect hand pulse wire on the main frame. 3).Put the lower hand pulse on the backrest frame fasten by 4 x M8*15mm screws and 4 x M8 spring washers.
- Page 15 UNPACKING & ASSEMBLY Step7: Assembling seat bottom and backrest. 1).Take out seat bottom from carton box. 2).Set seat bottom on the backrest frame and fasten by 4 x M6*40mm screws and 4 x M6 spring washers. #4-16 #4-17 #4-18...
- Page 16 UNPACKING & ASSEMBLY Step8: Assembling seat backrest and backrest frame. 1).Take out seat backrest from carton box. 2).Set seat backrest on backrest frame and fasten by 4 x M6*40mm screws and 4 x M6 spring washers. #4-19 #4-17 #4-18...
- Page 17 UNPACKING & ASSEMBLY Step9: Assembling the water bottle holder and lower hand pulse. 1).Take out the left and right water bottle holder from carton box. 2).Put the left water bottle holder on the lower hand pulse and fasten by 2 x M4*12mm screws. 3).Put the right water bottle holder on the lower hand pulse and fasten by 2 x M4*12mm screws.
- Page 18 UNPACKING & ASSEMBLY Step10: Assembling the backrest cover with seat set. 1).Fasten front backrest cover by 2 x M4*20mm screws on the seat. 2).Fasten rear backrest cover by 2 x M4*10mm screws on the seat. #4-25 #4-11 #4-23 #4-26 #4-11 #4-23...
- Page 19 UNPACKING & ASSEMBLY Step11: Assembling the left/right track cover on the seat set. 1).Fasten left track cover by 2 x M4*10mm screws on the seat set. 2).Fasten right track cover by 2 x M4*10mm screws on the seat set. #4-28 #4-27 #4-11...
- Page 20 UNPACKING & ASSEMBLY Step12: Assembling the seat adjust lever to the seat set. 1).Fasten seat adjust lever on the seat set by 2 x M4*18mm screws. #4-29 #4-30 #4-31...
- Page 21 UNPACKING & ASSEMBLY Step13: Assembling the adjust pad to the main frame. 1).Left up the main frame. 2).Fasten the adjust pad under the main frame. #1-7...
-
Page 22: Warm Up & Cool Down
WARM UP & COOL DOWN A successful exercise program consists of a warm up, aerobic exercise, and a cool down. Warming up is an important part of your workout, and should begin every session. It prepares your body for more strenuous exercise by heating up and stretching out your muscles. At the end of your workout, repeat these exercises to reduce sore muscle problems. -
Page 23: Operation
OPERATION A. After assembly, the rear stabilizer can be adjusted to accommodate slightly uneven ground. Turn the adjustment knobs on the ends of the rear foot caps to level the rear stabilizer to the floor. B. Adjust seat set Pull up the adjust lever to slide forward or backward from the scale 3 to 13 and adjust seat position according user’s height. -
Page 24: Panel Control
PANEL CONTROL Display & Keys Dot-matrix, display program profiles & message Message window... - Page 25 PANEL CONTROL Display function Display Definition Time Displays time remaining or total time. Calories Displays calories burned. Heart Rate Displays hand grip and wireless Heart Rate reading. Distance Displays total distance KM/Mi. Displays pedaling RPM. Watts Displays consuming watt. Mets Displays the multiple of rest.
-
Page 26: Program
PROGRAM PROGRAMS DESCRIPTION 1. QUICK START 1.1 To pedal over 30 rpm to wake up and initial the system to idle mode, press『START』 to quick start. 1.2 Press shift UP or DOWN to exercise level by 1 level or press quick Level Key to change level. - Page 27 PROGRAM 3.2.3. Preset program profiles: P1=ROLLING、P2=VALLEY、P3=FAT BURN、P4=INTERVAL、P5= RANDOM LEVEL 1 LEVEL 2 LEVEL 3 LEVEL4 LEVEL5 LEVEL 1 LEVEL 2 LEVEL 3 LEVEL4 LEVEL5 LEVEL 1 LEVEL 2 LEVEL 3 LEVEL4 LEVEL5 LEVEL 1 LEVEL 2 LEVEL 3 LEVEL4 LEVEL5...
- Page 28 PROGRAM 4. HRC(Heart Rate Control) 4.1. Press『H.R.C』key to enter the program. 4.2. Set time:use shift up or down device to set time then press『ENTER』to next settings. 4.3. Set weight: use shift up or down device to set weight then press『ENTER』to next settings. 4.4.
- Page 29 PROGRAM Fitness Test : 5.1. Press『Fitness Test』key to enter the program. 5.2. Set weight: use shift up or down device to set weight then press『ENTER』to next settings. 5.3. Set age: use shift up or down device to set age then press『START』to begin workout. 5.4.
- Page 30 PROGRAM Equipment adjustments An optimal seating position is crucial for comfortable cycling. ‧Height of seat As a general rule you should be able to reach the pedal with your heel when straightening your leg and aligning it with the pipe supporting the seat. ‧Body position Your handlebars should be set to a position in which you can reach them with slightly bent arms.
-
Page 31: Preventative Maintenance
PREVENTATIVE MAINTENANCE HOW TO CARE FOR YOUR RECUMBENT BIKE The Safety of the equipment can be maintained only if the equipment is examined regularly for damage or wear. If maintenance is required, keep the equipment out of use until defective parts are repaired or replaced. - Page 32 PREVENTATIVE MAINTENANCE F839007-000-05 R-6000A1 10508 Preventative Maintenance Schedule Follow the schedule below to ensure proper operation of the product. ITEM WEEKLY MONTHLY BI-ANNUALLY ANNUALLY Display Console Console Mounting Bolts Accessory Tray Frame Plastic Covers Pedals and Straps KEY:C=Clean; I=Inspect Hand pulse Before/after running, to put your feet separately on each side rein, then hold the hand grip, so as to avoid any shaking.
Need help?
Do you have a question about the R6 and is the answer not in the manual?
Questions and answers