
Related Manuals for Advantech PCA-6008G2


Summary of Contents for Advantech PCA-6008G2
- Page 1 User Manual PCA-6008G2 Socket 479 Pentium© M/ Celeron© M Processor Card with VGA/ Dual Gigabit LAN/ HISA/ DVI (533/400 MHz FSB)
- Page 2 No part of this manual may be reproduced, copied, translated or transmitted in any form or by any means without the prior written permission of Advantech Co., Ltd. Information provided in this manual is intended to be accurate and reliable. How- ever, Advantech Co., Ltd.
- Page 3 Technical Support and Assistance Visit the Advantech web site at www.advantech.com/support where you can find the latest information about the product. Contact your distributor, sales representative, or Advantech's customer service center for technical support if you need additional assistance.
- Page 4 SEC K4T51083QC ZCD5 (64X8) 512M5 33NN- DDR2 TS128MLQ64V5J 96D2- SEC K4T51083QC ZCD5 (64X8) 1G533 512MB DDR2 TS64MLQ64V6J 96D2- SEC K4T51083QC ZCE6 (64x8) 512M6 67NN- 512MB DDR2 TS64MLQ64V6J Micron 5XB32D9DCL (64x8) DDR2 TS2QNJ23450-6S SEC K4T51083QE ZCE6 (64x8) DDR2 ELPIDA E5108AGBG-6E-E (64x8) PCA-6008G2 User Manual...
- Page 5 Never pour any liquid into an opening. This may cause fire or electrical shock. Never open the equipment. For safety reasons, the equipment should be opened only by qualified service personnel. PCA-6008G2 User Manual...
- Page 6 The sound pressure level at the operator's position according to IEC 704-1:1982 is no more than 70 dB (A). DISCLAIMER: This set of instructions is given according to IEC 704-1. Advantech disclaims all responsibility for the accuracy of any statements contained herein.
- Page 7 Anweisung des Herstellers. Der arbeitsplatzbezogene Schalldruckpegel nach DIN 45 635 Teil 1000 beträgt 70dB(A) oder weiger. Haftungsausschluss: Die Bedienungsanleitungen wurden entsprechend der IEC- 704-1 erstellt. Advantech lehnt jegliche Verantwortung für die Richtigkeit der in diesem Zusammenhang getätigten Aussagen ab. PCA-6008G2 User Manual...
- Page 8 Don't touch any components on the CPU card or other cards while the PC is on. Disconnect power before making any configuration changes. The sudden rush of power as you connect a jumper or install a card may damage sensitive elec- tronic components. PCA-6008G2 User Manual viii...
-
Page 9: Table Of Contents
2.13.2 Reset (JFP1 / RESET)..............18 2.13.3 HDD LED (JFP2 / HDDLED)............18 2.13.4 SM Bus Connector (JFP2 / SNMP)..........18 2.13.5 External Speaker (JFP2 / SPEAKER)......... 18 2.13.6 Power LED and Keyboard Lock Connector (JFP3 / PWR_LED&KEY LOCK) ............. 18 PCA-6008G2 User Manual... - Page 10 3.5.3 DRAM RAS# to CAS# Delay ............31 3.5.4 DRAM RAS# Precharge ............. 31 3.5.5 Precharge Delay (t RAS) ............32 3.5.6 System Memory Frequency............32 3.5.7 System BIOS Cacheable ............32 3.5.8 Video BIOS Cacheable............... 32 PCA-6008G2 User Manual...
- Page 11 PnP/PCI Configurations ................40 Figure 3.10PnP/PCI configurations screen......... 40 3.8.1 PNP OS Installed ................ 40 3.8.2 Reset Configuration Data............40 3.8.3 Resources Controlled By ............40 3.8.4 PCI/VGA Palette Snoop.............. 40 3.8.5 Maximum Payload Size .............. 40 PCA-6008G2 User Manual...
- Page 12 Sample Code ..................70 Appendix C Assignments....... 73 IDE Hard Drive Connector (IDE1)............74 Table C.1: IDE hard drive connector (IDE1) ......74 Floppy Drive Connector (FDD1) ............. 75 Table C.2: Floppy drive connector (FDD1) ........ 75 PCA-6008G2 User Manual...
- Page 13 Table C.27:DMA channel assignments........87 C.28 Interrupt Assignments ................88 Table C.28:Interrupt assignments..........88 C.29 1st MB Memory Map ................88 Table C.29:1st MB memory map ..........88 C.30 PCI Bus Map ................... 88 Table C.30:PCI bus map............. 88 xiii PCA-6008G2 User Manual...
- Page 14 PCA-6008G2 User Manual...
-
Page 15: Chapter 1 Hardware Configuration
Chapter Hardware Configuration... -
Page 16: Introduction
A remote management port allows users to monitor the sys- tem health status and control the system remotely through standard SNMP/HTTP protocols when used with Advantech's SNMP-1000 Intelligent System Manager. Features Supports 2 Serial-ATA devices... -
Page 17: Specifications
System CPU: Intel Socket 479 Celeron M up to 1.7GHz, Pentium M up to 2.26 GHz, FSB 400/533 MHz. Advantech also certifies several high-performance CPU coolers as optional parts for customers who use high-speed CPUs in 2U chassis or high temperature environments. -
Page 18: Ethernet Lan
The tables below list the function of each of the board jumpers and connectors. Later sections in this chapter give instructions on setting jumpers. Chapter 2 gives instruc- tions for connecting external devices to your single board computer. PCA-6008G2 User Manual... - Page 19 LCD inverter power connector LVDS1 LVDS connector JLVDS1 LVDS power jumper Note! The 4-pin ATX 12V power connector "ATX1" must be connected to the power supply to provide adequate power to the CPU card. Otherwise, the system may become unstable. PCA-6008G2 User Manual...
-
Page 20: Board Layout: Jumper And Connector Locations
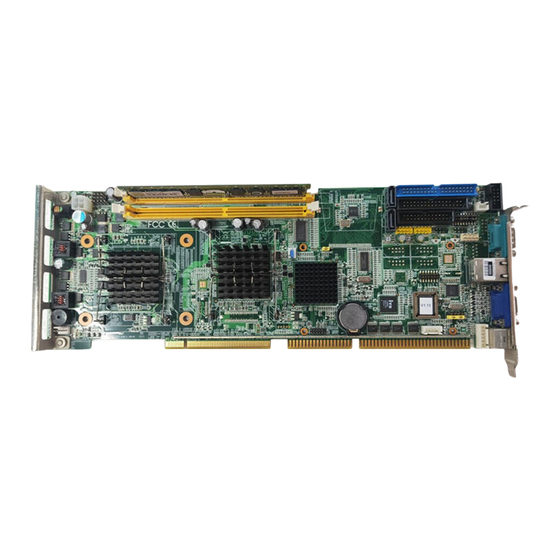
Board Layout: Jumper and Connector Locations Figure 1.1: Jumper and Connector locations PCA-6008G2 User Manual... -
Page 21: Pca-6008 Block Diagram
Modern electronic devices are very sensitive to static electric charges. As a safety precaution, use a grounding wrist strap at all times. Place all electronic components on a static-dissipative surface or in a static-shielded bag when they are not in the chassis. PCA-6008G2 User Manual... -
Page 22: Jumper Settings
* default setting 1.8.3 Watchdog Timer Output (JWDT1) The PCA-6008 contains a watchdog timer that will reset the CPU or send a signal to IRQ11 in the event the CPU stops processing. This feature means the PCA-6008 will PCA-6008G2 User Manual... -
Page 23: Jsetcom2 (Rs232/422/485 Jumper Setting (Jsetcom2))
Note! System resources such as PCI require physical memory address loca- tions that reduce available memory addresses above 3GB. This may result in less than 4GB of memory being available to the operating sys- tem and applications. PCA-6008G2 User Manual... -
Page 24: Cpu Fsb And Memory Speed
Place the load plate onto the package. Press the load lever down lightly onto the load plate, and then secure the lever with the hook under retention tab. Con- firm that your CPU cooler is firmly installed before turning on your system. PCA-6008G2 User Manual... -
Page 25: Chapter 2 Connecting Peripherals
Chapter Connecting Peripherals... -
Page 26: Introduction
Connect the first hard drive to the other end of the cable. Wire 1 on the cable should also connect to pin 1 on the hard drive connector, which is labeled on the drive circuit board. Check the documentation that came with the drive for more information. Floppy Drive Connector (FDD1) FDD1 PCA-6008G2 User Manual... -
Page 27: Parallel Port (Lpt1)
LPT1 on the CPU card. Wire 1 of the cable is red or blue, and the other wires are gray. Make sure that wire 1 corresponds to pin 1 of LPT1. Pin 1 is on the upper right side of LPT1. PCA-6008G2 User Manual... -
Page 28: Usb Ports (Usb12, Usb34, Usb56, Usb78)
VGA1 The PCA-6008 includes a VGA interface that can drive conventional CRT displays. VGA1 is a standard 15-pin D-SUB connector commonly used for VGA. Pin assign- ments for the CRT connector VGA1 are detailed in Appendix B. PCA-6008G2 User Manual... -
Page 29: Dvi Connector (Dvi1)
PCI-Express x1 of the ICH6 I/O controller. The PCA-6008 is fully compliant with IEEE 802.3ab 1000Base-T standards. It is supported by all major net- work operating systems and is 100% Novell NE-2000 compatible. An onboard RJ-45 jack provides convenient 10/100/1000Base-T RJ-45 operation. PCA-6008G2 User Manual... -
Page 30: Serial Ports (Com1, Com2, Com3, Com4, Com5, Com6 )
PS/2 keyboard or a PS/2 mouse, respectively. The KBMS1 connector can also be connected to an adapter cable (P/N: 1700060202, available from Advan- tech) for connecting to both a PS/2 keyboard and a PS/2 mouse. PCA-6008G2 User Manual... -
Page 31: External Keyboard Connector (Kbms2)
This gives system inte- grators greater flexibility in designing their systems. 2.12 CPU Fan Connector (CPUFAN1) CPUFAN1 The PCA-6008 provides a 4 pin CPU fan connector. 2.13 Front Panel Connectors (JFP1, JFP2, JFP3) PCA-6008G2 User Manual... -
Page 32: Atx Soft Power Switch (Jfp1 / Pwr_Sw)
2.13.4 SM Bus Connector (JFP2 / SNMP) This connector is reserved for Advantech's SNMP-1000 HTTP/SNMP Remote Sys- tem Manager. The SNMP-1000 allows users to monitor the internal voltages, temper- ature and fans from a remote computer through an Ethernet network. -
Page 33: Atx Feature Connector (Jatxf1)
System Off Slow flashes 2.14 ATX Feature Connector (JATXF1) JATXF1 Connect to the JATFX1 connector on the Advantech backplane to enable the ATX function, 5V stand-by. 2.15 AC-97 Audio Interface (AC-97) AC97 The PCA-6008 provides AC-97 audio through the PCA-AUDIO-00A1E module from Advantech. -
Page 34: Serial Ata Interface (Sata1, Sata2)
To ensure a sufficient power supply for the Pentium® 4 single board computer, one auxiliary 4-pin power connector is available on the PCA-6008. This connector must be connected to the power supply, otherwise the system may become unstable. 2.18 Hardware Monitor Alarm (JWDT1+JOBS1+JIR1) JWDT1+JOBS1+JIR1 PCA-6008G2 User Manual... -
Page 35: Case Open Connector (Jcase1)
Pin setting Function Close Enable OBS alarm Open Disable OBS alarm 2.19 Case Open Connector (JCASE1) JCASE1 The signal is connected to the limit switch sensor of the chassis to detect if the case open or closed. PCA-6008G2 User Manual... -
Page 36: Lan1 And Lan2 Led (Lanled1)
The PCA-6008 specifically has a 14-pin General Purpose I/O interface for port 80 functions used in detecting hardware bugs or for programmable 8-bit I/O. 2.22 LVDS Connector (LVDS1) The PCA-6008 provides a 40-pin LVDS connector for customers who needs dual dis- play feature. PCA-6008G2 User Manual... -
Page 37: Lvds Jumper (Jlvds1)
2.23 LVDS Jumper (JLVDS1) This is a 3-pin jumper to set up voltage for the LVDS panel. 2.24 LVDS Invert (VP1) This is a 5-pin LVDS inverter to adjust the panel backlight PCA-6008G2 User Manual... - Page 38 PCA-6008G2 User Manual...
-
Page 39: Award Bios Setup
Chapter Award BIOS Setup... -
Page 40: Introduction
If the "CMOS checksum error..."message appears over and over, please check to see if you need to replace the battery in your system. Entering Setup Turn on the computer and press <Del> to enter the BIOS setup. Figure 3.1 Award BIOS Setup initial screen PCA-6008G2 User Manual... -
Page 41: Standard Cmos Setup
Precomp: Write precomp Landing Zone: Landing zone Sector: Number of sectors 3.3.5 Drive A / Drive B This category identifies the types of floppy disk drives installed in the system. The options are: None/360K, 5.25"/1.2M, 5.25"/720K, 3.5"/1.44M, 3.5"/2.88M, 3.5". PCA-6008G2 User Manual... -
Page 42: Halt On
The choices are 4 Min, 8 Min, 16 Min, and 32 Min. Limit CPUID MaxVal Set Limit CPUID MaxVa1 to 3, should be Disabled for WinXP. Execute Disable Bit When disabled, forces the XD feature flag to always return 0. PCA-6008G2 User Manual... -
Page 43: Hard Disk Boot Priority
The commands are “Enabled” or “Disabled.” Enabling allows the typematic rate and delay to be selected. 3.4.13 Typematic Rate (Chars/Sec) BIOS accepts the following input values (characters/second) for typematic rate: 6, 8, 10, 12, 15, 20, 24, 30. PCA-6008G2 User Manual... -
Page 44: Typematic Delay (Msec)
1.4 adds extended configuration tables for improved support of multiple PCI bus con- figurations and greater expandability in the future. In addition, MPS 1.4 introduces support for a secondary PCI bus without requiring a PCI bridge . PCA-6008G2 User Manual... -
Page 45: Advanced Chipset Features
Setting options: [2T] to [5T], [Auto]. 3.5.4 DRAM RAS# Precharge When the DRAM Timing Selectable is set to [Manual], this field is adjustable. This setting controls the number of cycles for Row Address Strobe (RAS) to be allowed to PCA-6008G2 User Manual... -
Page 46: Precharge Delay (T Ras)
The On-Chip Frame Buffer Size can be set us 1 MB or 8 MB. This memory is shared with the system memory. 3.5.12 DVMT Mode This option shows the active system memory mode. 3.5.13 DVMT/ FIXED Memory Size Specify the size of DVMT and system memory to allocate for video memory. PCA-6008G2 User Manual... - Page 47 You can select a preferred panel resolution through the various options. 3.5.16 Init Display First Choose the first display interface to initiate while booting. The choice is "PCI Slot" or "Onboard." Integrated Peripherals Figure 3.5 Integrated peripherals PCA-6008G2 User Manual...
- Page 48 SATA controller. The "Combined Mode" will combine PATA and SATA, and max of 2 IDE drives in each channel. The "Enhanced Mode" will enable both SATA and PATA, and maxes of 4 IDE drives are supported. The "SATA Only" means SATA is operat- ing in legacy mode. PCA-6008G2 User Manual...
- Page 49 AC-97 Audio Select Disable if you do not want to use AC-97 audio. Option is "Auto", "Disabled." 3.6.9 Onboard LAN1 Control Options are "Enabled" and "Disabled" Select Disable if user does not want to use onboard LAN controller1. PCA-6008G2 User Manual...
- Page 50 This item allows you to enable/disable IR transmission delay. The choices: "Enabled", "Disabled". 3.6.16 UR2 Duplex Mode This item allows you to select the IR half/full duplex function. The choices: "Half", "Full.” 3.6.17 Use IR Pins The Choice : "RxD2, TxD2", "IR-Rx2Tx2". PCA-6008G2 User Manual...
- Page 51 This selection is available only if you select “ECP” or “ECP + EPP” in the Parallel Port Mode field. In ECP Mode, you can select DMA channel 1 or DMA channel 3. Leave this field on the default setting. PCA-6008G2 User Manual...
- Page 52 Table 3.2: ,Power Saving Min Saving Minimum power management., Suspend Mode = 1 hr., and HDD Power Down = =15 min. Max Saving Maximum power management., Suspend Mode = 1 min., and HDD Power Down = 1 min. PCA-6008G2 User Manual...
- Page 53 This item allows you to power on the system by LAN. The choices: "Enabled," "Dis- abled." 3.7.14 PowerOn by Alarm The Choice: “Enabled”,”Disabled”. 3.7.15 Primary IDE 0 When Enabled. the system will resume from suspend mode if Primary IDE 0 is active. The Choice: “Enabled”,”Disabled” PCA-6008G2 User Manual...
- Page 54 This is set to “Disabled” by default. 3.8.5 Maximum Payload Size It allows you to set the maximum TLP payload size for the PCI Express devices. Set- ting options: [128 bytes], [256 bytes], [512 bytes], [1024 bytes], [2048 bytes], [4096 bytes]. PCA-6008G2 User Manual...
-
Page 55: Pc Health Status
This shows you the voltage of VCORE, VCC3, +5V, +12V, -12V, -5V, VBAT(V), and 5VSB(V). 3.9.6 Shutdown Temperature The system will shut down automatically when the CPU temperature is over the selected setting. This function can prevent CPU damage caused by overheating. PCA-6008G2 User Manual... -
Page 56: Frequency / Voltage Control
CMOS. The password must be no longer than eight (8) characters. Remember, to enable the password setting feature, you must first select either “Setup” or “System” from the “Advanced BIOS Features” menu. PCA-6008G2 User Manual... -
Page 57: Save & Exit Setup
This record is required for the system to operate. 3.13 Exit Without Saving Selecting this option and pressing <Enter> lets you exit the setup program without recording any new values or changing old ones. PCA-6008G2 User Manual... - Page 58 PCA-6008G2 User Manual...
-
Page 59: Chipset Software Install Utility
Chapter Chipset Software Install Utility... -
Page 60: Before You Begin
Windows XP Windows XP Driver Setup Insert the driver CD into your system's CD-ROM drive. In a few seconds, the software installation main menu appears. Move the mouse cursor over the "Auto" button under the "CSI UTILITY" heading. PCA-6008G2 User Manual... - Page 61 A message pops up telling you to install the CSI utility before other device drivers. Click on this button. Taking Windows XP as example. Click "Next" when you see the following message. Click "Yes" when you see the following message. PCA-6008G2 User Manual...
- Page 62 Click "Next" when you see the following messages. PCA-6008G2 User Manual...
- Page 63 When the following message appears, click "Finish" to complete the installa- tion and restart Windows. PCA-6008G2 User Manual...
- Page 64 PCA-6008G2 User Manual...
-
Page 65: Vga Setup
Chapter VGA Setup... -
Page 66: Introduction
VGA driver for the OS. Windows XP is used as a example in the fol- lowing steps Please click on "Next" to continue the installation You will see a welcome window. Please chick on "Yes" to continue the installation. PCA-6008G2 User Manual... - Page 67 Click "Finish" to complete the installation and restart the computer now or later. PCA-6008G2 User Manual...
- Page 68 PCA-6008G2 User Manual...
-
Page 69: Lan Configuration
Chapter LAN Configuration... -
Page 70: Introduction
The PCA-6008's Realtek RTL8111B Gigabit integrated controller supports all major network operating systems. However, the installation procedure varies with different operating systems. In the following sections, refer to the one that provides driver setup procedure for the operating system you are using. PCA-6008G2 User Manual... -
Page 71: Win Xp Driver Setup (Realtek Rtl8111B)
Win XP Driver Setup (Realtek RTL8111B) Insert the driver CD into your system's CD-ROM drive. Select the "LAN" folder then click the proper Lan driver for the OS. Please click on "Next" to continue the installation Click "Install" to continue. PCA-6008G2 User Manual... - Page 72 Click "Finish" to complete the installation. PCA-6008G2 User Manual...
-
Page 73: Usb 2.0 Configuration
Chapter USB 2.0 Configuration... -
Page 74: Introduction
See Chapter 4 for information on installing the CSI util- ity. Note! USB 2.0 driver is not available for Windows 98SE/ME from PCA-6008 driver CD. Under these operating systems, the USB device will operate at USB 1.1 speeds PCA-6008G2 User Manual... -
Page 75: Appendix A Programming The Watchdog
Appendix Programming the Watchdog... -
Page 76: Programming The Watchdog Timer
2E (hex) is the address port. 2F(hex) is the data port. You must first assign the address of register by writing address value into address port 2E(hex), then write/read data to/from the assigned register through data port 2F (hex). PCA-6008G2 User Manual... - Page 77 Unlock W83627H Select register of watchdog timer Enable the function of the watchdog timer Use the function of the watchdog time Lock W83627HF PCA-6008G2 User Manual...
- Page 78 0. [default=0] Bit 4: Read status of watchdog timer, 1 means timer is ""time out""." AA (hex) ----- Write this address to I/O port 2E (hex) to lock the watchdog timer.2 PCA-6008G2 User Manual...
- Page 79 ; Set timeout interval as 10 seconds and start counting al,0f6h dx,al al,10 dx,al ;----------------------------------------------------------- Dec dx ; lock W83627HF al,0aah dx,al Enable watchdog timer and set 5 minutes as timeout interval ;----------------------------------------------------------- Mov dx,2eh ; unlock W83627H Mov al,87h Out dx,al Out dx,al ;----------------------------------------------------------- PCA-6008G2 User Manual...
- Page 80 Enable watchdog timer to be reset by mouse ;----------------------------------------------------------- Mov dx,2eh ; unlock W83627H Mov al,87h Out dx,al Out dx,al ;----------------------------------------------------------- Mov al,07h ; Select registers of watchdog timer dx,al al,08h dx,al ;----------------------------------------------------------- Dec dx ; Enable the function of watchdog timer PCA-6008G2 User Manual...
- Page 81 ;----------------------------------------------------------- Dec dx ; Enable the function of watchdog timer al,30h dx,al al,01h dx,al ;----------------------------------------------------------- Dec dx ; Enable watchdog timer to be strobed reset by keyboard al,0f7h dx,al al,dx Or al,40h dx,al ;----------------------------------------------------------- PCA-6008G2 User Manual...
- Page 82 ; Enable the function of watchdog timer al,30h dx,al al,01h dx,al ;----------------------------------------------------------- Dec dx ; Generate a time-out signal al,0f7h dx,al ;Write 1 to bit 5 of F7 register al,dx Or al,20h dx,al ;----------------------------------------------------------- Dec dx ; lock W83627HF al,0aah dx,al PCA-6008G2 User Manual...
-
Page 83: Appendix B Programming The Gpio
Appendix Programming the GPIO... -
Page 84: Sample Code
_M_Begin _M_END: ENDM ;------------------------------------------------------------ ; Logic_Dev_Sel ;------------------------------------------------------------ Logic_Dev_Sel MACRO Log_Dev DX,2Eh AL,07h ; Point To Logical Device Number Reg. DX,AL DX,2Fh AL,Log_Dev ; Select Logical Device Number 7 DX,AL ; (GAME/MIDI/GPIO Port) ENDM ;------------------------------------------------------------ ;------------------------------------------------------------ AnyKey MACRO PCA-6008G2 User Manual... - Page 85 DX,2Fh DX,AL ;;-Data Logic_Dev_Sel 7 dx,2eh ;Logic Device 7 CR-F0(GPIO 10-17) al,0f0h dx,al ;-Index (F0) dx,2fh al,0f0h ; 1=GPI/0=GPO GPIO[7:4]=GPI dx,al ;-Data(F0) GPIO[3:0]=GPO Print MSG_1 MTEST1 05h ;05h=0101B Print MSG_3 AnyKey dx,2eh ;Logic Device 7 CR-F0(GPIO 10-17) PCA-6008G2 User Manual...
- Page 86 ;-Index (F0) dx,2fh al,0fh ; 1=GPI/0=GPO GPIO[7:4]=GPO dx,al ;-Data(0F) GPIO[3:0]=GPI Print MSG_2 MTEST1 50h ;50h=0101b Print MSG_3 ;------------------------------------------------------------ AH,4CH BEGIN PCA-6008G2 User Manual...
-
Page 87: Appendix C Pin Assignments
Appendix Pin Assignments... -
Page 88: Ide Hard Drive Connector (Ide1)
DATA 15 SIGNAL GND DISK DMA REQUEST IO WRITE IO READ IO CHANNEL READY CSEL HDACKO* IRQ14 IDSC16- ADDR 1 PDIAG ADDR 0 ADDR 2 HARD DISK SELECT 0* HARD DISK SELECT 1* IDE ACTIVE* * low active PCA-6008G2 User Manual... -
Page 89: Floppy Drive Connector (Fdd1)
Table C.2: Floppy drive connector (FDD1) Signal Signal FDHDIN* FDEDIN* INDEX* MOTOR 0* DRIVE SELECT 1* DRIVE SELECT 0* MOTOR 1* DIRECTION* STEP* WRITE DATA* WRITE GATE* TRACK 0* WRITE PROTECT* READ DATA* HEAD SELECT* DISK CHANGE* * low active PCA-6008G2 User Manual... -
Page 90: Parallel Port Connector (Lpt1)
Table C.3: Parallel port connector (CN4) Signal Signal STROBE* AUTOFD* INIT* SLCTINI* ACK* BUSY SLCT * low active USB Connector (USB12, USB34, USB56, USB78) Table C.4: USB1/USB2 connector (USB12) USB1 Signal USB2 Signal +5 V +5 V Chassis GND N/CA PCA-6008G2 User Manual... -
Page 91: Vga Connector (Vga1)
VGA Connector (VGA1) Table C.5: VGA connector (CN7) Signal Signal GREEN BLUE H-SYNC V-SYNC PCA-6008G2 User Manual... -
Page 92: Dvi Connector(Dvi1)
DVI connector(DVI1) Table C.6: DVI connector(DVI1) Signal Signal #TMDS1_0 AGP_5V_TMDS2 DDC3_SDAOUT TMDS1_0 #TMDS1_2 #TMDS1_2 TMDS1_2 TMDS1_CK ATI_12C_DAT #TMDS1_1 AGP_5V_TMDS2 ATI_12C_CLK #TMDS1_1 CPIS_ENA_BL DDC3_SCLOUT CPIS_VDD_VCL RS-232 Serial Port (COM1, COM2) Table C.7: RS-232 Serial Port (COM1, COM2) Signal PCA-6008G2 User Manual... -
Page 93: Ps/2 Keyboard/ Mouse Connnector (Kbms1)
PS/2 Keyboard/ Mouse Connnector (KBMS1) Table C.8: PS/2 Keyboard/ Mouse connector (KBMS1) Signal KB DATA MS DATA KB CLOCK MS CLOCK External Keyboard Connector (KBMS2) Table C.9: External keyboard connector (KBMS2) Signal DATA PCA-6008G2 User Manual... -
Page 94: Cpu Fan Power Connector (Cpufan1)
External Speaker Connector (JFP2/ SPEAKER) The single board computer has its own buzzer. You can also connect it to the exter- nal speaker on your computer chassis. Table C.12: External Speaker Connector (JFP2/SPEAKER) Function SPK+ SPK_IN SPK- PCA-6008G2 User Manual... -
Page 95: Reset Connector (Jfp1/ Reset)
Table C.13: Reset connector (JFP1/ RESET) Signal RESET C.14 HDD LED Connector (JFP2/ HDDLED) Table C.14: HDD LED connector (JFP2/ HDDLED) Signal VCC (LED+) IDE LED (LED-) C.15 ATX Feature Connector (JATXF1) Table C.15: ATX feature connector (JATXF1) Signal PS-ON VCCSB PCA-6008G2 User Manual... -
Page 96: Atx Soft Power Switch (Jfp1/ Pwr_Sw))
Disable OBS alarm C.18 AC-97 Audio Interface (AC-97) Table C.18: AC-97 Audio Interface (AC-97) 1 VCC 2 GND 3 SYNC 4 BITCLK 5 SDOUT 6 SDIN0 7 SDIN1 8 AC-RST 9 +12V 10 GND 11 GND 12 N/C PCA-6008G2 User Manual... -
Page 97: Sm Bus Connector (Jfp2/ Snmp)
Case Open Connector (JCASE) Table C.20: Case Open ConnectorJ (CASE) Signal CASEOP# C.21 LAN1 and LAN2 connector (LANLED1) Table C.21: LAN1 and LAN2 connector (LANLED1) Signal Signal LAN1_LINK N/C LAN2_LINK1000 LAN2_LINK N/C LAN1_LINK100 LAN1_ACT LAN2_LINK100 LAN2_ACT 3VDUAL LAN1_LINK1000 PCA-6008G2 User Manual... -
Page 98: Gpio Pin Header (Gpio1)
OCK- (channel B) OD0- (channel A) OCK+ (channel A) OD0- (channel B) OCK+ (channel B) OD0+ (channel A) GND (channel A) OD0+ (channel B) GND (channel B) GND (channel A) DDC_CLK (channel A) GND (channel B) DDC_DAT (channel B) PCA-6008G2 User Manual... -
Page 99: Lvds Power Jumper (Jlvds1)
OD3+ (channel A) GND (channel B) OD3+ (channel B) OD2- (channel A) LVDS_BKLTEN OD2- (channel B) VCON (channel B) C.24 LVDS Power Jumper (JLVDS1) Voltage Jumper Setting *3.3V *default setting Table C.24: LVDS Power Jumper (JLVDS1) Signal VCC3 VDD_LCD PCA-6008G2 User Manual... -
Page 100: Lvds Invert (Vp1)
C.25 LVDS Invert (VP1) Table C.25: LVDS Invert (VP1) Signal VCC12_INV1 LVDS_BKLTEN VP3_P5 PCA-6008G2 User Manual... -
Page 101: System I/O Ports
3D0-3DF Color/graphics monitor adapter 3F0-3F7 Diskette controller 3F8-3FF Serial port 1 C.27 DMA Channel Assignments Table C.27: DMA channel assignments Channel Function Available Available Floppy disk (8-bit transfer) Available Cascade for DMA controller 1 Available Available Available PCA-6008G2 User Manual... -
Page 102: Interrupt Assignments
PCI slot 2 AD30 INT C, D, A, B GNT B REQ B PCI slot 3 AD29 INT D, A, B, C GNT C REQ C PCI slot 4 AD28 INT A, B, C, D GNT D REQ D PCA-6008G2 User Manual... - Page 103 PCA-6008G2 User Manual...
- Page 104 Please verify specifications before quoting. This guide is intended for reference purposes only. All product specifications are subject to change without notice. No part of this publication may be reproduced in any form or by any means, electronic, photocopying, recording or otherwise, without prior written permis- sion of the publisher.
Need help?
Do you have a question about the PCA-6008G2 and is the answer not in the manual?
Questions and answers