
Related Manuals for ARTRAY ARTCAM-130SWIR-CL


Summary of Contents for ARTRAY ARTCAM-130SWIR-CL
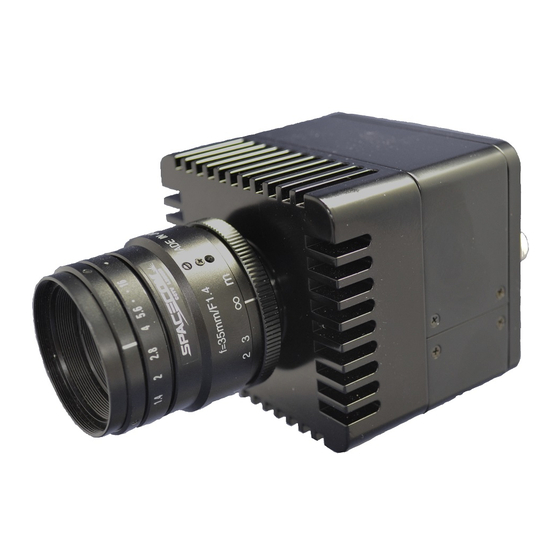
- Page 1 130SWIR-CL Camera Link Setting Manual ARTCAM-130SWIR-CL Camera Link Setting Manual rev.1.05 Rev.1.04 © 2004 – 2018 ARTRAY Co., Ltd...
-
Page 2: Table Of Contents
Camera Information ......................18 Settings ............................19 6.1. Preparation ..........................19 6.2. Connect to Camera ........................19 6.3. Example of Serial Communication Software Settings .............. 20 6.4. Example of Viewer Software Settings ..................22 Rev.1.04 © 2004 – 2018 ARTRAY Co., Ltd... -
Page 3: Introduction
While using other devices, users could adapt settings correspondent to the devices. Table 2-2: Device and System recommended Item Recommendation Camera Link Frame Grabber Board PIXCI®EB1 (Manufactured by EPIX) Viewer Software XCAP for Windows Lite Tera Term Serial Communication Software Rev.1.04 © 2004 – 2018 ARTRAY Co., Ltd... -
Page 4: Camera Link Format
4. Connector Pin Assignment The connector pin assignment is as follows: Table 4-1: Connector Pin Assignment Pin No. Signal Name Pin No. Signal Name XCK- XCK+ CC0- CC0+ CC1+ CC1- CC2- CC2+ CC3+ CC3- Rev.1.04 © 2004 – 2018 ARTRAY Co., Ltd... -
Page 5: Communication Specifications
NG. It doesn’t matter the letters of command is in upper case or lower case. Option is omissible. (In this case, a default option will be chosen automatically.) Rev.1.04 © 2004 – 2018 ARTRAY Co., Ltd... -
Page 6: List Of Commands
Start (Option is omissible) - Stop - Camera Mode SIM (Standard image mode) - LNIM (Low noise image mode) - Camera Show camera name (Option is omissible) - Information Show firmware version - Rev.1.04 © 2004 – 2018 ARTRAY Co., Ltd... -
Page 7: Commands Details
Details 1: x = Reset 2: Delimiter (Omissible) 3: -i = Option: initialize camera 4: Line feed code Response Normal: OK⏎ Abnormal: NG⏎ Note To initialize the camera while it is on. Rev.1.04 © 2004 – 2018 ARTRAY Co., Ltd... -
Page 8: Shutter
6: Line feed code Response Normal: OK⏎ Abnormal: NG⏎ Note To set the shutter speed in synchronous and asynchronous modes. ※To calculate the shutter speed, please refer to the instruction of the camera. Rev.1.04 © 2004 – 2018 ARTRAY Co., Ltd... -
Page 9: External I/O
6: Line feed code Response Normal: OK⏎ Abnormal: NG⏎ Note To change the polarity of external trigger to one of followings: 0: Active-low (Synchronized when signal falls) 1: Active-high (Synchronized when signal rises) Rev.1.04 © 2004 – 2018 ARTRAY Co., Ltd... - Page 10 6: Line feed code Response Normal: OK⏎ Abnormal: NG⏎ Note To change external output 2 to one of followings: 0: Low-fixed/ 1: LINE_VALID / 2: FRAME_VALID / 3: TRIG_READY / 4: STROBE / 8: High-fixed Rev.1.04 © 2004 – 2018 ARTRAY Co., Ltd...
-
Page 11: Analog Gain
Format 〼 ⏎ Details 1: p = Analog gain 2: Delimiter (Omissible) 3: -m = Option: medium 4: Line feed code Response Normal: OK⏎ Abnormal: NG⏎ Note To set analog gain medium. Rev.1.04 © 2004 – 2018 ARTRAY Co., Ltd... -
Page 12: Digital Gain
3: -v = Option: digital gain settings (Omissible) 4: Delimiter (Omissible) 5: Digital gain settings 6: Line feed code Response Normal: OK⏎ Abnormal: NG⏎ Note To change the setting value of digital gain. Rev.1.04 © 2004 – 2018 ARTRAY Co., Ltd... -
Page 13: Offset
2: Delimiter (Omissible) 3: -v = Option: offset settings (Omissible) 4: Delimiter (Omissible) 5: Offset settings 6: Line feed code Response Normal: OK⏎ Abnormal: NG⏎ Note To change the setting value of offset. Rev.1.04 © 2004 – 2018 ARTRAY Co., Ltd... -
Page 14: Black Level Correction
⏎ Details 1: s = Sensitivity correction 2: Delimiter (Omissible) 3: -y = Option: sensitivity correction ON (Omissible) 4: Line feed code Response Normal: OK⏎ Abnormal: NG⏎ Note To enable sensitivity correction. Rev.1.04 © 2004 – 2018 ARTRAY Co., Ltd... -
Page 15: Defective Pixel Correction
1: f = Defective pixel correction 2: Delimiter (Omissible) 3: -n = Option: defective pixel correction OFF 4: Line feed code Response Normal: OK⏎ Abnormal: NG⏎ Note To disable defective pixel correction. Rev.1.04 © 2004 – 2018 ARTRAY Co., Ltd... -
Page 16: Temperature Control
⏎ Details 1: u = Frame control 2: Delimiter (Omissible) 3: -s = Option: start frame transfer (Omissible) 4: Line feed code Response Normal: OK⏎ Abnormal: NG⏎ Note To start frame transfer. Rev.1.04 © 2004 – 2018 ARTRAY Co., Ltd... -
Page 17: Camera Mode
1: z = Camera mode 2: Delimiter (Omissible) 3: -l = Option: LNIM mode 4: Line feed code Response Normal: OK⏎ Abnormal: NG⏎ Note To set camera mode as LNIM (low noise image mode). Rev.1.04 © 2004 – 2018 ARTRAY Co., Ltd... -
Page 18: Camera Information
⏎ Details 1: n = Camera information 2: Delimiter (Omissible) 3: -v = Option: camera name 4: Line feed code Response Normal: Version: 00.18.20180305 (example)⏎ Abnormal: NG⏎ Note To show firmware version. Rev.1.04 © 2004 – 2018 ARTRAY Co., Ltd... -
Page 19: Settings
Please connect camera to the Camera Link frame grabber board with Camera Link cable. Before connect AC adapter to the camera, please start up the serial communication software. Command will be sent from the camera once it is connected to the power. Rev.1.04 © 2004 – 2018 ARTRAY Co., Ltd... -
Page 20: Example Of Serial Communication Software Settings
Please click “Setup” on menu bar, then choose “Serial Port” for communication method settings. Please refer to table 5-1 Communication Method for details of the settings. Figure 6-4: To Set up Serial Port on Tera Term Rev.1.04 © 2004 – 2018 ARTRAY Co., Ltd... - Page 21 “OK” on the dialog box. Then you can send command to control camera. Please note that camera will start up only when you send out the command. Figure 6-6: Initialization Rev.1.04 © 2004 – 2018 ARTRAY Co., Ltd...
-
Page 22: Example Of Viewer Software Settings
Figure 6-8: Welcome message Please click “PIXCI®” from XCAP menu, then choose “PIXCI®Open/Close” to open the dialog box. Please click “Open” to start the camera. Figure 6-9: To Open Camera Rev.1.04 © 2004 – 2018 ARTRAY Co., Ltd... - Page 23 Please refer to table 3-1 to confirm the Camera Link format. Figure 6-10: Configure Settings Second, please set the resolution. Please refer to table 3-2 to confirm the resolution of each model. Figure 6-11: Resolution Settings Rev.1.04 © 2004 – 2018 ARTRAY Co., Ltd...
- Page 24 The settings are finished now. The image will be displayed either by clicking “Live” in “Capture” on the sub-window, or simply by clicking “Live Icon” on the left side of the sub-window. Figure 6-13: Live Icon Rev.1.04 © 2004 – 2018 ARTRAY Co., Ltd...
Need help?
Do you have a question about the ARTCAM-130SWIR-CL and is the answer not in the manual?
Questions and answers