Advertisement
RF Single Color Wall Mounted Controller
Important: Read All Instructions Prior to Installation
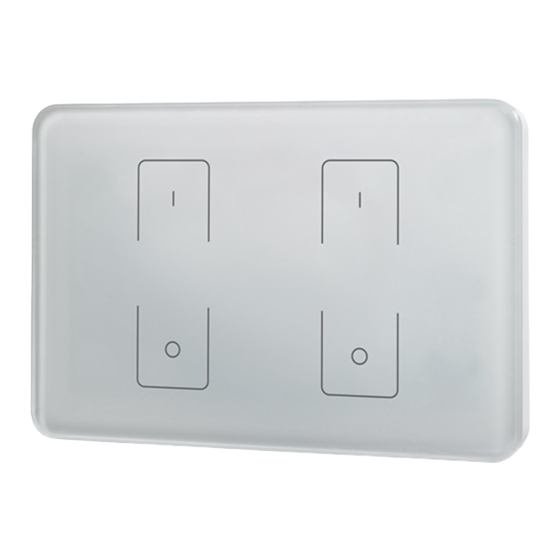
Function introduction
Zone 1
19.50 mm
Wall Mounted Controller
Zone 2
Click to turn on,
press and hold down
to increase light intensity
Click to turn off,
press and hold down to
decrease light intensity
Front side
101.00 mm
83.00 mm
71.00 mm
RF RGBW Color
DC Version
DC INPUT
V+ V+ V- V-
DC Power input
AC INPUT
L
L
N
N
AC Version
AC Power input
Back side
Product Data
09.28T1I.04209
Output Signal
Power Supply
Power consumption
Operating temperature
Relative humidity
Dimensions
• Touch sensitive
• Glass interface(white & black)
• Control single color
• Control 2 zones synchronously and separately
• Compatible with all universal series RF receivers, radio frequency: 868/869.5/434MHz
• Back lighting for finding in the dark
• Waterproof grade: Ip20
Safety & Warnings
• DO NOT install with power applied to device.
• DO NOT expose the device to moisture.
Wiring diagram
DC Version
RF RGBW Color
Wall Mounted Controller
V+ V+ V- V-
12-24VDC
PSU
AC 100-240V
DC Version
AC Version
RF signal
RF signal
12-24VDC
100-240VAC
200 mA
15 mA
0-40°C
0-40°C
8% to 80%
8% to 80%
120x80x29.1mm
120x80x29.1mm
DC INPUT
AC Power
50/60Hz
AC Version
RF RGBW Color
Wall Mounted Controller
AC INPUT
L
L
N
N
AC Power
AC 100-240V
50/60Hz
Advertisement
Table of Contents

Subscribe to Our Youtube Channel
Related Manuals for Sunricher SR-2833T1


Summary of Contents for Sunricher SR-2833T1
- Page 1 Product Data RF Single Color Wall Mounted Controller 09.28T1I.04209 DC Version AC Version Output Signal RF signal RF signal Power Supply Important: Read All Instructions Prior to Installation 12-24VDC 100-240VAC Function introduction Power consumption 200 mA 15 mA Operating temperature 0-40°C 0-40°C Relative humidity...
- Page 2 Pair with RF receiver Step 1:Do wiring the wall panel & RF receiver according to wiring diagram (please refer to the instruction of RF receiver that you would like to pair with) RF LED Receiver Learning Key Step 2:Click the “Learning Key” button on RF receiver or re-power on the receiver three times continuously to set it into pairing status Step 3:Choose one zone and touch or button of the zone...
Need help?
Do you have a question about the SR-2833T1 and is the answer not in the manual?
Questions and answers