
Subscribe to Our Youtube Channel
Related Manuals for ORiNG IGAP-W99110GP+


Summary of Contents for ORiNG IGAP-W99110GP+
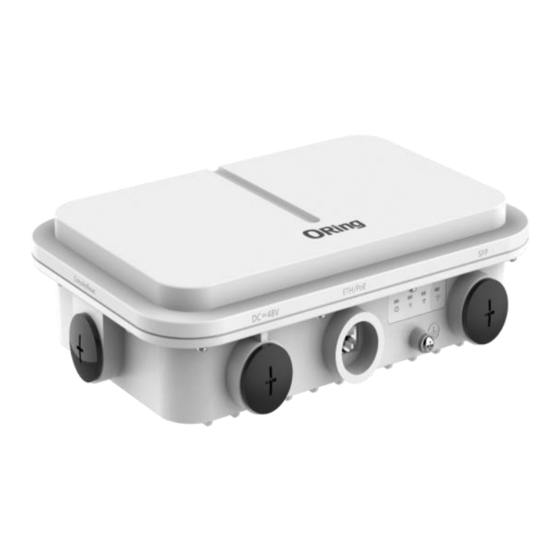
- Page 1 IGAP-W99110GP+ Industrial Dual Wi-Fi 6 Wireless Access Point User Manual Version 1.0 Aug, 2021 https://oringnet.com/...
- Page 2 ORing warrants that all ORing products are free from defects in material and workmanship for a specified warranty period from the invoice date (5 years for most products). ORing will repair or replace products found by ORing to be defective within this warranty period, with shipment expenses apportioned by ORing and the distributor.
-
Page 3: Table Of Contents
3.3.4 Installing the AP .................... 12 3.3.5 Cables and Pin Assignment ................14 3.3.6 Connecting Cables ..................15 Web-based Configuration ................19 Overview ........................19 Config Wizard ......................21 Monitoring ......................... 23 4.3.1 Dashboard ....................23 ORing Industrial Networking Corp. - Page 4 4.4.4 Security ......................46 4.4.5 Authentication ....................60 4.4.6 Advanced ...................... 61 4.4.7 Rapid ......................62 Maintenance ......................63 4.5.1 Settings ......................63 4.5.2 System ......................65 Appendix ...................... 68 Product Specification....................68 Antenna Patterns ....................69 ORing Industrial Networking Corp.
-
Page 5: Getting Started
ARP Spoofing Protection Support IPv4/IPv6 address Support AP/Client Mode SSID capacity up to 32 Wireless connecting status monitoring Secured Management by Telnet, SSH, TFTP, HTTP Event Warning by Syslog ORing Industrial Networking Corp. -
Page 6: Hardware Specifications
1x Gigabit SFP socket 1x Console port Surge Protection +/-9kV (Common mode) IP68 enclosure for outdoor applications ο Operating temperature -40 to 65 Dimension 251(W) x 168(D) × 64(H) mm Wall/Pole-mount installation ORing Industrial Networking Corp. -
Page 7: Hardware Overview
Initialization in progress or proper operation. Blinking red The uplink port is disconnected. WDS RSSI (3 LEDs 1 solid on < -70dBm in total; available 2 solid on -70 to -50dBm when bridging is 3 solid on > -50dBm enabled) ORing Industrial Networking Corp. -
Page 8: Dimension
IGAP-W99110GP+ User Manual 2.2 Dimension IGAP-W99110GP+ dimension: 251(W) x 168(D) × 64(H) mm (Excluding the bracket) ORing Industrial Networking Corp. -
Page 9: Hardware Installation
L wire and N wire are properly connected. Ensure that the ground resistance is less than 5 ohms. In areas with high soil resistivity, reduce the soil resistivity via measures such as spreading resistivity reduction mixture around the grounding conductor. ORing Industrial Networking Corp. -
Page 10: Preparing The Installation Site
The AP can be mounted on a wall or pole. 3.2.3 Waterproof Use a seal plug to seal the unused ports. Use a watertight adapter to connect cables to the AP. For details, see Chapter “Installing the Access Point”. ORing Industrial Networking Corp. -
Page 11: Emi
9600 / Parity: None / Data Bit: 8 / Stop Bit: 1) Then you can access CLI interface. The default username/password is admin/admin. 3.2.7 Checking before Installation Please check your materials carefully against the package contents. If there are any errors, please contact your distributor or ORing sales representative. ORing Industrial Networking Corp. -
Page 12: Installing The Access Point
Before you install the AP, verify that all the parts in the package contents are there and make sure that: The installation site meets temperature and humidity requirements. The installation site is equipped with a proper power supply. Network cables are in place. ORing Industrial Networking Corp. -
Page 13: Precautions
Figure: Securing the AP with M5 Screws 2. Install the mounting bracket to a pole or wall. Pole mount Attach the bracket to a pole with two hose clamp and fasten the clamp with screws and nuts. ORing Industrial Networking Corp. - Page 14 Attach the bracket to the wall and mark the screw hole locations. Align the screw holes on the bracket and those on the wall, and tighten the M8 x 40 screws to mount the bracket. Figure: Mounting the Bracket on Wall ORing Industrial Networking Corp.
-
Page 15: Cables And Pin Assignment
Figure: 1000BASE-T Connection 10BASE-T uses Category 3, 4, 5 100-ohm UTP/STP and 1000BASE-T uses Category 5 100-ohm UTP/STP for connections. Both support a maximum length of 100 meters. ORing Industrial Networking Corp. -
Page 16: Connecting Cables
The grounding cable is made on site. Connect the supplied grounding wire (yellow-green) to the AP grounding hole on one end and ground the wire on the other end through OT terminals. To avoid waste, adjust the cable length for actual demands. ORing Industrial Networking Corp. - Page 17 2. Thread the cable through liquid-tight adapter and add a plug to the end. See figure below. Figure: Threading the Network Cable 3. Wrap the cable between B and C upwards with two or three layers of liquid-tight material. See figure below. Figure: Wrapping Liquid-tight Material around Cable ORing Industrial Networking Corp.
- Page 18 If the diameter of LC-LC fiber is not 2.7 ± 0.2mm, waterproofness of the adapter cannot be guaranteed. Connecting the DC Power Cord (Optional) Waterproofing material is customer-supplied. Please make sure the port for DC power supply face to the ground. ORing Industrial Networking Corp.
- Page 19 Thread the DC power cord through the liquid-tight adapter in the order as shown in Figure below. Use waterproof duct tape and waterproof plaster to fill in the space between the power cord and the adapter. Figure: Threading the DC Power Cord ORing Industrial Networking Corp.
-
Page 20: Web-Based Configuration
Exceptions such as font alignment error and format error may occur when other resolutions are selected. The following table lists the Web management system default configuration. Feature Default Settings Web service Enabled Management IP 192.168.110.1 Default Username/Password admin/admin The default password is not saved in show running-config. ORing Industrial Networking Corp. - Page 21 Enter to access the login page, as shown in the following figure. When you log in successfully for the first time, you will be prompted to change the password to increase security, please enter a new password containing at least eight characters. ORing Industrial Networking Corp.
-
Page 22: Config Wizard
2. The Config Wizard page is also displayed when you click the Config Wizard link in the upper-right corner on the homepage. The device supporting NAT can work in Bridge mode or NAT mode. Bridge mode NAT mode ORing Industrial Networking Corp. - Page 23 If the AP device is in access mode, it is recommended to build the gateway and address pool on the other device. If the AP device is in routing mode, it is recommended to build the gateway and address pool on the AP device and configure the NAT for it. ORing Industrial Networking Corp.
-
Page 24: Monitoring
Click the Traffics > Details or RSSI Summary > Details link in the lower left corner to view the STA details on the displayed page, for example, the MAC address and RSSI. 4.3.2 User Info User information is displayed here. ORing Industrial Networking Corp. -
Page 25: Dhcp
IGAP-W99110GP+ User Manual 4.3.3 DHCP DHCP includes DHCP client list and DHCP server status. DHCP Client List DHCP clients are displayed here. DHCP Server Status DHCP server status and address pool usage are displayed here. ORing Industrial Networking Corp. -
Page 26: Configuration
The WLAN allows wireless STAs to access the AP through WiFi for Internet services. Multiple WLANs can be added or deleted. 4.4.1.1 W /WLAN The following figure shows the page for adding a WLAN. ORing Industrial Networking Corp. - Page 27 WLAN ID: WLAN ID is used to identify a WLAN network. – SSID: An SSID is the name of a wireless local area network. – Encryption Type: Open, WPA/WPA2-PSK, WPA/WPA2-802.1X 3. Click Save. The Edit succeeded message is displayed. ORing Industrial Networking Corp.
- Page 28 GHz frequency band do not overlap or generate interference. Wireless channel settings are mainly about adjusting the strength of the WiFi signal sent out by the device. Channel parameters can be set for the 2.4G and 5G networks. ORing Industrial Networking Corp.
- Page 29 2. Click Force switching from 2.4GHz to 5GHz Network to forcibly switch the network type. Enabling the 5G network 1. Click to enable or disable the 5G network. 2. Click Enforce switching from 5GHz to 2.4GHz Network to forcibly switch the network type. ORing Industrial Networking Corp.
- Page 30 Bluetooth, and mainly applied to WeChat Shake. ORing Industrial Networking Corp.
- Page 31 4.4.2.4 C LIENT IMIT Client limit refers to the maximum number of associated STAs. IGAP-W99110GP+ supports up to 1024 clients. 4.4.2.5 R ADIO ALANCE Radio balance refers to the balance of STAs on each radio. ORing Industrial Networking Corp.
-
Page 32: Network
DHCP server. NAT Mode: The ORing APs run as DHCP servers to assign IP addresses to wireless clients out of a private 10.x.x.x IP address pool behind a NAT. You can select the AP working mode to determine the AP role and then configure based on the corresponding working mode. - Page 33 Generally, the speed of an Ethernet physical port is determined through negotiation with the peer device. The negotiated speed can be any speed within the interface capability. You can also configure any speed within the interface capability for the Ethernet physical port on the Web page. ORing Industrial Networking Corp.
- Page 34 Note: The default network segments of Gi0/1 and MT0/2 are different, if you need to set the ports in the same segment, please configure in CLI or Telnet. Command Example ORing(config)#in gi0/1 ORing(config-if-GigabitEthernet 0/1)#no ip add ORing(config-if-GigabitEthernet 0/1)#encapsulation dot1Q ORing(config-if-GigabitEthernet 0/1)#in mt 0/2 ORing(config-if-MTGigabitEthernet 0/2)#no ip add...
- Page 35 Click Add VLAN. A dialog box is displayed, as shown in the preceding figure. Set corresponding parameters in the dialog box and click Save. The newly added VLAN is displayed in the VLAN list after the Add operation succeeded message is displayed. Editing a VLAN ORing Industrial Networking Corp.
- Page 36 Default route is a setting on a computer that defines the packet forwarding rule to use when no specific route can be determined for a given Internet Protocol (IP) destination address. All packets for destinations not established in the routing table are sent via the default route. ORing Industrial Networking Corp.
- Page 37 Adding the default route Click Add Default Route. Set the configuration items in the displayed dialog box, and click Save. The newly added route is displayed in the route list after the Save operation succeeded message appears. ORing Industrial Networking Corp.
- Page 38 Click the Delete button for a route in the list and then click OK in the displayed dialog box to finish deleting. Deleting routes in batches 1. Select the route from the list. 2. Click Delete Selected Route to finish deleting. ORing Industrial Networking Corp.
- Page 39 A particular network will use one or more of these mechanisms, depending on the policies of the network administrator. 4.4.3.5.1 DHCP Settings DHCP service Click to enable or disable the DHCP service. Adding a DHCP Pool ORing Industrial Networking Corp.
- Page 40 Click Excluded Address Range. A dialog box is displayed, as shown in the preceding figure. Set the configuration items in the displayed dialog box, and click Save. The newly configured address range is displayed in the DHCP pool list after the Save operation succeeded message is displayed. ORing Industrial Networking Corp.
- Page 41 Click Delete to finish deleting. Deleting DHCPs in batches 1. Select the DHCP pool from the list. 2. Click Delete Selected DHCP and then click OK in the dialog box displayed to finish deleting. 4.4.3.5.2 Static Address ORing Industrial Networking Corp.
- Page 42 1. Click the Edit button for a static address in the list. A dialog box is displayed. 2. The configuration for the static address is displayed in the dialog box. Next, edit the configuration. 3. Click Save. The Save operation succeeded message is displayed. ORing Industrial Networking Corp.
- Page 43 A DHCP relay agent is any host that forwards DHCP packets between clients and servers. You need to enable DHCP server before configuring DHCP relay, and then fill the DHCP server’s IP address in the DHCP Relay page. ORing Industrial Networking Corp.
- Page 44 2. Click Bind MAC to Dynamic IP and then click OK in the displayed dialog box to finish deleting. Querying clients based on IP address Input the IP address in the text box. Click Search. The search results meeting the criterion are displayed in the list. ORing Industrial Networking Corp.
- Page 45 Click Add Port Mapping, set the configuration items in the dialog box displayed, and then click Save. The newly added port mapping is displayed in the list after the Save operation succeeded message is displayed. Batch deleting port mapping entries ORing Industrial Networking Corp.
- Page 46 2. The configuration for port mapping is displayed in the dialog box. Next, edit the configuration. 3. Click Save. The Save operation succeeded message is displayed. Deleting port mapping Click the Delete button for a port mapping entry in the list to finish deleting. ORing Industrial Networking Corp.
-
Page 47: Security
Rogue APs may exist in a WLAN. Rogue APs may have security vulnerabilities and can be manipulated by attackers to seriously threaten and endanger network security. The containment function can be enabled on the AP to attack rogue devices and prevent other wireless STAs from being associated with rogue devices. ORing Industrial Networking Corp. - Page 48 AP containment for the device. Adding a MAC address You can add the MAC address to be contained here. Adding an SSID blacklist You can add the MAC address to be contained here. ORing Industrial Networking Corp.
- Page 49 APs are trusted devices and special processing is required. You can configure the MAC addresses of trusted devices. 4.4.4.1.3 Phishing WiFi Keyword If an SSID matches with the keyword fuzzily, the WiFi is a phishing WiFi. ORing Industrial Networking Corp.
- Page 50 Add the blacklist or whitelist user by adding the MAC address. Click to add a MAC address for a user. You can add multiple MAC addresses. Click the SSID-based Access Control link to configure the blacklist and whitelist for each WiFi. Deleting a blacklist user ORing Industrial Networking Corp.
- Page 51 1. Click Batch Import Users. 2. Download the template file and enter the data. 3. Import the file. Setting blacklist capacity 1. Click 2. Enter a value. 3. Click OK. The message “Configuration succeeded.” will be displayed. ORing Industrial Networking Corp.
- Page 52 IGAP-W99110GP+ User Manual 4.4.4.2.2 SSID-based Blacklist Click in the list and configure the whitelist/blacklist for the specified SSID. You can select the blacklist/whitelist type, add blacklist/whitelist users, import blacklist/whitelist users and set blacklist/whitelist capacity. ORing Industrial Networking Corp.
- Page 53 2. Click to delete the MAC address of the user. 3. Click the Add icon to add a MAC address for a mutual-access user. You can add multiple MAC addresses. 4. Click Save to finish the configuration. ORing Industrial Networking Corp.
- Page 54 4. DHCP-guard: Enables DHCP-guard configuration. Click the DHCP-guard List link to view the host where a DHCPv4 attack is detected. 5. DHCPv6-guard: Enables DHCPv6-guard configuration. Click the DHCPv6-guard List link to view the host where a DHCPv6 attack is detected. 6. ND-guard: Enables ND-guard configuration. 4.4.4.5 ARP ORing Industrial Networking Corp.
- Page 55 When there are different filtration rules, multiple rules may be applied simultaneously and only several of them can be applied. If a packet matches an ACE entry, this packet is processed (permitted or denied) according to the action policy defined by this ACE. 4.4.4.6.1 ACL Settings ORing Industrial Networking Corp.
- Page 56 ACL is displayed in the ACL List drop-down list on the left after the Save operation succeeded message is displayed. Deleting an ACL 1. Select the ACL from the ACL List drop-down list. 2. Click Delete ACL to finish deleting. ORing Industrial Networking Corp.
- Page 57 3. Click OK. The Save operation succeeded message is displayed. Deleting an access rule 1. Select one or multiple records from the access rule list. 2. Click Delete Selected and then click OK in the displayed dialog box to finish deleting ORing Industrial Networking Corp.
- Page 58 Deleting time objects in batches 1. Select one or multiple records from the time object list. 2. Click Delete Selected and then click OK in the dialog box displayed to finish deleting. ORing Industrial Networking Corp.
- Page 59 3. Click Save. The Save operation succeeded message is displayed. Deleting a time object Click the Delete button for a time object in the list. 4.4.4.6.3 ACL Application Apply an ACL to a port or a WiFi to limit user access. ORing Industrial Networking Corp.
- Page 60 Select ACL number, port and direction in the popup window. Click Save. After the message “Configuration succeeded.” is displayed, the ACL will appear in the list. Deleting selected ACL applications Editing an ACL application ORing Industrial Networking Corp.
-
Page 61: Authentication
IGAP-W99110GP+ User Manual 4.4.5 Authentication 4.4.5.1 W UTHENTICATION WiFiDog Authentication enables new users to be redirected to the authentication page. Advanced Settings provide some optional features applicable to both Web authentication V1 and Web authentication V2. ORing Industrial Networking Corp. -
Page 62: Advanced
Whether antenna type switchover and orientation switchover are supported depends on the radio capacity, which is displayed on the page. IGAP-W99110GP+ built-in internal directional antenna, and it cannot switch to another antenna type and orientation. ORing Industrial Networking Corp. -
Page 63: Rapid
System mode will be turned to Fit AP mode after system resetting. In order to use full function normally, please press System Mode Switch for switching to Fat AP mode. Fat AP mode: System mode for IGAP-W99110GP+ Fit AP mode: Reserve for further use. NOT support at the current stage. ORing Industrial Networking Corp. -
Page 64: Maintenance
OCAL PGRADE This page allows you to upgrade firmware. We suggest to use the latest firmware before installing the switch to the customer site. Please download the latest firmware from ORing website. 4.5.1.2 R ESTART Click the Restart button to restart the system. - Page 65 Most importantly, it translates domain names meaningful into the numerical identifiers associated with networking equipment for the purpose of locating and addressing these devices worldwide. You could and one or more DNS servers in this page. ORing Industrial Networking Corp.
-
Page 66: System
IGAP-W99110GP+ User Manual 4.5.2 System 4.5.2.1 W Admin Password Change the password of admin. Basic Settings Permissions Add more user accounts with different permission. ORing Industrial Networking Corp. - Page 67 Extensible web-based command line interface. 4.5.2.4 SNMP Simple Network Management Protocol (SNMP) is a protocol used for exchanging management information between network devices. SNMP is a member of the TCP/IP protocol suite. IGAP-W99110GP+ supports SNMP v2 and v3. ORing Industrial Networking Corp.
- Page 68 IGAP-W99110GP+ User Manual The SNMP Community cannot be set to “public” in the webUI, if you need to configure the community as public, please set commands in CLI. ORing Industrial Networking Corp.
-
Page 69: Appendix
Green 1 Solid : <-70dBm, 2 Solid : -70 ~ -50dBm, 3 Solid : > -50dBm Power Input Power PoE (802.3af / 802.3at) or 44~57VDC power supply Power Consumption (Typ.) <12.95W Surge Protection Common mode +/-9kV ORing Industrial Networking Corp. -
Page 70: Antenna Patterns
0% to 100% Non-condensing Regulatory Approvals EN55032, EN55035, EN301 489, GB9254 EN300 328, EN301 893, SRRC Safety EN60950-1, GB4943 Warranty years 5.2 Antenna Patterns Horizontal planes (top view) Vertical (elevation) planes (side view, AP facing down) ORing Industrial Networking Corp.
Need help?
Do you have a question about the IGAP-W99110GP+ and is the answer not in the manual?
Questions and answers