
Related Manuals for Durr Dental XR 24


Summary of Contents for Durr Dental XR 24
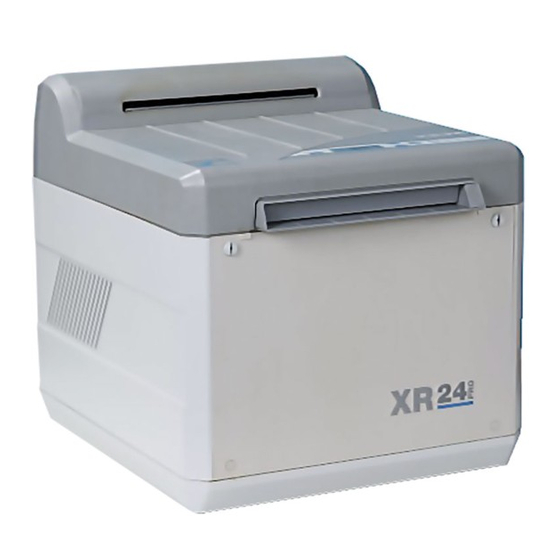
- Page 1 Installation and Operating Instructions DÜRR Regeneration Unit for X-ray developers XR 24, XR24 II, XR 24 Nova, XR 24 Pro 2006/01...
-
Page 2: Table Of Contents
1.7 Warnings and Symbols ....4 10. Electrical connections ......11 2. Product information ......4 10.1 XR 24, XR 24 II, XR 24 NOVA ..11 2.1 Correct Usage ........4 10.2 XR 24 PRO ........11 2.2 Incorrect usage ........ 4 11. -
Page 3: Important Information
IMPORTANT INFORMATION Operating Instructions. • The developer unit herein described conforms to the relevant safety standards 1. Notes valid at this time. All switches, processes, trade marks, software programs and 1.1 CE - Labeling appliances named in this document are This product bears the CE- Labeling in registered names. -
Page 4: Combining Appliances
1.7 Warnings and Symbols • The operator must be knowledgeable in the operation of the appliance. In the Installation and Operating Instructions • The product is not designed to be used in use is made of the following terms or medical treatment areas where there exists symbols to denote information of special the danger of explosion. -
Page 5: Contents
230 - 240 Is the regeneration unit to be Frequency (Hz) connected to a developer of the Power model XR 24, XR 24 II, XR 24 NOVA consumption (A)0.65 / 0.9 to an XR 24 PRO? Output (W) 50 - 80... -
Page 6: Functional Diagram
5. FUNCTIONAL DIAGRAM 5.1 Regeneration Unit connected to XR 24, XR 24 II, XR 24 NOVA 50% OFF REG. 100% ON 5.2 Regeneration Unit connected to XR 24 PRO... -
Page 7: Functional Description
The software in the service program of the XR 24 PRO allows the running time of the regeneration pumps to be set at any interval between 0 s and 60 seconds, see section 11.3. -
Page 8: Installation
INSTALLATION 7. Set-up alternatives for Regeneration Unit • Set-up of Regeneration Unit RU 24 next to the X-ray developer: Where sufficient space is available, this set-up is preferred. • Set-up of Regeneration Unit RU 24 in a cupboard: The operator must be instructed to check the state of the chemicals regularly. -
Page 9: Preliminary Measures
8. Preliminary measures The following measures need only be taken when the Regeneration Unit is subsequently being connected to a X-ray developer. • Remove mains plug (1) from socket • Lift cover (2) • Drain any chemicals from the X-ray developer •... -
Page 10: Hose Connections
9. Hose connections 9.1 Hose connection to XR24, XR 24 II, XR 24 NOVA or to XR 24 PRO with serial number up to T005999 The regeneration connection is effected using the nozzles to the tank at 16E and 16F, see figs. 6 and 7. -
Page 11: Electrical Connections
10. Electrical connections 10.1 XR 24, XR 24 II, XR 24 NOVA • Place the appliance plug into the socket (15a) to the rear of the X-ray developer and secure in place with the locking screw. 10.2 XR 24 PRO •... -
Page 12: Setting The Regeneration Electronics12
11.1 XR 24 Switch „S1“ ON / OFF: • If switch (22) is set to OFF, regeneration will take place after 1.3m of developed film. -
Page 13: Xr 24 Ii And Xr 24 Nova
11.2 XR 24 II and XR 24 NOVA The controller for the Regeneration Unit of XR 24 II and XR 24 Nova is not integrated into the main board. For these models the controller can be found on the PCB (24), Order No. -
Page 14: Xr 24 Pro
X-ray developer (Fig. 14). Please refer to the Installation and Operating Instructions of the X-ray developer XR 24 PRO (order no. 9000-600-74/30) See section 18.6 Service Routine. • • • • • Start Service Routine Switch off appliance at main switch (press min. -
Page 15: Check Settings
12. Check Settings 12.1 XR 24, XR 24 II, XR 24 NOVA 12.2 XR 24 PRO Check regeneration at start of operation A processor in the electronics of the XR 24 PRO stores the complete • Main switch ON developing time, therefore setting •... -
Page 16: Setting Regeneration Pump Piston Stroke
13. Setting Regeneration Pump Piston Stroke The amount of chemicals actually transported by the Regeneration Unit can be adjusted by % OF STROKE altering the setting of the piston stroke. If the amounts pumped by the developer pump and the fixer pump are not the same then this can be regulated by altering the piston stroke of each pump. -
Page 17: Operation
See section 15.1 or 15.2. Every 3 months Change chemicals (See Installation and 15.1 XR 24, XR 24 II, XR 24 NOVA Operating Instructions 9000-600-74/30) Regeneration on operation activated • Switch the X-ray developer on and wait... -
Page 18: Troubleshooting
Repairs may only be carried out by Dürr Dental or by a person or agency authorised by Dürr Dental. Before carrying out any repair or maintenance procedures remove power supply! 18. Troubleshooting Tips for XR 24, XR 24 II, XR 24 NOVA Fault Possible causes Remedy 1.Regeneration... -
Page 19: Troubleshooting Tips Xr 24 Pro
(e.g. turn the fan wheel). • Regeneration time at • Set potentiometer to ca. 30s and potentiometer set at 0s. check amount of regeneration material pumped. 19. Troubleshooting Tips XR 24 PRO Fault Possible causes Remedy • Regeneration time set too long. 1.Regeneration •...
Need help?
Do you have a question about the XR 24 and is the answer not in the manual?
Questions and answers