Durr Dental XR 24 PRO Installation And Operating Instructions Manual
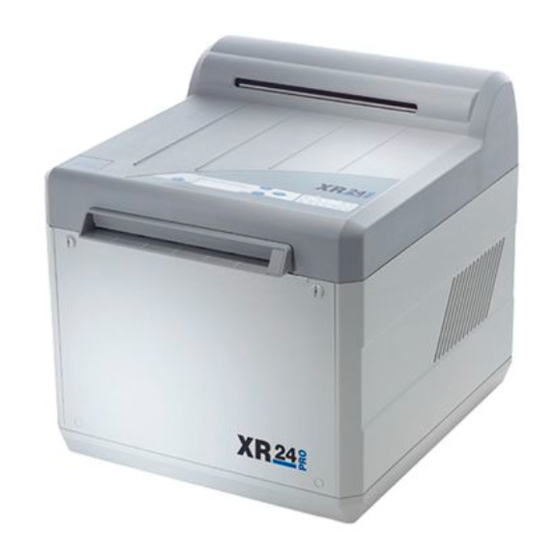
X-ray film developing appliance
Hide thumbs
Also See for XR 24 PRO:
- Installation and operating instructions manual (48 pages) ,
- Installation and operating instructions manual (19 pages)

Subscribe to Our Youtube Channel
Related Manuals for Durr Dental XR 24 PRO


Summary of Contents for Durr Dental XR 24 PRO
- Page 1 INSTALLATION AND OPERATING INSTRUCTIONS DÜRR XR 24 PRO X-RAY FILM DEVELOPING APPLIANCE 2006/03...
-
Page 3: Table Of Contents
17. Tips for Technicians ......34 4. Technical data ......... 7 18. Troubleshooting tips ......35 5. Functional principle XR 24 PRO ..8 18.1 Before beginning work ....35 6. Functional description of the 18.2 Removing front covering ....35 XR 24 PRO .......... -
Page 4: Important Information
IMPORTANT INFORMATION 1. INSTRUCTIONS • The XR 24 PRO developing appliance fulfils the basic norms on safety and technology. 1.1 EU - Labelling All rights of protection are reserved for the The product carries EU labelling in circuits, procedures, names, software accordance with the Council’s guideline on... -
Page 5: Use Of Additional Apparatus
1.7 Safety instructions for electric • Before using the machine, the user must always check its functional safety and that power protection it is in proper condition.. • The developing machine may only be • The user must be familiar with the connected to an earthed plug which has operating instructions for the machine. -
Page 6: Warning Instructions And Symbols
Confirm selection tigen 2.3 Product information Switch on mains button The exposed film passes through different zones within the Dürr XR 24 PRO X-ray Switch off mains button developing machine: the developing, fixing, rinsing and drying zones. Open bibcock - every morning... -
Page 7: Extent Of Supply
3. EXTENT OF SUPPLY 4. TECHNICAL DATA XR 24 PRO X-ray developing machine XR 24 PRO X-ray developing machine Model 1700-08 (230 V ~, 50-60 Hz) Model 1700-08 (230 V) Model 1700-09 (100-110 V ~, 50-60 Hz) Model 1700-09 (110 V) Accessories, complete 1700-001-00 3.1 Special accessories... -
Page 8: Functional Principle Xr 24 Pro
5. FUNCTIONAL PRINCIPLE XR 24 PRO Stand By Position W W W W W D D D D D F F F F F 19 19a 18 Film inlet Water valve Start flap Continuous heater Roller packet, film inlet PTC-sensor... -
Page 9: Functional Description Of The Xr 24 Pro
6. FUNCTIONAL DESCRIPTION OF THE XR 24 PRO When the mains button is pressed Should the outflow pipe be blocked, a signal (min. 2 sec.), , , , , the display is illuminated. The is sounded via a level sensor (13). The... -
Page 10: Mounting And Assembly
The operating staff must have easy access to the bibcock (27) and the earthed plug (26).. • We recommend that the XR 24 PRO be set up in a darkroom. If the machine is not not set up in a darkroom, a daylight attachment (24) (DL24 or DL26) must be fixed to it. -
Page 11: How To Set Up Machine
7.2 How to set up machine • Set the machine up on a horizontal, stable, even board at working height. • When the tubes are being passed under, the board must have an opening measuring ca. 7 x 10 m •... -
Page 12: Installation
8. INSTALLATION 8.1 Mains water supply • Check whether or not pure water is flowing out of the bibcock (27). When the machine is being installed initially, rinse the pipelines thoroughly! • Because the water quality can vary greatly from region to region, a fine-mesh filter (32) must be inserted between the bibcock (27) and the water pipe (34). -
Page 13: Connection For Developer And Fixer Outflow Pipe
When moving the outflow pipe, avoid sagging, constrictions and reductions. • Cover exterior of end of pipe with UHU plaster • Screw screwed fitting (37) to pipe and attach to siphon’s (25) muff using pipe clip (38). • Secure outflow pipe using pipe clips, screws and pins. -
Page 14: Before Operating Machine For First Time
9. BEFORE OPERATING MACHINE FOR FIRST TIME 9.1 Cleaning the machine • Take lid off. • Remove floating lid from developing bath and fixing bath • Open green stop flaps (44) and seals (45). • Swivel drier packet (8) backwards. •... -
Page 15: Power Point (Mains)
• Actuate lateral lever and remove lifting tank (22). • Clean roller packets, lifting tray and tanks with damp sponge Adding chemicals Adding chemicals „ Adding chemicals Adding chemicals Adding chemicals „ and inserting roller packets and inserting roller packets „... -
Page 16: Circuit Diagram
11. CIRCUIT DIAGRAM 11.1 Printed circuit board, operating part / 11.2 Printed circuit board, control (see also pos. 23 A and 23 B under Pt. 6) 23 B 23 A... - Page 17 11.3 Printed circuit board, power part 230 V (see also pos. 23 C under Pt. 6) 23 C...
-
Page 18: First Time Operation
12. FIRST TIME OPERATION The XR 24 PRO developing machine has The operating instructions on the three settings which determine the amount of display for the user are contained in time it takes a film to pass through the the chapter on USAGE, point 14 machine. -
Page 19: Settings / Servicing Work For Technician
12.1 Settings / Servicing work for technician • Open the bibcock. • End servicing mode Switch off machine using mains • Check leak tightness of machine and button (press for min. 2 sec.) connections • Start servicing operation • Parameters such as language, mains + + + + + press at same time (min. -
Page 20: Checking Developer Temperature And Carrying Out Acceptance Test
12.2 Checking developer temperature carrying out acceptance test The following procedure is only valid for, e.g., Germany. Users in other countries should comply with the relevant local regulations! • Switch on the machine and wait until the heating phase for the bath has ended (see also point 14.1, “in the morning or before beginning work”). -
Page 21: Transporting The Machine
13. TRANSPORTING THE MACHINE Before carrying the developing machine, please note the following: The developing machine may only be transported when the tanks are empty. • Switch off the machine by pressing the mains button. • Close the bibcock (27). •... -
Page 22: Usage
USAGE Mains button Confirmation button „Browsing through menu“ Program overview 14. OPERATION The intra, extra and endo programs are set Before operating the machine, please note to particular values when the machine is the following: being manufactured (see below). • The developing machine must However, each of them can be adapted by the never be used without roller technician using the list of films. -
Page 23: Procedure To Be Followed Every Morning Or Before Beginning Work
2 sec. until the signal sounds 1 The display lights up. The lifting tray >> DURR DENTAL<< automatically moves to the corresponding XR 24 PRO V .. position, ca. 30 sec. WARM UP PHASE 2 The machine is heated until the correct temperature for the developing bath is WAITING .. -
Page 24: Procedure To Be Followed Every Evening Or After Finishing Work
Changing the program 6:00 PROCESS 6:00 INTRA DRYER 30% BATH TEMP. 28.0°C [ENTER]=END [ENTER]=END [ENTER]=END M. FREE 4:00 EXTRA DRYER 30% PROCESS 4:00 BATH TEMP. 28.0°C [ENTER]=END M. FREE [ENTER]=END [ENTER]=END 2:45 ENDO BATH TEMP. 28.0°C DRYER 30% PROCESS 2:45 [ENTER]=END [ENTER]=END M. -
Page 25: List Of Reccomended Films For Dürr
14.7 List of reccomended films for Dürr XR 24.. developing machine. Intraorale Films Extraorale Films Bath temperature 28 °C Bath temperature 28 °C Processing time 6 min Film formats bis max. 24 x 30 cm Drier capacity 30 % Filmtypes Processing Drier- time... -
Page 26: Maintenance
15. MAINTENANCE Every 4 weeks Change chemicals without using replenishing unit (91) (see paragr.15.1 below) Chemicals should be changed every 4 weeks if a maximum amount of 10 intra-oral and 3 extra-oral films are used on a daily basis. The instructions on how to clean the apparatus should be kept close to the machine and should be displayed in poster (A3) format. - Page 27 15.1.2 Cleaning tanks and roller packets • Open green stop flaps (44) and seals (45). • Swivel drier packet (8) backwards • Swivel display (90) upwards. If a daylight attachment is being used, the display must be removed and moved to the left •...
- Page 28 • Place roller packets in washbasin. Spray with, e.g., WR 2000 Spray Cleaner and allow to work in for ca. 10 min. • Actuate lateral lever and remove lifting tank (22). Rinse using the sponges; black for developing and red for fixing tank •...
- Page 29 • Remove roller packets for water (6) and developer/fixer (5); tilt sideways to allow water to drain off. • Unscrew large plugs for developer (21) and fixer (18); allow water to drain off from these. 15.1.3 Pouring in chemicals The information on pouring in the chemicals refers to the “DÜRR AUTOMAT XR”...
- Page 30 • Insert lifting tray (22) • Screw small plugs into lifting tray 15.1.4 Inserting roller packets Danger. The developing machine must never be used without roller packets. If no roller packets are used, the developing and fixing fluids can spurt up and out of the developing unit when placed under pressure.
-
Page 32: Troubleshooting
TROUBLESHOOTING 16. TIPS FOR THE USER If faults cannot be remedied by using the following information, the Dental Depot technician should be contacted for further technical assistance. Error Possible causes Remedying faults 1. Completely out • Mains cable not correctly •... - Page 33 Error Possible causes Remedying faults 7. Increased • Film concealed • Check expiration date basic veil on • Film incorrectly stored • Check storage provisions, expiration film date or manufacturer’s data on film packaging. Do not store films near camera. Pre-exposure of films can result due to stray radiation.
-
Page 34: Tips For Technicians
17. TIPS FOR TECHNICIANS also see pt.18. Trouble Schooting Tips Error Possible causes Remedying faults 1. Completely out • Fuses in house defective • Check fuses; replace if necessary of order • Fuses in appliance defective • Check fuses; replace if necessary (see point 18.8) 2. -
Page 35: Troubleshooting Tips
18. TROUBLESHOOTING TIPS 18.1 Before beginning work • • • • • Switch off machine using mains Switch off machine using mains Switch off machine using mains Switch off machine using mains Switch off machine using mains button button button button button •... -
Page 36: Plan For Carrying Out Service Work
18.6 Plan for carrying out service work • Start service operation Further DEUTSCH? ENGLISH? FRANCAIS? Switch off machine using mains [ENTER]=OK [ENTER]=OK Language... [ENTER]=OK button (press for min. 2 s) + + + + + press at same time (min.4 sec) 50 Hz? 60 Hz? Machine now in service mode... - Page 37 SERV.INTERVAL? SERVICE OFF SERVICE ON 0490H SERVICE (TARGET) [ENTER]=OK SERVICE RESET 0500H [ENTER]=OK [ENTER]=OK CALIBRATION? VALUE 28.0 °C [ENTER]=OK [ENTER]=CONTINUE BACK COMP. TEST? [ENTER]=OK [ENTER]=OK START MANUEL CIRCULAT.PUMP? BATH HEATER? ROLLER DRIVE? [ENTER]=OK [ENTER]=OK [ENTER]=OK [ENTER]=OK CIRCULAT.PUMP OFF START MANUEL OFF BATH HEATER OFF DRIVE OFF [ENTER]=CONTINUE...
-
Page 38: Changing The Display
18.7 Changing the display • Pull the display cable’s (92) plug out of the plate (86) and pull through openings (91).. • Pull display (90) upwards. • Attach new display in reverse sequence. 18.8 Checking appliance fuses • Open flap (64) on rear of unit by applying slight pressure with screwdriver. -
Page 39: Replacing Flow Heating Unit With Ptc Sensor
18.9 Replacing flow heating unit with PTC sensor • Remove all coverings. • Allow chemicals to drain out (see point 15.1.1) • Pull out plug (93, photo 43) on plate. • Twist screw on circulating pump holder and raise circulating pump. •... -
Page 40: Cleaning The Water Level Sensor
18.12 Cleaning the water level sensor • Close bibcock. • Remove lid. • Open green stop flaps and seals • Swivel drier packet backwards. • Remove water roller packet. • Clean level sensors (82 and 83) so that no calcified bridges can form. •...
Need help?
Do you have a question about the XR 24 PRO and is the answer not in the manual?
Questions and answers