
Related Manuals for Durr Dental Power Tower Silence 200


Summary of Contents for Durr Dental Power Tower Silence 200
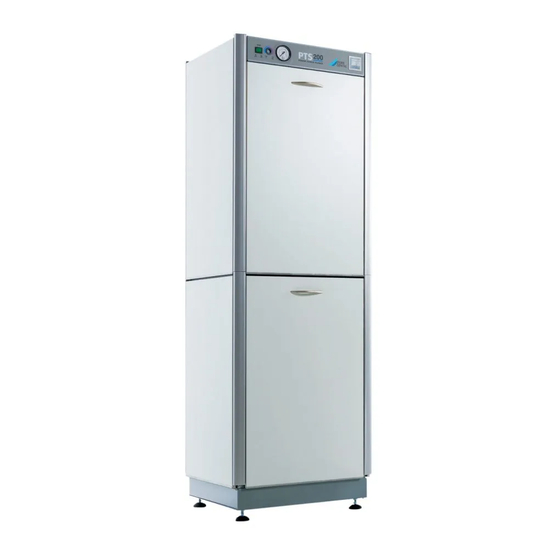
- Page 1 Power Tower Silence 200 Installation and operating instructions A949100002L02 ...
-
Page 3: Table Of Contents
Contents Install the compressed air module ..... 12 Install the compressor units ..12 Important information Install the drying unit . -
Page 4: Important Information
Important information About this document Observe the operating instructions. These installation and operating instructions represent part of the unit. CE labelling If the instructions and information in these installation and operating instruc- Manufacturer tions are not followed, Dürr Dental will not be able to offer any warranty or as- Date of manufacture sume any liability for the safe operation... -
Page 5: Safety
Important information Safety 2.5 Transport The original packaging provides optimum pro- Dürr Dental has designed and constructed this tection for the unit during transport. unit so that when used properly and for the in- If required, original packaging for the unit can be tended purpose it does not pose any danger to ordered from Dürr Dental. -
Page 6: Product Description
Product description Overview PTS 200/32 with cabinet 0949-64 ..0949-200/32 3.1 Scope of delivery – VS 900 S (installed) – Membrane drying unit The following items are included in the scope of delivery (possible variations due to country-spe- –... -
Page 7: Technical Data
Product description Technical data Electrical data 0949-54 0949-64 0949-71 A949200035 Rated voltage 400 / 3N~ Nominal current 8.3 (11.4)* 7.3 (10.4)* 11.6 Mains frequency Weight 266 (301)* 256 (291)* * Information on the retrofitted units Electrical data 0949-53 0949-55 Rated voltage 400 / 3N~ Nominal current 7.3 (10.4)*... -
Page 8: Type Plate
Product description 4.1 Type plate The type plate is located under the cover. A949100002L02 1806V002... -
Page 9: Operation
Product description Operation Advert Suction module Suction unit Compressor unit Drying unit Pressure module Amalgam separator Main power switch 5.1 Functional description The insulated unit contains different individual components, controls and monotors them. Different parameters are displayed. Depending on type, the unit can be operated on a touch display. A949100002L02 1806V002... -
Page 10: Analogue Display
Product description 5.2 Analogue display 1 Display of relative humidity blue <30 % pale pink >30 % 2 Pressure display Start-up pressure 6.0 bar Cut off pressure 7.5 bar 3 Amalgam separator display panel 5.3 Digital display and operation 1 Display of operating status, messages and When the relative air humidity is displayed, operation the green range corresponds to approx. -
Page 11: Assembly
Assembly The following types of hoses must not be Only qualified specialists or employees used: trained by Dürr Dental are permitted to install, connect and start using the unit. – Rubber hoses – Completely PVC hoses Requirements – Hoses that are not sufficiently flexible Further information can be found in our suction planning information leaflet. -
Page 12: Information About Connecting Ca
Assembly 6.5 Information about connecting Installation type Line layout (minimum cables requirements) The diameter of the connections depends on Fixed installation – Shielded sheathed cable the current consumption, length of line and the (e.g. (N)YM (St)-J) ambient temperature of the unit. Information Flexible –... -
Page 13: Installation
Assembly Installation Connect the exhaust air and secretion hose to the floor connection. 7.1 Combining devices safely Take care when connecting units together or to parts of other systems as there is always an ele- ment of risk (e.g. due to leakage currents). Only connect units when there can be no question of danger to operator or to patient. -
Page 14: Install The Compressed Air Module
Assembly Position the compressed air module on the suction module. 7.3 Install the compressed air module Remove the mounting plate. 7.4 Install the compressor units CAUTION Functional disorder in case of incor- rect installation Unit does not start up. For retrofitting a compressor unit, re- connect the compressor unit from star connection to delta connection. - Page 15 Assembly Mount the compressor unit on the retaining Push on and secure the noise insulation on plate and then mount it in the unit. the suction manifold of the compressor unit. Position the second compressor unit. Push on and secure the noise insulation on the suction manifold of the compressor unit.
-
Page 16: Install The Drying Unit
Assembly 7.5 Install the drying unit 7.6 Install the amalgam separator (optional) Install the drying unit. Remove the amalgam collecting vessel. Mount the elevating plate. Insert nozzle, see installation instructions 9000-610-49/01. Insert the filter and close the drying unit with the cover. Remove the electronic hood. -
Page 17: Connecting The Unit
Assembly Attach the wastewater connection of the pres- Before start-up, check the mains voltage sure compensation containers at the inlet of against the voltage indicated on the type plate the amalgam separator and the wastewater (see also "4 Technical data"). hose on the amalgam separator outlet. -
Page 18: Commissioning
Tyscor Pulse The following units can be monitored with Tys- Switch on the main power switch. cor Pulse: Compressor will start and switches off at ap- Power Tower Silence 200/42 0949-200/42 prox. 0.75 MPa. surgery supply Power Tower Silence 200... - Page 19 Assembly Network configuration Add device Various options are available for network config- uration: – Automatic configuration via DHCP (recom- mended). – Automatic configuration via Auto-IP for direct connection of unit and computer. – Manual configuration. Configure the network settings of the unit us- ing the software or, if available, the touch screen.
- Page 20 Assembly Adding the device in the cockpit Click on the Start button with the left mouse key; on some devices you will need to keep it pressed. All devices that are connected to the software can be added to the cockpit. When the unit is first connected to the software, the unit is auto- matically added to the cockpit.
-
Page 21: Usage
Usage Operation We recommend changing the amalgam collector vessel when it reaches 95% full. 9.1 Unit with display The software interface consists of the menu bar Disposable amalgam container filled to and the contents area. 100 % Menu bar – The disposable amalgam container must be Contents area changed. -
Page 22: Unit With Analogue Display
Usage 9.2 Unit with analogue display Rights Operator – Query unit information. Display/handling – Change language. Service techni- – Query unit information. cian – Change language. – Perform maintenance. – Perform maintenance actions. – Change unit parameters. Press user authorisations. Select User or Technician wählen and confirm with OK. - Page 23 Usage – At a fill level of 100% the signal melody can no Brake monitoring longer be switched off by pressing the reset Red display and button. green LED flash alternately – The disposable amalgam container must be changed. Occurs upon braking action of amalgam Wear protective gloves.
- Page 24 Troubleshooting 10 Tips for operators and service technicians Any repairs exceeding routine maintenance may only be carried out by qualified personnel or our service. Pressure switch Switch S2 Fault Probable cause Solution A compressor unit is defective Switch off the device at the main Compressed air is not conveyed power switch.
-
Page 25: Appendix
Appendix 11 Connection media plan PTS 200 A949100002L02 1806V002... - Page 26 Appendix PTS 200 PC board mit / with CA 4 A949100002L02 1806V002...
- Page 27 Appendix A949100002L02 1806V002...
-
Page 28: Electrical Connection Plan
Appendix 12 Electrical connection plan 12.1 Version 400 V, 3N~ PTS 200 L1 L2 PE L3 N U1 V1 W1 PE U1 V1 W1 PE PE U V W L N PE A949100002L02 1806V002... -
Page 29: Version 400 V, 3N~ With Display
Appendix 12.2 Version 400 V, 3N~ with display PTS 200 L1 L2 PE L3 N A949100002L02 1806V002... -
Page 30: Version 230 V, 1~, 2 Units
Appendix 12.3 Version 230 V, 1~, 2 units L N PE L N PE L N PE L N PE L N PE A949100002L02 1806V002... -
Page 31: Version 230 V, 1
Appendix 12.4 Version 230 V, 1~ PTS 200 L N PE L N PE L N PE L N PE A949100002L02 1806V002... -
Page 32: Circuit Diagram
Appendix 13 Circuit diagram 13.1 Version 400 V, 3N~, part 1-4 M5 Drying unit fan A1 Amalgam separator M1 Compressor unit M4 Fan M3 Suction unit X13 Mains connection 3/N/PE AC 400 V H1 Display panel M2 Compressor unit A949100002L02 1806V002... - Page 33 Appendix Y1 Relief valve A949100002L02 1806V002...
- Page 34 Appendix X3 Top display (optional) X4 Manifold control contact A949100002L02 1806V002...
- Page 35 Appendix PCB 0947-505-50 A1 Amalgam separator M3 Suction unit S3 Main power switch H1 Display panel M4 Fan X3 Top display M1 Compressor unit M5 Drying unit fan X4 24 VAC manifold control contact M2 Compressor unit Q4 Pressure switch X13 Mains connection 3/N/PE AC 400 V A949100002L02 1806V002...
-
Page 36: Version 400 V, 3N~ With Display
Appendix 13.2 Version 400 V, 3N~ with display A1 Amalgam separator CA4 A6 PC power suply M5 Cooler with BUS adapter A3 Main PCB with power ele- M1+2 Compressor unit S0 Suction unit control contact ment A4 Control PCB M3 Suction unit S3/H3 Main power switch A5 Display M4 Fan... -
Page 37: Version 230 V, 1~, 2 Units Art
Appendix 13.3 Version 230 V, 1~, 2 units art 1-4 A1 Amalgam separator M3 Suction unit X13 Mains connection 1/N/PE AC 230 V H1 Display panel M4 Fan M1 Compressor unit M5 Drying unit fan A949100002L02 1806V002... - Page 38 Appendix M5 Drying unit fan Y1 Relief valve Q4 Pressure switch A949100002L02 1806V002...
- Page 39 Appendix X4 24 V AC Ablagesteuerkontakt A949100002L02 1806V002...
- Page 40 Appendix PCB 0947-200/XX A1 Amalgam separator M3 Suction unit S3 Main power switch H1 Display panel M4 Fan X4 24 VAC manifold control contact M1 Compressor unit M5 Drying unit fan X13 Mains connection 1/N/PE AC 230 V M2 Compressor unit Q4 Pressure switch A949100002L02 1806V002...
-
Page 41: Version 230 V, 1~, 1 Unit
Appendix 13.4 Version 230 V, 1~, 1 unit, part 1 - 4 A1 Amalgam separator M3 Suction unit X13 Mains connection 1/N/PE AC 230 V H1 Display panel M4 Fan M1 Compressor unit M5 Drying unit fan A949100002L02 1806V002... - Page 42 Appendix Y1 Relief valve A949100002L02 1806V002...
- Page 43 Appendix X4 24 V AC manifold control contact A949100002L02 1806V002...
- Page 44 Appendix PCB 0947-505/52 A1 Amalgam separator M3 Suction unit S3 Main power switch H1 Display panel M4 Fan X4 24 VAC manifold control contact M1 Compressor unit M5 Drying unit fan X13 Mains connection 1/N/PE AC 230 V M2 Compressor unit Q4 Pressure switch Y1 Relief valve A949100002L02 1806V002...
-
Page 45: Menu Structure For Unit With Display
Appendix 14 Menu structure for unit with display Level 1 Level 2 Level 3 Settings Language Deutsch English French Italian Information Name IP address Firmware version Software version User authorisations Operator Service technician Maintenance Next maintenance Maintenance actions Start compressors for container check Start CA 4 centrifuge motor Device parameters... - Page 46 Appendix A949100002L02 1806V002...
- Page 48 Hersteller/Manufacturer: DÜRR DENTAL SE Höpfigheimer Str. 17 74321 Bietigheim-Bissingen Germany Fon: +49 7142 705-0 www.duerrdental.com info@duerrdental.com...
Need help?
Do you have a question about the Power Tower Silence 200 and is the answer not in the manual?
Questions and answers