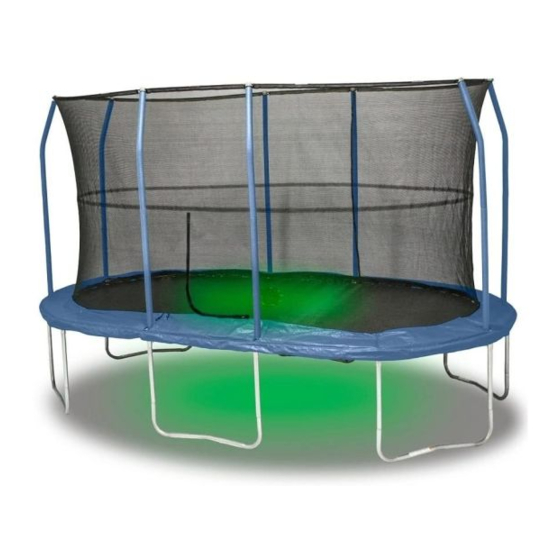
Summary of Contents for Jumpking JKOV1517SL2
- Page 1 Model#JKOV1517SL1 / JKOV1517SL2 15ft x 17ft Oval Combo WARNING YJ USA Corp., 3970 Lindbergh Drive Addison, TX 75001 www.jumpking.com 1-877-927-8777...
- Page 3 15ft x 17ft Oval Combo king...
- Page 4 2. Must place the trampoline on lawn, bark wood chip, sand or cushioning materials. 3. Maintain a free space of minimum 2500mm on all sides of the trampoline. This area should not included concrete, bitumen, brick, or other hard surfaces as these can cause serious injuries. recommended.
- Page 5 24. Learn fundamental bounces and body posi ons thoroughly before trying more advanced skills. A variety of trampoline ac vi es can be carried out by performing the basic fundamentals in various series and combina ons, performing one fundamental a er another, with or without feet bounces between them. 25.
- Page 6 WARNING Do not attempt or allow Do not allow more than one person somersaults. Serious injuries, on the trampoline at a time. paralysis, or death may result. To reduce the chance of landing on your head or neck, do not do somersaults(flips). Use trampoline only with mature, knowledgeable supervision.
- Page 7 1-877-927-8777,...
- Page 11 sharply spot.
- Page 15 Lay out all of the parts in groups : x 2 pcs 6 Toprails with T-connector with welded tube A marking. 4 Toprails with T-connector B marking. 2 Toprails with T-connector with welded tube C marking. x 4 pcs 6 “W” Shaped legs. 12 Extension legs.
- Page 16 You will need two people for this next step. Turn over 1 x Assembly 1 (AB) and 1 x Assembly 1 (AA) Join by inserting D into T-connector A. (Make sure spring hole lines up with gap in connector) Repeat this step so you are left with 2 halves of Trampoline Carefully join the 2 halves together.
- Page 17 Slot one of the springs onto one of the colored webbing V-rings as shown. Important: springs must be slotted on the right way around. Attach a spring to the opposite yellow stitched V-Ring. Important: You will now need to use the spring tool to attach the spring to the frame.
- Page 18 Safety pad(9) Lay the Frame Pad (9) on the frame. Double D-rings on the middle of pad should be fixed exactly on the right of each T-connector of frame. Do not use the trampoline without the Frame Pad (9), which is designed to reduce the likelihood of injury to the user from coming in con- tact with the trampoline frame.
- Page 19 Using the included plastic tie, attach the Safety Placard (11) to the frame near the point where jumpers will climb onto and off the trampoline. The trampoline is now fully assembled. Make sure that all parts are securely attached. Familiarize yourself and all users of the tram- Frame poline with the safety precautions, use and instructional materials, and care and mainte-...
- Page 20 Lay out Top G3 Pole (15), joint each section Top G3 Pole (15) Connector to a straight line as shown. Assemble the remaining Top G3 Pole (15) in the same way. Spread out G3 Pole and Joint each section to one straight line. Spread the Netting (17) on the trampoline bed, insert a Top G3 Pole (15) into the opening of Top Sleeve on the Netting (17).
- Page 21 Note: During steps 12 and 13, you will “sew” the lower edge of the Netting(17) to the V-rings on the bed using the Cords(19). Locate the V-ring closest to the door. Thread one end of a Cord(19) through the lower edge of the Netting(17) above the V-ring and then thread the Cord through the V-ring.
- Page 22 Stake It is possible for the trampoline/enclosure be blown about by high wind. If you anticipate high winds, the trampoline/enclosure should be moved to a sheltered location, disassembled, or tied down to the ground with ropes and stakes (not included). At least three ropes and three stakes should be used.
- Page 23 Toprail layout T-Connector+Welded tube T-Connector Bottom Enclosure pole Top Tube(With T-connector + Welded Top Enclosure pole tube marking A) Self-tapping screw Top Tube(With T-connector marking B) G3 Pole (Black) Top Tube(With T-connector + Welded Hemisphere Cap ( This part has been atta- tube marking C) ched to the top of the Top Tube (13).) Netting with attached Hardware...


Need help?
Do you have a question about the JKOV1517SL2 and is the answer not in the manual?
Questions and answers