Advertisement
Quick Links
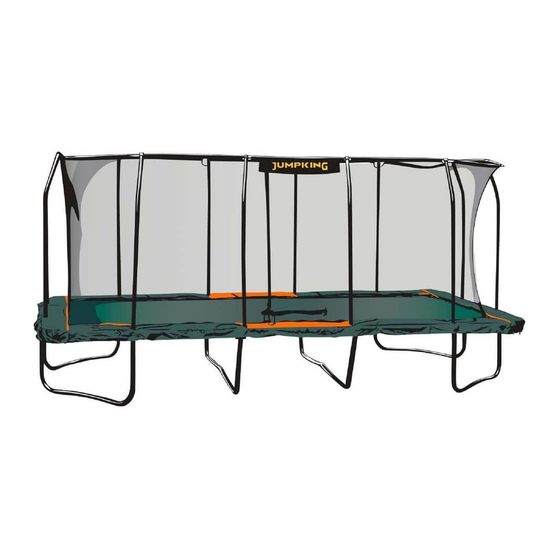
10ft x 18ft Rectangle
Trampoline and Enclosure
The trampoline / enclosure is designed for users weighing 181kg (400lbs) or less.
Got a Problem building your trampoline?
Please contact us at contact@jumpking.com
WARNING: Read these assembly instructions carefully
before attempting to assemble or use this product. Keep
this user guide in a safe place for future reference.
Jumpking
3970 Lindbergh Drive Addison, TX 75001
®
User Guide
Model: JKRC1018HEC3
Advertisement

Related Manuals for Jumpking JKRC1018HEC3


Summary of Contents for Jumpking JKRC1018HEC3
- Page 1 Model: JKRC1018HEC3 The trampoline / enclosure is designed for users weighing 181kg (400lbs) or less. Got a Problem building your trampoline? Please contact us at contact@jumpking.com WARNING: Read these assembly instructions carefully before attempting to assemble or use this product. Keep this user guide in a safe place for future reference.
- Page 2 10ft x 18ft Rectangle Trampoline and Enclosure Model: JKRC1018HEC3 If you have questions after IMPORTANT PRECAUTIONS ......
- Page 3 181 kg (400 lbs)
- Page 4 1. Trained Spo er supervision is recommended. 2. Must place the trampoline on lawn, bark wood chip, sand or cushioning materials. 3. Maintain a free space of minimum 8.2� on all sides of the trampoline. This area should not included concrete, bitumen, brick or other hard surfaces as these can cause serious injuries.
- Page 5 24. Learn fundamental bounces and body posi ons thoroughly before trying more advanced skills. A variety of trampoline ac vi es can be carried out by performing the basic fundamentals in various series and combina ons, performing one fundamental a er another, with or without feet bounces between them. 25.
- Page 6 WARNING Do not attempt or allow Do not allow more than one person somersaults. Serious injuries, on the trampoline at a time. paralysis, or death may result. To reduce the chance of landing on your head or neck, do not do somersaults(flips). Use trampoline only with mature, knowledgeable supervision.
- Page 7 Thank you for selecting a Jumpking trampoline If you have questions after reading this manual, / enclosure. “Jumpking” is designed and crafted please visit our websites at www.jumpking.com. to provide many years of fun and fitness. This trampoline / enclosure comes equipped with...
-
Page 15: What You Will Need
BUILDING YOUR TRAMPOLINE 1. This is a 2 person build. 2. Time for build is approximately 2 hours. 3. Choose a good location: (wood chippings, sand or grass). (7.3m) from ground level, away from wires, trees and other possible hazards. (2.5m) around sides, away from walls, fences, structures, roads and other hard surfaces and play areas. -
Page 16: Parts List
PARTS LIST Part 1 Part 2 Part 3 Part 5 Part 6 Part 4 Leg center corner Top tube A Top tube C Corner tube F Leg side middle Part#LCC101618HE Part#TRA101618HE Part#TRC101618HE Leg side corner Part#TRF101618HE Quantity: 2 Part#LSM101618HE Quantity: 4 Quantity: 4 Quantity: Part#LSC101618HE... - Page 17 Support Support Connector Connector Support Support Connector Connector...
- Page 18 Marked A Marked E Marked F Support Connector...
- Page 19 Support Connector Support Connector...
- Page 29 Turn over the Center Support Section. Top Tube B will be inserted into T-connectors with 2 welded tubes.
- Page 30 Turn over 2 corner sections then insert each end of Top Tube A into T-connector w/ 1 welded tube on Top tube B.
- Page 31 Then insert one end of both remaining Top Tubes B into the other T-connector w/ 2 welded tubes.
- Page 32 Next turn over remaining 2 corner sections. Insert each end of Top Tube B into T-connector w/ 1 welded tube. Note: Please keep Top tube C insert into top tube E later after jumping bed attached.
- Page 34 x116 (8.5” length) x8 (5.5” length)
- Page 35 Lay the stitched bed (with the V-rings) out inside the frame of the trampoline with the warning labels facing upwards. Warning label...
- Page 36 5.5” length spring Then take 4 of the 5.5" springs and use the spring pulling tool to insert one end into trampoline frame after connecting the other end to the V-ring. Place in the 1st corner than go to the next corner and repeat this step.
- Page 37 Then with the remaining each on of 5.5" springs on each corners, repeat previous step going clockwise.
- Page 38 Take the remaining Top Tube C and insert each end into T-connector w/ 1 welded tube. Now your frame is assembled.
- Page 39 Then with the remaining 4 5.5" springs, repeat previous step going clockwise. 5.5” length spring...
- Page 40 8.5” length spring Top spring holes Next you will use 16 8.5" springs and place 4 into top spring holes in the frame in position 1, then 2 (diagonally across), then 3 & finally 4 (diagonally across).
- Page 41 8.5” length spring Top spring holes Next you will use 16 8.5" springs and place them in the center top holes on the short sides with 8 each in positions 1 & 2.
- Page 42 Top spring holes...
- Page 43 Once finished, all Top Springs in the center of the trampoline should look like this.
- Page 44 Bottom spring holes...
- Page 45 Bottom spring holes...
- Page 48 Lay one long side of the pad out over the edge of the frame with the ties facing downwards. Align the openings in the frame pad with the T-connector+welded tube’s on the frame.
- Page 49 Repeat previous step with the other long side of pad.
- Page 50 Lay one short side of the pad out over the edge of the frame with the ties facing downwards. Align the openings in the frame pad with the T-connector+welded tube’s on the frame.
- Page 51 Repeat previous step with the other short side of pad.
- Page 52 Look under the trampoline and locate the pairs of straps near the edge of bed near the frame. Tie each of these around the frame to secure the pad in place. Now your frame pad is installed.
- Page 55 Insert the thin end on one of the bottom enclosure tubes into the open end of one of top enclosure tubes. Align the hole in the bottom enclosure tube with the slot in the top enclosure tube. Use a Phillips head screwdriver to secure a self tapping screw in place. Repeat for all remaining poles.
- Page 56 Slide the foam sleeve up to cover where enclosure poles are connected. Repeat for all poles.
- Page 57 Insert all 12 assembled enclosure poles into T-connectors with welded tubes. Please make sure the pole completely inserted into T-connector+welded tube.
- Page 67 IMPORTANT: Make sure that all poles are all the way down.
- Page 68 Continue to do this until you have used up nearly all the cord then tie the end round a V-ring.
- Page 70 181kg...
-
Page 71: Spare Parts
SPARE PARTS 4 13 14 Qty. Description Qty. Description L-Leg Top tube B Center Support L-leg Top tube D V-leg Top tube E Top tube A Enclosure netting Top tube C Safety frame pad Corner tube F Jumping bed T-connector with welded tube 8.5 inch spring T-connector with 2 welded 5.5 inch spring...
Need help?
Do you have a question about the JKRC1018HEC3 and is the answer not in the manual?
Questions and answers