Table of Contents
Advertisement
Quick Links
Advertisement
Table of Contents

Related Manuals for Kogan KAMOP151STMA


Summary of Contents for Kogan KAMOP151STMA
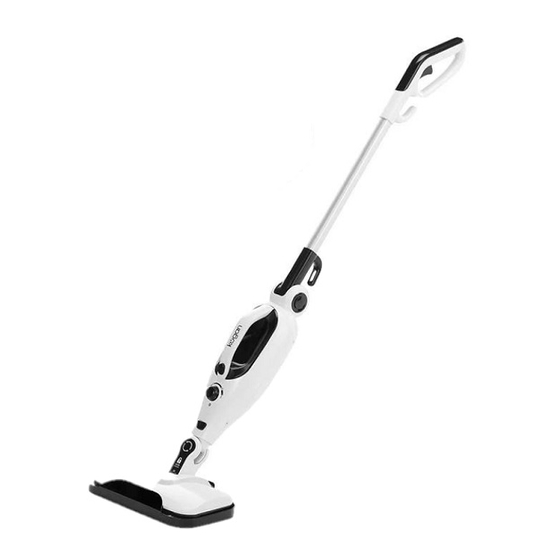
- Page 1 PREMIUM 15-IN-1 STEAM MOP KAMOP151STMA...
-
Page 3: Safety And Warnings
SAFETY & WARNINGS WARNING: To reduce the risk of fire, electrical shock, or injury, the following basic safety precautions should always be followed when using an electrical appliance. • Read all instructions before using the appliance and retain for reference. •... - Page 4 Always allow the appliance to cool completely (at least 5 minutes) before storing. Follow instructions in the Cleaning & Care section of this user guide. • This appliance contains no user-serviceable parts. If it suffers any failure or damage, cease use and contact help.kogan.com before further use.
- Page 5 COMPONENTS Long handle Water cup Small brush attachment Steamer unit Hose Large brush Mop head Microfibre cloths Wire bristle brush (with microfibre pad) (for use with window / upholstery tool and Carpet glider Steam wand steam wand) Water funnel Scraper tool Window/upholstery tool Utility nozzle Fine detail nozzle...
- Page 6 OVERVIEW Steam button Steam adjustment dial Accessory release button Steam outlet Water tank cap Anti-calc filter...
-
Page 7: Basic Operation
BASIC OPERATION Step 1: Filling water tank • Ensuring the device is turned off (Steam adjustment dial set to ‘Off’), remove the water tank cap (Figure 1a). • Using the supplied water cup (you may also use the funnel, not pictured), fill the water tank with water. - Page 8 Step 2: Starting the device • Make sure the device has been filled with water before turning on. Do not run dry. • Plug the power cord into a wall outlet and switch on. • Turn the Steam Adjustment Dial from ‘Off’ to your desired setting – the further the dial is turned toward ‘MAX’, the higher the steam intensity will be (Figure 2a).
- Page 9 ATTACHMENTS Connect to: Mop head Direct to unit Jet nozzle (Large adapter) Hose Jet nozzle Large Utility nozzle adapter (Large adapter) Steam wand Small Small brush accessory base Large brush Grout brush Scraper Small Utility nozzle adapter (Small adapter) Fine/detail nozzle Metal brush Metal grout brush Window/upholstery tool...
- Page 10 Long handle attachment • To use the steamer as a mop or to access high areas with the standard brushes, use the long handle attachment. • To insert the handle, align the stem of the handle with the opening at the back of the device, and push in until it clicks into place (Figure 3a).
- Page 11 Mop head • Align the mop head with the steam outlet opening on the device (Figure 4a), and push in until it clicks into place. • The mop head has a locking mechanism to secure it in place. To remove the mop head, press the release button at the front of the device to unlock, and pull back on the mop head until it detaches.
- Page 12 Jet nozzle / Large adapter • Align the jet nozzle with the steam outlet opening on the device (Figure 5a), and push in until it clicks into place. • The jet nozzle has a locking mechanism to secure it in place. To remove the jet nozzle, press the release button at the front of the device to unlock and remove the jet nozzle.
- Page 13 Hose • The hose attachment connects to the jet nozzle in a similar way to the utility nozzle (as shown in Figure 5b), however the hose can only be correctly secured if it is attached the right way up. • Look for the arrow icon on the hose ( ) and ensure it is in line with the jet nozzle before inserting.
- Page 14 Utility nozzle / Small adapter • Align the utility nozzle with the jet nozzle (look for the icon), insert, and rotate 90° until secured in place (Figure 7a). • To remove the utility nozzle, rotate 90° in the opposite direction and detach. Utility nozzle Jet nozzle (Small adapter)
- Page 15 Using Accessory Tools Utility nozzle Concentrated steam, suitable for use with cars to access difficult to reach stains. Removes dirt in hard- to-reach places. The utility nozzle doubles as the small accessory adapter. Brushes Hard-wearing for use on hard sealed surfaces. Always test before use.
- Page 16 Grout brushes Wide, straight brushes to tackle grout on tiled floors and surfaces. Lifts embedded dirt from between tiles and grouting. Scraper Suitable for scraping dried residue or getting into narrow corners. Fine/detail nozzle For small areas requiring delicate attention to detail, this fine/detail nozzle is ideal.
-
Page 17: Operation Tips
OPERATION TIPS Before first use Note that there may be residual water traces in the tank: this is due to quality control testing and does not indicate a defect with the product. For all usage modes • When mopping, we recommend using the long handle attachment to allow an upright position. - Page 18 Setting the steam adjustment dial Below is a general listing of some of the possible uses for the steamer and their recommended adjustment dial settings. These are only intended as general guidelines for using your steamer and not a complete list. •...
- Page 19 Steam mopping • Use a steady back-and-forth motion over the floor, pushing the mop away and pulling it back towards you. Work your way back over the floor, to avoid walking over the freshly mopped area. • While the microfibre pad will absorb most moisture during mopping, depending on the floor surface and steam intensity setting some residual moisture may be left behind.
- Page 20 Fabric steaming • For fabrics and linens, direct the unit (using the steam wand attachment) towards the material you wish to steam and keep the flow of steam focused there. Using a slight back-and-forth motion over the area you are steaming will further enhance the steaming process.
- Page 21 Anti-Calc filter On the bottom of the device is an anti-calc filter, which is used to soften water that is high in calcium and magnesium. If you live in an area with bore water or treated town water, you may have hard water. Using the anti-calc filter will assist with this. Signs that your water is hard may include difficulty achieving lather with soap or cleaning products, or a white build up on bathroom or kitchen areas such as shower screens, taps, or kettles.
-
Page 22: Cleaning And Care
CLEANING & CARE Storing after use • Unplug the power cord from the electrical outlet after steaming. • Allow unit time to cool (at least 5 minutes). • When cooled down, remove all accessories from the unit. To remove the mop head, press the release button at the front of the device to unlock, and pull back on the mop head until it detaches. - Page 23 Cleaning water tank • Use measuring cup to make a mixture of approximately 100ml distilled water and 50ml vinegar. • Slowly pour the water-vinegar solution into water tank via fill hole then replace water tank cap. • Plug-in power cord set steam adjustment dial to Max and spray full contents of water tank into a sink or tub.
-
Page 24: Troubleshooting
TROUBLESHOOTING Issue Possible Cause Troubleshooting Residue in the water tank The residue left over from This is normal and not cause (first use). quality control testing. for concern. Plug electrical cord into an Unit is not plugged in or electrical outlet, and turn the turned on. -
Page 25: Specifications
SPECIFICATIONS Dimensions 1102 x 300 x 207mm Cord length 5 metres Maximum temperature 100 - 105°C Water tank capacity 380ml Input voltage 220 - 240V Power 1500W... - Page 26 NOTES...
- Page 27 NOTES...
- Page 28 Need more information? We hope that this user guide has given you the assistance needed for a simple set-up. For the most up-to-date guide for your product, as well as any additional assistance you may require, head online to help.kogan.com...
Need help?
Do you have a question about the KAMOP151STMA and is the answer not in the manual?
Questions and answers