Advertisement
Quick Links
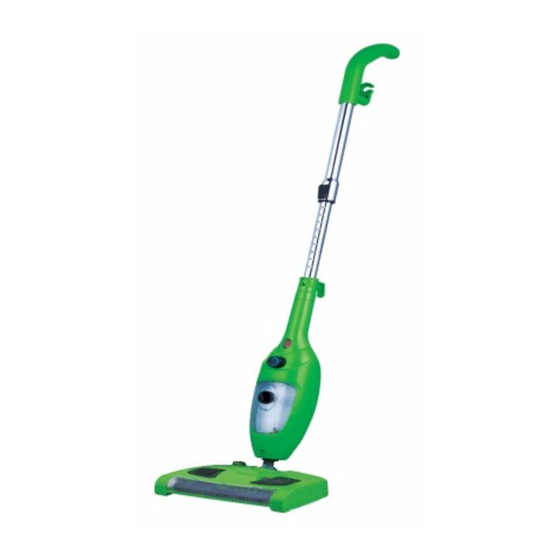
11-in-1 Steam Mop Sweeper
KASWPSTM11A
Quick Start Guide
Table of Contents
Safety & Warnings ............................................................................................................................................. 2
Overview ............................................................................................................................................................... 4
Assembly Instructions ..................................................................................................................................... 5
Operation ............................................................................................................................................................ 10
Cleaning & Care ................................................................................................................................................ 19
Troubleshooting ................................................................................................................................................ 21
In The Box ........................................................................................................................................................... 22
1
Advertisement

Related Manuals for Kogan KASWPSTM11A


Summary of Contents for Kogan KASWPSTM11A
-
Page 1: Table Of Contents
11-in-1 Steam Mop Sweeper KASWPSTM11A Quick Start Guide Table of Contents Safety & Warnings ............................. 2 Overview ................................4 Assembly Instructions ............................. 5 Operation ................................10 Cleaning & Care ..............................19 Troubleshooting ..............................21 In The Box ................................22... -
Page 2: Safety & Warnings
10. Do not use with a damaged cord or plug. If the steam cleaner is not working as it should, or may have been dropped, damaged, left outdoors or immersed in water, contact Kogan.com Support. If the supply cord is damaged, it must be replaced by the manufacturer or a qualified repair facility to avoid hazard. - Page 3 27. Do not expose to rain. 28. Stop using the steam cleaner if you observe water leakage and contact Kogan.com Support. 29. Do not use on leather, wax polished furniture or floors, unsealed hardwood or parquet floors, synthetic fabrics, velvet or other delicate steam-sensitive materials.
-
Page 4: Overview
Overview... -
Page 5: Assembly Instructions
Assembly Instructions How to Assemble the Steam Mop Sweeper Please make sure that the unit is unplugged from an electrical outlet and the steam switch and brush switch are in the “OFF” position before assembling the unit or changing the accessories. 1) Attach the head to the main body as follows: Insert the swivel joint into designated hole in the main body until it locks in place with the lock button on the main body. - Page 6 How to Assemble Hand-held Steamer Make sure that the steam cleaner is unplugged before assembly. 1) Remove the power supply cord from the upper cord wrap as illustrated below. 2) Press the telescopic handle lock button and remove the telescopic handle and the curved handle from the main body.
- Page 7 4) To attach the jet nozzle: Insert the jet nozzle into the designated hole in the main body unit until it locks in place with the lock button on the main body (you will hear a clicking sound when locked) as illustrated in Fig. 4a below. Ensure the jet nozzle is securely locked in place before use.
- Page 8 Make sure that the extension hose is securely locked into place before use. Window cleaning tool: 2. Loosen up the drawstring on the coral cloth, install the coral cloth onto the designated hooks on the window cleaning tool frame and pull up the draw string to secure the coral cloth in place.
- Page 9 Duster: 6. Install the cleaning coral cloth onto the duster frame. (As illustrated in Fig. 6a and 6b) 7. Attach the duster frame to the extension hose as follows: Align the lock button on the extension hose with the designated hole on the duster frame and then push in the extension hose until it locks in place.
-
Page 10: Operation
Operation How to Use the Steam Mop Sweeper Please read the instructions carefully before using the appliance. The steam mop sweeper is designed to thoroughly clean floor surfaces, such as ceramic tile, carpet, vinyl, marble, stone, linoleum and sealed hardwood floors and parquet. Not all floor types are suitable for steam cleaning. - Page 11 Replace the water tank cap and turn clockwise approximately 90° to the “CLOSE” position until the cap is tightened securely. The steam mop sweeper uses tap water, however, in areas with hard water, distilled water should be used for better performance. Make sure the copper cone inside the water tank is always submerged in water (as illustrated in Fig.
- Page 12 1) Turn on the brush switch to activate the brush. 2) To empty the dust bin, turn the power off and pull the dust bin from the side of head. Empty it into a trash can. The dust bin may be warm to touch. 3) Replace the dust bin by pushing it back into the head until it snaps back into place.
- Page 13 • Never steam one spot for too long. This can cause floor surface damage. • Do not put hands or feet under the steam cleaner. Unit gets very hot. • During use, a pulsing noise may be heard indicating that the mop is producing steam.
- Page 14 4. Slowly pass over the surfaces to be cleaned. Apply steam liberally. Keep a towel handy and wipe away any excess water that may accumulate. 5. When the hand-held steamer stops emitting steam, simply turn OFF and unplug the unit, refill the water tank and continue cleaning. To sanitise your work surfaces, kitchen countertops, sinks, bathrooms, etc.
- Page 15 Do not pull on the extension hose with excessive force. Pulling on the extension hose with excessive force will damage it, possibly resulting in a steam leak. Danger of Scalding Do not touch the window cleaning tool/coral cloth during use, as these components can get extremely hot.
- Page 16 Please refer to label on item of clothing to check if garment can be steamed. Some fabrics like leather, suede and velvet may not be suitable for steaming. If you are not sure, then steam a small part of the garment to test that it does not damage the fabric before steaming the entire garment or fabric.
- Page 17 6. Slowly pass over surface to be cleaned. The absorbent coral cloth picks up the dirt loosened by the steam. Keep a towel handy and wipe away any excess water that may accumulate. Do not pull on the extension hose. Pulling the extension hose with excessive force will damage it, possibly resulting in a steam leak.
- Page 18 Danger of scalding Do not touch the window cleaning/garment steamer tool or the garment steaming cloth during usage, as these components can get extremely hot. Keep the extension hose away from your body and avoid touching the hose, as it can get hot. When the hand-held steamer stops emitting steam, simply turn off and unplug the unit, refill the water tank and continue cleaning.
-
Page 19: Cleaning & Care
Cleaning & Care Be sure that both switches are in off position and the unit is disconnected from the power outlet when performing cleaning. Drain the remaining water in the tank and clean the tank after every use. Please use detergent to clean the accessories (jet nozzle and round brush) when they are dirty, then wash with clean water and air dry. - Page 20 By using cleaning solution: Prepare a solution of 1/3 white vinegar and 2/3 tap water and add to the water tank. 2. Secure and position the unit to ensure steam released is aimed away from the floor or surrounding objects and surfaces. Plug the unit in, turn the unit ON by pressing the steam switch (O/I) and allow the unit to produce steam until the vinegar/water solution is used up.
-
Page 21: Troubleshooting
Troubleshooting To reduce the risk of fire, electric shock or injury, unplug the appliance from outlet before servicing. Problem Possible cause Solution The unit does not power on The unit is not plugged in Make sure the unit is or turned ON. plugged into a proper outlet and the switch is ON (I). -
Page 22: In The Box
Measuring Cup Cleaning Pin Optional Accessories Window Cleaning Garment Steaming Cloth Cloth Extension Hose for the Hand-Held Duster Window Cleaning Tool Steamer User manual is subject to change without notice. For the latest version of your user manual, please visit https://www.kogan.com/usermanuals/...
Need help?
Do you have a question about the KASWPSTM11A and is the answer not in the manual?
Questions and answers