Table of Contents
Advertisement
Quick Links
Advertisement
Table of Contents

Related Manuals for Kogan KAMOP101STMA


Summary of Contents for Kogan KAMOP101STMA
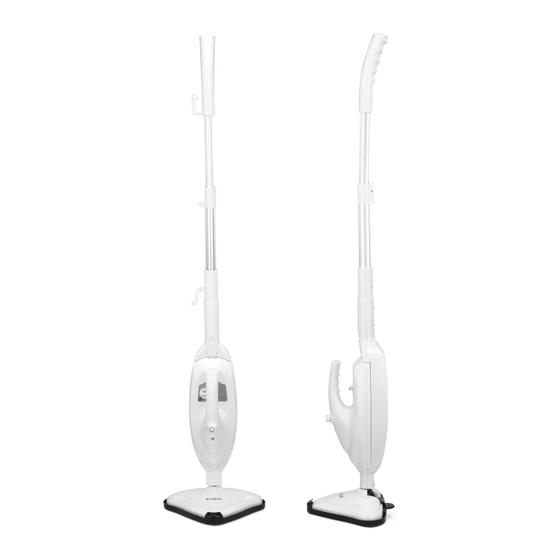
- Page 1 13-IN-1 STEAM MOP KAMOP101STMA...
-
Page 3: Safety And Warnings
This appliance has been designed for domestic use only. It must only be used in accordance with these instructions. Kogan.com will not be held responsible for any damage caused by improper or misuse of the appliance. Commercial use of this unit voids the warranty. - Page 4 • If the product, power supply cord or plug shows any signs of damage: stop use, unplug and contact Kogan.com support. • Never put hot water or any other liquids such as aromatic, alcoholic or detergent products into the unit water tank. This will make the operation unsafe and damage the unit.
- Page 5 • Do not use for space heating purposes. • Do not touch the hot surface. • Do not let cord hang over the edge of table or counter or touch hot surfaces. • Do not place on or near a hot gas or electric burner or in a heated oven. •...
-
Page 6: Assembly Instruction
ASSEMBLY INSTRUCTION Warning: Please make sure that the unit is unplugged from an electrical outlet. Attaching the Mop Head to The Main Body Insert the swivel joint into the designated hole in the main body and use a screw to fit tightly in place. -
Page 7: Hand-Held Steamer
Place the microfiber cloth over the bottom of the mop head, ensuring that the elastic holds the cloth securely to the head. Hand-Held Steamer The hand-held steamer is an ideal portable cleaner. It is there for you to detach and use on work surfaces, kitchen countertops, sinks, bathrooms, windows, mirrors, tiles as well as spot cleaning on floor carpets and rugs. - Page 8 Unlock the button on the extension hose and take out the hand-held steamer. Assembling the Accessories Note: After assembly of each accessory, add water in the tank up to the MAX level by using the measuring cup. Turn the knob of the water tank to the “lock” position. Select the desired temperate from “MIN”...
- Page 9 Window Cleaning Tool Loosen up the drawstring on the coral cloth and install the coral cloth onto the designated hooks on the window cleaning tool frame and pull up the drawstring to secure the coral cloth in place. Note: Do not cover the squeegee blade. Make sure to hook up the coral cloth to all hooks on the cleaning tool frame so it doesn’t slip or fall from the frame during use.
-
Page 10: Garment Steamer
Garment Steamer Use the window cleaner tool as a garment steamer. Install the microfiber cloth or the lint cloth over the window cleaning/ garment steamer tool. Black Tag Back Side Attach the garment steaming tool to the extension hose as follows: Aligning the lock button on the extension hose with the designated hole on the garment steaming tool frame and then push the extensions hose until it locks into place. - Page 11 Duster Install the cleaning coral cloth onto the duster frame. Attach the duster frame to the extensions hose as follows: Aligning the lock button on the extension hose with the designated hole on the duster frame and then push in the extension hose until it locks into place.
-
Page 12: Straight Nozzle
Table Cleaner Attach the main steamer to the square brush until it locks into place. Place the square cloth on the bottom of the square head and make sure all the loops on the cloth are aligned with the gripping hooks on the bottom of the square head. Note: Press the two buttons on the square brush to take off the main steamer. - Page 13 Bend Nozzle Attach the bend nozzle by screwing it onto the straight nozzle that is connected to the extension hose. After Use Unplug the power cord from the outlet. Allow mop pad to cool down before carefully remove cleaning cloth from the mop head, as cleaning cloth could still be hot.
-
Page 14: Operation
OPERATION Using the Steam Mop Please read before use: • The unit is designed to thoroughly clean floor surfaces such as marble, ceramic, carpet, stone, linoleum, sealed hardwood floor and parquet. Not all floor types are suitable for steam cleaning. •... - Page 15 Fill the water tank with water. Make sure that the unit is unplugged. Turn the water tank cap counterclockwise to the open off position and remove the cap as illustrated below. Hold the mop at a 45-degree angle and add water in the tank up to the MAX level by using the measuring cup.
-
Page 16: Cleaning And Care
CLEANING & CARE Warning: Be sure that the unit is disconnected from the power outlet when performing user maintenance. Do not immerse the unit in water. Drain the remaining water in the tank and clean it after every use. Please use detergent to clean the accessories (jet nozzle and round brush) when they are dirty, then wash them with clean water and dry them in air. -
Page 17: Troubleshooting
TROUBLESHOOTING Warning: To reduce the risk of fire, electric shock or injury, unplug appliance from outlet before service. Problem Possible Cause Possible Solution Make sure the unit is The unit is not plugged in or The unit does not power up plugged into a proper outlet turned ON and switched is ON. - Page 18 Need more information? We hope that this user guide has given you the assistance needed for a simple set-up. For the most up-to-date guide for your product, as well as any additional assistance you may require, head online to help.kogan.com...
Need help?
Do you have a question about the KAMOP101STMA and is the answer not in the manual?
Questions and answers