Mitsubishi MELSEC-A A2USHCPU-S1 User Manual
Hide thumbs
Also See for MELSEC-A A2USHCPU-S1:
- User manual (160 pages) ,
- Programming manual (538 pages)
Table of Contents
Advertisement
Advertisement
Table of Contents
Troubleshooting

Related Manuals for Mitsubishi MELSEC-A A2USHCPU-S1


Summary of Contents for Mitsubishi MELSEC-A A2USHCPU-S1
- Page 3 SAFETY PRECAUTIONS (Be sure to read these instructions before use.) Before using the product, read this and relevant manuals carefully and handle the product correctly with full attention to safety. In this manual, SAFETY PRECAUTIONS are classified into 2 levels: "DANGER" and "CAUTION". Indicates that incorrect handling may cause hazardous conditions, resulting in DANGER death or severe injury.
- Page 4 [DESIGN PRECAUTIONS] DANGER If load current more than the rating or overcurrent due to a short circuit in the load has flowed in the output module for a long time, it may cause a fire and smoke. Provide an external safety device such as a fuse.
- Page 5 [DESIGN PRECAUTIONS] CAUTION Do not install the control lines or communication cables together with the main circuit or power lines, or bring them close to each other. Keep a distance of 100mm (3.94inch) or more between them. Failure to do so may cause malfunctions due to noise. When an output module is used to control the lamp load, heater, solenoid valve, etc., a large current (ten times larger than the normal one) may flow at the time that the output status changes from OFF to ON.
- Page 6 [WIRING PRECAUTIONS] DANGER Be sure to shut off all phases of the external power supply used by the system before wiring. Failure to do so may result in an electric shock or damage of the product. Before energizing and operating the system after wiring, be sure to attach the terminal cover supplied with the product.
- Page 7 [STARTUP AND MAINTENANCE PRECAUTIONS] DANGER Do not touch any terminal during power distribution. Doing so may cause an electric shock. Properly connect batteries. Do not charge, disassemble, heat or throw them into the fire and do not make them short-circuited and soldered.
- Page 8 CAUTION When performing online operations (especially, program modification, forced output or operating status change) by connecting a peripheral device to the running CPU module, read the manual carefully and ensure the safety. Incorrect operation will cause mechanical damage or accidents. Do not disassemble or modify each of modules.
- Page 9 [DISPOSAL PRECAUTIONS] CAUTION When disposing of the product, treat it as an industrial waste. When disposing of batteries, separate them from other wastes according to the local regulations. (For details of the battery directive in EU member states, refer to Appendix 7.) [TRANSPORTATION PRECAUTIONS] CAUTION When transporting lithium batteries, make sure to treat them based on the transportation regulations.
- Page 10 Revision *The manual number is given on the bottom left of the back cover. Print Date *Manual Number Revision Jun., 1997 IB(NA)-66789-A First edition Jun., 2002 IB(NA)-66789-B Equivalent to the Japanese version C Correction SAFETY PRECAUTIONS, Chapter 1, Section 1.2, Section 2.1, 2.2.1, 2.2.2, 2.2.3, 2.3, Chapter 3, Section 4.1.4, 4.2.2, 4.2.5, Section 5.1, 5.2, Section 6.1.2, 6.1.3, Section 7.1.1, 7.1.5, Section 8.1, Chapter 9, Section 10.3.2, Appendix 2.1, 2.2, Appendix 4.2...
- Page 11 This manual confers no industrial property rights or any rights of any other kind, nor dose it confer any patent licenses. Mitsubishi Electric Corporation cannot be held responsible for any problems involving industrial property rights which may occur as a result of using the contents noted in this manual.
-
Page 12: Table Of Contents
Introduction Thank you for purchasing the Mitsubishi programmable logic controller MELSEC-A Series. Prior to use, please read this manual thoroughly to fully understand the functions. Please hand in a copy of this manual to the end user. Table of Contents... - Page 13 POWER SUPPLY MODULE 5 - 1 to 5 - 5 Specifications ..........................5 - 1 5.1.1 Power supply module selection.....................5 - 3 Part Names ...........................5 - 4 BASE UNIT AND EXTENSION CABLE 6 - 1 to 6 - 10 Specifications ..........................6 - 1 6.1.1 Base unit specifications......................6 - 1 6.1.2...
- Page 14 9.1.5 Ferrite core..........................9 - 9 9.1.6 Noise filter (power supply line filter) ..................9 - 10 9.1.7 Power line for external power supply terminal ..............9 - 10 Requirements for Compliance with Low Voltage Directives............9 - 11 9.2.1 Standard applied for MELSEC-AnS series programmable controller .........9 - 11 9.2.2 Precautions when using the MELSEC-AnS series programmable controller......9 - 11 9.2.3...
- Page 15 Appendix 4 Precautions for Utilizing the Existing Sequence Programs for A2USHCPU-S1, A2USCPU(S1), or A2ASCPU(S1/S30) ..............App - 51 Appendix 4.1 Instructions with different specifications............App - 52 Appendix 4.2 Special relays and special registers with different specifications...... App - 53 Appendix 4.3 Parameter setting....................
- Page 16 About This Manuals The following manuals are related to this product. Related Manuals Manual No. Manual Name (Model Code) ACPU/QCPU-A (A mode) Programming Manual (Fundamentals) IB-66249 Describes programming methods necessary for creating programs, device names, parame- (13J740) ters, program types, memory area configuration, and so on. (Sold separately) ACPU/QCPU-A (A mode) Programming Manual (Common Instructions) IB-66250...
- Page 17 USER PRECAUTIONS Precautions when using the AnS series For a new CPU module, which has never used before, the contents of built-in RAM and device data are undefined. Make sure to clear the built-in RAM memory (PC memory all clear) in the CPU module by peripheral devices and operate latch clear by RUN/STOP key switches.
- Page 18 Memo A - 16...
-
Page 19: Overview
OVERVIEW OVERVIEW This User's Manual describes the performance, functions, and handling methods of the A2USHCPU-S1 general-purpose PLC (abbreviated as A2USHCPU-S1 hereafter), A2USCPU/A2USCPU-S1 general-purpose PLC (abbreviated as A2USCPU(S1)) and A2ASCPU/A2ASCPU-S1/A2ASCPU-S30 general-purpose PLC (abbreviated as A2ASCPU(S1/S30)) as well as the specifications and handling of the memory cassette, power supply and the base unit. -
Page 20: Features
OVERVIEW Features The A2USHCPU-S1/A2USCPU(S1)/A2ASCPU(S1/S30) has the following features. Increment of the program capacity • A2USHCPU-S1/A2ASCPU-S30 : 30k steps • A2USCPU(S1)/A2ASCPU/A2ASCPU-S1 : 14k steps Improvement of the operation speed (sequence instructions) • A2USHCPU-S1 : 0.09 s/steps • A2USCPU(S1)/A2ASCPU(S1/S30) : 0.2 s/steps Bytes of built-in RAM memory •... - Page 21 OVERVIEW Can execute the dedicated instructions for the AnA/AnUCPU. Dedicated instructions for AnA/AnUCPU, AD57 instructions, and PID control instructions can be executed. 1 - 3...
-
Page 22: A2Ushcpu-S1, A2Uscpu(S1), A2Ascpu(S1/S30) Performance/Specification Comparisons
OVERVIEW A2USHCPU-S1, A2USCPU(S1), A2ASCPU(S1/S30) Performance/Specification Comparisons The differences in the performance and specifications between A2USHCPU-S1, A2USCPU(S1) and A2ASCPU(S1/S30) are as follows. A2USHCPU-S1, A2USCPU(S1) and A2ASCPU(S1/S30) performances/specifications are the same but the following items. Item A2USHCPU-S1 A2USCPU(S1) A2ASCPU(S1/S30) I/O control mode Refresh mode Refresh mode Refresh mode... -
Page 23: System Configuration
SYSTEM CONFIGURATION SYSTEM CONFIGURATION The possible system configuration with A2USHCPU-S1, A2USCPU(S1), A2ASCPU(S1/ S30), and the precautions when the system is configured, and system conponents are described. Overall Configuration The system configurations of the A2USHCPU-S1, A2USCPU(S1), A2ASCPU(S1/S30) stand-alone systems and peripheral devices are shown as follows: To peripheral devices A2USHCPU-S1, A2USCPU(S1), A2ASCPU(S1/S30) Battery (A6BAT) - Page 24 SYSTEM CONFIGURATION AC30R4 (To CPU module) AC300R4 cable A6PHP Plasma hand-held graphic programmer Printer AC30R2 A6GPP (A7NPR-S1,K6PR-K, cable intelligent GPP general-purpose printer) A7PUS programming unit AC30R4-PUS cable A8PUE programming unit AC20R4-A8PU cable IBM-PC/AT-compatible RS-232C personal computer RS-422 converter When using an IBM-PC/AT-compatible personal A6DU-B computer, refer to the system configuration sections of AC30R4-PUS...
-
Page 25: Precautions When Configuring The System
SYSTEM CONFIGURATION Precautions When Configuring the System The hardware and software packages which can be used for the CPU module are described. 2.2.1 Hardware I/O module All the building-block-type I/O modules for A N and A A can be used by installing them to the extension base unit of A5 B/A6 B. - Page 26 SYSTEM CONFIGURATION Special function module (a) Special function modules for A N and A A can be used by installing them in the extension base of A5 B/A6 B. (b) Installation count of the following modules are limited of the special function modules.
- Page 27 SYSTEM CONFIGURATION (c) When a remote I/O network is constructed with the MELSECNET/10 network system, use the A2USHCPU-S1 software of version "A" or later, and the AJ71LP21/LR21/BR11, A1SJ71LP21/BR11-type network software of version "J" or later. <Example> For AJ71LP21/BR11: (d) When a remote I/O network is constructed with the MELSECNET/10 network system, use the A2USCPU(S1), A2ASCPU, A2ASCPU-S1 software of version "D"...
- Page 28 SYSTEM CONFIGURATION Writing while running when operated by the E PROM (When the A2SNMCA-30KE is installed.) When "write while running " to the E PROM is executed, the program transfer in progress status is displayed on the peripheral device, then the processing for the sequence program is stopped for approximately two seconds until the transfer finishes to complete the "write while running ".
-
Page 29: Software Package
SYSTEM CONFIGURATION 2.2.2 Software package GPP function software packages and model name setting at the start-up The table below shows the GPP function software packages allowing you to create the A2USCPU program and PLC model settings at start-up. When creating a CPU module program, set the PLC type "A2USH-S1", "A2US (S1)", "A2AS(S1)"... - Page 30 SYSTEM CONFIGURATION NOTE For A2USHCPU-S1, A2ASCPU-S30 use caution on the followings. (a) Since the PLC's model name for the GPP function software package (SW IVD- GPPA; is older than 3 is set to "A3U", pay attention to the followings: 1) When the LED or LEDC instruction is written, it is not usable but no error will be issued.
- Page 31 SYSTEM CONFIGURATION Utility package None of the following utility packages for A6GPP/A6PHP can be used: SW -AD57P SW -UTLP-FN0 The packages marked with * can execute the same SW -UTLP-FN1 functions using the dedicated instructions. For details, refer to type AnSHCPU/AnACPU/ SW -UTLP-PID AnUCPU/QCPU-A (A Mode) Programming Manual SW -SIMA...
-
Page 32: Precautions When Using Gpp Function Software Packages And A8Pue Peripheral Devices Which Are Not Compatible With Anu, A2As
SYSTEM CONFIGURATION 2.2.3 Precautions when using GPP function software packages and A8PUE peripheral devices which are not compatible with AnU, A2AS When starting with GPP function software packages not compatible with the AnU, A2USH- S1, A2US, A2AS(S1), A2AS-S30 (starting with the PLC model name "A3A ", "A2A" or "A3H") or a A8PUE peripheral device (containing A7PUS), the usable device ranges are limited as follows. - Page 33 SYSTEM CONFIGURATION (b) For the A2USCPU(S1), A2ASCPU, A2ASCPU-S1 AnACPU-compatible module A3HCPU-compatible module Item Modules whose PLC model for Modules whose PLC model for A8PUE A7PUS system FD start-up is "A2A" system FD start-up is "A3H" Instruction (sequence/basic/ All instructions can be used. application/dedicated) Program capacity A maximum of 30k steps can be used for the main program.
-
Page 34: System Equipment
SYSTEM CONFIGURATION System Equipment Various components of each module and peripheral devices which can be used by the A2USHCPU-S1, A2USCPU(S1), A2ASCPU(S1/S30) are listed. Modules dedicated to AnS Number of occupied Current points (points) Consumption Product Name Model Name Description Remark [I/O allocation 5VDC(A) 24VDC(A) module type]... - Page 35 SYSTEM CONFIGURATION Number of occupied Current points (points) Consumption Product Name Model Name Description Remark [I/O allocation 5VDC(A) 24VDC(A) module type] A1SX10 16-point 100 to 120VAC input module [16 input points] 0.05 – A1SX10EU 16-point 100 to 120VAC input module [16 input points] 0.05 –...
- Page 36 SYSTEM CONFIGURATION Number of occupied Current points (points) Consumption Product Name Model Name Description Remark [I/O allocation 5VDC(A) 24VDC(A) module type] [16 output A1SY10 16-point relay contact output module (2A) 0.12 0.09 points] [16 output A1SY10EU 16-point relay contact output module (2A) 0.12 0.10 points]...
- Page 37 SYSTEM CONFIGURATION Number of occupied Current points (points) Consumption Product Name Model Name Description Remark [I/O allocation 5VDC(A) 24VDC(A) module type] 32-point 12/24VDC input module [32 output A1SH42 32-point 12/24VDC transistor output module 0.50 0.008 points] (0.1A) sink type 32-point 24VDC input module [32 output A1SH42-S1 32-point 12/24VDC transistor output module...
- Page 38 SYSTEM CONFIGURATION Number of occupied Current points (points) Consumption Product Name Model Name Description Remark [I/O allocation 5VDC(A) 24VDC(A) module type] Blank cover A1SG60 Dust-proof cover for unused slot [Empty] – – Specified number of points 16-point, 32-point, 48-point, 64-point selectable Dummy module A1SG62 –...
- Page 39 SYSTEM CONFIGURATION Number of occupied Current points (points) Consumption Product Name Model Name Description Remark [I/O allocation 5VDC(A) 24VDC(A) module type] For connecting to Pt100 (3-wire) [32 special A1S62RD3 0.49 – Temperature input, 2 channels points] Temperature/ For connecting to Pt100 (4-wire) [32 special digital converter A1S62RD4...
- Page 40 SYSTEM CONFIGURATION Number of occupied Current points (points) Consumption Product Name Model Name Description Remark [I/O allocation 5VDC(A) 24VDC(A) module type] Transistor output, thermocouple input 4 channels/modules [32 special A1S64TCRT-S1 0.33 – PID control: ON/OFF pulse or 2 positioning points] control Temperature Transistor output, thermocouple input...
- Page 41 SYSTEM CONFIGURATION Number of occupied Current points (points) Consumption Product Name Model Name Description Remark [I/O allocation 5VDC(A) 24VDC(A) module type] 1 axis positioning control, speed control and First half speed-positioning control, A1SD70 16 empty points – analog voltage output for speed-positioning Second half control (0 to 10V)
- Page 42 SYSTEM CONFIGURATION Number of occupied Current points (points) Consumption Product Name Model Name Description Remark [I/O allocation 5VDC(A) 24VDC(A) module type] For the control, master, and normal stations of [32 special A1SJ71LP21 the MELSECNET/10 data link module system 0.65 – points] (For the dual loop SI-type optical fiber cable) For the control, master, and normal stations of...
- Page 43 SYSTEM CONFIGURATION Number of occupied Current points (points) Consumption Product Name Model Name Description Remark [I/O allocation 5VDC(A) 24VDC(A) module type] [32 special A1SJ71PB92D PROFIBUS-DP master module 0.56 – points] PROFIBUS interface module [32 special A1SJ71PB96F PROFIBUS-FMS interface module 0.56 –...
- Page 44 SYSTEM CONFIGURATION Number of occupied Current points (points) Consumption Product Name Model Name Description Remark [I/O allocation 5VDC(A) 24VDC(A) module type] Large-size graphic operation terminal A985GOT 256 colors, TFT color, 800 600 dots, high intensity Large-size graphic operation terminal A975GOT 256 colors, TFT color, 640 480 dots, high intensity Large-size graphic operation terminal...
- Page 45 SYSTEM CONFIGURATION Number of occupied Current points (points) Consumption Product Name Model Name Description Remark [I/O allocation 5VDC(A) 24VDC(A) module type] A1S52B 2 I/O modules can be installed. A1S52B-S1 The power supply – – – module cannot be A1S55B installed. 5 I/O modules can be installed.
- Page 46 SYSTEM CONFIGURATION Product Name Model Name Description Applicable model Memory Direct writing to and reading from a peripheral device is PROM A2SNMCA-30KE With 30k-step E PROM (direct connection) cassette feasible. Installed in the A2USHCPU-S1, A2USCPU(S1), Battery A6BAT IC-RAM memory backup A2ASCPU(S1/S30) main unit For the sink-type input module and sink-type output A6TBXY36...
- Page 47 SYSTEM CONFIGURATION Product Name Model Name Description Applicable model IDC terminal block adapter for 32 points 0.5mm A1S-TA32 (AWG20) IDC terminal block IDC terminal block adapter for 32 points 0.3mm A1S-TA32-3 A1SX41(S1/S2), A1SX71, A1SY41, A1SY41P, A1SY71 adapter (AWG22) IDC terminal block adapter for 32 points 0.75mm A1S-TA32-7 (AWG18) Terminal block...
- Page 48 SYSTEM CONFIGURATION Peripheral device Product Name Model Name Remark • A6PHP main unit • SW GP-GPPA..GPP function start-up floppy disk for the A series. Plasma hand-held A6PHP-SET GPP function start-up floppy disk for the K series. • SW GP-GPPK..graphic programmer User floppy disk (2DD).
- Page 49 SYSTEM CONFIGURATION Product Name Model Name Remark K6PR-K Printer • For printing out program circuit diagrams and various lists. A7NPR-S1 Connection cable for between A6GPP/A6PHP and printer (K6PR-K, A7NPR-S1, RS232C cable AC30R2 and a general-purpose printer with RS-232C interface) 3m (9.84ft.) long K6PR-Y Printer paper for K6PR(S1) and K6PR-K.
-
Page 50: System Configuration Overview
SYSTEM CONFIGURATION System Configuration Overview There are four system configuration types as follows: Stand-alone system ..... A system with a main base unit only, or with a main base system and an extension base unit connected with the extension cable. Network system ..... - Page 51 SYSTEM CONFIGURATION (a) A2USHCPU-S1, A2USCPU-S1, A2ACPU-S1 and A2ASCPU-S30 system [When the AnS dedicated extension base is used] [When the A N, A A extension base is used] An example when the 64-point module is installed to An example when the 64-point module is installed to each slot is shown.
- Page 52 SYSTEM CONFIGURATION (b) A2USCPU, A2ASCPU system [When the AnS dedicated extension base is used] [When the A N, A A extension base is used] An example when the 32-point module is installed to An example when the 32-point module is installed to each slot is shown.
-
Page 53: Specifications
Do not use or store the programmable controller in the environment when the pressure is higher than the atmospheric pressure at sea level. Otherwise, malfunction may result. To use the programmable controller in high-pressure environment, please contact your local Mitsubishi representative. 3 - 1... -
Page 54: Cpu Module
CPU MODULE CPU MODULE Performance Specifications Performance specifications of CPU modules are shown below. (1) A2USHCPU-S1, A2USCPU, A2USCPU-S1 Performance specifications Model Item Remark A2USHCPU-S1 A2USCPU A2USCPU-S1 Control method Sequence program control method Instructions to enable I/O control mode Refresh mode partial direct I/O are available. - Page 55 CPU MODULE Performance specifications (Continued) Model Item Remark A2USHCPU-S1 A2USCPU A2USCPU-S1 Internal relay [M] 7144 points (M0 to M999, M2048 to M8191) The range can be Total 8192 shared by Latch relay [L] 1048 points (L1000 to L2047) changed by M, L, S parameters.
- Page 56 CPU MODULE Performance specifications (Continued) Model Item Remark A2USHCPU-S1 A2USCPU A2USCPU-S1 Comment Max. 4032 points (Set by the unit of 64 points) Set in parameters. Expanded comment Max. 3968 points (Set with the unit of 64 points) Select either re-output the operation status before stopping (default) or output Set in parameters.
- Page 57 CPU MODULE (2)A2ACPU, A2ASCPU-S1, A2ASCPU-S30 Performance specifications Model Item Remark A2ASCPU A2ASCPU-S1 A2ASCPU-S30 Control method Sequence program control method Instructions to enable I/O control mode Refresh mode partial direct I/O are available. Language dedicated to sequence control Programming language Relay symbol language, logic symbol language, MELSAP-II (SFC) Processing speed (sequence instruction) 0.2 s/step Constant scan...
- Page 58 CPU MODULE Performance specifications (Continued) Model Item Remark A2ASCPU A2ASCPU-S1 A2ASCPU-S30 Internal relay [M] 7144 points (M0 to M999, M2048 to M8191) The range can be Total 8192 shared by Latch relay [L] 1048 points (L1000 to L2047) changed by M, L, S parameters.
- Page 59 CPU MODULE Performance specifications (Continued) Model Item Remark A2ASCPU A2ASCPU-S1 A2ASCPU-S30 Comment Max. 4032 points (Set with the unit of 64 points) Set in parameters. Expanded comment Max. 3968 points (Set with the unit of 64 points) Select either re-output the operation status before stopping (default) or output Set in parameters.
-
Page 60: Overview Of Operation Processing
CPU MODULE 4.1.1 Overview of operation processing An overview of processing when starting power supply for the CPU module to execution of the sequence program is explained. CPU modules processing may be categorized roughly into the following four kinds: Initial processing This is a preprocess to execute sequence operations, and is performed only once upon power-on or reset. - Page 61 CPU MODULE (d) Executes the refresh processing when there is a refresh request from the network module or link module. (e) When the trace point setting of sampling trace is by each scan (after the execution of END instruction), stores the device status for which it is setup into the sampling trace area.
- Page 62 CPU MODULE POINT When executing the FROM/TO instruction for the special function module frequently in short scan time, it may cause the target special function module operation error. When executing FROM/TO instruction to the special function module, set the processing time and converter time by using such as a timer and a constant scan function of the special function module.
-
Page 63: Operation Processing Of Run, Stop, Pause, And Step-Run
CPU MODULE 4.1.2 Operation processing of RUN, STOP, PAUSE, and STEP-RUN The programmable controller CPU has four kinds of operation status: RUN status, STOP status, PAUSE status, and step operation (STEP-RUN) status. Operation processing of programmable controller CPU in each operation status is explained. - Page 64 CPU MODULE Operation processing of PLC CPU when RUN/STOP key switch is operated PLC CPU operation processing Operation Data memory Remark RUN/STOP key processing of a External output switch operation M, L, S, T, C, D sequence program Retains the condition OS saves the output Executes up to the OS saves the output...
-
Page 65: Operation Processing Upon Instantaneous Power Failure
CPU MODULE 4.1.3 Operation processing upon instantaneous power failure The PLC CPU detects a momentary power failure when input power voltage supplied to the power supply module becomes lower than the specified range. When the PLC CPU detects an instantaneous power failure, the following operation processing is performed. -
Page 66: Self-Diagnostics Functions
CPU MODULE 4.1.4 Self-diagnostics functions Self-diagnostics is a function with which a CPU module diagnoses itself for the presence of any abnormalities. In turning on the power supply to the PLC or when an abnormality occurred while the PLC is running, the CPU module's self-diagnostics processing prevents malfunctions of the PLC. - Page 67 CPU MODULE Error information confirmation screen of GX Developer Target error code: error message 1) Detail 2) Error step I/O module verify error module 31: UNIT VERIFY ERR. - ("0" is displayed) (Content of D9002) Fuse blown module No. 32: FUSE BREAK OFF - ("0"...
- Page 68 CPU MODULE When the self-diagnostics detects an error, the module will be in one of the two modes below: • Mode wherein operation of the PLC is stopped • Mode wherein operation of the PLC continues In addition, there are errors with which the operation can be selected to stop or to continue by the parameter setting.
- Page 69 CPU MODULE Self-diagnostics list CPU module Status of Contents of error Error code Diagnosis item Diagnosis timing status "RUN" LED indication (D9008) Instruction code check Upon execution of each instruction INSTRCT CODE ERR. • When switching ON or resetting Parameter setting check •...
-
Page 70: Device List
CPU MODULE 4.1.5 Device list Device means a general name for such as a contact, coil and timer used on the program operations in a PLC. Usage ranges and device names of the PLC are shown below. For * in the devices below, they can be used by setting the parameters on each peripheral device. - Page 71 CPU MODULE Device list (From the previous page) Range of usage (points) A2USCPU-S1 Device Description of device A2USHCPU-S1 A2ASCPU A2ASCPU-S1 A2ASCPU-S30 A2USHCPU-S1, A2USCPU, A2USCPU-S1 : D0 to D8191 (8192 points) Data register Memory used to store data inside programmable controller. A2ASCPU, A2ASCPU-S1, A2ASCPU-S30 : D0 to D6143 (6144 points) Special register...
-
Page 72: Parameter Setting Ranges
CPU MODULE Parameter Setting Ranges Parameter contents in the CPU modules and parameter setting ranges are explained below. 4.2.1 List of parameter setting range Parameters are used for allocating the user memory area inside the CPU module, setting various functions and device ranges. A parameter is usually stored in the first 3k bytes of the user memory area. - Page 73 CPU MODULE List of parameter setting range (From the previous page) Setting range Item Default value A2USHCPU-S1 A2USCPU A2USCPU-S1 A2ASCPU-S30 A2ASCPU A2ASCPU-S1 T0 to T199 256 points by 100ms, 10ms, and retentive timers (in 8 point units) (100ms) T0 to T255 T200 to Timers are serial numbered.
- Page 74 CPU MODULE List of parameter setting range (From the previous page) Setting range Item Default value A2USHCPU-S1 A2USCPU A2USCPU-S1 A2ASCPU-S30 A2ASCPU A2ASCPU-S30 Number of link 0 to 64 station(s) stations X/Y0 to X/Y3FF X/Y0 to X/Y1FF X/Y0 to X/Y3FF Link range I/O (X/Y) (in 16 point units) (in 16 point units)
-
Page 75: Memory Capacity Setting (For Main Program, File Register, Comment, Etc.)
CPU MODULE 4.2.2 Memory capacity setting (for main program, file register, comment, etc.) The CPU modules has the following user memory (built-in RAM) as a standard. • A2USHCPU-S1,A2USCPU-S1,A2ASCPU-S1, A2ASCPU-S30..........256k bytes • A2USCPU,A2ASCPU........64k bytes Parameters, T/C set value main program, MELSECNET/10 network parameters, expanded comment, file register, and comment data are stored in the user memory. - Page 76 CPU MODULE The capacity for network parameters of MELSECNET/10 changes depending on the contents set. The area for the network parameters shall be secured in 2k byte units based on the total of capacity for each setting. The memory capacity of each network parameter is as follows: Item Memory capacity (bytes) Internal data...
- Page 77 CPU MODULE Storing order in the user memory Each data set by the parameters are stored in the order shown below: Execute the memory protect after confirming that the write area during execution of the sequence program such as a file register is not in the range of memory protection.
- Page 78 CPU MODULE (b) When the main program is made into E PROM Even when making the main program into E PROM, the extension file register cannot be enlarged, because the built-in RAM area (area shown in the following figure ) will be used in the system.(Applicable memory cassette A2SNMCA- 30KE) 1) For A2USHCPU-S1, A2ASCPU-S30 (a) During RAM operation...
- Page 79 CPU MODULE POINT Note that the sequence program can use only up to 22k steps when the maximum 16k bytes are used for the MELSECNET/10 network parameters. The memory area for the sequence program for A2USHCPU-S1, A2ASCPU-S30 is the same as that for MELSECNET/10. Therefore, the remainder which is subtracted the memory area used by the MELSECNET(II) and MELSECNET/10 parameters from the max.
- Page 80 CPU MODULE (c) Stored address of user memory Data address for storing to RAM memory can be calculated as follows. Note that confirm the data destination address as follows so as not to protect the data destination switched. 1) During RAM operation Head address for storing to RAM memory Memory A2USHCPU-S1...
- Page 81 CPU MODULE Can be confirmed at GX Developer, Memory capacity of Parameter. Expanded comment can be allocated to the empty area of "RAM memory area usable for parameter range". When setting the capacity exceeded the empty area, the total capacity is allocated from block No.10 in order in the extension file register.
- Page 82 CPU MODULE 2) When operating the EP-ROM Head address for storing to RAM memory A2USHCPU-S1 Memory Item Remark A2USCPU-S1 A2USCPU capacity A2ASCPU-S30 A2ASCPU A2ASCPU-S1 Parameter, T/C set value – (Stored to EP-ROM) (Stored to EP-ROM) Sequence program – (Stored to EP-ROM) (Stored to EP-ROM) Main program Microcomputer program...
- Page 83 CPU MODULE 3) When operating the E PROM Head address for storing to RAM memory A2USHCPU-S1 Memory Item Remark A2USCPU-S1 A2USCPU capacity A2ASCPU-S30 A2ASCPU A2ASCPU-S1 Parameter, T/C set value 4k bytes (Stored to E PROM) (Stored to E PROM) Sequence program (Stored to E PROM) (Stored to E...
- Page 84 CPU MODULE REMARK When performing RAM operation as following parameter setting, calculation examples for addresses stored various data are shown. 4 - 31...
- Page 85 CPU MODULE Memory Item Head address for storing Remark capacity Parameter, T/C set value 4k bytes Sequence program 30k bytes Main program Microcomputer program 0k byte – MELSECNET/10 network parameter 2k bytes Not used area (12k) (36k) Block No.8 16k bytes –...
-
Page 86: Setting Ranges Of Timer And Counter
CPU MODULE 4.2.3 Setting ranges of timer and counter Timer setting range (a) Default values of the timer setting ranges are as follows: Timer points :256 points 100ms timer :T0 to T199 10ms timer :T200 to T255 Retentive timer :None (b) When timer-use points are set to 257 or more, the default values will be as follows: 100ms timer... - Page 87 CPU MODULE The interrupt counters in C224 to C255 are allocated to the interrupt pointers I0 to I31 as shown below, and count the occurrences of interrupts by those of I0 to I31. Interrupt Interrupt Interrupt Interrupt Interrupt Interrupt Interrupt Interrupt pointer counter...
-
Page 88: I/O Devices
CPU MODULE 4.2.4 I/O devices A2USHCPU-S1, A2USCPU(S1), A2ASCPU(S1/S30) has 8192 I/O device points (X/Y0 to X/Y1FFF) each for input (X) and output (Y). There are actual I/O devices and remote I/O devices in this I/O range. Actual I/O device This is the device range where an I/O module or special function module can be installed to the main base unit/extension base unit and controlled. -
Page 89: I/O Assignment Of Special Function Modules
CPU MODULE 4.2.5 I/O assignment of special function modules By registering the model name of the following special function modules upon the I/O assignment from the peripheral devices, the dedicated instructions for special function modules can be used. Model name of special function Setting for model name module registration... -
Page 90: Melsecnet/Mini-S3 Auto Refresh Processing
CPU MODULE 4.2.6 MELSECNET/MINI-S3 auto refresh processing By setting link information, I/O storage device, etc. of the MELSECNET/MINI-S3 to the parameters, the module automatically communicates with the buffer memory area for the batch refresh send/received data of the A1SJ71PT32-S3/AJ71PT32-S3 master module (abbreviated as the master module hereafter). - Page 91 CPU MODULE Parameter setting items, setting ranges and contents of auto refresh, as well as the buffer memory address of the master module which is used for exchanging data with the CPU modules are shown below. Set the parameters for the number of use of the A1SJ71PT32-S3/AJ71PT32-S3 master modules.
- Page 92 CPU MODULE (Continued) I/O signal Buffer memory from the address of the Item Setting range Description master master module module (1) Link priority ..Link access by MINI-S3 has the priority. During the link access, FROM/TO is caused to wait. •...
- Page 93 CPU MODULE Setting of the send/received data storage devices is explained using the system example shown below. <Example> When the device X/Y400 and later are used as the remote I/O stations: Sample parameter setting of the GPP function software package for the above system configuration is shown below: The storage devices for the send/received data for the present system example are as follows:...
- Page 94 CPU MODULE 3) The device numbers of input modules connected are as follows: Stations 1 to 4 AX41C X400 to X41F Stations 5 to 6 AJ35TB-16D X420 to X42F Stations 7 to 8 AX40Y50C X430 to X43F With respect to X440 to X45F, they are simultaneously refreshed, and set to OFF at any time.
-
Page 95: Function List
CPU MODULE Function List Various functions of the CPU modules are explained below. Function (application) Description Overview of setting and operation Constant scan • Makes the processing time for a single scan in the sequence program constant. • Write to the special register D9020 •Program execution at constant •... - Page 96 CPU MODULE (Continued) Function (application) Description Overview of setting and operation • With respect to a device for which the sampling trace is • Using the peripheral devices, set Sampling trace set up, the operating condition of the device is sampled the device to which the status for the number of times specified per scan or per period, latch is performed and the...
-
Page 97: Handling Precautions
CPU MODULE Handling Precautions Precautions when handling the CPU module from unpacking to installation are described below. Use the programmable controller under the environment specified in the user's CAUTION manual. Otherwise, it may cause electric shocks, fires, malfunctions, product deterioration or damage. -
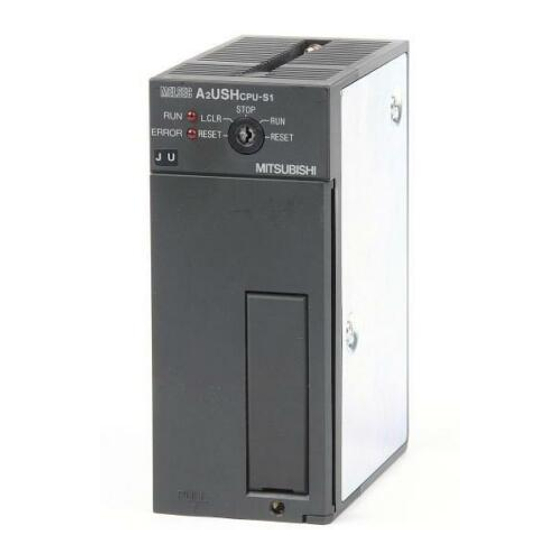
Page 98: Part Names
A2ASCPU-S30 MELSEC A CPU-S1 STOP L.CLR RESET RESET ERROR MITSUBISHI (11) (12) (10) Name Description • RUN/STOP: Used to start/stop sequence program execution. • RESET: Resets the hardware. Performs the reset and initialization of the operation at the operation error occurrence. - Page 99 CPU MODULE Name Description • ON: RUN/STOP key switch is in the "RUN" position, and the sequence program operation is being executed. In case of an error which continues the operation of sequence program occurs (refer to Section 11.3), the LED remains ON. •...
-
Page 100: Settings For Memory Protect Switch
CPU MODULE 4.5.2 Settings for memory protect switch Memory write protect switch is for prevent a program from overwriting and deletion by an operation of the peripheral device. It is used to prevent overwriting and deletion of a program after the program is created. To modify the ROM memory, cancel the memory write protect (OFF). -
Page 101: Latch Clear Operation
CPU MODULE 4.5.3 Latch clear operation When performing latch clear by RUN/STOP key switch, follow the procedures below. When performing latch clear, devices outside the latch range and error information by self- diagnostics of CPU module (information on the newest error and the past 15 errors) are also cleared. -
Page 102: Power Supply Module 5 - 1 To
POWER SUPPLY MODULE POWER SUPPLY MODULE Specifications Specifications of power supply modules are shown below. Table 5.1 Power supply module specifications Performance specifications Item A1S61PN A1S62PN A1S63P Base mounting position Power supply module installing slot +10% +30% 100 to 240VAC 24VDC -15% -35%... - Page 103 POWER SUPPLY MODULE Performance specifications Item A1S61PN A1S62PN A1S63P External dimensions 130mm (5.12inch) 55mm (2.17inch) 93.6mm (3.69inch) Weight 0.60kg 0.60kg 0.50kg POINT *1 Overcurrent protection The overcurrent proctection device shuts off the 5VDC and/or 24VDC circuit(s) and stops the system if the current exceeding the specified value flows in the circuit(s). As this results in voltage drop, the power supply module LED turns OFF or is dimly ON.
-
Page 104: Power Supply Module Selection
POWER SUPPLY MODULE 5.1.1 Power supply module selection Power supply module is selected based on to the total current consumption of the I/O module, special function module and peripheral devices to which power is supplied by the subject power supply module. When extension base unit A1S52B(S1), A1S55B(S1), A1S58B(S1), A52B, A55B, A58B is used, take into consideration that the power to the module is supplied by the power supply module of the main base. -
Page 105: Part Names
POWER SUPPLY MODULE Part Names Part names of the power supply modules are shown here. (1) A1S61PN (2) A1S62PN Name Description POWER LED LED for the 5VDC power indicator. Used to supply 24VDC power supply to inside the output module (using external 24VDC, 24GDC terminal wiring). - Page 106 POWER SUPPLY MODULE (3) A1S63P Name Description Power input terminal Used to connect a 24VDC power supply. Power input terminal Used to connect 100VAC to 240VAC power supply. Terminal screw M3.5 7 Terminal cover A protective cover for the terminal block. Used to fix a module to the base unit.
-
Page 107: Base Unit And Extension Cable
BASE UNIT AND EXTENSION CABLE BASE UNIT AND EXTENSION CABLE Specifications This section explains the specifications of the base units (the main and extension base units) and extension cables available for the systems, and the applicable standards for use of the extension base units. 6.1.1 Base unit specifications Main base unit specifications... -
Page 108: Extension Cable Specifications
BASE UNIT AND EXTENSION CABLE 6.1.2 Extension cable specifications The specifications of the extension cables applicable to PLC systems are shown in Table 6.3. Table 6.3 Extension cable specifications Item A1SC01B A1SC03B A1SC07B A1SC12B A1SC30B A1SC60B A1SC05NB A1SC07NB A1SC30NB A1SC50NB 0.055m 0.33m 0.7m... -
Page 109: Applicable Standards Of Extension Base Units (A1S52B(S1), A1S55B(S1), A1S58B(S1), A52B, A55B, A58B)
BASE UNIT AND EXTENSION CABLE 6.1.3 Applicable standards of extension base units (A1S52B(S1), A1S55B(S1), A1S58B(S1), A52B, A55B, A58B) When using the A1S52B(S1), A1S55B(S1), A1S58B(S1), A52B, A55B or A58B extension base unit, make sure that the voltage of the receiving port (the module installed in the last slot of the extension base unit) is 4.75V or more. - Page 110 BASE UNIT AND EXTENSION CABLE Receiving voltage calculation method CPU module to V : Voltage drop at each slot of the main base unit to I : Current consumption at each slot of the main base unit to V : Voltage drop at each slot of the extension base unit to I : Current consumption at each slot of the extension base unit (a) Calculation of voltage drops with the main base unit (A1S32B, A1S33B,...
- Page 111 BASE UNIT AND EXTENSION CABLE (b) Voltage drop calculation on the extension base unit (A1S52B(S1), A1S55B(S1), A1S58B(S1)) The resistive value on the extension base unit is 0.006 per slot. Calculate the voltage drop of each slot and obtain the total voltage drop. 1) Voltage drop at slot 8: V =0.006 (I 2) Voltage drop at slot 9: V...
- Page 112 BASE UNIT AND EXTENSION CABLE Calculation examples (a) Calculation of voltage drop on the main base unit = 0.007 {0.32 + 0.05 (9 + 8 + 7 + 6 + 5 + 4 + 3 + 2) + (0.27 8) 9} = 0.15372 (b) Calculation of voltage drop on the extension base unit = 0.006...
-
Page 113: Part Names
BASE UNIT AND EXTENSION CABLE Part Names Part names of the base unit are shown here. Main base unit (A1S32B, A1S33B, A1S35B, A1S38B) Remove with a tool such as a nipper POWER A1S38B Name Description Extension cable connector A connector used to connect an extension cable, by which signals can be transferred to/from an extension base unit. - Page 114 BASE UNIT AND EXTENSION CABLE Extension base unit (A1S52B, A1S55B, A1S58B, A1S52B-S1, A1S55B-S1, A1S58B- S1, A1S65B, A1S68B, A1S65B-S1, A1S68B-S1) A1S65B, A1S68B, A1S65B-S1, A1S68B-S1 POWER A1S68B A1S52B, A1S55B, A1S58B, A1S52B-S1, A1S55B-S1, A1S58B-S1 A1S58B (FG) Name Description Extension cable connector A connector used to connect an extension cable, by which signals can be transferred to/from an main base unit.
-
Page 115: Installation And Removal Of Din Rail
BASE UNIT AND EXTENSION CABLE Installation and Removal of DIN Rail Each of the main and extension base units is supplied with a DIN rail hook as standard. The following explains how to install the DIN rail. Applicable DIN rail type (JIS C 2812) TH35-7.5Fe TH35-7.5Al TH35-15Fe... - Page 116 BASE UNIT AND EXTENSION CABLE Installing to and removing from the DIN rail (a) Installing the unit to the DIN rail The base unit is installed to the DIN rail as follows: [1] Engage the upper side groove on the base unit with the upper part of the DIN rail.
-
Page 117: Memory Cassette And Battery
MEMORY CASSETTE AND BATTERY MEMORY CASSETTE AND BATTERY Memory Cassette This section explains the specifications of the memory cassette, the handling precautions and the installation and removal procedures. 7.1.1 Specifications The specifications of the memory cassette are shown in Table 7.1 Table 7.1 Specifications of the memory cassette Item A2SNMCA-30KE... -
Page 118: Handling Precautions
MEMORY CASSETTE AND BATTERY 7.1.2 Handling precautions This section explains the specifications of the memory cassette, the handling precautions and the installation and removal procedures. Since the memory cassette and pin connector are made of resin, do not drop them or apply heavy impact to them. -
Page 119: Installation And Removal Of Memory Cassette
MEMORY CASSETTE AND BATTERY 7.1.3 Installation and removal of memory cassette Insert the memory cassette and fully press it to the memory cassette connector. CAUTION Check for incomplete connection after installing it. Poor electrical contact may cause a malfunctions. How to install and remove the memory cassette is described below. Installation of the memory cassette Projection CPU module... - Page 120 MEMORY CASSETTE AND BATTERY Removal of the memory cassette Projections for hook disengagement A2SNMCA CPU module CPU module -30KE A2SNMCA -30KE (a) While pressing the top and bottom projections for hook disengagement with fingers, pull the memory cassette. 7 - 4...
-
Page 121: Memory Protection Setting Of A2Snmca-30Ke
MEMORY CASSETTE AND BATTERY 7.1.4 Memory protection setting of A2SNMCA-30KE When the A2SNMCA-30KE is installed in the CPU module, memory protection can be set up to the A2SNMCA-30KE to prevent the memory from being modified by PROM erroneous operation of peripheral equipment. Setting the memory protection setting pin to ON allows the user memory area of 64k bytes to be protected all at once. -
Page 122: Battery
MEMORY CASSETTE AND BATTERY Battery This section explains the specifications, handling precautions and installation procedures of the battery. Properly connect batteries. Do not charge, disassemble, heat, or throw them into the DANGER fire and do not make them short-circuited and soldered. Incorrect battery handling may cause personal injuries or a fire due to exothermic heat, burst and/or ignition. -
Page 123: Battery Installation
MEMORY CASSETTE AND BATTERY 7.2.3 Battery installation The battery connector is removed to prevent battery consumption during distribution and storage. Connect the lead connector of the battery to the battery connector on the CPU module print broad before using CPU module for the following objectives: •... -
Page 124: Loading And Installation
LOADING AND INSTALLATION LOADING AND INSTALLATION To increase the system reliability and fully utilize the functions, procedures and cautions concerning loading and installation are described below. Fail-Safe Circuit Concept When the programmable controller is powered ON and then OFF, improper outputs may be generated temporarily depending on the delay time and start-up time differences between the programmable controller power supply and the external power supply for the control target (especially, DC). - Page 125 LOADING AND INSTALLATION Design a circuit so that the external power will be supplied after power-up of the DANGER programmable controller. Activating the external power supply prior to the programmable controller may result in an accident due to incorrect output or malfunction. For the operation status of each station at a communication error in data link, refer to the respective data link manual.
- Page 126 LOADING AND INSTALLATION System design circuit example AC system AC/DC system Power supply Power supply Transformer Transformer DC power supply established signal Fuse Fuse input CPU module Start/stop circuit CPU module DC power M9006 Can be started M9006 supply M9039 by turning ON of ( - )( + ) RA1, which is the...
- Page 127 Though Mitsubishi programmable controllers are manufactured under strict quality control, they may fail or malfunction due to unspecified reasons. To prevent the whole system failure, machine breakdown, and accidents, build a fail-safe circuit outside the programmable controller.
- Page 128 LOADING AND INSTALLATION When constructing a fail safe circuit using on delay timers only On delay timer Internal program M9032 On delay timer 0.5s 0.5s Externai load 24VDC output module CPU module Use a solid state relay for the M1 relay. 8 - 5...
-
Page 129: Installation Environment
LOADING AND INSTALLATION Installation Environment Avoid the following environment when you install the programmable controller system: A location in which the ambient temperature falls outside the range of 0 to 55 A location in which the ambient humidity falls outside the range of 10 to 90%RH. Location in which condensation may occur due to drastic changes in temperature. -
Page 130: Calculation Method Of Heat Amount Generated By The Plc
LOADING AND INSTALLATION Calculation Method of Heat Amount Generated by the PLC It is necessary to keep the temperature of the panel which stores the PLC to the operating ambient temperature of the PLC, which is 55 , or below. For heat dissipation design of the panel, it is necessary to know the average power consumption (heat generation) of the devices and machinery stored inside. - Page 131 LOADING AND INSTALLATION Total 24VDC average power consumption of the output module (power consumption equivalent to the points simultaneously ON) Average power of the 24VDC output circuit of the power supply module is the total power consumption of each module. 24(W) Total 24VDC average power consumption of the output module (power consumption equivalent to the points simultaneously ON)
-
Page 132: Installing The Base Units
LOADING AND INSTALLATION Installing the Base Units Precautions concerning installation of the main base unit and extension base unit are described next. 8.4.1 Precautions when installing programmable controller Precautions concerning the installation of programmable controller to the panel, etc. are explained below. -
Page 133: Installation
LOADING AND INSTALLATION 8.4.2 Installation Installation location of the main base unit and the extension base unit is shown below. Indicates the location of ceiling of the panel, wiring duct or other part. 30mm (1.18inch) Main base Extension base or more 30mm (1.18inch) or more Figure8.1 Parallel installation... -
Page 134: Installation And Removal Of The Base Units
LOADING AND INSTALLATION Installation and Removal of the Base Units How to install and remove the power supply module, CPU module, I/O module and special function module, etc. to/from the base unit are explained. Insert the module fixing projection into the fixing hole in the base unit and then tighten CAUTION the module fixing screw within the specified torque. - Page 135 LOADING AND INSTALLATION Module installation Installation procedure of the module is explained. Base unit Module Module connector Insert the module fixing projection of the module into the module fixing hole. Install the module to the base unit by pushing it in the direction of the Projection arrow.
- Page 136 LOADING AND INSTALLATION Removal of the module Removal procedure of the module is explained. Base unit Remove the module installation screw, then pull out the top of the module while using the bottom of the module as the fulcrum. Module connector While lifting the module upward, Module...
-
Page 137: Installation And Removal Of The Dustproof Cover
LOADING AND INSTALLATION Installation and Removal of the Dustproof Cover When setting up the system, do not allow any empty slot on the base unit. DANGER If any slot is left empty, be sure to use a blank cover (A1SG60) or a dummy module (A1SG62) for it. - Page 138 LOADING AND INSTALLATION Removal I/O module Hole for removal Dust-proof cover To remove the dustproof cover from the I/O module, insert the tip of a flat-tip screwdriver into the removal hole as shown in the figure, then move the screwdriver towards the rear of the module to separate the clip from the removal hole and remove the cover.
-
Page 139: Wiring
LOADING AND INSTALLATION Wiring 8.7.1 Wiring instructions Instructions for wiring the power cable and I/O wire. Be sure to shut off all the phases of the external power supply used by the system DANGER before wiring. Failure to do so may result in an electric shock or damage of the product. Before energizing and operating the system after wiring, be sure to attach the terminal cover supplied with the product. - Page 140 LOADING AND INSTALLATION (b) Use a power supply which generates minimal noise between wires and between the programmable controller and ground. If excessive noise is generated, connect an isolating transformer. Programmable equipment controller Insulation Insulation transformer transformer (c) When a power supply transformer or isolating transformer is employed to reduce the voltage from 200VAC to 100VAC, use one with a capacity greater than those indicated in the following table.
- Page 141 LOADING AND INSTALLATION (f) Note on using the 24VDC output of the A1S62PN power supply module. Do not connect multiple power supply modules to one module in parallel. CAUTION The power supply modules may be heated, resulting in a fire or failure. If the 24VDC output capacity is insufficient for one power supply module, supply 24VDC from the external 24VDC power supply as shown below: (g) 100VAC, 200VAC and 24VDC wires should be twisted as dense as possible.
- Page 142 LOADING AND INSTALLATION POINT (1) Separate the ground of the surge absorber for lightening (E1) from that of the programmable controller (E2). (2) Select a surge absorber for lightening whose power supply voltage does not exceed the maximum allowable circuit voltage even when line voltage is maximum.
- Page 143 LOADING AND INSTALLATION Grounding Always ground the FG and LG terminals to the protective ground connector. CAUTION Failure to do so may cause an electric shock or malfunctions. (a) Carry out the independent grounding if possible. (b) If the independent grounding is impossible, carry out the shared grounding (2) as shown below.
-
Page 144: Wiring To Module Terminals
LOADING AND INSTALLATION 8.7.2 Wiring to module terminals This section explains the wiring of power cables and ground wires to the main and extension bases. Main base unit (A1S38B) Main base unit (A1S38B) 100/110VAC 100/110VAC 200/240VAC A1S61PN A1S62PN 200/240VAC +24V Fuse Fuse (FG) -
Page 145: Precautions When Connecting The Uninterruptible Power Supply (Ups)
Use the on-line UPS or line interactive UPS (voltage distortion of 5% or less.) Alternatively, use the off-line system UPS, i.e., FREQUPS-F series with serial number P or later (manufactured by Mitsubishi Electric). Example: FW-F10-03.K/0.5K Do not use the off-line system UPS other than above. -
Page 146: Emc And Low Voltage Directives
CE mark on the products. Authorized representative in Europe Authorized representative in Europe is shown below Name: Mitsubishi Electric Europe BV Address: Gothaer strase 8, 40880 Ratingen, Germany Requirements for Compliance with EMC Directives The EMC Directives specifies emission and immunity criteria and requires the products to meet both of them, i.e., not to emit excessive electromagnetic interference (emission): to... -
Page 147: Emc Standards
EMC AND LOW VOLTAGE DIRECTIVES 9.1.1 EMC standards Standards related to EMC directive are described below. Specifications Test Item Test Description Standard Values 30 M-230 M Hz QP : 30 dB V/m (30 m measurement) Measure the emission released by EN55011 the product. -
Page 148: Installation Instructions For Emc Directive
EMC AND LOW VOLTAGE DIRECTIVES 9.1.2 Installation instructions for EMC directive The programmable controller is open equipment and must be installed within a control panel for use. This not only ensures safety but also ensues effective shielding of programmable controller-generated electromagnetic noise. * Also, each network remote station needs to be installed inside the control panel. -
Page 149: Cables
EMC AND LOW VOLTAGE DIRECTIVES 9.1.3 Cables The cables pulled out of the control panel contain a high frequency noise component. On the outside of the control panel, therefore, they serve as antennas to emit noise. Ensure to use shielded cables for the cables, which are connected to the I/O modules, special function modules and those pulled out to outside of the control panel. - Page 150 EMC AND LOW VOLTAGE DIRECTIVES MELSECNET (II) and MELSECNET/10 modules (a) Use a double-shielded coaxial cable (MITSUBISHI CABLE INDUSTRIES, LTD.: 5C-2V-CCY) for the MELSECNET modules (such as A1SJ71AR21, A1SJ71LR21, A1SJ71BR11) which uses coaxial cables. Noise in the range of 30 MHz or higher in radiated noise can be suppressed by the use of double- shielded coaxial cables.
- Page 151 EMC AND LOW VOLTAGE DIRECTIVES (c) Always use double-shielded coaxial cables as the coaxial cables connected to the 10BASE2 connectors. Earth the double-shielded coaxial cable by connecting its outer shield to the ground. Refer to (1) for the earthing of the shield. Make sure to install a ferrite core for the cable.
-
Page 152: Ferrite Core
• Wire the external wiring cable to the drive unit and external device with the minimum distance of cable. (c) Ferrite core and cable clamp types and required quantities • Cable clamp Type : AD75CK (Manufactured by Mitsubishi Electric) • Ferrite core Type : ZCAT3035-1330 (TDK ferrite core) Contact: TDK Corporation •... - Page 153 EMC AND LOW VOLTAGE DIRECTIVES CC-Link Module (a) Be sure to ground the cable shield that is connected to the CC-Link module close to the exit of control panel or to any of the CC-Link stations within 30cm (11.81inch) from the module or stations. The CC-Link dedicated cable is a shielded cable.
- Page 154 EMC AND LOW VOLTAGE DIRECTIVES 9.1.4 Power supply module The precautions required for each power supply module are described below. Always observe the items noted as precautions. Model Precautions A1S61PN, A1S62PN Make sure to short-circuit and ground the LG and FG terminals. Use the 24VDC panel power supply equipment conforming to the EU A1S63P Directive.
-
Page 155: Noise Filter (Power Supply Line Filter)
EMC AND LOW VOLTAGE DIRECTIVES 9.1.6 Noise filter (power supply line filter) A noise filter is a component which has an effect on conducted noise. With the exception of some models, it is not required to fit the noise filter to the power supply line, but fitting it can further suppress noise. -
Page 156: Requirements For Compliance With Low Voltage Directives
EMC AND LOW VOLTAGE DIRECTIVES Requirements for Compliance with Low Voltage Directives The Low Voltage Directives apply to the electrical equipment operating from 50 to 1000VAC or 75 to 1500VDC; the manufacturer must ensure the adequate safety of the equipment. Guidelines for installation and wiring of MELSEC-AnS series programmable controller are provided in 9.2.1 to Section 9.2.7 for the purpose of compliance with the EMC Directives. -
Page 157: Power Supply
EMC AND LOW VOLTAGE DIRECTIVES 9.2.3 Power supply The insulation specification of the power supply module was designed assuming installation category II. Be sure to use the installation category II power supply to the programmable controller. The installation category indicates the durability level against surge voltage generated by a thunderbolt. -
Page 158: Control Panel
EMC AND LOW VOLTAGE DIRECTIVES 9.2.4 Control panel Because the programmable controller is an open device (a device designed to be stored within another device), be sure to use it after storing in the control panel. * Also, each network remote station needs to be installed inside the control panel. However, the waterproof type remote station can be installed outside the control panel. -
Page 159: Module Installation
EMC AND LOW VOLTAGE DIRECTIVES 9.2.5 Module installation Installing modules contiguously In AnS series programmable controllers, the left side of each I/O module is left open. When installing an I/O module to the base, do not make any empty slots between any two modules. -
Page 160: Maintenance And Inspection
10. MAINTENANCE AND INSPECTION MAINTENANCE AND INSPECTION Do not touch any terminal during power distribution. DANGER Doing so may cause an electric shock. Properly connect batteries. Do not charge, disassemble, heat or throw them into the fire and do not make them short-circuited and soldered. -
Page 161: Daily Inspection
10. MAINTENANCE AND INSPECTION 10.1 Daily Inspection Dairy inspection items recommended are shown in Table 10.1. Table 10.1 Dairy inspection Item Check item Content of inspection Judgement Action Confirm if mounting Installation condition of screws are not loose or It is installed securely. Retighten the screw. the base unit cover is not detached. -
Page 162: Periodic Inspection
10. MAINTENANCE AND INSPECTION 10.2 Periodic Inspection Inspection on items shown below should be conducted once or twice every six months to a year. Conduct the inspection when the equipment is moved or modified, or wiring is changed. Table 10.2 Periodic inspection Item Check item Content of inspection... -
Page 163: Battery Replacement
10. MAINTENANCE AND INSPECTION 10.3 Battery Replacement Properly connect batteries. Do not charge, disassemble, heat or throw them into the DANGER fire and do not make them short-circuited and soldered. Incorrect battery handling may cause personal injuries or a fire due to exothermic heat, burst and/or ignition. - Page 164 MAINTENANCE AND INSPECTION Battery Life After Turning ON Actual Value (TYP) M9006 or M9007 Current-carrying CPU model name Guaranteed (Power failure Hour Rate Ambient Ambient compensation Value Temperature Temperature time after alarm occurrence 3600 hr 3900 hr 43800 hr 168 hr A1SHCPU-S1 0.4 years 4.5 years...
- Page 165 MAINTENANCE AND INSPECTION POINT (1) Use the battery within the time shown by the guaranteed value of the battery life. (2) If the battery may be used exceeding the guaranteed time, perform ROM operation to protect data in case that the battery will be exhausted during power-off of the programmable controller.
-
Page 166: Battery Replacement Procedure
10. MAINTENANCE AND INSPECTION 10.3.2 Battery replacement procedure Replace the battery according to the following procedure when life of the battery is over. Even when the battery is removed memory is backed up by the capacitor for a while. However, if replacement takes longer than the guaranteed value shown in Table 10.4, the content of the memory may be erased, so replace the battery quickly. - Page 167 After replacing a battery, write the date for next battery replacement on the sticker on the back side of the front cover. Write the proper date by checking the battery life. (Refer to Section 10.3.1) MELSEC A CPU-S1 STOP L.CLR RESET RESET ERROR MITSUBISHI 10 - 8...
-
Page 168: Troubleshooting
11. TROUBLESHOOTING TROUBLESHOOTING The description, cause determination, and corrective actions of each error which may occur during system usage are described. 11.1 Fundamentals of Troubleshooting Besides using obviously highly-reliable devices to increase system reliability, it is an important point to quickly start up the system again when an error occurs. In order to quickly start up the system, find the cause of the problem and resolve it. -
Page 169: Troubleshooting Procedure
11. TROUBLESHOOTING 11.2 Troubleshooting The error definition determination method, error definition corresponding to the error code, and corrective actions are described. 11.2.1 Troubleshooting procedure The error definitions are described by events. Error occurrence details To "Flow for actions when the "POWER" The "POWER"... -
Page 170: Flow For Actions When The "Power" Led Is Turned Off
11. TROUBLESHOOTING 11.2.2 Flow for actions when the "POWER" LED is turned OFF The corrective action when the "POWER" LED turns OFF when the power supply is turned ON or during operation is described. The "POWER" LED turned OFF. Is the power Supply the power. -
Page 171: Flow For Actions When The "Run" Led Is Turned Off
11. TROUBLESHOOTING 11.2.3 Flow for actions when the "RUN" LED is turned OFF The corrective action when the "RUN" LED turns OFF during operation is described. The "RUN" LED turned OFF. Is there Perform the correction using the an error display when the peripheral device is error detail list. -
Page 172: Flow For Actions When The "Run" Led Is Flickering
11. TROUBLESHOOTING 11.2.4 Flow for actions when the "RUN" LED is flickering The corrective action when the "RUN" LED is flickering when turning on the power supply, starting operation, or during operation is described. The "RUN" LED is flickering. Confirm the error details Hardware error from the peripheral device. -
Page 173: Flow For Actions When The "Error" Led Is Turned On
11. TROUBLESHOOTING 11.2.5 Flow for actions when the "ERROR" LED is turned ON The flow when the "ERROR" LED turns ON during operation is described. The "ERROR" LED turned ON. Is the M9008 ON? Hardware error Check the corrective Cause of error action Software error Can it be... -
Page 174: Flow For Actions When The "Error" Led Is Flickering
11. TROUBLESHOOTING 11.2.6 Flow for actions when the "ERROR" LED is flickering The flow when the "ERROR" LED turns ON during operation is described. The "ERROR" LED is flickering. Is the details If "0" of the special register D9124 "0"? Describe the problem to the If not "0"... -
Page 175: Flow For Actions When The Output Module's Output Load Does Not Turn On
11. TROUBLESHOOTING 11.2.7 Flow for actions when the output module's output load does not turn ON The corrective action when the output load of the output module does not turn ON during operation is described. The output load does not turn ON. Is the output Check the output status module's operation... -
Page 176: Flow For Actions When The Program Cannot Be Written
OFF) switch OFF? Can the program be written? Is a ROM Replace the E PROM memory cassette memory cassette or use a used? built-in RAM Can the program be written? Counstult your nearest Mitsubishi representative. Complete 11 - 9... -
Page 177: Flow For Actions When The Cpu Module Is Not Started Up
3)Extension cable 4)Network module (Only when installed) For the malfunctioning module even after executed the serial operation check from the minimum system, please consult your local Mitsubishi service center or representative, explaining a detailed description of the problem. 11 - 10... -
Page 178: Error Code List
11. TROUBLESHOOTING 11.3 Error Code List When an error occurs while the programmable controller is running or during RUN, error is displayed, or error code, detailed error code and error step are stored to special registers, D9008, D9091 and D9010, respectively, by the self-diagnostics function. Error definitions and corrective actions are shown below. -
Page 179: Error Code List For The Anucpu, A2Us(H)Cpu, A2Ascpu And A2Ush Board
11. TROUBLESHOOTING 11.3.2 Error code list for the AnUCPU, A2US(H)CPU, A2ASCPU and A2USH board The following table shows the error messages, error codes, error definition and cause of error and corrective actions of detailed error codes. (*: The detailed error codes added to AnUCPU, A2USCPU, A2ASCPU and A2USH board) Table 11.1 Error Code List for the AnUCPU, A2US(H)CPU, A2ASCPU and A2USH board Detailed... - Page 180 TROUBLESHOOTING Table 11.1 Error Code List for the AnUCPU, A2US(H)CPU, A2ASCPU and A2USH board (Continue) Detailed Error Error Error Massage Code Error and Cause Corrective Action Code States (D9008) (D9091) "PARAMETER STOP Capacity settings of the main and sub Read parameters in the CPU memory, ERROR"...
- Page 181 TROUBLESHOOTING Table 11.1 Error Code List for the AnUCPU, A2US(H)CPU, A2ASCPU and A2USH board (Continue) Detailed Error Error Error Massage Code Error and Cause Corrective Action Code States (D9008) (D9091) "CAN'T STOP The same device number is used at two Eliminate the same pointer numbers EXECUTE (P)"...
- Page 182 TROUBLESHOOTING Table 11.1 Error Code List for the AnUCPU, A2US(H)CPU, A2ASCPU and A2USH board (Continue) Detailed Error Error Error Massage Code Error and Cause Corrective Action Code States (D9008) (D9091) "CHK FORMAT STOP Instructions (including ) other than Check the program of the instruction and correct it referring to ERR"...
- Page 183 Since this is CPU hardware error, execution of the (1) When the instruction was to consult Mitsubishi representative. be executed, the instruction was instruction.) read as other instruction code due to noise. (2) The instruction changed to other instruction code due to unknown cause.
- Page 184 3-tier system is not used. "I/O INT. — STOP Though the interrupt module is not Since it is hardware error of a module, ERROR" loaded, an interrupt occurred. replace and check a defective module. For defective modules, consult Mitsubishi representative. 11 - 17...
- Page 185 TROUBLESHOOTING Table 11.1 Error Code List for the AnUCPU, A2US(H)CPU, A2ASCPU and A2USH board (Continue) Detailed Error Error Error Massage Code Error and Cause Corrective Action Code States (D9008) (D9091) "SP.UNIT STOP A special function module is assigned Execute I/O assignment again using LAY.ERR."...
- Page 186 (4) Persistent error occurrence may written to the link parameter area indicate a hardware fault. Consult differs from the link parameter data your nearest Mitsubishi read by the CPU. Alternatively, no representative, explaining the nature link parameters have been written.
- Page 187 (3) Persistent error occurrence may differ from the actual network indicate a hardware fault. Consult system. your nearest Mitsubishi (2) The link parameters for the first link representative, explaining the nature unit have not been written. of the problem.
- Page 188 TROUBLESHOOTING Table 11.1 Error Code List for the AnUCPU, A2US(H)CPU, A2ASCPU and A2USH board (Continue) Detailed Error Error Error Massage Code Error and Cause Code States (D9008) (D9091) "OPERATION Stop or (1) When file registers (R) are used, Read the error step using a peripheral ERROR"...
- Page 189 DOWN" noise. noise. (2) Hardware failure. (2) Since this is hardware error, consult Mitsubishi representative. (1) Failure in the power module, CPU (1) Replace the power module, CPU module, main base unit or module, main base unit or expansion expansion cable is detected.
-
Page 190: Fault Examples With I/O Modules
11. TROUBLESHOOTING 11.4 Fault Examples with I/O Modules Examples of faults concerning I/O circuits and the corrective actions are explained. 11.4.1 Faults with the input circuit and the corrective actions Examples of faults concerning input circuits and the corrective actions are explained. Table 11.2 Faults with the input circuit and the corrective actions Situation Cause... - Page 191 TROUBLESHOOTING Table 11.2 Faults with the input circuit and the corrective actions (Continued) Situation Cause Countermeasure • Sneak path due to the use of two power • Use only one power supply. supplies. • Connect a diode to prevent the sneak path (figure below).
-
Page 192: Faults In The Output Circuit
TROUBLESHOOTING 11.4.2 Faults in the output circuit Faults concerning output circuits and the corrective actions are explained. Table 11.3 Faults with the output circuit and the corrective actions Situation Cause Countermeasure • When the load is subjected to half wave •... - Page 193 TROUBLESHOOTING Table 11.3 Faults with the output circuit and the corrective actions (Continued) Situation Cause Countermeasure • Connect a resistor to both ends of a • The load current is lower than the minimum load current. load so that the load current is higher Surge suppressor than the minimum load current.
- Page 194 TROUBLESHOOTING Table 11.3 Faults with the output circuit and the corrective actions (Continued) Situation Cause Countermeasure When the external power turns ON/OFF, Erroneous output due to the stray capacitance (C) between check that the external power supply collector and emitter of hotocoupler. rising edge must be 10ms or more, and switch the SW1 to the primary side of There is no erroneous output at normal road.
- Page 195 TROUBLESHOOTING Table 11.3 Faults with the output circuit and the corrective actions (Continued) Situation Cause Countermeasure To prevent the generation of the back The load [2] which was turned OFF may be turned ON due to electromotive force, connect diode in back electromotive force at the time of power-off [1] if an parallel with load where the back inductive load is used.
-
Page 196: Appendix
APPENDIX APPENDIX Appendix1 Instruction List The instruction list to be used with a programmable controller is shown. Refer to the following Programming Manuals for the details of the instructions. • ACPU/QCPU-A (A Mode) Programming Manual (Fundamentals) IB-66249 • ACPU Programming Manual (Common Instructions) IB-66250 •... - Page 197 APPENDIX Basic instructions (a) Comparison instructions 16 bit LD=, AND=, OR= 32 bit LDD=, ANDD=, ORD= 16 bit LD<>, AND<>, OR<> 32 bit LDD<>, ANDD<>, ORD<> 16 bit LD>, AND>, OR> 32 bit LDD>, ANDD>, ORD> 16 bit LD<=, AND<=, OR<= 32 bit LDD<=, ANDD<=, ORD<= 16 bit...
- Page 198 APPENDIX (c) BCD arithmetic operation instructions BCD 4-digit Two types each for B+, B+P + Addition Two types each for DB+, BCD 8-digit DB+P BCD 4-digit Two types each for B-, B-P - Subtraction Two types each for DB, BCD 8-digit DB-P BCD 4-digit B *, B * P...
- Page 199 APPENDIX (g) Refresh instructions Link refresh Link refresh enable/disable EI, DI Partial refresh Application instructions (a) Logical operation instructions Two types each for WAND, 16 bit WANDP Logical product 32 bit DAND, DANDP 16 bit Two types each for WOR, WORP Logical sum 32 bit DOR, DORP...
- Page 200 APPENDIX (d) Data processing instructions Data search 16 bit SER, SERP 16 bit SUM, SUMP Bit check 32 bit DSUM, DSUMP DECO, DECOP -bit Decode 16 bit Encode ENCO, ENCOP -bit Bit set 16 bit BSET, BSETP Bit reset 16 bit BRST, BRSTP Separation 16 bit...
- Page 201 APPENDIX (k) Other instructions WDT reset WDT, WDTP Error check Status latch SLT, SLTR Sampling trace STRA, STRAR Carry flag set/reset 1 bit STC, CLC Timing clock 1 bit DUTY Dedicated instructions (a) Direct processing instructions Direct output DOUT Direct set DSET Direct reset DRST...
- Page 202 APPENDIX (e) Real value processing instructions (BCD format processing) BCD 4-digit square root BSQR BCD 8-digit square root BDSQR SIN (sine) operation BSIN COS (cosine) operation BCOS TAN (tangent) operation BTAN BASIN (arcsine) operation BACOS (arccosine) operation BATAN (arctangent) operation (f) Real value processing instructions (Floating point format real value processing) INT, DINT Real value...
- Page 203 APPENDIX (g) Text string processing instructions BINDA, DBINDA 16/32-bit BIN decimal ASCII conversion BINHA, DBINHA 16/32-bit BIN hexadecimal ASCII conversion BCDDA, DBCDDA 16/32-bit BCD decimal ASCII conversion Decimal ASCII 16/32-bit BIN conversion DABIN, DDABIN HABIN, DHABIN Hexadecimal ASCII 16/32-bit BIN conversion DABCD, DDABCD Decimal ASCII 16/32-bit BCD conversion...
- Page 204 APPENDIX Extension file register instructions Extension file register block number conversion RSET Between extension file registers block transfer BMOVR Between extension file registers block exchange BXCHR Direct read of extension file register in 1 word unit ZRRD Direct read of extension file register in 1 byte unit ZRRDB Direct write of extension file register in 1 word unit ZRWR...
- Page 205 APPENDIX (m) AJ71C24(S8) computer link module control instructions Character up to 00 code Data send Intended number of characters Data receive INPUT Communication status read SPBUSY Communication processing forced interruption SPCLR (n) AJ71C21(S1) terminal interface module control instructions Data output to RS-232C (data up to 00 code) Data output to RS-422 (data up to 00 code)
- Page 206 APPENDIX (p) PID operation instructions Control data setting PIDINIT PID operation PIDCONT PID operation result monitoring for AD57(S1) PID57 (q) AD59(S1) memory card/centronix interface module control instructions Character up to 00 code Output to printer Intended number of characters Data read to memory card Data write to memory card (r) AD57(S1) control instructions Display mode setting instruction...
- Page 207 APPENDIX ASCII character display PR, PRN ASCII character write PRV, PRNV Specified character display Character display EPR, EPRN instructions Character write EPRV, EPRNV Continuous display of same CR1, CR2, CC1, CC2 character - (minus) display CINMP - (hyphen) display CINHP .
- Page 208 APPENDIX (s) CC-Link dedicated instructions Network parameter setting RLPA Automatic refresh parameter setting RRPA Read from the auto refresh buffer memory of the RIFR intelligent device station Write to the auto refresh buffer memory of the intelligent RITO device station Read from the buffer memory of the intelligent device RIRD station...
-
Page 209: Appendix1.1 Precautions For Write During Run Of A Dedicated Instruction
APPENDIX Appendix1.1 Precautions for write during RUN of a dedicated instruction Contents of write during RUN In the case of LEDA In the case of LEDB After writing, the instruction is After writing, the instruction is Write normal configuration during executed with the previous executed when the previous contact is contact ON. -
Page 210: Appendix 2 Lists Of Special Relays And Special Registers
APPENDICES Appendix 2 LISTS OF SPECIAL RELAYS AND SPECIAL REGISTERS Appendix 2.1 List of Special Relays The special relays are the internal relays that have specific applications in the sequencer. Therefore, do not turn the special register ON/OFF on the program. (Except for the ones marked by *1 or *2 in the table.) Table App2.1 Special Relay List Number... - Page 211 APPENDICES Table App2.1 Special Relay List (Continue) Number Name Description Details Applicable CPU • Clears the data memory including the latch range Data memory OFF: No processing (other than special relays and special registers) in Usable with all M9016 clear flag ON: Output clear remote run mode from computer, etc.
- Page 212 APPENDICES Table App2.1 Special Relay List (Continue) Number Name Description Details Applicable CPU 0.05 0.1 second M9030 seconds 0.05 clock seconds 0.2 second M9031 • 0.1 second, 0.2 second, 1 second, 2 second, and 1 seconds clock seconds minute clocks are generated. •...
- Page 213 APPENDICES Table App2.1 Special Relay List (Continue) Number Name Description Details Applicable CPU OFF:Except during Unusable with A1 M9046 Sampling trace trace • Switched on during sampling trace. and A1N. ON: During trace OFF:Sampling trace Sampling trace stop • Turn on M9047 to execute sampling trace. Unusable with A1 M9047 preparation...
- Page 214 APPENDICES Table App2.1 Special Relay List (Continue) Number Name Description Details Applicable CPU • Turned on when one of remote terminal modules has become a faulty station. (Communication error is detected when normal communication is not restored after the number of retries set at D9174.) Remote OFF:Normal...
- Page 215 APPENDICES Table App2.1 Special Relay List (Continue) Number Name Description Details Applicable CPU OFF:Reading time • Turn on to reduce the search time of A8UPU/ Time required reduction OFF A8PUJ. Usable with AnU for search of M9070 ON: Reading time (In this case, the scan time of the CPU module and A2US(H).
- Page 216 APPENDICES Table App2.1 Special Relay List (Continue) Number Name Description Details Applicable CPU • Compares the setting value at D9077 with the time elapsed from the start of measurement (accumulation time) at every scan. Then, performs the following operations: Setting value > Accumulation time: Turns M9077 ON and clears the accumulation Sequence time.
- Page 217 APPENDICES Table App2.1 Special Relay List (Continue) Number Name Description Details Applicable CPU OFF:Communication request to remote Registration Usable with AnA, terminal modules area busy signal • Indication of communication enable/disable to AnA, AnU, A2AS, enabled M9081 remote terminal modules connected to the MINI —...
- Page 218 APPENDICES Table App2.1 Special Relay List (Continue) Number Name Description Details Applicable CPU • After the head address of the required I/O module is set to D9094, switching M9094 on allows the I/O module to be changed in online mode. (One module is only allowed to be changed by one setting.) *2 *3...
- Page 219 APPENDICES Table App2.1 Special Relay List (Continue) Number Name Description Details Applicable CPU Usable with AnN*, • Selects consecutive or step-by-step transfer of AnA*, AnU, OFF:Consecutive step steps of which transfer conditions are established Consecutive A2AS, QCPU-A transfer disable when all of the transfer conditions of consecutive step transfer —...
- Page 220 APPENDICES Table App2.1 Special Relay List (Continue) Number Name Description Details Applicable CPU Usable with AnN*, AnA*, AnU, Active step • Turned on when sampling trace of all specified A2AS, QCPU-A OFF:Trace start M9180 sampling trace blocks is completed. Turned off when sampling —...
- Page 221 APPENDICES POINTS (1) Contents of the M special relays are all cleared by power off, latch clear or reset with the reset key switch. When the RUN/STOP key switch is set in the STOP position, the contents are retained. (2) The above relays with numbers marked *1 remain "on" if normal status is restored.
-
Page 222: Appendix 2.2 Special Registers
APPENDICES Appendix 2.2 Special Registers Special registers are data registers of which applications have been determined inside the PC. Therefore, do not write data to the special registers in the program (except the ones with numbers marked 2 in the table). Table App2.2 Special Register List Number Name... - Page 223 APPENDICES Table App2.2 Special Register List (Continue) Number Name Description Details Applicable CPU The number of bits • The number of bits detected by execution of the SUM SUM instruction Dedicated to D9003 detected by SUM instruction are stored. in BIN code and updated every —...
- Page 224 APPENDICES Table App2.2 Special Register List (Continue) Number Name Description Details Applicable CPU • When operation error has occurred during execution of Step number at which application instruction, the step number, at which the Unusable with D9010 Error step operation error has error has occurred, is stored in BIN code.
- Page 225 APPENDICES Table App2.2 Special Register List (Continue) Number Name Description Details Applicable CPU ROM/RAM • Indicates the setting of memory select chip. One value Usable with A1 — setting of 0 to 2 is stored in BIN code. and A1N. E 2 PROM Main program (ROM)
- Page 226 APPENDICES Table App2.2 Special Register List (Continue) Number Name Description Details Applicable CPU • Stores the year (2 lower digits) and month in BCD....
- Page 227 APPENDICES Table App2.2 Special Register List (Continue) Number Name Description Details Applicable CPU D9021 • Sets the head station number of remote terminal D9022 modules connected to A2C and A52G. Setting is not D9023 necessarily in the order of station numbers. D9024 A2CCPUC24:1 to 57 Other CPUs:1 to 61...
- Page 228 APPENDICES Table App2.2 Special Register List (Continue) Number Name Description Details Applicable CPU • Designate the device number for the extension file register for direct read and write in 2 words at D9036 and D9037 in BIN data. D9036 Use consecutive numbers beginning with R0 of block No.
- Page 229 APPENDICES Table App2.2 Special Register List (Continue) Number Name Description Details Applicable CPU • Stores the step number in which error 84 occurred in the SFC program in BIN code. Step number in which Usable with D9052 Error step Stores "0" when errors 80, 81 and 82 occurred. —...
- Page 230 APPENDICES Table App2.2 Special Register List (Continue) Number Name Description Details Applicable CPU Stores the bit pattern of the base module in abnormal condition. When basic base module is abnormal: Bit 0 turns ON. When 1st expansion base module is abnormal: Bit 1 Stores the bit pattern turns ON.
- Page 231 APPENDICES Table App2.2 Special Register List (Continue) Number Name Description Details Applicable CPU Sequence • Stores the accumulation time used by M9077. Dedicated to accumulation Accumulation time Setting range: 1 to 255ms (Default: 5ms) D9077 — QCPU-A time setting * When the value other than 1 to 255 ms is designated, (A Mode) measurement the value in D9077 is reset to 0.
- Page 232 APPENDICES Table App2.2 Special Register List (Continue) Number Name Description Details Applicable CPU Usable with AnN*, AnA*, Detail error number of SFC program AnU, A2US(H), the error which • Stores the detail error number of the error occurred in a D9091 detail error —...
- Page 233 APPENDICES Table App2.2 Special Register List (Continue) Number Name Description Details Applicable CPU • Output module numbers (in units of 16 points), of which D9100 fuses have blown, are entered in bit pattern. (Preset output unit numbers when parameter setting has been performed.) D9101 15 14...
- Page 234 APPENDICES Table App2.2 Special Register List (Continue) Number Name Description Details Applicable CPU • When I/O modules, of which data are different from D9116 those entered at power-on, have been detected, the I/ O unit numbers (in units of 16 points) are entered in bit D9117 pattern.
- Page 235 APPENDICES Table App2.2 Special Register List (Continue) Number Name Description Details Applicable CPU • When one of F0 to 255 (F0 to 2047 for AnA and AnU) is turned on by , F number, which has turned on, D9125 SET F is entered into D9125 to D9132 in due order in BIN code.
- Page 236 APPENDICES Table App2.2 Special Register List (Continue) Number Name Description Details Applicable CPU D9141 D9142 D9143 D9144 D9145 • Stores the number of retries executed to I/O modules D9146 or remote terminal modules which caused communication error. D9147 (Retry processing is executed the number of times set D9148 at D9174.) D9149...
- Page 237 APPENDICES Table App2.2 Special Register List (Continue) Number Name Description Details Applicable CPU Mode setting Auto- • When an I/O module or a remote matic terminal module caused communication online error, the station is placed offline. return • Communication with normal stations is enabled continued.
- Page 238 APPENDICES Table App2.2 Special Register List (Continue) Number Name Description Details Limit switch output state Dedicated to D9180 — torage areas for A73. • Stores output state of limit switch function. axes 1 and 2 b14 b13 b12 b11 b10 b9 b8 b7 b6 b5 b4 b3 b2 b1 b0 Limit switch D9180 Y0E Y0D Y0C Y0B Y0A Y09 Y08 Y07 Y06 Y05 Y04 Y03 Y02 Y01 Y00...
- Page 239 APPENDICES Table App2.2 Special Register List (Continue) Number Name Description Details • Stores error code when the manual pulse generator axis setting error flag (M9077) is turned on in the bit each corresponds to each axis number. b8 b7 axis axis axis axis...
- Page 240 APPENDICES Table App2.2 Special Register List (Continue) Number Name Description Details • Bit which corresponds to faulty I/O module or remote terminal module is set (1). D9196 (Bit which corresponds to a faulty station is set when normal communication cannot be restored after executing the number of retries set at D9174.) •...
-
Page 241: Appendix3 Peripheral Device
APPENDIX Appendix3 Peripheral Device The following table shows peripheral devices used in the existing systems and applicability of the system FD. (a) For A2USHCPU-S1 Model name of PLC model name the peripheral Model name of the software package Applicability Applicable range at start-up device SW4GP-GPPA... - Page 242 APPENDIX (c) For A2ASCPU-S30 Model name of PLC model name the peripheral Model name of the software package Applicability Applicable range at start-up device SW4GP-GPPA Usable Device range of A2ACPU A6GPP/A6PHP SW3GP-GPPA Usable Device range of A3HCPU SW2 type or earlier Not usable –...
- Page 243 APPENDIX (d) For A2ASCPU,A2ASCPU-S1 Model name of PLC model name the peripheral Model name of the software package Applicability Applicable range at start-up device SW4GP-GPPA Usable Device range of A2ACPU A6GPP/A6PHP SW3GP-GPPA Usable Device range of A3HCPU SW2 type or earlier Not usable –...
- Page 244 APPENDIX (b) For A2USCPU(S1) Product used to write to the Product used to read from Compatibility CPU module the CPU module Conventional product New Product (PLC: A2A start-up) (PLC: A2A start-up) • All the data are compatible. New Product Conventional product (PLC: A2A start-up) (PLC: A2A start-up) •...
- Page 245 APPENDIX (d) For A2ASCPU,A2ASCPU-S1 Product used to write to the Product used to read from Compatibility CPU module the CPU module Conventional product New Product (PLC: A2A start-up) (PLC: A2A start-up) • All the data are compatible. New Product Conventional product (PLC: A2A start-up) (PLC: A2A start-up) •...
-
Page 246: Precautions For Utilizing The Existing Sequence Programs For A2Ushcpu-S1, A2Uscpu(S1), Or A2Ascpu(S1/S30)
APPENDIX Appendix4 Precautions for Utilizing the Existing Sequence Programs for A2USHCPU-S1, A2USCPU(S1), or A2ASCPU(S1/S30) This section explains the precautions for utilizing the sequence programs created for the A1SHCPU, A2SHCPU to the A2USHCPU-S1, A2USCPU(S1), A2ASCPU(S1/S30). POINT (1) The following 3 instructions dedicated to the AnUCPU can be used by adding to the existing sequence program. -
Page 247: Appendix4.1 Instructions With Different Specifications
APPENDIX Appendix4.1 Instructions with different specifications This section explains how to modify the sequence program when instructions with different specifications are used. Basically, the instructions which are not listed in this section do not require modifications. CHK instruction..Modifications are required when the A1SHCPU or A2SHCPU is used in the refresh mode. -
Page 248: Appendix4.2 Special Relays And Special Registers With Different Specifications
APPENDIX Appendix4.2 Special relays and special registers with different specifications The A2USHCPU-S1, A2USCPU(S1) and A2ASCPU(S1/S30) do not use the following special relays and special registers. Although no error occurs even if the following special relays and registers in the original program remains in the newly created program (they will be ignored), it is recommended to delete them from the program. -
Page 249: Appendix4.3 Parameter Setting
APPENDIX Appendix4.3 Parameter setting The parameters set in the existing CPU module can be utilized without any modification if none of them meets the following conditions. Setting items Description The microcomputer program area of the A2USHCPU-S1, A2USCPU(S1) and Microcomputer program A2ASCPU(S1/S30) is dedicated for the SFC. -
Page 250: Appendix4.4 I/O Control Method
APPENDIX Appendix4.4 I/O control method The I/O control method of the A2USHCPU-S1,A2USCPU(S1) and A2ASCPU(S1/S30) is the refresh method (partial direct I/O depending on the instruction), and is different from that of the A1SHCPU and A2SHCPU. Therefore pay attention to the input timing of the input (X) and the output timing of the output (Y). -
Page 251: Appendix4.5 Microcomputer Program
APPENDIX Appendix4.5 Microcomputer program Since the A2USHCPU-S1, A2USCPU(S1) and A2ASCPU(S1/S30) do not have the microcomputer mode, the utility software packages and user-created microcomputer programs used for the A1SHCPU and A2SHCPU are not available. (The microcomputer program area for A2USHCPU-S1, A2USCPU(S1) and A2ASCPU(S1/S30) is dedicated for the SFC.) When the utility software packages or the microcomputer programs above are used, delete all of the SUB instructions (microcomputer program call) used for executing them... -
Page 252: Appendix4.6 Processing Of The Index Register
APPENDIX Appendix4.6 Processing of the index register The index register of the A2USHCPU-S1, A2USCPU(S1) and A2ASCPU(S1/S30) is rewritten to the value prior to the execution of the interrupt program when the processing is transferred to the main or sequence program even if the value was updated by the interrupt program. -
Page 253: Appendix5 External Dimensions
APPENDIX Appendix5 External Dimensions Appendix5.1 A2USHCPU-S1, A2USHCPU, A2USCPU, A2USCPU-S1, A2ASCPU, A2ASCPU-S1, A2ASCPU-S30 modules Unit : mm (inch) App - 58... -
Page 254: Appendix5.2 A1S61Pn, A1S62Pn And A1S63P Power Supply Modules
APPENDIX Appendix5.2 A1S61PN, A1S62PN and A1S63P power supply modules Unit : mm (inch) App - 59... -
Page 255: Appendix5.3 Main Base Unit
APPENDIX Appendix5.3 Main base unit Appendix5.3.1 A1S32B main base unit Unit : mm (inch) Appendix5.3.2 A1S33B main base unit Unit : mm (inch) App - 60... -
Page 256: Appendix5.3.3 A1S35B Main Base Unit
APPENDIX Appendix5.3.3 A1S35B main base unit Unit : mm (inch) Appendix5.3.4 A1S38B main base unit Unit : mm (inch) App - 61... -
Page 257: Appendix5.4 Extension Base Unit
APPENDIX Appendix5.4 Extension base unit Appendix5.4.1 A1S65B extension base unit Unit : mm (inch) Appendix5.4.2 A1S68B extension base unit Unit : mm (inch) App - 62... -
Page 258: Appendix5.4.3 A1S52B Extension Base Unit
APPENDIX Appendix5.4.3 A1S52B extension base unit Unit : mm (inch) Appendix5.4.4 A1S55B extension base unit Unit : mm (inch) App - 63... -
Page 259: Appendix5.4.5 A1S58B Extension Base Unit
APPENDIX Appendix5.4.5 A1S58B extension base unit Unit : mm (inch) Appendix5.4.6 A1S65B-S1 extension base unit Unit : mm (inch) App - 64... -
Page 260: Appendix5.4.7 A1S68B-S1 Extension Base Unit
APPENDIX Appendix5.4.7 A1S68B-S1 extension base unit Unit : mm (inch) Appendix5.4.8 A1S52B-S1 extension base unit Unit : mm (inch) App - 65... -
Page 261: Appendix5.4.9 A1S55B-S1 Extension Base Unit
APPENDIX Appendix5.4.9 A1S55B-S1 extension base unit Unit : mm (inch) Appendix5.4.10 A1S58B-S1 extension base unit Unit : mm (inch) App - 66... -
Page 262: Appendix5.5 Memory Cassette
APPENDIX Appendix5.5 Memory cassette Appendix5.5.1 A2SNMCA-30KE memory cassette Unit : mm (inch) App - 67... -
Page 263: Appendix6 Transportation Precautions
APPENDIX Appendix6 Transportation Precautions When transporting lithium batteries, make sure to handle them based on the transportation regulations. Appendix6.1 Relevant models The batteries used for CPU modules are classified as follows: Product Name Model Name Description Handling Category A series battery A6BAT Lithium battery Non-dangerous goods... -
Page 264: Appendix6.2 Transportation Guidelines
APPENDIX Appendix6.2 Transportation Guidelines Products are packed properly in compliance with the transportation regulations prior to shipment. When repacking any of the unpacked products to transport it to another location, make sure to observe the IATA Dangerous Goods Regulations, IMDG Code and other local transportation regulations. -
Page 265: Appendix7 Handling Of Batteries And Devices With Built-In Batteries In Eu Member States
The following symbol is printed on the batteries and packaging of batteries and devices with built-in batteries used for Mitsubishi programmable controllers. Note: This symbol is for EU member states only. -
Page 266: Appendix7.2 Exportation Precautions
September 26, 2008 or later, provide the latest manuals that include the explanation of the symbol. If no Mitsubishi manuals or any old manuals without the explanation of the symbol are provided, separately attach an explanatory note regarding the symbol to each manual of the devices. - Page 267 INDEX Index register [V, Z] ........ 4-2,4-5 Accumulator [A] .......... 4-2,4-5 Internal relay [M] ........4-2,4-5 Allowable period of momentary power failure Interrupt pointer [I] ........4-2,4-5 ..............4-3,4-6 Latch relay [L] ......... 4-2,4-5 Annunciator [F] ........... 4-2,4-5 Link register [W]........4-2,4-5 Link relay [B] ...........
- Page 268 Initial processing..........4-7 Notes Battery handling precautions ......7-6 Installation and Removal of the Dustproof Cover ................ 8-14 CPU module handling precautions ....4-44 Installation Environment ........8-6 DESIGN PRECAUTIONS ......A-1 Instantaneous power failure ......4-12 DISPOSAL PRECAUTIONS......A-7 Instruction List ..........APP-1 Memory cassette handling precautions ..7-2 Instructions with different specifications ..
- Page 269 Procedure to read an error code ....11-11 Flow for actions when the "ERROR" LED is turned ON ............11-6 Processing of the index register ....App-57 Processing speed ........4-1,4-4 Flow for actions when the "POWER" LED is Program capacity........4-1,4-4 turned OFF ..........11-3 Programming language ......
- Page 270 6. Failure caused by reasons unpredictable by scientific technology standards at time of shipment from Mitsubishi. 7. Any other failure found not to be the responsibility of Mitsubishi or that admitted not to be so by the user. 2. Onerous repair term after discontinuation of production (1) Mitsubishi shall accept onerous product repairs for seven (7) years after production of the product is discontinued.
Need help?
Do you have a question about the MELSEC-A A2USHCPU-S1 and is the answer not in the manual?
Questions and answers