
Related Manuals for Mitsubishi A1SJH


Summary of Contents for Mitsubishi A1SJH
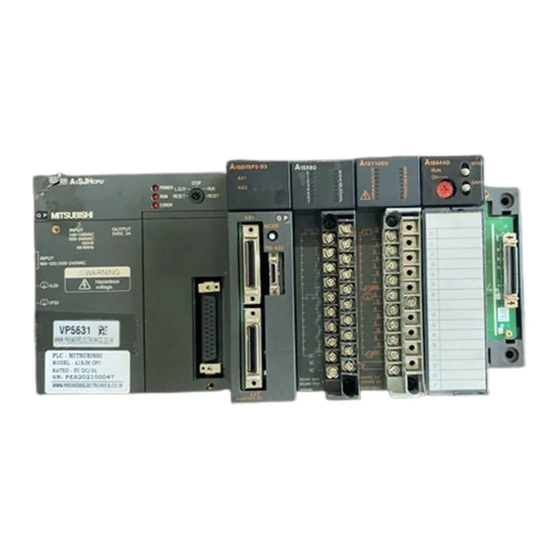
- Page 1 Type A1SJH(S8)/A1SH/A2SHCPU (S1) User s Manual Mitsubishi Programmable Logic Controller...
- Page 2 SAFETY PRECAUTIONS (Read these precautions before using.) When using Mitsubishi equipment, thoroughly read this manual and the associated manuals introduced in this manual. Also pay careful attention to safety and handle the module properly. These SAFETY PRECAUTIONS classify the safety precautions into two categories: "DANGER" and "CAUTION".
- Page 3 [DESIGN PRECAUTIONS] DANGER When overcurrent which exceeds the rating or caused by short-circuited load flows in the output module for a long time, it may cause smoke or fire. To prevent this, configure an external safety circuit, such as fuse. Build a circuit that turns on the external power supply when the PLC main module power is turned on.
- Page 4 [DESIGN PRECAUTIONS] CAUTION Do not bunch the control wires or communication cables with the main circuit or power wires, or install them close to each other. They should be installed 100 mm (3.94 inch) or more from each other. Not doing so could result in noise that would cause erroneous operation. When controlling items like lamp load, heater or solenoid valve using an output module, large current (approximately ten times greater than that present in normal circumstances) may flow when the output is turned OFF to ON.
- Page 5 [WIRING PRECAUTIONS] DANGER Completely turn off the external power supply when installing or placing wiring. Not completely turning off all power could result in electric shock or damage to the product. When turning on the power supply or operating the module after installation or wiring work, be sure that the module's terminal covers are correctly attached.
- Page 6 [STARTUP AND MAINTENANCE PRECAUTIONS] DANGER Do not touch the terminals while power is on. Doing so could cause shock or erroneous operation. Correctly connect the battery. Also, do not charge, disassemble, heat, place in fire, short circuit, or solder the battery. Mishandling of battery can cause overheating or cracks which could result in injury and fires.
- Page 7 [DISPOSAL PRECAUTIONS] CAUTION When disposing of this product, treat it as industrial waste. [TRANSPORTATION PRECAUTIONS] CAUTION When transporting lithium batteries, make sure to treat them based on the transport regulations. (Refer to Appendix 5 for details of the controlled models.) A - 6...
- Page 8 Japanese Manual Version SH (NA) 3635-G This manual does not imply guarantee or implementation right for industrial ownership or implementation of other rights. Mitsubishi Electric Corporation is not responsible for industrial ownership problems caused by use of the contents of this manual.
- Page 9 INTRODUCTION Thank you for choosing the Mitsubishi MELSEC-A Series of General Purpose Programmable Controllers. Please read this manual carefully so that the equipment is used to its optimum. A copy of this manual should be forwarded to the end user.
-
Page 10: Table Of Contents
Contents OVERVIEW ........................1 – 1 to 1 – 3 Overview ..........................1 – 1 Features ..........................1 – 2 SYSTEM CONFIGURATION ..................2 – 1 to 2 – 21 Overall Configuration......................2 – 1 2.1.1 Total configuration of AnSHCPU ................2 – 1 2.1.2 Total configuration of A1SJHCPU(S8)..............2 –... - Page 11 BASE UNIT AND EXTENSION CABLE ................. 6 – 1 to 6 – 10 Specifications ........................6 – 1 6.1.1 Specifications of base units ..................6 – 1 6.1.2 Specifications of extension cables................6 – 2 6.1.3 Application standards for extension base units (A1S52B(S1), A1S55B(S1), A1S58B(S1), A52B, A55B, A58B) .......6 – 2 Part Identification and Setting ....................6 –...
- Page 12 9.1.2 Installation inside the control cabinet ................9 – 2 9.1.3 Cables........................9 – 3 9.1.4 Power supply module....................9 – 7 9.1.5 Ferrite core........................9 – 7 9.1.6 Noise filter (power supply line filter) ................9 – 7 Requirement to Conform to the Low-Voltage Instruction ............9 – 8 9.2.1 Standard applied for AnS series ................9 –...
- Page 13 Appendix 2 Special Relay, Special Register List ................APP – 6 Appendix 2.1 Special Relay List ....................APP – 6 Appendix 2.2 Special Registers D ..................APP – 18 Appendix 3 Precautions when Switching from AnSCPU to AnSHCPU ........APP – 36 Appendix 3.1 Dissimilarities between A1SHCPU and A1SCPU ..........APP – 36 Appendix 3.2 Dissimilarities between A2SHCPU(-S1) and A2SCPU........APP –...
- Page 14 About This Manual The following table lists manuals regarding this product. Related Manuals Manual No Manual Name (Model Code) ACPU Programming Manual (Fundamentals) Describes programming methods necessary for creating programs,, device names IB-66249 parameters,, program types,, memory area configuration,, and so on (13J740) (Sold separately) ACPU Programming Manual (Common Instructions)
- Page 15 MEMO...
-
Page 16: Overview
1. OVERVIEW MELSEC-A OVERVIEW Overview This user's manual describes the functions, specification, and handling of the A1SJHCPU general purpose PLC (abbreviated as A1SJHCPU from here on), A1SJHCPU-S8 general purpose PLC (abbreviated as A1SJHCPU-S8), A1SHCPU general purpose PLC (abbreviated as A1SHCPU), A2SHCPU general purpose PLC (abbreviated as A2SHCPU), and A2SHCPU-S1 general purpose PLC (abbreviated as A2SHCPU-S1). -
Page 17: Features
1. OVERVIEW MELSEC-A Features High-speed operation processing speed Compared to the conventional A1SCPU, the A1SHCPU is three times and A2SHCPU (-S1) is four times faster in the operation processing speed, respectively. Item A1SHCPU A2SHCPU(-S1) A1SCPU 0.33 µs 0.25 µs 1 µs Operation processing speed *1 I/O processing : Refresh and LD instruction Addition of new dedicated instructions... -
Page 18: System Configuration
1. OVERVIEW MELSEC-A Max. 8 k/14 k steps of program An AnSCPU allows the creation of a program of up to 8 k (A1SCPU(S1)/ A1SCPUC24-R2)/ 14 k (A2SCPU(S1)) steps containing up to 26 sequence instructions, 131 basic instructions, 106 application instructions, and 8 CC- Link dedicated instructions. -
Page 19: Overall Configuration
2. SYSTEM CONFIGURATION MELSEC-A SYSTEM CONFIGURATION This chapter describes the applicable system configurations, cautions on configuring a system, and component devices of the AnSHCPU. Overall Configuration 2.1.1 Total configuration of AnSHCPU The figure below shows a system configuration when the AnSHCPU is used independently. - Page 20 2. SYSTEM CONFIGURATION MELSEC-A *: As for the applicable printer ROM writer, see the operating manuals for A7PHP/A7HGP. A7PHP plasma AC30PIO-26P Parallel handy graphic cable printer programmer Memory write A7NPR-S1 adapter dedicated A7HGP printer AC30R2 to A1SNMCA-8KP handy graphic cable (A6WA-28P) programmer ROM writer *...
-
Page 21: Total Configuration Of A1Sjhcpu(S8)
2. SYSTEM CONFIGURATION MELSEC-A 2.1.2 Total configuration of A1SJHCPU(S8) The figure below shows a system configuration and peripheral device configuration when the A1SJHCPU(S8) is used independently. (To peripheral device) Battery (A6BAT) A1SJHCPU (S8) Thin type I/O module (A1SJ-56 ROM cassette A1SNMCA-8KP equipped with EPROM... - Page 22 2. SYSTEM CONFIGURATION MELSEC-A *: As for the applicable A7PHP plasma Parallel AC30PIO-26P printer ROM writer, see handy graphic printer cable the operating manuals programmer for A7PHP/A7HGP. A7NPR-S1 A7HGP printer AC30R2 ROM writer * handy graphic cable programmer (To A1SJHCPU(S8)) AC30R4/ AC300R4 cable...
-
Page 23: Cautions On Configuring A System
When the dedicated instruction for the CPU UNIT CC-Link is used, use the master MODEL module with ("9707 B" or later), shown DATE 9707 B right, inscribed in the DATE column of the rated plate. MITSUBISHI ELECTRIC Function version Date of manufacture 2 - 5... - Page 24 2. SYSTEM CONFIGURATION MELSEC-A Peripheral device Points to note when using an A6WU P-ROM writer When using an A1SHCPU Use an A6WU P-RPM writer module whose software version is "E" or later. [ ] [ ] [ ] ( ) ( ) A6WU Label Date of...
- Page 25 2. SYSTEM CONFIGURATION MELSEC-A When writing a program to the A1SNMCA-2KE, set the parameter for main sequence program capacity to 2 k steps or less. Programs written with a main sequence program capacity setting of 3 k steps or over cannot work properly. Checking between the AnSHCPU and a peripheral device will result in a mismatch.
-
Page 26: Software Packages
Take caution when using a software version that selects "A0J2H" or "A1S" for ROM writing, since the file register area of 8k points is reduced to 4k points. To measure this, use a software package for which A1SJH/A1SH can be selected. 2 - 8... - Page 27 2. SYSTEM CONFIGURATION MELSEC-A Utility package The applicable utility packages are listed below. • SW0GHP-UTLPC-FN1 • SW0GHP-UTLPC-FN0 • SW0GHP-UTLP-FD1 • SW0-AD57P • SW1GP-AD57P • SW0GHP-UTLPC-PID Select "A3CPU" when an SW0GHP-UTLPC-FN1 or SW0GHP- UTLP-FD1 is started up. If both an SW1GP-AD57P and another utility package are used in combination, specify "AD57P-COM"...
-
Page 28: System Equipment
2. SYSTEM CONFIGURATION MELSEC-A System Equipment The following table shows the list of modules and devices which can be used for an AnS system. (1) AnSCPU dedicated modules Current Number of Item Model Description consumption Remarks inputs/outputs Approved [I/O allocation standard 5 V DC 24 V DC... - Page 29 2. SYSTEM CONFIGURATION MELSEC-A Number of Current Item Model Description inputs/outputs consumption Remarks Approved [I/O allocation standard 5 V DC 24 V DC module type] A1SY10 16-point relay contact output module (2 A) 16 [16 outputs] 0.12 0.09 A1SY10EU 16-point relay contact output module (2 A) 16 [16 outputs] 0.12 0.09...
- Page 30 2. SYSTEM CONFIGURATION MELSEC-A Number of Current Item Model Description inputs/outputs consumption Remarks Approved [I/O allocation standard 5 V DC 24 V DC module type] Blank A1SG60 Keeps unused slots free from dust 16 [empty] — — cover Number of set Dummy 16-, 32-, 48-, and 64-input selectable A1SG62...
- Page 31 2. SYSTEM CONFIGURATION MELSEC-A Number of Current Item Model Description inputs/outputs consumption Remarks Approved [I/O allocation standard 5 V DC 24 V DC module type] Current Memory consumption card A1SD59J-S2 Memory card interface module is when 0.05 — interface [Special 32-point] A1SD59J-MIF module is connected.
- Page 32 2. SYSTEM CONFIGURATION MELSEC-A Number of Current Item Model Description inputs/outputs consumption Remarks Approved [I/O allocation standard 5 V DC 24 V DC module type] Transistor output, thermocouple input A1S62TCTT- 2 channels/module 0.19 — PID control : ON/OFF pulse Transistor output, thermocouple input [Special 32-point] A1S62TCTTB 2 channels/module...
- Page 33 2. SYSTEM CONFIGURATION MELSEC-A Number of Current Item Model Description inputs/outputs consumption Remarks Approved [I/O allocation standard 5 V DC 24 V DC module type] JEMANET A1SJ71J92-S3 JEMANET(OPCN-1)Master module 0.40 — [Special 32-point] (OPCN-1) Interface A1SJ71J95 JEMANET(OPCN-1)slave module 0.40 — module [Special 32-point] Exclusive I/O...
- Page 34 2. SYSTEM CONFIGURATION MELSEC-A Number of Current Item Model Description inputs/outputs consumption Remarks Approved [I/O allocation standard 5 V DC 24 V DC module type] Large-size graphic operation terminal 0.22 When bus- 32 [Special 32- 256 colors, TFT color, 800 × 600 dots, A985GOT —...
- Page 35 2. SYSTEM CONFIGURATION MELSEC-A Number of Current Item Model Description inputs/outputs consumption Remarks Approved [I/O allocation standard 5 V DC 24 V DC module type] A1S32B Up to two I/O modules can be loaded. Equipped with two A1S33B Up to three I/O modules can be loaded. extension A1S35B Up to five I/O modules can be loaded.
- Page 36 MELSEC-A * Approved Item Model Description Applicable model standard EPROM A1SNMCA- 8 k steps, equipped with EPROM For A1SJH/A1SHCPU : A6WA-28P (directly) required A1SNMCA- 2 k steps, equipped with E PROM For A1SJH/A1SHCPU (directly) Memory Writing/reading directly from the A1SNMCA-...
- Page 37 I/O cables with connectors for I/O modules with 40-pin connector specifications (A1SX41, A1SX42, A1SY41, A1SY42, etc.) or 37-pin D-sub connector specifications (A1SX81, A1SY81, A1SY81EP) are available. Consult your nearest Mitsubishi representative for I/O cables with connectors. Peripheral devices Item Module Remarks •...
-
Page 38: General Description Of System Configuration
2. SYSTEM CONFIGURATION MELSEC-A General Description of System Configuration 2.4.1 Outline of AnSHCPU configuration The following gives the system configuration, number of inputs/outputs, I/O number allocation, etc. when the AnSHCPU is used as an independent system. Main base unit (A1S38B) Slot number Extension cable 1st extension... -
Page 39: Outline Of A1Sjhcpu(S8) Configuration
2.4.2 Outline of A1SJHCPU(S8) configuration This section describes the system configuration, numbers of I/O points, I/O allocations, etc., for a stand-alone A1SJHCPU(S8) system. Slot number A1SJH : 5 A1SJHCPU Extension cable A1SJH-S8 : 8 1st extension Extension base unit (A1S58B-S1) -
Page 40: Specifications
*3 : Do not use or store the PLC in the environment where the pressure is higher than the atmospheric pressure at sea level. Otherwise, malfunction may result. To use the PLC in high-pressure environment, contact your nearest Mitsubishi representative. 3 - 1... -
Page 41: Anshcpu Module
4. AnSHCPU MODULE MELSEC-A AnSHCPU MODULE Performance Specifications The memory capacities of AnSHCPU modules, performances of devices, etc., are presented below. Table 4.1 Performance specifications Type A1SJHCPU A1SJHCPU- A1SHCPU A2SHCPU(S1) Item Control system Repeated operation (using stored program) I/O control method Refresh mode/Direct mode selectable Language dedicated to sequence control. - Page 42 4. AnSHCPU MODULE MELSEC-A Table 4.1 Performance specifications (Continued) Type A1SJHCPU A1SJHCPU- A1SHCPU A2SHCPU(S1) Item Index register (V, Z) (points) 2 (V, Z) Pointer (P) (points) 256 (P0 to P255) Interrupt pointer (I) (points) 32 (I0 to I31) Special relay (M) (points) 256 (M9000 to M9255) Special register (D) (points) 256 (D9000 to D9255)
-
Page 43: Outline Of Anshcpu Operation Processing
4. AnSHCPU MODULE MELSEC-A 4.1.1 Outline of AnSHCPU operation processing This section explains the operation processing which takes place from the time the AnSHCPU power is switched ON until the sequence program is executed. AnSHCPU processing is generally divided into the following four types: Initial processing This is the pre-processing for executing sequence operations. - Page 44 4. AnSHCPU MODULE MELSEC-A Start up Initial screen I/O module initialization Data memory initialization I/O module I/O address assignment Self-diagnosis check Link parameter set I/O module refresh If the refresh mode for I/O control is selected. Sequence program processing Step 0 END (FEND) instruction execution END processing...
-
Page 45: Operation Processing In The Run, Stop, Pause Status
4. AnSHCPU MODULE MELSEC-A 4.1.2 Operation processing in the RUN, STOP, PAUSE status The PLC CPU can be operated in the RUN, STOP and PAUSE status as described below. RUN operation RUN indicates repeated operations of the sequence program from step 0 to the END (FEND) instruction. -
Page 46: Operation Processing When A Momentary Power Interruption Occurs
4. AnSHCPU MODULE MELSEC-A 4.1.3 Operation processing when a momentary power interruption occurs When voltage supplied to the power supply module is below the specified range, the AnSHCPU detects a momentary power interruption. When the AnSHCPU detects a momentary power interruption, the following operations are executed : Momentary power interruption within 20 msec Program processing is stopped and the output is retained. -
Page 47: Self-Diagnosis
4. AnSHCPU MODULE MELSEC-A 4.1.4 Self-diagnosis The self-diagnosis function allows the AnSHCPU to detect its own errors. Self-diagnosis is carried out when the PLC power supply is turned ON and if an error occurs while the PLC is in the RUN status. If the AnSHCPU detects an error, it displays an error message and stops to prevent faulty PLC operation. - Page 48 4. AnSHCPU MODULE MELSEC-A Table 4.2 Self-diagnosis "RUN" Diagnosis Diagnosis timing module display message status status INSTRUCT. CODE Memory error When the corresponding instruction is executed ERR. Instruction code check When power is switched ON or a reset is executed Parameter setting check PARAMETER ERROR When switched from STOP/PAUSE to RUN...
-
Page 49: List Of Devices
4. AnSHCPU MODULE MELSEC-A 4.1.5 List of devices A device is any contact, coil, or timer used in PLC program operations. AnSHCPU devices and their range of use are shown below. The items marked "*" can be used and set for range change by setting the parameters. Set parameters which are appropriate for the system configuration and its program. - Page 50 4. AnSHCPU MODULE MELSEC-A Table 4.3 Devices (Continued) Device Application range (Number of points) Explanation Indicates the destination of branch instructions (CJ, SCJ, CALL, Pointer P0 to P255 (256 points) JMP). Pointer for Indicates an interrupt program corresponding to the interrupt I0 to I31 (32 points) interruption source.
-
Page 51: List Of Parameter Setting Ranges
4. AnSHCPU MODULE MELSEC-A 4.1.6 List of parameter setting ranges The parameters specify various PLC functions, device ranges and user memory assignments of the AnSHCPU. As shown in Table 4.4, the parameters have default settings so the user does not have to set all the parameter items. - Page 52 4. AnSHCPU MODULE MELSEC-A Table 4.4 Parameter setting ranges (Continued) Setting Valid peripheral Default value Setting range devices Item X0 to 1FF A2SHCPU (in units of 16 points) Input (X) X0 to 3FF A2SHCPU-S1 (in units of 16 points) A1SJHCPU(S8) Y0 to FF A1SHCPU (in units of 16 points)
-
Page 53: Memory Capacity Settings (Main Programs, File Registers, Comments, Etc.)
4. AnSHCPU MODULE MELSEC-A 4.1.7 Memory capacity settings (main programs, file registers, comments, etc.) The A1SHCPU, A2SHCPU(S1) provides 64 k (192 k) bytes of user memory area (RAM). Data for parameters, T/C set values, main programs, sampling trace, status latch, file registers, and comments can be stored in the user memory area. - Page 54 4. AnSHCPU MODULE MELSEC-A When the A1SJHCPU(S8)/A1SHCPU is used Even if the main program is stored in an E PROM/EPROM, the capacities of the sampling trace, status latch, file register, and comment areas cannot be increased, because the system uses the internal RAM area (area indicated by *1 in the following figure) as in RAM operation.
-
Page 55: Functions
4. AnSHCPU MODULE MELSEC-A Functions The following table describes the functions of the AnSHCPU. Table 4.6 List of functions Section Function Description reference • Executes the sequence program at the predetermined intervals independently of the scan Constant scan time. 4.2.1 •... -
Page 56: Handling Precautions
4. AnSHCPU MODULE MELSEC-A Handling precautions This section gives handling instructions from unpacking to installation of the AnSHCPU, I/O module, extension base unit, etc. CAUTION • Use the PLC in an environment that meets the general specifications contained in this manual. Using this PLC in an environment outside the range of the general specifications could result in electric shock, fire, malfunction, and damage to or deterioration of the product. -
Page 57: Part Identification And Setting
4. AnSHCPU MODULE MELSEC-A Part Identification and Setting 4.4.1 Part identification of AnSHCPU, A1SJHCPU (S8) A1SHCPU A1SH/A2SHCPU(-S1) side face MELSEC A1SHCPU STOP LCLR RESET RESET ERROR MITSUBISHI (10) A2SHCPU A2SHCPU-S1 MELSEC A2SHCPU MELSEC A2SHCPU-S1 STOP STOP LCLR LCLR RESET RESET RESET... - Page 58 4. AnSHCPU MODULE MELSEC-A A1SJHCPU(S8) (12) (3) (2) (11) (21) MELSEC A1SJHCPU POWER STOP L.CLR RESET RESET ERROR MITSUBISHI INPUT OUTPUT 100Ð120VAC 5VDC 3A 200Ð240VAC 105VA (20) 50/60Hz (13) INPUT 100-120/200-240VAC WARNING (14) (LG) Hazardous I/D0 I/D1 I/D2 I/D3 I/D4 voltage.
- Page 59 4. AnSHCPU MODULE MELSEC-A Name Function • Used to connect a peripheral device to write/read, monitor, or test a program using a peripheral RS-422 connector device. • Close with the cover when not connected to a peripheral device. • Protects AnSHCPU printed circuit board, memory cassette, RS-422 connector, battery, etc. •...
-
Page 60: I/O Control Switch Setting
4. AnSHCPU MODULE MELSEC-A 4.4.2 I/O control switch setting The I/O control system uses either the direct mode or the refresh mode. Use the DIP switch (SW1) to switch the I/O control mode. On shipment from the factory, the direct mode is set for both inputs and outputs (SW1 : ON). - Page 61 4. AnSHCPU MODULE MELSEC-A When the A2SHCPU(S1) is used The memory write protect range can be changed by changing the settings of the memory write protect DIP switches. For details, see Fig. 4.16. The SW2 may be in the ON or OFF position. A2SHCPU Switch No.
-
Page 62: Clearing Latched Data
4. AnSHCPU MODULE MELSEC-A 4.4.4 Clearing latched data Follow the procedure described below to clear latched data using the RUN/STOP key switch. The latch clear operation also clears unlatched device data. Turn the RUN/STOP key switch from the "STOP" position to the "L.CLR" position several times to make the "RUN"... -
Page 63: Power Supply Module
5. POWER SUPPLY MODULE MELSEC-A POWER SUPPLY MODULE Specifications Table 5.1 shows the specifications of the power supply modules. Table 5.1 Power supply modules specifications Performance specifications Item A1S61PN A1S62PN A1S63P Base installation location Power supply module installation slot +10% +30% 100 to 240VAC 24VDC... - Page 64 5. POWER SUPPLY MODULE MELSEC-A Performance specifications for the A1SJHCPU(S8) built-in power supply. Table 5.2 Performance specifications for the A1SJHCPU(S8) built -in power supply Type A1SJHCPU(S8) Item ±10 % 100-120 V AC 15 % (85 to 132 V AC) Input power supply ±10 % 500-240 V AC 15 %...
- Page 65 5. POWER SUPPLY MODULE MELSEC-A 5.1.1 Selection of the power supply module Select the power supply module according to the total current consumption of I/O modules, special function modules and peripheral devices supplied by the power supply module. When an A1S52B(S1), A1S55B(S1), A1S58B(S1), A52B, A55B or A58B is used, the power is supplied from the power supply module of the main base unit.
- Page 66 5. POWER SUPPLY MODULE MELSEC-A Part Identification and Setting The following gives the names and description of the parts of the power supply modules : MELSECA1S61PN MELSECA1S62PN POWER POWER MITSUBISHI MITSUBISHI INPUT OUTPUT INPUT OUTPUT 100–240VAC 5VDC 5A 100–240VAC 5VDC 3A...
- Page 67 5. POWER SUPPLY MODULE MELSEC-A Name Description Grounding for the power supply filter. The potential of A1S61P or A1S62P terminal is 1/2 of the input LG terminal voltage. Power supply input Used to connect a 24 V DC power supply. terminals Power supply input Used to connect 100 V AC to 200 V AC power supply.
-
Page 68: Base Unit And Extension Cable
6. BASE UNIT AND EXTENSION CABLE MELSEC-A BASE UNIT AND EXTENSION CABLE Specifications This section describes the specifications for the base units (main base units, extension base units) that can be used in the system, and the application standards for extension base units. 6.1.1 Specifications of base units Specifications of main base units... -
Page 69: Specifications Of Extension Cables
6. BASE UNIT AND EXTENSION CABLE MELSEC-A 6.1.2 Specifications of extension cables Table 6.3 shows the specifications of the extension cables which can be used for the AnSHCPU system. Table 6.3 Extension cable specifications Model A1SC01B A1SC03B A1SC07B A1SC12B A1SC30B A1SC60B A1SC05NB A1SC07NB A1SC30NB A1SC50NB Item... - Page 70 6. BASE UNIT AND EXTENSION CABLE MELSEC-A Factors of voltage drop Voltage drop may involve the following factors (a), (b), and (c) depending on the connecting method and type of extension base units. Voltage drop of a main base unit Voltage drop of an extension base unit Voltage drop in an extension cable Extension cable connected to the left side...
- Page 71 6. BASE UNIT AND EXTENSION CABLE MELSEC-A Calculation of the receiving-end voltage AnSH to V : Voltage drop of each slot of a main base unit to I : Current consumption of each slot of a main base unit to V : Voltage drop of each slot of an extension base unit to I : Current consumption of each slot of an extension base unit...
- Page 72 6. BASE UNIT AND EXTENSION CABLE MELSEC-A Calculation of voltage drop of an extension base unit (A1S52B(S1), A1S55B(S1), A1S58B(S1)) Each slot of an extension base unit has a resistance of 0.006 Ω. Calculate the voltage drop of each slot, to obtain the total voltage drop of an extension base unit.
- Page 73 6. BASE UNIT AND EXTENSION CABLE MELSEC-A Examples A1S38B A1S03B (0.021 Ω) A1S58B Calculation of voltage drop of the main base unit Vk = 0.007 × {0.32 + 0.05 × (9 + 8 + 7 + 6 + 5 + 4 + 3 + 2) + (0.27 × 8) × 9} = 0.15372 Calculation of voltage drop of the extension base unit Vz = 0.006 ×...
- Page 74 6. BASE UNIT AND EXTENSION CABLE MELSEC-A Parts Identification and Setting Main base unit (A1S32B, A1S33B, A1S35B, A1S38B) IOUT IOUT POWER A1S38B Name Application Connector for extension cable Connector for sending and receiving signals to and from the extension base unit. Cover to protect the connector for the extension cable.
- Page 75 6. BASE UNIT AND EXTENSION CABLE MELSEC-A Main base modules (A1S52B(S1), A1S55B(S1), A1S58B(S1), A1S65B(S1), A1S68B(S1)) A1S65B (S1), A1S68B (S1) IN OUT POWER A1S68B A1S52B (S1), A1S55B (S1), A1S58B (S1) A1S58B Name Purpose Used to connect an extension cable to a main base module. Extension cable connector Remove the connector cover attached to the module and connect the extension cable.
-
Page 76: Installing And Removal On/From A Din Rail
6. BASE UNIT AND EXTENSION CABLE MELSEC-A Installing and Removal on/from a DIN Rail Both main base units and extension base units are equipped with hooks for mounting on a DIN rail. The method for mounting them on a DIN rail is explained below : Applicable DIN rails (JIS-C2B12) TH35-7.5 Fe TH35-7.5 Al... - Page 77 6. BASE UNIT AND EXTENSION CABLE MELSEC-A Mounting/removing on/from a DIN rail Mounting procedure Mount a base unit on a DIN rail as follows : Engage the hook of the base unit with the rail from above rail. Push the base unit onto the rail and fix it in position. Module DIN rail hook DIN rail...
-
Page 78: Memory Cassette And Battery
7. MEMORY CASSETTE AND BATTERY MELSEC-A MEMORY CASSETTE AND BATTERY Memory Cassette This section describes the specifications, handling instructions and installation of the memory ICs used in the AnSHCPU. 7.1.1 Specifications Table 7.1 and 7.2 show the specifications of the ROMs. Table 7.1 Memory specifications (A1SJHCPU(S8)/A1SHCPU) Model A1SNMCA-2KE *1... -
Page 79: Handling Precautions
7. MEMORY CASSETTE AND BATTERY MELSEC-A 7.1.2 Handling precautions Handle memory cassettes and pin connectors with care since their plastic bodies cannot resist strong impacts. Do not remove the printed circuit board from its enclosure. Take care not to let chips of wires and other foreign material enter the memory cassette. -
Page 80: Installing And Removing A Memory Cassette
7. MEMORY CASSETTE AND BATTERY MELSEC-A 7.1.3 Installing and removing a memory cassette DANGER • Push the memory cassette onto the fixing connector to install it securely. Check that floating does not occur after its installation. Poor contact could result in a malfunction. The installation/removal method of the memory cassette is common in all AnSHCPU models, but the installation position is unique to each model. - Page 81 7. MEMORY CASSETTE AND BATTERY MELSEC-A Removing a memory cassette Hook releasing lugs A1SNMCA -8KE A1SNMCA -8KE A1SHCPU A1SHCPU Hook releasing lugs A1SJHCPU A1SJHCPU Pull out the memory cassette while pushing the hook releasing lugs that are provided at the top and the bottom of the memory cassette. 7 - 4...
-
Page 82: Writing A Sequence Program To A Memory Cassette
ROM, since the file register area of 8k points will be reduced to 4k points. As a countermeasure, use a software package for which A1SJH/A1SH can be selected. Mount a memory cassette to the memory write adapter. Couple the connectors correctly. -
Page 83: Memory Write-Protect Setting For An A2Snmca-30Ke
7. MEMORY CASSETTE AND BATTERY MELSEC-A 7.1.5 Memory write-protect setting for an A2SNMCA-30KE When an A2SNMCA-30KE is installed on an A2SHCPU, misuse of peripheral devices can cause the E PROM memory to be over-written. In order to prevent this from occurring, the A2SNMCA-30KE has been provided with a memory write- protect setting. -
Page 84: Battery
7. MEMORY CASSETTE AND BATTERY MELSEC-A Battery DANGER • Connect the battery correctly. Do not perform charging, disassembly, heating, throwing into fire, short-circuit, soldering and so on. Handling the battery incorrectly may cause injuries or a fire due to overheating, blowout, ignition and so on. -
Page 85: Loading And Installation
8. LOADING AND INSTALLATION MELSEC-A LOADING AND INSTALLATION This chapter describes the procedure for loading and installation and gives relevant precautions to ensure that the system performs with high reliability and that its functions are used to best effect. Consideration for Safety When the power to the system is turned ON or OFF, the process output may not perform normally at times due to the difference between the delay time and the rise time of the power supply of the PLC CPU main module and the external power... - Page 86 8. LOADING AND INSTALLATION MELSEC-A System design circuit example ALL AC Mixed AC and DC POWER POWER TRANSFORMER TRANSFORMER TRANSFORMER FUSE FUSE FUSE FUSE FUSE FUSE M9006 M9006 M9039 POWER M9039 SUPPLY M9084 PROGRAM M9084 START SW FUSE FUSE STOP SW PROGRAM INPUT MODULE START...
- Page 87 Although Mitsubishi PLCs are manufactured under strict quality control, they may fail or operate abnormally due to unspecifiable reasons. To prevent the abnormal operation of the whole system, machine breakdown, and accidents, build a fail-safe circuit outside the PLC.
-
Page 88: Installation Environment
8. LOADING AND INSTALLATION MELSEC-A Installation Environment Never install the AnSHCPU system in the following environments : Locations where the ambient temperature is outside the range of 0 to 55 °C. Locations where the ambient humidity is outside the range of 10 to 90 % RH. Locations where dew condensation takes place due to sudden temperature changes. - Page 89 8. LOADING AND INSTALLATION MELSEC-A Power consumption of a power supply module Approximately 70 % of the power supply module current is converted into power and 30 % of that 70 % is dissipated as heat, i.e., 3/7 of the output power is actually used.
- Page 90 8. LOADING AND INSTALLATION MELSEC-A Power consumption of the special function module power supply is expressed as : × 5 + I × 24 + I × 100 (W) Ws = I 100V The sum of the above values is the power consumption of the entire PLC system.
-
Page 91: Module Mounting
8. LOADING AND INSTALLATION MELSEC-A Module Mounting This section gives the mounting instructions for the main base unit and extension base units. 8.4.1 Mounting instructions The instructions for mounting the PLC to a panel, etc. are presented below : To improve ventilation and facilitate the replacement of the module, provide 30 mm (1.18 in.) or more of clearance around the PLC. - Page 92 8. LOADING AND INSTALLATION MELSEC-A 8.4.2 Installation This section explains how to mount main and extension base units. Indicates the panel top, wiring duct, or any assembly. Main base Extension base 30 mm (1.17 in.) or more 30 mm (1.17 in.) or more Fig.
- Page 93 8. LOADING AND INSTALLATION MELSEC-A Installation and Removal of Module This section explains the mounting and removal of the I/O module and special function module, etc., to and from the base module. Module mounting The module mounting procedure is as follows. Insert the module mounting Base unit Module...
- Page 94 8. LOADING AND INSTALLATION MELSEC-A Module removal The module removal procedure is as follows. Base unit Remove the module mounting screw. Then, while pushing the hook latch, pull the module toward you. Module connector Lift upwards and remove the module hook from the module mounting hole.
-
Page 95: Installation
8. LOADING AND INSTALLATION MELSEC-A Installing and Removing the Dustproof Cover DANGER • When configuring the system, do not leave any vacant slots on the base. Should there be any vacant slots, be sure to use a blank cover (A1SG60) or a dummy module (A1SG62). - Page 96 8. LOADING AND INSTALLATION MELSEC-A Removal I/O module Notch Dustproof cover Fit the tip of a flat blade screwdriver into the notch on the left side of the dustproof cover. While keeping the screwdriver tip in the notch, gently move the screwdriver to the left (as shown above) until the cover snaps open.
-
Page 97: Wiring
8. LOADING AND INSTALLATION MELSEC-A Wiring This section gives the wiring instructions for the system. 8.7.1 Wiring instructions DANGER • Before biginning any installation or wiring work, make sure all phases of the power supply have been obstructed from the outside. Failure to completely shut off the power supply phases may cause electric shock and/or damage to the module. - Page 98 8. LOADING AND INSTALLATION MELSEC-A Precautions when wiring power supply cable are described. Wiring power supply Separate the PLC's power supply line from the lines for I/O devices and power devices as shown below. When there is much noise, connect an insulation transformer. Insulation PLC power Main power...
- Page 99 8. LOADING AND INSTALLATION MELSEC-A Wiring of I/O equipment The applicable size of wire for connection to the terminal block connector is 0.75 (18) to 1.25 mm (14 AWG). However, it is recommended to use wires of 0.75 mm (18 AWG) for convenience. Separate the input and output lines.
-
Page 100: Wiring To Module Terminals
(abbreviated as UPS hereafter) : Use the online UPS with a voltage distortion of 5% or less or line-interactive UPS. For standby UPS, select the Mitsubishi FREQUPS-F series UPS (serial No. P or later) such as FW-F10-03K/0.5K. -
Page 101: Emc Directive And Low-Voltage Instruction
When installed in the specified manner this unit will be compliant with the relevant standards EN50081-2 and prEN50082-2 as applicable in the EMC directive. Failure to comply with these instructions could lead to impaired EMC performance of the equipment and as such Mitsubishi Electric Corporation can accept no liability for such actions. 9.1.1... - Page 102 9. EMC DIRECTIVE AND LOW-VOLTAGE INSTRUCTION MELSEC-A 9.1.2 Installation inside the control cabinet Since the PLC is an open type device (device incorporated into another device), it must be installed in the control cabinet. This has a good effect of not only for assuring safety but also for shielding noise emitted from the PLC, by means of the control cabinet.
- Page 103 9. EMC DIRECTIVE AND LOW-VOLTAGE INSTRUCTION MELSEC-A 9.1.3 Cables The cables led from the control cabinet contain a high frequency noise element and outside the control panel these cables act as antennae and radiate noise. The cables connected to input/output modules or special modules which leave the control panel must always be shielded cables.
- Page 104 9. EMC DIRECTIVE AND LOW-VOLTAGE INSTRUCTION MELSEC-A (1) Shield earthing When a shield of the shielded cable is earthed to the cabinet body, please ensure that the shield contact with the body is over a large surface area. If the cabinet body is painted it will be necessary to remove paint from the contact area.
- Page 105 9. EMC DIRECTIVE AND LOW-VOLTAGE INSTRUCTION MELSEC-A (3) Ethernet module, Web server module Precautions for using AUI cables, twisted pair cables and coaxial cables are described below. (a) Always earth the AUI cables connected to the 10BASE5 connectors. Because the AUI cable is of the shielded type, strip part of the outer cover and earth the exposed shield section to the ground on the widest contact surface as shown below.
- Page 106 External wiring cable (2 m to 10 m (6.56 ft. to 32.81 ft.)) Drive unit Ferrite core and cable clamp types and required quantities • Cable clamp Type : AD75CK (Mitsubishi Electric) • Ferrite core Type : ZCAT3035-1330 (TDK ferrite core) • Required quantity...
-
Page 107: Ferrite Core
9. EMC DIRECTIVE AND LOW-VOLTAGE INSTRUCTION MELSEC-A 9.1.4 Power supply module The precautions required for each power supply module are described below. Always observe the items noted as precautions. Model Precautions A1S63P *1 Use a CE-compliant 24VDC internal power supply. Make sure to short and ground the LG and FG terminals. -
Page 108: Requirement To Conform To The Low-Voltage Instruction
9. EMC DIRECTIVE AND LOW-VOLTAGE INSTRUCTION MELSEC-A The precautions required when installing a noise filter are described below. Do not bundle the wires on the input side and output side of the noise filter. When bundled, the output side noise will be induced into the input side wires from which the noise was filtered. -
Page 109: Precautions When Using The Ans Series
9. EMC DIRECTIVE AND LOW-VOLTAGE INSTRUCTION MELSEC-A 9.2.2 Precautions when using the AnS series Module selection Power module For a power module with rated input voltage of 100/200 V AC, select a model in which the internal part between the first order and second order is intensively insulated, because it generates hazardous voltage (voltage of 42.4 V or more at the peak) area. -
Page 110: Control Box
9. EMC DIRECTIVE AND LOW-VOLTAGE INSTRUCTION MELSEC-A 9.2.4 Control box Because the PLC is an open device (a device designed to be stored within another module), be sure to use it after storing in the control box. Electrical shock prevention In order to prevent persons who are not familiar with the electric facility such as the operators from electric shocks, the control box must have the following functions :... -
Page 111: Grounding
9. EMC DIRECTIVE AND LOW-VOLTAGE INSTRUCTION MELSEC-A 9.2.6 Grounding There are two kinds of grounding terminals as shown below. Either grounding terminal must be used grounded. Be sure to ground the protective grounding for the safety reasons. Protective grounding Maintains the safety of the PLC and improves the noise resistance. -
Page 112: 10. Maintenance And Inspection
10. MAINTENANCE AND INSPECTION MELSEC-A 10. MAINTENANCE AND INSPECTION DANGER • Do not touch a terminal while power is supplied. Doing so may result in electric shock or a malfunction. • Connect the battery correctly. Do not perform charging, disassembly, heating, throwing into fire, short-circuit, soldering and so on. -
Page 113: Daily Inspection
10. MAINTENANCE AND INSPECTION MELSEC-A 10.1 Daily Inspection Table 10.1 shows the inspection and items which are to be checked daily. Table 10.1 Daily inspection Check item Check point Judgement Corrective action Base unit Check for loose The base unit should be mounting mounting screws Retighten screws. -
Page 114: Periodic Inspection
10. MAINTENANCE AND INSPECTION MELSEC-A 10.2 Periodic Inspection This section explains the inspection items which are to be checked every six months to one year. This inspection should also be performed when the equipment is moved or modified or the wiring is changed. Table 10.2 Periodic inspection Check item Check point... -
Page 115: Replacement Of Battery
10. MAINTENANCE AND INSPECTION MELSEC-A 10.3 Replacement of Battery M9006 or M9007 turns ON when the voltage of the battery for program backup and power interruption compensation falls. Even if this special relay turns ON, the contents of the program and the power interruption compensation function are not lost immediately. -
Page 116: Battery Replacement Procedure
10. MAINTENANCE AND INSPECTION MELSEC-A 10.3.2 Battery replacement procedure When the service life of the battery has expired, replace the battery using the following procedure : Even if the battery is removed, the memory is backed up by a capacitor for some time. -
Page 117: 11. Troubleshooting
11. TROUBLESHOOTING MELSEC-A 11. TROUBLESHOOTING This chapter describes various procedures for troubleshooting, and corrective action. 11.1 Basic Troubleshooting System reliability depends not only on reliable equipment but also on short down- times in the event of faults. The three basic points to be kept in mind in troubleshooting are : Visual checks Check the following points Machine motion (in the stopped and operating status) -
Page 118: 11. Troubleshooting
11. TROUBLESHOOTING MELSEC-A 11.2 Troubleshooting This section explains the procedure for determining the cause of problems, errors, and corrective action to be taken in response to error codes. 11.2.1 Troubleshooting flowcharts The procedures for troubleshooting are given in the following flowcharts : Occurrence of error See Section 11.2.2 Is the POWER LED OFF? -
Page 119: Flowchart Used When The Power Led Goes Off
Does the POWER LED come ON? Overcurrent or overvoltage (1) Eliminate the excess protection device current. activated? (2) Switch the input power OFF, then ON. Does the POWER LED come ON? Consult your nearest Mitsubishi representative. 11 - 3... -
Page 120: Flowchart Used When The Run Led Goes Off
RUN LED remains OFF. In case of (1) In case of (2) Move the RUN/STOP keyswitch on the AnSHCPU Consult your nearest Mitsubishi to STOP and write END to representative. address 0 using a periph- eral device. RUN LED dose not go ON. -
Page 121: Flowchart Used When The Run Led Flashes
ON, when operation is started, or during operation. RUN LED flashes. Hardware fault Check the error using pe- ripheral equipment. (See Section 11.3) Consult your nearest Mitsubishi representative. Reset the AnSHCPU using the RUN/STOP keyswitch. Correct the error. (See Section 11.3) Set the RUN/STOP key- switch to the RUN position. -
Page 122: Flowchart Used When The Error Led Is Lit
11. TROUBLESHOOTING MELSEC-A 11.2.5 Flowchart used when the ERROR LED is lit The following shows the corrective measures when the ERROR LED is lit in the RUN status. ERROR LED is lit. Is M9008 ON? Cause of the Hardware fault Check corrective action in ERROR LED the fault code list. -
Page 123: Flowchart Used When The Error Led Flashes
11. TROUBLESHOOTING MELSEC-A 11.2.6 Flowchart used when the ERROR LED flashes The following shows the corrective measures when the ERROR LED flashes. The ERROR LED flashes. Is "0" stored in special register D9124? Consult your nearest Mit- subishi representative. Reset the ON annunciator coil using a RST F[ ] in- struction. -
Page 124: Flowchart Used When The Output Load Of The Output Module Does Not Come On
Consult your nearest the maximum number of current to comply with Mitsubishi representative. simultaneous ON signals. specifications. POINT If the input or load signals are not switched OFF, see Section 11.4 I/O Connection Troubleshooting and take corrective measures. -
Page 125: Flowchart Used When A Program Cannot Be Written To The Plc Cpu
11. TROUBLESHOOTING MELSEC-A 11.2.8 Flowchart used when a program cannot be written to the PLC CPU The following shows the corrective measures when a program cannot be written to the PLC CPU. Program cannot be written to the PLC CPU Is the RUN/STOP Set the RUN/STOP... -
Page 126: Error Code List
11. TROUBLESHOOTING MELSEC-A 11.3 Error Code List If an error occurs in the RUN mode, an error display or error code (including a step number) is stored in the special register by the self-diagnosis function. The error code reading procedure and the causes of and corrective actions for errors are shown in Table 11.1. - Page 127 11. TROUBLESHOOTING MELSEC-A Table 11.1 Error codes (Continue) Detailed Error Error Error Message Code Error and Cause Corrective Action Code States (D9008) (D9092) "CAN’T Stop (1) There is no jump destination or Read the error step by use of EXECUTE(P)" multiple destinations specified by peripheral equipment and correct the the CJ , SCJ , CALL ,...
- Page 128 Stop The CPU has checked if write and Since this CPU hardware error, read operations can be performed consult Mitsubishi representative. properly to the data memory area of CPU, and as a result, either or both has not been performed.
- Page 129 (1) The special function module being accessed is faulty. "I/O INT. Stop Interrupt occurs though no interrupt The hardware of a module is faulty. ERROR" module is installed. Replace the module and check the faulty module. Consult Mitsubishi representative. 11 - 13...
- Page 130 (2) If the error persists, there is a device in the parameter area of fault in hardware. Consult (set by the link under link range Mitsubishi representative. para- designation using parameter meter) setup, and the link parameter data read by the CPU module.
- Page 131 11. TROUBLESHOOTING MELSEC-A Table 11.1 Error codes (Continue) Detailed Error Error Error Message Code Error and Cause Corrective Action Code States (D9008) (D9092) "OPERATION Stop (1) The result of BCD conversion Use the peripheral device to read and ERROR" exceeds the rated range ("9999" correct the error step in the program.
-
Page 132: I/O Connection Troubleshooting
11. TROUBLESHOOTING MELSEC-A 11.4 I/O Connection Troubleshooting This section explains possible problems with I/O circuits. 11.4.1 Input circuit troubleshooting This section describes possible problems with input circuits, and corrective action. Table 11.2 Input circuit problems and corrective action Condition Cause Corrective action •... - Page 133 11. TROUBLESHOOTING MELSEC-A Table 11.2 Input circuit problems and corrective action Condition Cause Corrective action • Sneak path due to the use of two power supplies. • Use only one power supply. • Connect a sneak path prevention diode. (Figure below) Input signal Example does not turn...
-
Page 134: Output Circuit Failures And Corrective Action
11. TROUBLESHOOTING MELSEC-A 11.4.2 Output circuit failures and corrective action Table 11.3 Output circuit failures and corrective action Condition Cause Corrective action • Load is half-wave rectified inside (in some cases, • Connect a resistor of 10 to 99 k Ω. this is true of a solenoid). -
Page 135: Appendices
APPENDICES MELSEC-A APPENDICES Appendix 1 Instructions Instructions used with the AnSHCPU are listed below. See the following programming manuals for details of the instructions. • ACPU Programming Manual (Fundamentals) (IB-66249) • ACPU Programming Manual (Common Instructions) (IB-66250) • AnSHCPU/AnACPU/AnUCPU/QCPU-A (A mode) (IB-66251) Programming Manual (Dedicated Instructions) Sequence instructions... - Page 136 APPENDICES MELSEC-A Basic instructions Comparison instructions 16 bits LD=, AND=, OR= 32 bits LDD=, ANDD=, ORD= 16 bits LD<>, AND<>, OR<> < > 32 bits LDD<>, ANDD<>, ORD<> 16 bits LD>, AND>, OR> > 32 bits LDD>, ANDD>, ORD> 16 bits LD<=, AND<=, OR<= <= 32 bits...
- Page 137 APPENDICES MELSEC-A Program branch instructions Jump CJ, SCJ, JMP Subroutine call CALL, CALLP, RET Interrupt program enable/disable EI, DI, IRET Microcomputer program call Refresh instructions Link refresh Link refresh enable/disable EI, DI Partial refresh Application instructions Logical operation instructions 16 bits Two types each for WAND and WANDP Logical product 32 bits...
- Page 138 APPENDICES MELSEC-A ASCII instructions ASCII conversion ASCII print Two types each for PR and PRC Buffer memory access instructions 1 word FROM, FROMP Data read 2 words DFRO, DFROP 1 word TO, TOP Data write 2 words DTO, DTOP FOR NEXT instruction Repetition FOR, NEXT Data link module instruction...
-
Page 139: Appendix 1.1 Caution When Performing A Write While Running Dedicated Instruction
APPENDICES MELSEC-A Appendix 1.1 Caution when Performing a Write while Running Dedicated Instruction Description of write For LEDA For LEDB performed when running. After write, the instruction is After write, the previous contact Normal configuration is written executed when the previous turns on and the instruction is when running. -
Page 140: Appendix 2 Special Relay, Special Register List
APPENDICES MELSEC-A Appendix 2 Special Relay, Special Register List Appendix 2.1 Special Relay List Special relay list Special relays are internal relays whose uses are determined inside the PLC. Therefore, they cannot be turned ON/OFF as coils is a program. (Except for *1 and *2 in the table) Table 2.1 Special relay list... - Page 141 APPENDICES MELSEC-A Table 2.1 Special relay list (Continue) Number Name Description Details Applicable CPU • Clears the data memory including the latch range Data memory OFF: No processing (other than special relays and special registers) in Usable with all M9016 types of CPUs.
- Page 142 APPENDICES MELSEC-A Table 2.1 Special relay list (Continue) Number Name Description Details Applicable CPU 0.05 seconds 0.05 M9030 0.1 second clock seconds seconds M9031 0.2 second clock seconds • 0.1 second, 0.2 second, 1 second, 2 second, and 1 minute clocks are generated. •...
- Page 143 APPENDICES MELSEC-A Table 2.1 Special relay list (Continue) Number Name Description Details Applicable CPU OFF: Except during trace Unusable with A1 M9046 Sampling trace • Switched on during sampling trace. ON: During trace and A1N. Sampling trace OFF: Sampling trace stop •...
- Page 144 APPENDICES MELSEC-A Table 2.1 Special relay list (Continue) Number Name Description Details Applicable CPU • Turned on when one of remote terminal modules has become a faulty station. (Communication error is detected when normal communication is not restored after the number of retries set at D9174.) Remote terminal OFF: Normal...
- Page 145 APPENDICES MELSEC-A Table 2.1 Special relay list (Continue) Number Name Description Details Applicable CPU OFF: Reading time Time required for • Turn on to reduce the search time of A8UPU/A8PUJ. reduction OFF Usable with AnU search of (In this case, the scan time of the CPU module M9070 ON: Reading time and A2US(H).
- Page 146 APPENDICES MELSEC-A Table 2.1 Special relay list (Continue) Number Name Description Details Applicable CPU • Compares the setting value at D9077 with the time elapsed from the start of measurement (accumulation time) at every scan. Then, performs the following operations: Setting value >...
- Page 147 APPENDICES MELSEC-A Table 2.1 Special relay list (Continue) Number Name Description Details Applicable CPU OFF: Communication request to remote Usable with AnA, Registration area terminal modules • Indication of communication enable/disable to busy signal for enabled AnA, AnU, A2AS, M9081 remote terminal modules connected to the MINI (S3) —...
- Page 148 APPENDICES MELSEC-A Table 2.1 Special relay list (Continue) Number Name Description Details Applicable CPU • During duplex operation of the operating CPU with a OFF: Normal Duplex operation stand-by CPU, verification is performed by the both — Dedicated to A3V. M9095 ON: Duplex operation verify error...
- Page 149 APPENDICES MELSEC-A Table 2.1 Special relay list (Continue) Number Name Description Details Applicable CPU Step transfer monitoring timer start M9108 (corresponds to D9108) Step transfer monitoring timer start M9109 (corresponds to D9109) Step transfer monitoring timer start M9110 (corresponds to Usable with AnN , D9110) AnA , AnU,...
- Page 150 APPENDICES MELSEC-A Table 2.1 Special relay list (Continue) Number Name Description Details Applicable CPU Usable with AnN , AnA , AnU, A2AS, QCPU-A Active step • Turned on when sampling trace of all specified OFF: Trace start M9180 sampling trace blocks is completed.
- Page 151 APPENDICES MELSEC-A POINTS (1) Contents of the M special relays are all cleared by power off, latch clear or reset with the reset key switch. When the RUN key switch is set in the STOP position, the contents are retained. (2) The above relays with numbers marked 1 remain "on"...
-
Page 152: Appendix 2.2 Special Registers D
APPENDICES MELSEC-A Appendix 2.2 Special Registers D The special registers are data registers used for specific purposes. Therefore, do not write data to the special registers in the program (except the ones with numbers marked *2 in the table). Table 2.2 Special registers list Number Name... - Page 153 APPENDICES MELSEC-A Table 2.2 Special registers list (Continue) Number Name Description Details Applicable CPU The number of bits • The number of bits detected by execution of the SUM SUM instruction Dedicated to D9003 detected by SUM instruction are stored. in BIN code and updated every —...
- Page 154 APPENDICES MELSEC-A Table 2.2 Special registers list (Continue) Number Name Description Details Applicable CPU • When operation error has occurred during execution of Step number at which application instruction, the step number, at which the Unusable with D9010 Error step operation error has error has occurred, is stored in BIN code.
- Page 155 APPENDICES MELSEC-A Table 2.2 Special registers list (Continue) Number Name Description Details Applicable CPU 0: ROM ROM/RAM • Indicates the setting of memory select chip. One value of Usable with A1 1: RAM — setting 0 to 2 is stored in BIN code. and A1N.
- Page 156 APPENDICES MELSEC-A Table 2.2 Special registers list (Continue) Number Name Description Details Applicable CPU • Stores the year (2 lower digits) and month in BCD....
- Page 157 APPENDICES MELSEC-A Table 2.2 Special registers list (Continue) Number Name Description Details Applicable CPU Usable with AnA, Extension file • Stores the block No. of the extension file register being A2AS, AnU and — D9035 Use block No. QCPU-A register used in BCD code.
- Page 158 APPENDICES MELSEC-A Table 2.2 Special registers list (Continue) Number Name Description Details Applicable CPU • Stores the step number in which error 84 occurred in the SFC program in BIN code. Usable with Step number in which D9052 Error step Stores "0"...
- Page 159 APPENDICES MELSEC-A Table 2.2 Special registers list (Continue) Number Name Description Details Applicable CPU • Stores error code when M9061 is turned on (communication with I/O modules or remote terminal modules fails). 0: Normal Usable with A2C Communication • 1...Total number of stations of I/O modules or —...
- Page 160 APPENDICES MELSEC-A Table 2.2 Special registers list (Continue) Number Name Description Details Applicable CPU Stores the status of writing (enabled/disabled) to the Stores the status of standard ROM. Dedicated to Status of writing writing Statuses of DIP switch 3 and M9073 —...
- Page 161 APPENDICES MELSEC-A Table 2.2 Special registers list (Continue) Number Name Description Details Applicable CPU Detail error number of Usable with AnA, SFC program A2AS, QCPU-A the error which • Stores the detail error number of the error occurred in a —...
- Page 162 APPENDICES MELSEC-A Table 2.2 Special registers list (Continue) Number Name Description Details Applicable CPU • Output module numbers (in units of 16 points), of which D9100 fuses have blown, are entered in bit pattern. (Preset output unit numbers when parameter setting has been performed.) D9101 15 14...
- Page 163 APPENDICES MELSEC-A Table 2.2 Special registers list (Continue) Number Name Description Details Applicable CPU • When I/O modules, of which data are different from those entered at power-on, have been detected, the I/O unit D9116 numbers (in units of 16 points) are entered in bit pattern. (Preset I/O unit numbers when parameter setting has D9117 been performed.)
- Page 164 APPENDICES MELSEC-A Table 2.2 Special registers list (Continue) Number Name Description Details Applicable CPU • When one of F0 to 255 (F0 to 2047 for AnA and AnU) is turned on by SET F , F number, which has turned on, is D9125 entered into D9125 to D9132 in due order in BIN code.
- Page 165 APPENDICES MELSEC-A Table 2.2 Special registers list (Continue) Number Name Description Details Applicable CPU D9141 D9142 • Stores the number of retries executed to I/O modules or D9143 remote terminal modules which caused communication D9144 error. D9145 (Retry processing is executed the number of times set at D9146 D9174.) D9147...
- Page 166 APPENDICES MELSEC-A Table 2.2 Special registers list (Continue) Number Name Description Details Applicable CPU Mode setting 0 Auto- • When an I/O module or a remote terminal matic module caused communication error, the online station is placed offline. return • Communication with normal stations is enabled continued.
- Page 167 APPENDICES MELSEC-A Table 2.2 Special registers list (Continue) Number Name Description Details Applicable CPU • Stores error code of a faulty remote terminal module D9180 when M9060 is turned on. D9181 • The error code storage areas for each remote terminal D9182 module are as shown below.
- Page 168 APPENDICES MELSEC-A Table 2.2 Special registers list (Continue) Number Name Description Details Applicable CPU • Stores error code when the manual pulse generator axis setting error flag (M9077) is turned on in the bit each corresponds to each axis number. b8 b7 axis axis...
- Page 169 APPENDICES MELSEC-A Table 2.2 Special registers list (Continue)\ Number Name Description Details Applicable CPU • Bit which corresponds to faulty I/O module or remote terminal module is set (1). D9196 (Bit which corresponds to a faulty station is set when normal communication cannot be restored after executing the number of retries set at D9174.) •...
-
Page 170: Appendix 3 Precautions When Switching From Anscpu To Anshcpu
APPENDICES MELSEC-A Appendix 3 Precautions when Switching from AnSCPU to AnSHCPU Appendix 3.1 Dissimilarities between A1SHCPU and A1SCPU The dissimilarities between the A1SHCPU and A1SCPU are as follows : Item A1SHCPU A1SCPU 0.33 µs 1 µs CPU processing speed *1 I/O points 2048 points *2 256 points... -
Page 171: Appendix 3.2 Dissimilarities Between A2Shcpu(-S1) And A2Scpu
APPENDICES MELSEC-A Appendix 3.2 Dissimilarities between A2SHCPU(-S1) and A2SCPU The dissimilarities between the A2SHCPU(-S1) and A2SCPU are as follows : Item A2SHCPU(-S1) A2SCPU 0.25 µs 1 µs CPU processing speed *1 I/O points 2048 points *2 512 points File register capacity (R) Max. -
Page 172: Appendix 3.3.3 The Precaution When Utilizing The Sequence Program
APPENDICES MELSEC-A Appendix 3.3.3 The precaution when utilizing the sequence program Please follow the procedures below for applying the parameter and program created for AnSCPU to AnSHCPU: Select the 'Read File' from the initial setting menu after starting up the GPP function software. -
Page 173: Appendix 3.3.6 Switching From The A2Smca-14Kp (When A2Scpu + A2Smca-14Kp Has Been Used)
APPENDICES MELSEC-A Appendix 3.3.6 Switching from the A2SMCA-14KP (when A2SCPU + A2SMCA-14KP has been used) When A2SHCPU + A2SNMCA-30KE was switched, *1 area cannot be used as the extension file register. When *1 area has been used as the extension file register, the system of A2ASCPU(-S1) + A2SMCA-14KP should be used. -
Page 174: Outside Dimensions
APPENDICES MELSEC-A Appendix 4 Outside Dimensions Appendix 4.1 CPU Module Appendix 4.1.1 A1SHCPU/A2SHCPU(S1) module A1SHXPU STOP L.CLR RESET RESET ERROR MITHUBISHI 130 (5.12) 93.6 (3.69) 54.5 (2.15) 6.5 (0.26) Unit : mm (in.) Appendix 4.1.2 A1SJHCPU module 4-ø6 mounting screws (M5 ×... - Page 175 PULL 16.4 (0.65) 410 (16.2) 82 (3.23) 435 (17.1) Unit: mm (in) Appendix 4.2 A1S61PN/A1S62PN/A1S63P Power Supply Module 1S61PN POWER MITSUBISHI INPUT OUTPUT 85~132 VAC 5 VDC 5 A 170~264 VAC 50/60 Hz 130 (5.12) 93.6 (3.69) 54.5 (2.15) 6.5 (0.26) Unit : mm (in.)
-
Page 176: Appendix 4.3 Main Base Units
APPENDICES MELSEC-A Appendix 4.3 Main Base Units Appendix 4.3.1 A1S32B main base unit 4-mounting screws (M5 × 25) MITSUBISHI ELECTRIC CORPORATION POWER A1S32B 200 (7.87) 16.4 (0.65) 220 (8.66) 28 (1.10) Unit : mm (in.) Appendix 4.3.2 A1S33B main base unit 4-mounting screws (M5 ×... - Page 177 APPENDICES MELSEC-A Appendix 4.3.3 A1S35B main base unit 4-mounting screws (M5 × 25) 110 (4.33) 130 (5.12) POWER MITSUBISHI ELECTRIC CORPORATION 80626E680G52 E.S.D MADE IN JAPAN A1S35B 16.4 (0.65) 305 (12.01) 325 (12.80) 28 (1.10) Unit : mm (in.) Appendix 4.3.4...
-
Page 178: Appendix 4.4 Extension Base Units
Extension Base Units Appendix 4.4.1 A1S65B extension base unit 4-mounting screws (M5 × 25) 110 (14.33) 130 (15.12) POWER MITSUBISHI ELECTRIC CORPORATION A1S65B 16.4 (0.65) 295 (11.61) 315 (12.40) 28 (1.10) Unit : mm (in.) Appendix 4.4.2 A1S68B extension base unit 4-mounting screws (M5 ×... - Page 179 APPENDICES MELSEC-A Appendix 4.4.3 A1S52B extension base unit 4-mounting screws (M5 × 25) MITSUBISHI ELECTRIC CORPORATION A1S52B 16.4 (0.65) 135 (5.31) 155 (6.10) 28 (1.10) Unit : mm (in.) Appendix 4.4.4 A1S55B extension base unit 4-mounting screws (M5 × 25) 110 (4.33)
- Page 180 APPENDICES MELSEC-A Appendix 4.4.5 A1S58B extension base unit 4-mounting screws (M5 × 25) MITSUBISHI ELECTRIC CORPORATION A1S58B 16.4 (0.65) 345 (13.58) 365 (14.37) 28 (1.10) Unit : mm (in.) Appendix 4.4.6 A1S65B-S1 extension base unit 4-mounting screws (M5 × 25) 110 (14.33)
- Page 181 APPENDICES MELSEC-A Appendix 4.4.7 A1S68B-S1 extension base unit 4-mounting screws (M5 × 25) 130 (5.12) MITSUBISHI ELECTRIC CORPORATION POWER 80626E680G52 MADE IN JAPAN A1S68B E.S.D 16.4 (0.65) 400 (15.75) 420 (16.54) 28 (1.10) Unit : mm (in.) Appendix 4.4.8 A1S52B-S1 extension base unit 4-mounting screws (M5 ×...
-
Page 182: Appendix 4.4.10 A1S58B-S1 Extension Base Unit
APPENDICES MELSEC-A Appendix 4.4.9 A1S55B-S1 extension base unit 4-mounting screws (M5 × 25) 110 (4.33) 130 (5.12) MITSUBISHI ELECTRIC CORPORATION A1S55B 16.4 (0.65) 240 (10.24) 260 (10.24) 28 (1.10) Unit : mm (in.) Appendix 4.4.10 A1S58B-S1 extension base unit 4-mounting screws (M5 ×... -
Page 183: Appendix 4.5 Memory Cassette
APPENDICES MELSEC-A Appendix 4.5 Memory Cassette Appendix 4.5.1 AnSMCA-[ ] memory cassette 68.6 (2.70) 57.6 (2.27) 63.6 (2.50) Unit : mm (in.) Appendix 4.5.2 AnSNMCA-[ ] memory cassette 69.6 (2.74) 57.6 (2.27) 64.6 (2.54) Unit : mm (in.) APP - 49... -
Page 184: Appendix 4.6 Memory Write Adapter
Transport guidelines Comply with IATA Dangerous Goods Regulations, IMDG code and the local transport regulations when transporting products after unpacking or repacking, while Mitsubishi ships products with packages to comply with the transport regulations. Also, contact the transporters. APP - 50... - Page 185 1. Gratis Warranty Term and Gratis Warranty Range If any faults or defects (hereinafter "failure") found to be the responsibility of Mitsubishi occurs during use of the product within the gratis warranty term, the product shall be repaired at no cost via the dealer or Mitsubishi Service Company.
- Page 186 Type A1SJH(S8)/A1SH/A2SHCPU (S1) User s Manual ANSHCPU-U-E MODEL MODEL 13JL22 CODE IB(NA)-66779-G(0312)MEE HEAD OFFICE : 1-8-12, OFFICE TOWER Z 14F HARUMI CHUO-KU 104-6212,JAPAN NAGOYA WORKS : 1-14 , YADA-MINAMI 5-CHOME , HIGASHI-KU, NAGOYA , JAPAN When exported from Japan, this manual does not require application to the Ministry of Economy, Trade and Industry for service transaction permission.
Need help?
Do you have a question about the A1SJH and is the answer not in the manual?
Questions and answers