Table of Contents
Advertisement
Quick Links
Advertisement
Table of Contents

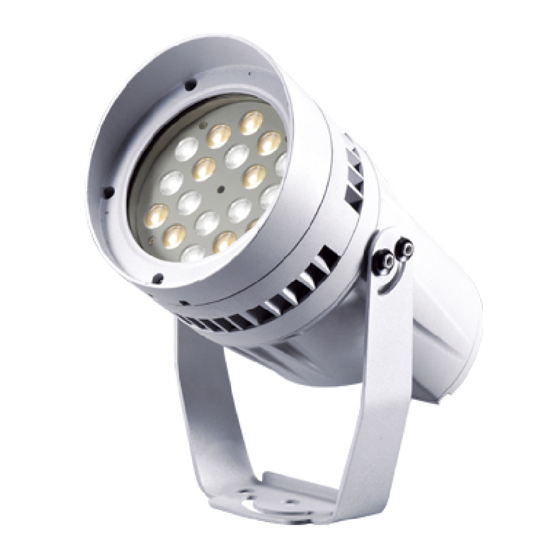
Summary of Contents for ACME BP-183 RGBW S R DXX
- Page 1 BP-183 RGBW S R DXX...
-
Page 2: Table Of Contents
TABLE OF CONTENTS 1. Safety Instructions ....................2 2. Technical Specifications ..................3 3. How To Set The Fixture ................... 4 3.1 Control Panel ....................4 3.2 Main Functions ....................5 4. How To Control The Fixture .................. 10 4.1 DMX Controller ....................10 4.2 DMX 512 Configuration .................. -
Page 3: Safety Instructions
1. Safety Instructions Please read the instructions carefully which includes important information about the installation, operation and maintenance. WARNING Please keep this User Guide for future consultation. If you sell the unit to another user, be sure that they also receive this instruction booklet. ... -
Page 4: Technical Specifications
Warning: To prevent or reduce the risk of electrical shock or fire, do not expose the unit to rain or moisture. The housing and lenses must be replaced if they are visibly damaged. Installation: The unit should be mounted via its screw holes on the bracket. Always ensure that the unit is firmly fixed to avoid vibration and slipping while operating and make sure that the structure to which you are attaching the unit is secure and is able to support a weight of 10 times of the fixtures weight. -
Page 5: How To Set The Fixture
3. How To Set The Fixture 3.1 Control Panel 1. Function Display: Used To show the various menus and the selected functions 2. Button: MENU To select the programming functions DOWN To go backward in the selected functions To go forward in the selected functions ENTER To confirm the selected functions 3. -
Page 6: Main Functions
Water proof cable with 3-pin XLR connectors for DMX 512 operation 4. POWER IN: Water proof power cable with connectors for power input 5. POWER OUT: Water proof cable with connectors for power output 6. DMX OUT: Water proof cable with connectors for DMX 512 operation with 3-pin XLR plug 3.2 Main Functions To select any functions, press the MENU button until the required one is shown on the display. - Page 8 DMX 512 Address Select the , press the ENTER button and the display will blink. Use the DOWN/UP button to change the DMX 512 address between 1 and 512. Once the address has been selected, press the ENTER button to save or automatically exit menu mode without any change after one minute. Back to the previous functions without any change press the MENU button.
- Page 9 (Green), (Blue), (White), (Dimmer) or (Strobe). Once selected, press the ENTER button to setup, then use the DOWN/UP button to adjust the value (0~255) or automatically exit menu mode without any change after one minute. To go back to the functions without any change press the MENU button. White Balance Press the MENU button up to when the is showing on the display.
- Page 10 button and the display will blink. Use the DOWN/UP button to select the (normal) or (inverse), Once the mode has been selected, press the ENTER button to setup or automatically return to the main functions without any change after one minute. To go back to the previous functions without any change press the MENU button.
-
Page 11: How To Control The Fixture
4. How To Control The Fixture You can operate the unit by DMX controller: No need to turn the unit off when you change the DMX address, as new DMX address setting will be affected at once. The unit will be ready to receive DMX signal or run the built in programs. 4.1 DMX Controller Use universal DMX controller to control the units, you have to set DMX address from 1 to 512 channel so that the units can receive DMX signal. - Page 12 5 Channels Mode: Channel Value Function 0 - 255 0% 100% GREEN 0 - 255 0% 100% BLUE 0 - 255 0% 100% WHITE 0 - 255 0% 100% DIMMER 0 - 255 0% 100% 7 Channels Mode: Channel Value...
-
Page 13: Dmx512 Connections
STROBE 0 - 7 8 - 15 OPEN 16 - 131 STROBE, SLOW TO FAST 132 - 139 OPEN 140 - 181 FAST CLOSE SLOW OPEN 182 - 189 OPEN 190 - 231 FAST OPEN SLOW CLOSE 232 - 239 OPEN 240 - 247 RANDOM STROBE... -
Page 14: Troubleshooting
5. The end of the DMX 512 system should be terminated to reduce signal errors. 6. 3 pin XLR connectors are more popular than 5 pin XLR. 3 pin XLR: Pin 1: GND, Pin 2: Negative signal (-), Pin 3: Positive signal (+) 5 pin XLR: Pin 1: GND, Pin 2: Negative signal (-), Pin 3: Positive signal (+) Pin 4/Pin 5: Not used. - Page 15 Declaration of Conformity We declare that our products (lighting equipments) comply with the following specification and bears CE mark in accordance with the provision of the Electromagnetic Compatibility (EMC) Directive 89/336/EEC. EN55103-1: 2009 ; EN55103-2: 2009; EN62471: 2008; EN61000-3-2: 2006 + A1:2009 + A2:2009; EN61000-3-3: 2008. &...
- Page 16 Innovation, Quality, Performance...


Need help?
Do you have a question about the BP-183 RGBW S R DXX and is the answer not in the manual?
Questions and answers