
Subscribe to Our Youtube Channel
Related Manuals for Munters Green Field


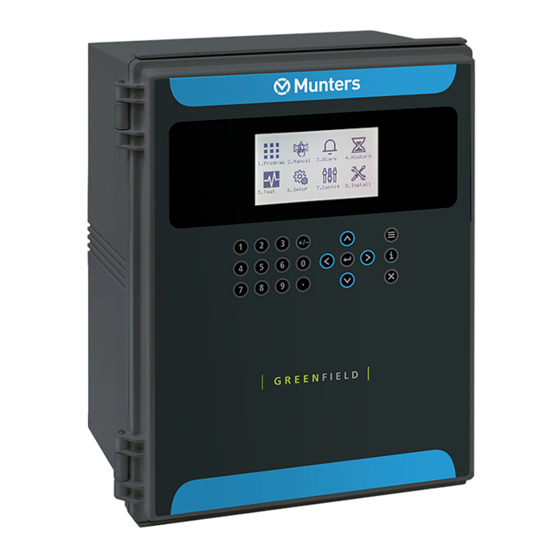
Summary of Contents for Munters Green Field
- Page 1 Green Field Installation Manual Green Field Irrigation Controller Ag/MIS/UmEN-2733-05/19 Rev 1.6 P/N: 116783...
- Page 2 Munters reserves the right to effect modifications to the apparatus in accordance with technical and legal developments. © Munters AB, 2018...
-
Page 3: Table Of Contents
4.2.3 Dry Contact Card ....................27 4.2.3.1 Option 1 - Dry Contact Used as 24 VAC Output Card ........27 4.2.3.2 Option 2 - Dry Contact Used as Normally Open Contact ........28 Input Terminals --------------------------------------------------------------------------------------------------------------------------------------------------------------- © Munters AB, 2018... - Page 4 4.7.10 History Resolution ..................... 51 4.7.11 System Nutrigation™ Check ................51 4.7.11.1 EC/pH IS ON Target ................. 52 4.7.11.2 System Nutrigation Simulation ..............52 4.7.11.3 Water Run Time ..................52 4.7.11.4 Start/Stop Valve ..................53 4.7.12 Data Plug ......................54 © Munters AB, 2018...
- Page 5 ------------------------------------------------------------------------------------------------------------------------------------------------------------- Alarm Setting ------------------------------------------------------------------------------------------------------------------------------------------------------------------ 7.4.1 Analog Output Alarm Generation ................82 EC/pH Alarm Definition ------------------------------------------------------------------------------------------------------------------------------------------- EC/pH Alarm Setting ------------------------------------------------------------------------------------------------------------------------------------------------- Radio Sys. Alarm Definition ------------------------------------------------------------------------------------------------------------------------------------ Radio Sys. Alarm View ---------------------------------------------------------------------------------------------------------------------------------------------- HISTORY MENU ---------------------------------------------------------------------------------------------------------------------------------------- 86 Irrigation Log ------------------------------------------------------------------------------------------------------------------------------------------------------------------- © Munters AB, 2018...
- Page 6 EC/pH Calibration -------------------------------------------------------------------------------------------------------------------------------------------------- 10.5.1 Calibration of the EC/pH Monitor Transmitter ............104 10.5.1.1 EC Calibration ..................104 10.5.1.2 pH Calibration ..................104 10.5.2 EC/pH Transmitter Monitor & Green Field Correlation ........... 106 10.6 Pressure Calibration ------------------------------------------------------------------------------------------------------------------------------------------------ 10.7 Weather Station Calibration ----------------------------------------------------------------------------------------------------------------------------- 10.8...
- Page 7 ---------------------------------------------------------------------------------------------------------------------------------------------- 13.7 Hot Keys and Status Screens ---------------------------------------------------------------------------------------------------------------------------- 13.8 Operation Mode ------------------------------------------------------------------------------------------------------------------------------------------------------ APPENDIX A – GREEN FIELD PARTS LIST ---------------------------------------------------------------------------------------- 143 APPENDIX B – TROUBLESHOOTING ----------------------------------------------------------------------------------------------- 144 15.1 Controller Malfunction ------------------------------------------------------------------------------------------------------------------------------------------ 15.2 Burnt Fuse - In Case of Voltage ------------------------------------------------------------------------------------------------------------------------ APPENDIX C –...
- Page 8 APPENDIX D - SENSOR INSTALLATION AND DEFINITION ---------------------------------------------------- 149 17.1 EC – pH Sensor Connection ----------------------------------------------------------------------------------------------------------------------------- 17.1.1 EC Sensor Calibration ..................150 17.1.2 pH Sensor Calibration ..................151 17.1.3 Green Field pH Calibration ................153 17.2 Measuring Box Connection ------------------------------------------------------------------------------------------------------------------------------- 17.3 Humidity Sensor Definition ---------------------------------------------------------------------------------------------------------------------------------- 17.3.1 Outside Temperature/Humidity Sensor Connection ..........
-
Page 9: Introduction
The information contained herein has been prepared by qualified experts within Munters. While we believe the information is accurate and complete, we make no warranty or representation for any particular purposes. The information is offered in good faith and with the understanding that any use of the units or accessories in breach of the directions and warnings in this document is at the sole discretion and risk of the user. -
Page 10: General Instructions
• proper grounding of the inverter's chassis and motor power cable • proper grounding of low voltage cable shield wire • that the controller and inverter cables are kept in separate conduits or wire bundles • © Munters AB, 2018... -
Page 11: General Dimensions
2.3 General Dimensions © Munters AB, 2018... -
Page 12: Power Supply Wiring
3 Power Supply Wiring Main Power Wiring, page 12 • Power Supply Options, page 13 • Cold Start, page 15 • Set Language, Time and Date, page 16 • Electric Test, page 16 • 3.1 Main Power Wiring © Munters AB, 2018... -
Page 13: Power Supply Options
3.2 Power Supply Options Power Supply Option A • Power Supply Option B • © Munters AB, 2018... -
Page 14: Power Supply Optiona
In case of voltage discrepancy or fluctuation in the main voltage, there is an option of connecting the system to an independent supplier and keeping the main voltage as power source for the output devices as shown: © Munters AB, 2018... -
Page 15: Cold Start
3.3 Cold Start NOTE To perform a cold start or firmware upgrade, the controller must be in the “Technician” mode; refer to the Controller Advanced Settings - Operation Mode. © Munters AB, 2018... -
Page 16: Set Language, Time And Date
NOTE In any given menu, you can use arrow and ENTER keys on the touch pad to make a selection, or press the corresponding number and ENTER on touch pad as a short cut. 3.5 Electric Test © Munters AB, 2018... -
Page 17: Firmware Upgrade
CAUTION Any upgrade that is not performed in accordiance with these guidelines could result in unforseen malfunctions in the field equipment. Munters will not take responsibility for these issues. © Munters AB, 2018... -
Page 18: Accessing The Application
1. Select Hardware Firmware. The following screen appears (example only): SELECT A FILE Path: / GREEN FIELD <DIR> 13/Oct/2009 MUNTERS <DIR> 12/Sept/2014 GREENPRO~1 <DIR> 12/Sept/2014 Press ENTER to confirm selection or MENU to return. 2. Select the required directory. 3. Press © Munters AB, 2018... - Page 19 At the end of the process, the following screen appears (the version numbers are examples only): New Software Version New Software Found COLD START REQUIRED!! Old Version: 8.02.00 New Version: 8.02.49 Press ENTER To Continue. 8. Press and perform a Cold Start. © Munters AB, 2018...
-
Page 20: Electrical Installation
• Controller Test Procedure, page 42 • System Configuration Procedure, page 44 • 4.1 Input/Output Layout, page 21 • I/O Card Layout, page 21 • Controller Hardware Verification, page 23 • Input/Output Wiring, page 23 • © Munters AB, 2018... -
Page 21: Layout
4.1.1 L AYOUT The following diagram is an example setup of an Green Field board. Actual boards may differ. 4.1.2 I/O C AYOUT Modular I/O Bus: Up to 10 I/O Cards • 5 I/O Card Options • o 24 VAC Output Card... - Page 22 Dry Contact Output Card o Digital Input Card o SingleNet Dummy Output Card NOTE The diagram above is an example setup. Actual setups may differ. NOTE Analog Output Cards must be installed in the slots shown above. © Munters AB, 2018...
-
Page 23: Controller Hardware Verification
4.1.3 C ONTROLLER ARDWARE ERIFICATION 4.1.4 I NPUT UTPUT IRING 4.2 Output Terminal Analog Output Card • 24 VAC Connection • © Munters AB, 2018... -
Page 24: Analog Output Card
2. Disconnect the controller from the power. 3. Install the analog cards in the slots indicated in I/O Card Layout, page 21. 4. Apply power; the Green Field will detect the new card(s). 5. In the screen that appears, select YES. - Page 25 Use the dipswitches (#6 in the above illustration) to define a card as Card One or Card Two. This is needed to ensure that the Controller can properly manage analog output devices. NOTE Refer to Analog Dosing Channel Configuration, page 50. © Munters AB, 2018...
-
Page 26: Vac Connection
4.2.2 24 VAC C ONNECTION 24VAC OUTPUT CARD CONNECTION- EXAMPLE © Munters AB, 2018... -
Page 27: Dry Contact Card
ONTACT Option 1 - Dry Contact Used as 24 VAC Output Card • Option 2 - Dry Contact Used as Normally Open Contact • 4.2.3.1 Option 1 - Dry Contact Used as 24 VAC Output Card © Munters AB, 2018... -
Page 28: Option 2 - Dry Contact Used As Normally Open Contact
4.2.3.2 Option 2 - Dry Contact Used as Normally Open Contact 4.3 Input Terminals Wiring, page 28 • Analog Input Card, page 30 • 4.3.1 W IRING © Munters AB, 2018... - Page 29 Digital Input Connection Examples © Munters AB, 2018...
-
Page 30: Analog Input Card
4.3.2 A NALOG NPUT The analog input card includes 11 x analog inputs. • The type of every input can be selected by jumper positioning. • Ech2o 5, page 31 • © Munters AB, 2018... -
Page 31: Ech2O 5
Red: to inputs 1 – 11; jumper 0 – 5V (In the picture below, Red is attached to Terminal 9.) • Black to +5V • Bare to COM • CAUTION TO ENSURE INTERFERENCE AND LIGHTNING IMMUNITY, USE SHIELDED CABLE ONLY (22 AWG MINIMUM)! CAUTION POWER AND SIGNAL WIRES MUST BE IN SEPARATE CABLES! © Munters AB, 2018... -
Page 32: Ech2O 5 Jumper Position
When installing the Ech2o 5, place the jumper on the 0 – 5 V terminals of the required channel position. 4.3.2.3 Analog Input Connection - Example: EC/pH Sensors NOTE See Appendix 4.4 Expansion Unit Connection: Card Connection Options RS-485 Connection, page 33 • Wrong Relay Connection, page 35 • © Munters AB, 2018... -
Page 33: Connection
NOTE If there are more than 64 outputs, use an extension box. NOTE Distance from controller: See table on next page. NOTE The maximum number of outputs is 256 but the maximum number of valves is 255. © Munters AB, 2018... - Page 34 Table 1: Permitted Distance from Controller RS-485 One Expansion Box Distance Baud Rate 2000 m 9600 2500 m 4800 3000 m 2400 Three Expansion Boxes Distance Baud Rate 1200 m 9600 1800 m 4800 3000 m 2400 © Munters AB, 2018...
-
Page 35: Wrong Relay Connection
4.4.2 W RONG ELAY ONNECTION 4.4.3 E XPANSION Expansion Unit Settings, page 35 • System Setup, page 36 • 4.4.3.1 Expansion Unit Settings © Munters AB, 2018... -
Page 36: System Setup
4.4.3.2 System Setup 4.4.4 PC NTER ONTROLLER OMMUNICATION Card Installation • Comm-Box Wiring • © Munters AB, 2018... -
Page 37: Card Installation
4.4.4.1 Card Installation © Munters AB, 2018... -
Page 38: Comm-Box Wiring
Color Wire Black White Green Brown COM Port Shield wire Figure 1: RS-485 Wiring to Comm-Box NOTE Refer to the Comm-Box Manual on for wiring details, how to log-on to the Comm-Box and manage the controller. © Munters AB, 2018... -
Page 39: Controller Setup
NOTE Baud rate is dependent on cable length and number of controllers. 4.5 Controller Setup Start-Up, page 39 • Hardware Checklist, page 40 • Output Definition, page 40 • Digital Input Definition, page 41 • Analog Input Definition, page 41 • 4.5.1 S TART © Munters AB, 2018... -
Page 40: Hardware Checklist
4.5.2 H ARDWARE HECKLIST NOTE System in the example shown above is equipped with: 16 outputs 8 digital inputs 11 analog inputs *Additional cards available upon special request. 4.5.3 O UTPUT EFINITION © Munters AB, 2018... -
Page 41: Digital Input Definition
NOTE For sensor installation and definition, please refer to Appendix D. 4.5.6 A NALOG UTPUT EFINITION 1. In the Installation menu, select Device Layout. 2. In the screen that appears, define the required number of channels as Dosing channels. © Munters AB, 2018... -
Page 42: Controller Test Procedure
3. In the Installation menu, select Analog Output. 4. In the screen that appears, map analog outputs to dosing channels 4.6 Controller Test Procedure Test Relays, page 43 • Digital Input Test, page 43 • Analog Input Test, page 44 • © Munters AB, 2018... -
Page 43: Test Relays
4.6.1 T ELAYS 4.6.2 D IGITAL NPUT © Munters AB, 2018... -
Page 44: Analog Input Test
4.6.4 A NALOG UTPUT The Analog Output Test screen performs two functions: Automatic test: Displays the current state of the valves (functioning or not functioning) • Manual test: Tests their response to a test signal • © Munters AB, 2018... -
Page 45: Automatic Test
In the screen above, valves 1 – 4 are active, but they are closed. 4.6.4.2 Manual Test Manual testing enable you to verify that valves open in response to an electrical current. 1. Go to Test > Analog Output. 2. The screen displays the following: © Munters AB, 2018... -
Page 46: System Configuration Procedure
3. Place the cursor on the valve requiring testing, press Enter and select. 4. Under Open%, enter an opening percentage. o Green Field sends an electrical current to the valve, based on the number entered. o If the valve opens, OFF appears under Fail. If the valve does not open, ON appears. -
Page 47: Device Delay Configuration
NOTE Settings in the graph are for example only. Stagge Shift Shift Shift Stagge r Off 20 sec 30 sec 30 sec 30 sec 20 sec NOTE During shift and stagger delays, the Fertilization is not active © Munters AB, 2018... -
Page 48: Pump Station Configuration
4.7.2 P TATION ONFIGURATION NOTE If there is more than one pump, refer to Green Field Advanced Settings. 4.7.3 V ALVE ONFIGURATION 4.7.4 V ALVE ONFIGURATION © Munters AB, 2018... -
Page 49: Water Meter Configuration
4.7.5 W ATER ETER ONFIGURATION NOTE If there is more than one water meter, refer to Green Field Advanced Settings. 4.7.6 D OSING HANNEL ONFIGURATION © Munters AB, 2018... -
Page 50: Analog Dosing Channel Configuration
4. Munters recommends setting the parameters as shown below. However, you can change these specifics if needed. NOTE In case that different dosing pump (electric) or setting (fertilizer meter), refer to Green Field Advanced Settings. NOTE For a more detailed description of this procedure, refer to Section 11.6, Dosing Channel Configuration page, 117. -
Page 51: Ec/Ph Sensor Range
NOTE For different dosing settings, refer to Green Field Advanced Settings 4.7.9 EC/PH S ENSOR ANGE NOTE When using multiple EC or pH sensors, refer to Green Field Advanced Settings 4.7.10 H ISTORY ESOLUTION NOTE For more details on system setup, refer to Green Field Advanced Settings 4.7.11 S... -
Page 52: Ec/Ph Is On Target
Mix until acid and fertilizer is dissolved EC and pH levels. Results should be relatively close to desired target. Deviation of ≤ 0.5 from target is allowed. 4.7.11.3 Water Run Time © Munters AB, 2018... -
Page 53: Start/Stop Valve
4.7.11.4 Start/Stop Valve © Munters AB, 2018... -
Page 54: Data Plug
4.7.12 D © Munters AB, 2018... -
Page 55: Program Menu
NOTE To enter any of the menus, press the corresponding numeric key or scroll to the desired item using the up/down arrow keys and press ENTER: a new window will appear. The first menu under Program is Irrigation. © Munters AB, 2018... -
Page 56: Irrigation
If start time and priority are the same, irrigation programs with a lower number are executed first. Priority ranges are between 0 and 15, 15 being the highest (See Green Field Irrigation – Part 2 > Priority specifications for further information). - Page 57 Down arrow when the cursor is placed on the bottom of the screen. The Condition program has the third priority after active irrigation and uncompleted irrigation (See Green Field Irrigation – Part 2 > Priority specifications for further information).
- Page 58 Rad/VPD Sum level or the Condition program status. Valve #: The Green Field can operate valves in any required order. Set the valve number and • press enter. The following window will appear: Select ‘blank’...
-
Page 59: Setting Irrigation That Is Longer Than 24H
NOTE Dosing operates according to ('D-W') for the same day and not according to the setting when the irrigation has started. If an irrigation starts at 18:00 and on this day dosing is set ('D'), the irrigation crosses midnight to a day where no dosing is set ('W'), dosing stops at midnight! © Munters AB, 2018... -
Page 60: Influence Program
Several Influences adjust the EC setting. The final adjustment amount is based on the sum total • of the different Influences. You enter up to three points for each Influence setting. Green Field automatically calculates the • curve based on these points. -
Page 61: Radiation Influence On Ec
Example: As sunlight increases, a crop requires higher EC levels. The following screen illustrates increasing in the EC based on radiation. Since Green Field calculates the increase in EC proportionally, there will be a 7.5% increase when the radiation reaches 60 w/m2. -
Page 62: Drain Influence On Minimum Time
3. In , define the drainage meter’s Ratio Liter/Pulse. Program > Irrigation 4. In , select Drain/MinT. a. Define the Drainage percentage set points. b. Define the MinT percentage set points. 5. Set ACTIVE/SOURCE to Yes. © Munters AB, 2018... -
Page 63: Drainage Ec Level Influence On Target Ec
Define the EC percentage set points. 8. Set ACTIVE/SOURCE to Yes. 9. Press Menu and confirm changes. Program > Dosing Program 10. In set the Target EC. NOTE You can disable this function by disabling EC Control (Configuration > Dosing Configuration). © Munters AB, 2018... -
Page 64: Vpd Influence On Target Ec
Set EC Dosing Method to Pr. Qty. Example: A grower wants to lower the EC level as the VPD decreases. He sets this screen to reduce the increase in EC level to match the decreasing VPD levels. © Munters AB, 2018... -
Page 65: Temperature Influence On Target Ec
Set the Target EC b. Set EC Dosing Method to Pr. Qty. Example: A grower’s flower crop requires higher EC levels when the temperature goes above room temperature (22° C). Using this screen, he can adjust the levels accordingly. © Munters AB, 2018... -
Page 66: Water Run Time
After: Set quantity/time without dosing at the end of each irrigation cycle. • NOTE Before and After settings are deducted from the Water settings. Therefore Water quantity/time must be larger or equal to the Before and After settings. © Munters AB, 2018... -
Page 67: Dosing
5.4 Dosing Green Field includes 10 predefined dosing programs. Each program consists of injection methods, quantities and EC/pH target values. Each channel is completely independent and can be set to give a different amount. Overlapping between the various channels is possible. -
Page 68: Dosing Injection Methods
The total quantity of fertilizer that will be given is 5.0 * 3.5 = 17.5 liters (Gallons). 2. P.Time (hh:mm): Proportional time. Each dosing channel is given the time to fertilize independently. The Green Field divides this time equally within the given irrigation time (quantity) set in 1.2 WATER RUN... -
Page 69: Ext. Condition
Only If On: The associated Irrigation program will be turned on, providing the Start Dry Contact has been closed for more than 20 second and will remain on as long as the contact is closed. © Munters AB, 2018... -
Page 70: Defining Analog Sensors
Input Function Local < None> Local < None> Local < None> Local < None> Local < None> Local < None> Local < None> Local Analog Sensor Local Analog Sensor Setup > Analog Conversion Table. 3. Go to © Munters AB, 2018... -
Page 71: Agitator
Off: Define the required time between mixing. Dosing Not Active: definition of the On and Off times of the agitator when dosing is not taking • place: o On: Define the required mixing time. o Off: Define the required time between mixing. © Munters AB, 2018... -
Page 72: Selector
Delta Pressure Value (bar): Define the Delta Pressure of the inlet pressure sensor (Pin) and • outlet pressure sensor (Pout), at which filter flushing will be triggered (Only relevant when the application consists of analog Pin and Pout sensors). © Munters AB, 2018... -
Page 73: Cooling
Delta Pressure Reiteration: Number of consecutive filter flushing cycles triggered by the Delta • Pressure that can take place without any breaks, before the Green Field will generate an alarm indicating that the Delta pressure sensor is defective. The Green Field will than ignore the Delta Pressure and will continue flushing according to the set Time Between Flushing only, until the alarm is reset. - Page 74 81%. Below RH / Above t • o Below RH (when status is cooling): Stop cooling above this humidity. Cooling will be resumed when the humidity drops below the internal dead-band of 2%. For example, if © Munters AB, 2018...
-
Page 75: Misting
End (hh:mm): Set the end time of the Misting program. The Misting program will only be • operational in the defined time window (between Start to End times). Each Misting program can be operational on different hours. © Munters AB, 2018... -
Page 76: Water Heating
The Minimum difference is 0.3ºC and the default is 0.5ºC. Temp. Sensor 1/2: Assign up to 2 temperature sensors. If you assign 2 sensors, the Green • Field will operate according to their average. © Munters AB, 2018... -
Page 77: Manual Operation Menu
Pause Irrigation (Yes/No): Set Yes and press Enter to confirm; all irrigations will be paused • until the value will be set back to No. When the system is released from Pause mode it will complete all irrigations that should have taken place when it was paused. 6.2 Start/Stop Program © Munters AB, 2018... -
Page 78: Start/Stop Valve
6.3 Filter Flushing To flush filters manually, follow the prompts, select which filters to flush with the arrow keys and press ENTER to confirm. You can flush all filters or individual filters (without Pump or Main valve operation) © Munters AB, 2018... -
Page 79: Alarm Menu
This table shows active alarms and failures. The upper section allows you to cancel failures and reset alarms. Period of Automatic Reset allows you to set a time in which the Green Field will try to reset the alarms automatically and complete the uncompleted processes. -
Page 80: History
Dosing Channel Leak Delay (s): Delay after dosing channel is stopped before the system • starts measuring dosing channel Leak. This feature is usually used to cope with problems regarding hydraulic pumps that work with dosing meters. © Munters AB, 2018... - Page 81 Short Output Level (60-350): Define the A/D threshold value to be considered as a short • circuit (for further instructions see Green Field – Part 2 > Appendix 1 – General > Short Circuit Control). ¹ The following parameters will be visible only if an Extension box is defined;...
-
Page 82: Alarm Setting
Alarm Active: Define whether the alarm output should be triggered by the appropriate alarm. • NOTE An alarm will be generated on the Green Field screen even if the controller has been set to continue (ignore) or the alarm output has been set as not active (or not defined at all). -
Page 83: Ec/Ph Alarm Definition
No analog valve is physically connected • If these three conditions are present: Green Field ceases the Irrigation-Fertigation • An alarm appears on the Main Screen • 7.5 EC/pH Alarm Definition Delta EC Low: If the measured EC value is lower than the target value minus Delta EC Low, the •... -
Page 84: Ec/Ph Alarm Setting
• This option actually means that the system will generate an alarm but will not take action. Delay (mm:ss): Define the period the failure must be active before the Green Field will • generate an alarm and will take action. -
Page 85: Radio Sys. Alarm View
For Example: RTU – 0555.3.1 UNIT # CARD # INPUT/OUTPUT # Exiting and re-entering refreshes the alarm status screen. © Munters AB, 2018... -
Page 86: History Menu
8 History Menu The History Menu provides extensive information regarding measurements and processes performed by the Green Field. Irrigation Log, page 87 • RAD. / VPD Sum & Drain Log , page 87 • Uncompleted Irrigation, page 88 • Uncompleted Programs, page 89 •... -
Page 87: Irrigation Log
NOTE Water quantity is measured in m3 or gallons, duration is measured by time, flow is measured in m3/h or gallon/m, dosing quantity is measured in liters or gallons. 8.2 RAD. / VPD Sum & Drain Log Time: Time irrigation started. • Valve: Leading valve. • © Munters AB, 2018... -
Page 88: Uncompleted Irrigation
‘+’ sign is added next to it to indicate that more valves are associated. The Green Field will attempt to complete the irrigations from the current day (until end day time) upon manual or automatic alarm reset. -
Page 89: Uncompleted Programs
ENTER choice by pressing ENTER For example, 1 day ago means you would like to view yesterday's history, and Today means you would like to view the accumulated history since the last End Day. © Munters AB, 2018... -
Page 90: Irrigation Accumulation
NOTE These water meters are accumulators only and are not a part of the irrigation control. The quantities displayed are in liters (gallons) up to 9999.999. To reset an auxiliary meter refer to the Accumulation Reset table below. © Munters AB, 2018... -
Page 91: Accumulation Reset
NOTE When resetting an Aux meter (or all Aux meters) its history will be erased from the Aux Meter Accumulation table. 8.9 Filters The Filters History Table provides daily information of the number and cause of flushing. 8.10 Cooling Use this screen to view cooling history or time per valve. © Munters AB, 2018... -
Page 92: Sensors Log
In this case, the table will consist of a maximum of 2,500 lines. 8.12 Event Log The table provides information of all the processes performed by the Green Field including their time and date. -
Page 93: System Log
8.13 System Log This table provides information of all the system changes. Examples of system changes are changes of triggered by the controller, the PC communication, a power off, etc. The table displays of the last 999 events. © Munters AB, 2018... -
Page 94: Test Menu
Temperature, page 97 • Humidity, page 97 • Hardware Check List, page 97 • Analog Output Test, page 98 • 9.1 Relays The Relays Test screen allows you to check the current output status and verify proper operation. © Munters AB, 2018... -
Page 95: Digital Input
Pause, etc.) show either 0 when the contact is open or 1 when the contact is closed. Note that the card number is set according to its jumpers regardless to its location (local or extension box). © Munters AB, 2018... -
Page 96: Analog Input
RH% = 50 – A/D = 308 RH% = 100 – A/D = 620 T°C = 0 – A/D = 768 Temp sensor T°C = 25 – A/D = 489 T°C = 50 – A/D = 250 © Munters AB, 2018... -
Page 97: Temperature
Position of cards connected locally will appear on the bottom table. To update the Hardware Checklist, disconnect the Green Field from the power supply or perform a cold start procedure. -
Page 98: Analog Output Test
To test the analog output valves: Under Status, select one of the following: • o AUTO: Green Field tests the valve opening percentage. Use this option while the controller is operating. o MAN: The user defines the valves' opening percentage. -
Page 99: Setup
• EC/pH Calibration, page 103 • Pressure Calibration, page 106 • Weather Station Calibration, page 107 • Sensors Logging, page 107 • Write to Data Plug, page 108 • Read from Data Plug, page 108 • © Munters AB, 2018... -
Page 100: Time & Date
Start/End time for VPD Sum – Set the time frame for the VPD Sum counter. • o Only during this time frame will the VPD be summed o At End time for VPD Sum, the counter is reset 10.2 System Setup The System Setup screen includes all general system settings. © Munters AB, 2018... - Page 101 History Resolution: Set the history collection rate of the sensors. For example if set to 15 • minutes, the controller will collect data from the defined sensors every 15 minutes (see 10.8 Sensors Logging for configuring which sensors / data is collected). © Munters AB, 2018...
- Page 102 The baud rate in the controller and in the extension boxes must match; otherwise, the communication cannot operate properly. NOTE Green Field Part 2 > Table 2 – Baud rate values. This table provides explanations regarding how to set the Baud rates in the extension boxes.
-
Page 103: Temperature Calibration
Extension Box # Connected: Specify whether the relevant extension box is connected or not. • The Green Field will “search” for the relevant extension box and will update the Hardware Check List and all other relevant settings accordingly. If the Green Field doesn’t recognize the extension box an alarm “Ext. -
Page 104: Calibration Of The Ec/Ph Monitor Transmitter
ALIBRATION OF THE ONITOR RANSMITTER Use the following instructions when using Munters EC/pH transmitters. When using other types of transmitters use calibration guidelines supplied by the manufacturer and jump to EC/pH Transmitter Monitor & Green Field Correlation. EC & PH main screen 10.5.1.1... - Page 105 . You will be asked to wait for a few seconds, while the unit performs the ENTER value correction. The Offset point is now set. 6. If the calibration process is completed successfully, will be displayed. If it fails, pH Calibration OK is displayed. LOQUID IS POOR Menu Navigation Schema © Munters AB, 2018...
-
Page 106: Ec/Ph Transmitter Monitor & Green Field Correlation
ORRELATION Place the cursor on the relevant factor and use the left/right arrow keys to increase/decrease the factor until the values displayed by the Green Field are equal to the values indicated on the EC/pH transmitter screen. To ensure the measured values are stable it is recommended to immerse the sensor in calibration fluid when doing this process. -
Page 107: Weather Station Calibration
For temperature and humidity sensors calibration can be done using reference temperature and • humidity sensors. Wind direction sensor should be calibrated so that the value indicated by the Green Field fits • the actual direction pointed by the wind direction sensor. -
Page 108: Write To Data Plug
NOTE When writing to a data-plug, old data on the data-plug will be overwritten. 10.10 Read from Data Plug Use a data-plug to upload and restore controller settings when needed. Plug the data-plug into the GREEN FIELD data-plug socket (see the figure below). Data-plug © Munters AB, 2018... - Page 109 NOTE The Data plug should be used when the system is idle; otherwise, some of the running programs might be interrupted and moved to halt. Enter the READ FROM DATA PLUG screen and confirm your choice. NOTE When reading from the data-plug, the current settings data on the controller will be overwritten. © Munters AB, 2018...
-
Page 110: Configuration Menu
EC Pre-Control Configuration, page 122 • Drainage Configuration, page 123 • System Pressure Configuration, page 123 • EC/pH Range Definition, page 123 • Pressure Sensor Range Definition, page 124 • Cooling Configuration, page 124 • Misting Configuration, page 125 • © Munters AB, 2018... -
Page 111: Device Delay Configuration
This means that the next valve will start before the previous one. Stagger delay (sec): Define the time (in seconds) for the first shift and the last shift delay • between valves (inside of group). © Munters AB, 2018... -
Page 112: Example Of Stagger Valve Delay - Multiple Shifts
11.1.2 E – M XAMPLE OF TAGGER ALVE ELAY ULTIPLE HIFTS © Munters AB, 2018... -
Page 113: Pump Station Configuration
Green Field will start the minimal number of pumps required to supply the calculated flow rate. If several pumps should be started, the Green Field starts from the largest to the smallest and will turn them off from the smallest to the largest. -
Page 114: Valve Configuration
Pump: Define which pump or pump station should be started when irrigating this valve. When • choosing Station, the Green Field will choose which and how many pumps should be started to supply the required (calculated) flow. See Pump Station Configuration on page 113 for more information). -
Page 115: Valve Flow Rate
Standard: In this function valves which are operated in a group should be connected to the same water meter. NOTE If a few valves configured to different water meters will be started simultaneously, the Green Field uses the flow measured by the water meter connected to the leading valve. - Page 116 Water source: The Green Field will sum or deduct flow measured simultaneously from a few water meters. When choosing this function an additional column called ”SUM” will appear, this column enables to define which water meters should be summed and which deducted from the total measured flow.
-
Page 117: Dosing Channel Configuration
Liter/Pulse: Define whether a dosing meter is connected to this channel and used for control purposes. Set the volume per pulse on the Ratio column. o Time (cc/sec): Define whether the calculated flow rate of the dosing channel is in CC (gallons) of fertilizer per second. © Munters AB, 2018... -
Page 118: Calibrating The Analog Dosing Valves
High %: set an injection percentage limit. This percentage will limit the deviation from set • dosing recipe when Green Field is injecting more than specified in order to try and reach the target EC/pH values. Low %: set an injection percentage limit. This percentage will limit the deviation from set dosing •... -
Page 119: Calibrating The Venturi Pumps
11.6.2 C ALIBRATING THE ENTURI UMPS The following section details how to calibrate the dosing valve when using Venturi Pumps. 1. Ensure that all dosing channels are physically connected to the fertilizer tanks. © Munters AB, 2018... - Page 120 400 (the result of the equation shown in step 5c). 8. To fine tune the ratio: a. Prepare an Irrigation Program using the most common dosing capacity program. b. Run the program. c. Check the actual flow on the Rotameter. © Munters AB, 2018...
-
Page 121: Dosing Configuration
Coarse Tuning (0-10): pH Coarse Tuning is used to adjust the speed and strength of pH • control. A higher value will result in faster correction but might lead to over shooting (see Green Field Irrigation > Part 2 > General > EC/pH correction adjustment for further information). © Munters AB, 2018... -
Page 122: Ec Pre-Control Configuration
Start With First/Last Device: Define whether the EC Pre-Control Pump should open with the first or the last device of the irrigation (refer to table 1.3 to see device startup order). o Off Delay: Define Off delay (if required) for the EC Pre-Control pump. © Munters AB, 2018... -
Page 123: Drainage Configuration
Define which pressure sensor (inlet or outlet) should be used as the system’s pressure. This sensor can later be defined to stop the system in case of low pressure (see table 1.7). 11.11 EC/pH Range Definition © Munters AB, 2018... -
Page 124: Pressure Sensor Range Definition
• mA) is read by the Green Field. The Green Field will create a linear graph between the 0 Volt (4 mA) to the 5 Volt (20 mA). 11.13 Cooling Configuration The cooling configuration screen will only be visible after one (or more) cooling valves have been defined... -
Page 125: Misting Configuration
Pump: Configure a pump for each misting valve. This setting is not necessary if the misting • pump is not controlled by the Green Field. Main Valve: Configure a main valve to each misting valve. This setting is not necessary if the •... -
Page 126: Installation Menu
4. If you wish to define several devices of the same type, for example valves 1 to 10, configure the first one and press ENTER a few times until you reach the required amount. The Green Field automatically continues with the same device until instructed otherwise, or until reaching the system limitation for that device. - Page 127 NOTE If 'SingleNet' is chosen in table 6.2, the screen consists of 256 outputs. NOTE If 'Radio' is selected in table 6.2, the screen contains at least 64 outputs. Screen 1 Screen 2 Screen 3 Screen 4 © Munters AB, 2018...
-
Page 128: Device List
Screen 5 NOTE After making changes, be sure to exit and return again to check for errors. The Green Field will delete and replace conflicting assignments with ‘---‘. 12.2 Device List The Device List screen allows you to view what type, and how many devices are currently defined. This screen automatically updates depending on the devices set in the 7.1 screen. -
Page 129: Analog Input 1-2
<None> LOCAL <Non Rain Sensor LOCAL <None> Local <Non EC Drain Sensor LOCAL <Non Analog Sensor Installation > Analog Input 2 4. If required, in , define the Expansion Channels. NOTE Define up to 88 sensors. © Munters AB, 2018... - Page 130 Program > Ext Condition 7. In , configure the External Condition Program for the analog sensors. a. Enter the beginning and ending b. Under Start An. Dry Cont., define time for each program. the input type. © Munters AB, 2018...
- Page 131 <NONE> g. Under Start Value, enter the required value to start the analog sensor. Under Stop Value, entered the required value to stop the analog sensor. EXTERNAL CONDITION PROGRAM Start Oper. Stop Value to Stop Value © Munters AB, 2018...
-
Page 132: Analog Output
No.: Map the channel number to the dosing channel. • NOTE After defining and mapping the channels, go to Configuration > Dosing Channel Configuration (page 117). 12.6 Hardware Checklist Same as Hardware Check List screen from TEST section (Menu 6.6). © Munters AB, 2018... -
Page 133: Controller Advanced Settings
Dual EC/pH Sensors, page 138 • Hot Keys and Status Screens page 140 • Operation Mode, page 141 • 13.1 Pump Station Configuration 13.2 Multiple Water Meters Option A - Standard Use/Measurement • Option B - Multiple Water Sources • © Munters AB, 2018... -
Page 134: Option A - Standard Use/Measurement
This option is used for water management, meters are located before the irrigation system. NOTE Cannot allocate a water meter to a valve. The controller will simulate a virtual water meter with a calculated flow of WM1+WM2+WM3-WM4. © Munters AB, 2018... -
Page 135: Drain Meter Measurement
Use this option for greenhouses drain applications. 13.3.1 D RAINAGE IMING PTION Use this option when irrigating one valve is which allocated to a drain meter. Drain meter Valve 1 Drain Valve 1 08:30 08:35 09:00 09:10 09:20 09:30 © Munters AB, 2018... -
Page 136: Drainage Timing Option B
• Method 3 • 13.4.1 M ETHOD Dosing Pump control = Calculated according to Nominal Flow Rate • Dosing pump measurement = Calculated according to Fert. Meter • Dosing pump type = Venturi or Electric • © Munters AB, 2018... -
Page 137: Method 1
Dosing pump type = Venturi or Electric • 13.4.3 M ETHOD Dosing Pump control = According Fert. meter pulses (For quantitative injection only) • Dosing pump measurement = Fert. Meter • Dosing pump type = Hydraulic • © Munters AB, 2018... -
Page 138: Dosing Configuration
Dosing Boost Off Delay (mm:ss) 00:02 sensors reading Dosing by QTY. Method SPREAD EC/pH averaging- balanced reading from • EC/pH sensors 13.6 Dual EC/pH Sensors Additional sensors as fail-safe and to verify if difference occurs; alarms signal. © Munters AB, 2018... - Page 139 DUAL EC/pH SENSORS- Additional sensors as fail-safe and to verify if difference occurs, • alarm will signal. © Munters AB, 2018...
-
Page 140: Hot Keys And Status Screens
13.7 Hot Keys and Status Screens In the Active Irrigation screen, view the status of the system by pressing number keys corresponding to each hot key. Hot Screen 1- Active Irrigation Hot Screen 2- Irrigation Process Status © Munters AB, 2018... -
Page 141: Operation Mode
• 8 can be viewed but not modified Technician (unrestricted): All menus are fully accessible (no restrictions) • To change the operation mode, select Mode. OPERATION MODE – USER On the Front Panel, press Zone/Log In. © Munters AB, 2018... - Page 142 Upper Port – BaudRate ► To perform a cold start or firmware upgrade, the controller must be in the “Technician” • mode. If there is a power failure, the controller will power up with the last mode that used. © Munters AB, 2018...
-
Page 143: Appendix A - Green Field Parts List
Green Field/Climate Digital Input Card, 8 inputs 960-99-00004 Green Field/Climate Analog Input Card, 11 inputs 960-99-00005 Green Field/Climate Analog Output Card, 4 outputs 960-99-00037 Green Field Display card with LED backlit (new type) 960-99-00033 Green Field/Climate Keyboard card 960-99-00013 Green Field /Climate SD card 960-99-00035... -
Page 144: Appendix B - Troubleshooting
15 Appendix B – Troubleshooting Controller Malfunction • Burnt Fuse - In Case of Voltage • 15.1 Controller Malfunction 15.2 Burnt Fuse - In Case of Voltage © Munters AB, 2018... -
Page 145: Appendix C - Replacements And Additional Installations
Removing a Card, page 146 • Adding a Dry Contact Output Card, page 146 • Adding an Input Card, page 147 • LCD & Keyboard Replacement, page 148 • 16.1 Installing a 24 VAC Output Card © Munters AB, 2018... -
Page 146: Removing A Card
16.2 Removing a Card NOTE The procedure is the same for all cards. 16.3 Adding a Dry Contact Output Card © Munters AB, 2018... -
Page 147: Adding An Input Card
16.4 Adding an Input Card © Munters AB, 2018... -
Page 148: Lcd & Keyboard Replacement
16.5 LCD & Keyboard Replacement © Munters AB, 2018... -
Page 149: Appendix D - Sensor Installation And Definition
EC – pH Sensor Connection, page 149 • Measuring Box Connection, page 154 • Humidity Sensor Definition, page 155 • Pyranometer Connection – Green Field, page 157 • Radiation Sensor Definition, page 158 • Pressure Transducer Connection, page 161 •... -
Page 150: Ec Sensor Calibration
EC Sensor Calibration, page 150 • pH Sensor Calibration, page 151 • Green Field pH Calibration, page 153 • 17.1.1 EC S ENSOR ALIBRATION NOTE Perform the following procedure in one continual session. Interruptions or delays while performing the procedure can cause calibration failure. -
Page 151: Ph Sensor Calibration
NOTE Perform the following step as soon as the EC 7.0 screen appears. 4. Verify that the pH sensor is dry; insert it into a pH 7 calibration buffer, immerse for 5 - 7 seconds and press © Munters AB, 2018... - Page 152 6. Verify that the pH sensor is dry; insert it into pH 4 calibration buffer, immerse for 5 - 7 seconds and press The following screen appears. 7. Wait until the following screen appears. pH calibration is complete. NOTE If display says "BUFFER FAULT" please refer to Troubleshooting in the EC pH Manual. © Munters AB, 2018...
-
Page 153: Green Field Ph Calibration
REEN IELD P ALIBRATION IF EC and pH numbers match on both screens; if not: Use arrows to In Setup select EC/pH increase/decrease value Calibration so numbers match ENTER when • values match Press Menu • © Munters AB, 2018... -
Page 154: Measuring Box Connection
0 – 5 V Humidity 4 – 20 mA EC, pH, CO2 CAUTION TO ENSURE INTERFERENCE AND LIGHTNING IMMUNITY, USE SHIELDED CABLE ONLY (22 AWG MINIMUM)! CAUTION POWER AND SIGNAL WIRES MUST BE IN SEPARATE CABLES! © Munters AB, 2018... -
Page 155: Humidity Sensor Definition
Temp Sensor 02. Humidity Sensor Temp Sensor < None 03. EC Sensor Humidity Sensor < None 04. pH Sensor < None < None 05. EC Sens. Verify < None Outside Temperature/Humidity Sensor Connection • Sensor Definition • © Munters AB, 2018... -
Page 156: Outside Temperature/Humidity Sensor Connection
17.3.1 O UTSIDE EMPERATURE UMIDITY ENSOR ONNECTION 17.3.2 S ENSOR EFINITION © Munters AB, 2018... -
Page 157: Pyranometer Connection - Green Field
17.4 Pyranometer Connection --- - Green Field Jumper Position Sensor type Temp Temperature sensor (30kΩ) 0-5V Sensor Type 4-20 mA EC, pH, CO2 . . . © Munters AB, 2018... -
Page 158: Radiation Sensor Definition
17.5 Radiation Sensor Definition Radiation Sensor Configuration – Munters • Radiation Sensor Connection – Davis • 17.5.1 R – M ADIATION ENSOR ONFIGURATION UNTERS © Munters AB, 2018... -
Page 159: Radiation Sensor Connection - Davis
17.5.2 R – D ADIATION ENSOR ONNECTION AVIS Jumper Position Sensor type Temp Temperature Sensor (30kΩ) 0-5V Radiation 4-20 mA EC, pH, CO2 . . . 17.5.2.1 Radiation Sensor Definition © Munters AB, 2018... -
Page 160: Radiation Sensor Configuration - Option B- Davis
17.5.2.2 Radiation Sensor Configuration - Option B- Davis © Munters AB, 2018... -
Page 161: Pressure Transducer Connection
17.6 Pressure Transducer Connection 17.6.1 A NALOG RESSURE ENSOR EFINITION © Munters AB, 2018... -
Page 162: Wind Direction Connection
17.7 Wind Direction Connection Jumper positioning Sensor type Temp Temperature sensor (30KΩ) 0-5V Humidity, Radiation, Pressure 4-20 mA EC, pH, CO2 Wind Direction Sensor Definition • © Munters AB, 2018... -
Page 163: Wind Direction Sensor Definition
Wind Speed Digital Input Definition • 17.7.1 W IRECTION ENSOR EFINITION 17.7.2 W PEED IGITAL NPUT EFINITION © Munters AB, 2018... -
Page 164: Sensor And Cable Specifications
0.2-50 mm/hr Rain 200 cm2 (0.01 - 2"/hr) contact 100 meter (330 Collector (31 inch2) ±3%, Rainfall (tipping feet) Resolution: count between bucket) 0.254mm 50-150 mm/hr (0.01") (2-4"/hr) Rain Rain, No Rain 0.2mm/hr contact/ Detector 0-5 VDC © Munters AB, 2018... -
Page 165: Appendix E- Technical Specifications
GROUP 1 CLASS A FCC Part 15 Subpart B 18.2 Controller Components Keyboard & Display, page 166 • CPU, page 166 • Power Supply, page 166 • Digital Input, page 169 • Analog Input, page 169 • © Munters AB, 2018... -
Page 166: Keyboard & Display
Settings backup & software upgrade through SD memory card • LCD Connector SD card socket Key board connector 18.2.3 P OWER UPPLY AC Power Supply • o 230/115 VAC (±10%) Protection • o Thermal fuse o Current detector: short circuit detection © Munters AB, 2018... -
Page 167: Power Supply Circuit Drawing
90 VAC 0.5 Amp VAC, 0.5 Amp CAUTION Green Field units support 115 VAC, 230 VAC, or both. Each unit has a silver label stating the unit’s voltage. Verify that the power supply matches the unit’s requirements. 18.2.3.1 Power Supply Circuit Drawing... -
Page 168: Power Supply Fuse Protection
18.2.3.2 Power Supply Fuse Protection Location Designatio Type Style Rating Reaction Dimension Time GREEN FIELD Power Tubular M205 1.0 Slow Blow 20mm x Supply, Main Transformer Glass GREEN FIELD Power Tubular M205 4.0 Slow Blow 20mm x Supply, CPU & I/O Circuit... -
Page 169: Digital Input
RH – RHS-10 0 – 100% 0 – 3 VDC WD - Davis 0 - 360° 0 – 20kOhm Pressure Up to 10bar (145 PSI) 0 – 5 VDC Radiation 0 – 1800 w/m² 0 – 5 VDC © Munters AB, 2018... -
Page 170: Analog Output
18.2.6 A NALOG UTPUT Four outputs • 4 – 20 mA output • 24 VAC power supply • © Munters AB, 2018... -
Page 171: Appendix F - Main Menu Tree
Accumulation Cooling Accumulation Sensor EC Pre-Control Reset Calibration Configuration Misting Filters Write to Drainage Data Plug Configuration Water Cooling Read from System Heating Calibration Pressure Configuration Radiation Configuration Pressure Sensor Range Definition Cooling Configuration Misting Configuration © Munters AB, 2018... -
Page 172: Warranty
12 months of the delivery of the defective product. Munters has thirty days from the date of receipt in which to take action, and has the right to examine the product at the customer’s premises or at its own plant (carriage cost to be borne by the customer). - Page 173 The use of non-original spare parts or incorrect assembly exonerates the manufacturer from all liability. Requests for technical assistance and spare parts can be made directly to the nearest Munters office. A full list of contact details can be found on the back page of this manual.
- Page 174 Munters Brasil Industria e Comercio Ltda, Phone +55 41 3317 5050, Canada Munters Corporation Lansing, Phone +1 517 676 7070, China Munters Air Treatment Equipment (Beijing) Co. Ltd, Phone +86 10 80 481 121, Denmark Munters A/S, Phone +45 9862 3311, Munters India, Phone +91 20 3052 2520,...
Need help?
Do you have a question about the Green Field and is the answer not in the manual?
Questions and answers