
Related Manuals for Munters Element


Summary of Contents for Munters Element
- Page 1 Element Controller Manual for use and maintenance Element Climate Controller Ag/MIS/UmGb-2672-12/18 Rev 1.0 P/N: 117584...
- Page 2 Munters reserves the right to effect modifications to the apparatus in accordance with technical and legal developments. © Munters AB, 2018...
-
Page 3: Table Of Contents
PRECAUTIONS ---------------------------------------------------------------------------------------------------------------------------------------------- 7 2.1 Grounding ------------------------------------------------------------------------------------------------------------------------------------------------------------------------------- 2.2 Checking the Battery Level -------------------------------------------------------------------------------------------------------------------------------------------- 2.3 Filtering -------------------------------------------------------------------------------------------------------------------------------------------------------------------------------------- 2.4 Frequency Inverters ------------------------------------------------------------------------------------------------------------------------------------------------------------ INTRODUCTION TO THE ELEMENT ------------------------------------------------------------------------------------------------------ 9 3.1 General Description ---------------------------------------------------------------------------------------------------------------------------------------------------------- 3.1.1 Features ........................... 3.1.2 Capabilities ..........................3.2 Components --------------------------------------------------------------------------------------------------------------------------------------------------------------------------- 3.3 Environmental Protection... - Page 4 7.4 Viewing the Element Version ------------------------------------------------------------------------------------------------------------------------------------- SAVING AND LOADING SETTINGS -------------------------------------------------------------------------------------------------- 43 8.1 Saving Settings ------------------------------------------------------------------------------------------------------------------------------------------------------------------ 8.2 Loading Settings --------------------------------------------------------------------------------------------------------------------------------------------------------------- 8.3 Resetting the Element to Default Settings ----------------------------------------------------------------------------------------------------------- 8.4 Upgrading the Product Software ---------------------------------------------------------------------------------------------------------------------------- TEMPERATURE SETTINGS----------------------------------------------------------------------------------------------------------------------- 45 9.1 What is the Temperature Curve ------------------------------------------------------------------------------------------------------------------------------ 9.2 Configuring the Temperature Curve...
- Page 5 17.2 Viewing the Humidity Data ---------------------------------------------------------------------------------------------------------------------------------------- 17.3 Viewing the Water History ----------------------------------------------------------------------------------------------------------------------------------------- 17.4 Viewing the Heater History ---------------------------------------------------------------------------------------------------------------------------------------- 17.5 Viewing the Alarm History ------------------------------------------------------------------------------------------------------------------------------------------ 17.6 Viewing the Event History ------------------------------------------------------------------------------------------------------------------------------------------- 17.7 Monitoring the Current Sense ---------------------------------------------------------------------------------------------------------------------------------- WARRANTY ------------------------------------------------------------------------------------------------------------------------------------------------- 81 © Munters AB, 2018...
-
Page 6: Introduction
1.3 Notes Date of release: Jan 2018 Munters cannot guarantee to inform users about the changes or to distribute new manuals to them. All rights reserved. No part of this manual may be reproduced in any manner whatsoever without the expressed written permission of Munters. -
Page 7: Precautions
• proper grounding of the inverter's chassis and motor power cable • proper grounding of low voltage cable shield wire • that the controller and inverter cables are kept in separate conduits or wire bundles • © Munters AB, 2018... - Page 8 1. Controller 2. Inverter 3. Place the controller at least five meters from the inverter. © Munters AB, 2018...
-
Page 9: Introduction To The Element
Environmental Protection • 3.1 General Description Element is a standalone controller for swine barns. Employing a new hardware package, all programming and relay connections can be carried out from a single controller. As an option, users can install extension units. -
Page 10: Environmental Protection
Figure 1: Element – Extension – Communicator 2 Network Figure 1 key Communicator 2 Cell messages Internet access Alarms Element Voice messages Extension Unit (up to three) Figure 2: Element – Extension – Comm-Box Network Figure 2 key Communicator (option) -
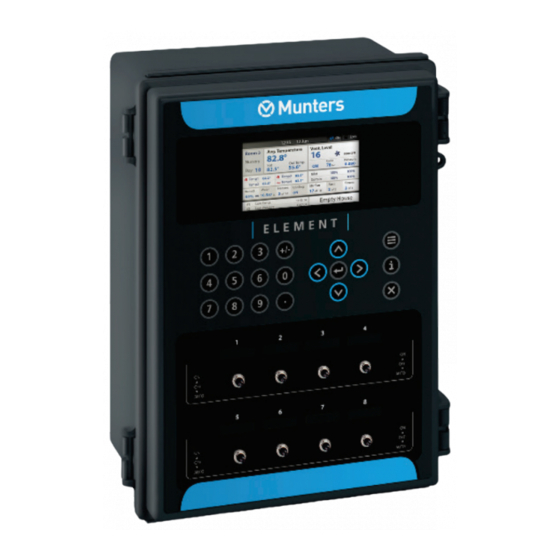
Page 11: Element Interface
• 4.1 Key Board Table 1: Keyboard Functions Menu Press this button to go to the Element menus (refer to Main Menu, page 14). Arrows Press arrow keys to navigate through the windows. Press the +/- key to switch between options (for example ventilation cycle options). -
Page 12: Main Screen
Main Screen • Screen Graphic Description area Room This screen displays the room number, Element mode (for example Hog), and the growth day. NOTE The mode is TBD. Temperature This screen displays the average data temperature (last 24 hours), the current temperature, and the outside temperature. -
Page 13: Front And Side Toggle Switches
Resetting the alarm is possible, but it only stops the siren and not the screen message. To stop the message, the problem must be addressed. NOTE If communication is off, Element does not accumulate history data. 4.2 Front Switches On the front panel are eight relay toggle switches. -
Page 14: Main Menu
Move the switch back to its original position to cancel the change. 4.3 Main Menu Table 2 and Table 3 detail the complete Element main menu structure. The menu has two levels. 1. Press the left/right arrow keys to scroll between menus. - Page 15 Ventilation levels Temperature & Relays General Settings Humidity Inlet & Curtain Levels Static Pressure Analog Sensors About Water Digital Sensors Inlet & Curtain Analog Output Opening/Closing Time TRIAC Temperature Definition Inlet & Curtain Setup Fan Air Capacity © Munters AB, 2018...
-
Page 16: Unit Installation
4. Close the Element enclosure lid carefully and tightly. Use RTV silicon or equivalent sealant to seal the cable holders. 5. After installation is completed, operate the Element for a few hours and re- check for proper operation. © Munters AB, 2018... -
Page 17: Grounding And Shielded Wiring
Otherwise, the acetic acid will attack the metal parts, including circuitry. Drill cable entry holes on the bottom of the box only. • 5.2 Wiring Diagrams Element to Communicator 2 • Element to Element Extensions • Element to Relays •... -
Page 18: Element To Communicator 2
5.2.1 E LEMENT TO OMMUNICATOR Figure 3: Communicator External Box – Daisy Chain Figure 4: Star Configuration CAUTION Do not install the Element in a star configuration! 5.2.2 E LEMENT TO LEMENT XTENSIONS Figure 5: Communication Wiring Diagram (Element Extension) •... - Page 19 Figure 5 key Element Extension 1 Element unit communication ports 2 Element board Element Extension board 3 Element Element Extension communication ports Figure 5: Communication Wiring Diagram (Element Extension) © Munters AB, 2018...
-
Page 20: Element To Relays
Figure 6: Element Extension Dipswitches The Element and Element Extension units each have dip switches that define the unit address. All Element dipswitches must be off (down). • Define each Extension units by setting one dipswitch (1, 2, or 3) to ON. -
Page 21: Relay Wiring
5.2.3.1 Relay Wiring Figure 7: Element Relay Wiring NOTE Figure 7 is an example. Actual installations can differ. © Munters AB, 2018... - Page 22 In general winches don't require current monitoring. NOTE If a device connected to a current sense relay fails, the relay shows 0 volts. NOTE To enable current sense monitoring, run the cable connecting a device to the relay. © Munters AB, 2018...
- Page 23 (found on the switch card): Relays 5 and 6: dipswitches 1, 2, and 3. Set to OFF. • Relays 7 and 8: dipswitches 4, 5, and 6. Set to ON. • Figure 10: Curtain Dipswitch Wiring © Munters AB, 2018...
-
Page 24: Configuring The Relays
Fan: 8 Cooling: 2 Inlet: 2 o Same as Analog (up to 8): This function controls a device using the Element's analog output settings. Assign the relay the number of the analog output device which will control the relay. -
Page 25: Element To Outputs/Inputs
NPUTS Analog Output / Digital Input Wiring • Configuring the Analog Output Devices • Configuring the Digital Sensors • 5.2.4.1 Analog Output / Digital Input Wiring Figure 11: Analog Output Wiring Figure 12: Digital Input Wiring © Munters AB, 2018... -
Page 26: Configuring The Analog Output Devices
2. Scroll to each analog output. 3. From the drop down list, select the device wired to that relay. o Element automatically assigns the device a number, according to the device type. The number of devices supports varies according to the device type. -
Page 27: Configuring The Digital Sensors
2. Scroll to each sensor. 3. From the drop down list, select the device wired to that port. o Element automatically assigns the sensor a number, according to the device type. The number of devices supports varies according to the device type. -
Page 28: Sensor Wiring
5.2.5.1 Sensor Wiring Figure 13: Temperature and Humidity Sensors Wiring Figure 13 key Element low voltage ports Sensor white wire Temperature sensors Sensor red wire Grounding strip Sensor black wire Humidity sensor Install up to four temperature sensors. • Port 5 can be used to connect a temperature sensor or a humidity sensor. A jumper defines •... -
Page 29: Potentiometer Wiring
Figure 14: Potentiometers Wiring NOTE Figure 14 is an example. Actual installations can differ. Figure 14 key Element low voltage ports Potentiometer devices Ports 3 and 17 can be used to connect a temperature sensor or a potentiometer. A jumper •... - Page 30 T4: Temperature sensor or humidity sensor • In Figure 16, all jumpers are placed on the temperature sensor pins. Figure 17 shows the jumpers placed on the potentiometer and humidity sensor pins. Figure 17: Jumpers expanded view (2) © Munters AB, 2018...
-
Page 31: Configuring The Analog Sensors
If a humidity sensor is installed, define sensor 6 only to be the humidity sensor. o Element automatically assigns the sensor a number, according to the device type. The number of devices supports varies according to the device type. -
Page 32: Humidity Configuration
NOTE Uninstalling a device in the Relay Layout, Analog Output or TRIAC tables removes the device from this screen. 5.2.5.6 Humidity Configuration Element responds to high humidity by increasing the ventilation. Install a humidity sensor as shown in Figure 13. -
Page 33: Triac Setup
Configuring the TRIAC Variable Speed Fans • 5.2.6.1 TRIAC Wiring Figure 18: TRIAC Device Wiring • Figure 19: Power Wiring • Figure 20: Wiring Diagram of Main Voltage Section Showing Filtering • Figure 18: TRIAC Device Wiring Figure 19: Power Wiring © Munters AB, 2018... -
Page 34: Configuring The Triac Variable Speed Fans
To ensure compliance with EMC 61000-6-3, install an appropriate filter; for example a Munters' filter (P/N: P-EMI), TDK-RSHN-2016 L or similar devices. Figure 20: Wiring Diagram of Main Voltage Section Showing Filtering 5.2.6.2 Configuring the TRIAC Variable Speed Fans ... -
Page 35: Timers
Figure 21: Element Toggle Switches 4. On the Element side are two toggle switches. After wiring a TRIAC device (refer to Figure 18), turn a toggle switch to On or Auto to enable the device o On: device runs continually o Auto: device runs according to the settings 5.3 Timers... - Page 36 2. Enable the parameters as required. Default: No. 3. Go to Control > Timers. NOTE On/Off Temp and On/Off (sec) columns appear only if they are enabled in the Timer Set screen. 4. Define the following parameters: © Munters AB, 2018...
- Page 37 If the On temperature is lower than the Off temperature, the device operates when the temperature is lower than the On temperature. o On/Off sec: Define the on/off cycles. Range: 0 – 999 seconds. Default: 0 © Munters AB, 2018...
-
Page 38: Technical Specifications
Up to 2 TRIACs Variable Speed Output: 2.2 KW 10 Amps, 230 VAC; 2.8 HP • 1.1 KW 10 Amps, 115 VAC; 1.4 HP • Housing Dimensions cm (L x W x H) 40.0 x 27.3 x 16.9 © Munters AB, 2018... - Page 39 Operating temperature range 32º to 122º F (0º to 50º C) Storage temperature range 14º to 158º F (-10º to 70º C) Indoor Applications The equipment is designed for use in indoor applications only! IP 65 Certification © Munters AB, 2018...
-
Page 40: Basic Setup
7 Basic Setup The following section details how to define basic Element parameters. These parameters define the user interface, growth cycle, and system parameters. Defining the General Settings • Defining the Group Settings • Defining the Expected Animal Weights •... -
Page 41: Defining The Group Settings
• Length (Meter/Feet) • Volume (M3/h or CFM) o Network ID: o Baud rate: Baud rate defines the communication rate between Element and any communication device (for example, the Comm-Box) or between Element and the Expansion units. Choose one of the following: •... -
Page 42: Defining The Expected Animal Weights
7.3 Defining the Expected Animal Weights Animal weights are used when calculating the amount of air required when using Ventilation by Weight (page 56). Refer to that section for details. 7.4 Viewing the Element Version Go to System > General > About. •... -
Page 43: Saving And Loading Settings
Upgrading the Product Software • 8.1 Saving Settings Use this menu to download Element settings to an USB flash drive. 1. Insert a USB flash drive containing the settings into place (Figure 22). 2. Go to Management > Save Settings. -
Page 44: Loading Settings
While loading settings, do not remove the USB flash drive or interrupt the process in any way! It is possible that not all tables upload to the Element. To view which tables (if any) do not upload: 1. After the loading process is complete, go to the directory on the USB flash drive containing the application data. -
Page 45: Temperature Settings
For example, if on day 1 the target temperature is 95° F and on day 5 the target temperature is 86° F, Element adjusts the target temperature on days 2 to 4 so that it approaches the day 5 setting. -
Page 46: Configuring The Temperature Curve
9.2 Configuring the Temperature Curve The following section details how to configure Element's Temperature Curve function. 1. Go to Control > Temperature Curve > Set. 2. Define the parameters: o Curve Points: This parameter defines the number of curve points representing the change of target temperature. - Page 47 High Alarm: Set the temperature at which an alarm is generated, signaling the barn temperature is too high. The High Alarm parameter must be greater than that day's target temperature. Range: 1.0° to 90° C/ 34° to 194 F. Default: 95 (first day). 0 (all other days). © Munters AB, 2018...
-
Page 48: Fan And Ventilation
When minimum ventilation is operating, the ventilation works to ensure that there is sufficient clean air while keeping the air temperature close to the target temperature. If the temperature is above the target temperature by a sufficient amount, the ventilation level increases (after a delay time). If the increase in © Munters AB, 2018... -
Page 49: Ventilation Guidelines
Time, fans operate at the percentage set to the level the control is on. o High output: During the Off time, fans operate at the percentage set to the level the control is on. During the On Time, fans operate at 100%. © Munters AB, 2018... - Page 50 Element increases the ventilation by one level (after waiting the appropriate delay time). Element will continue to increase the level of ventilation until the average temperature falls below the band level or it reaches a level that does have a differential.
-
Page 51: Configuring The Levels Of Ventilation
NOTE If either the On or Off time is defined as 0, the fan runs in continuous mode. o Fan Mode: Under F-1 to F-8, define each fans mode: : Continuous : Cycle ●: Off 3. If required, go to System > Levels > Levels of Ventilation > Set. © Munters AB, 2018... - Page 52 Off: Percentage per level. o On: 100% o Stir Fan Operate During Cycle: While in Cycle mode Element enables the stir fan to work with the fans in a synchronous or asynchronous manner. On: Stir fans operate during the On cycle time.
-
Page 53: Minimum Ventilation
As animals grow, the amount of air they need increases. Element supports three Minimum Ventilation options: Basic (default option): The Basic option determines the minimum ventilation levels based on the growth day. -
Page 54: Soft Minimum Ventilation
Soft Minimum ventilation provides ventilation based on the day and the temperature. As the temperature decreases or rises, the ventilation level changes accordingly. However between two parameters, the Soft Minimum and Warm Minimum, Element ramps the ventilation. Meaning, Element adjusts ventilation according to the temperature (to prevent changing the ventilation too frequently any change must be larger than a user-defined amount). -
Page 55: Configuring Soft Minimum Ventilation
Cold Minimum Band (Below Heat): Minimum Cold ventilation begins when the temperature drops by the amount of this differential below the heat temperature. Range: -20.0 – 20.0 F/C. Default: 2.0 3. Go to Control > Min Max Level. © Munters AB, 2018... -
Page 56: Ventilation By Weight
Ventilation by Weight provides air based on the number of animals in the house, their projected weight, and the outside temperature. After calculating how much air is required based on these factors, Element determines the required ventilation level to supply the air. Anytime that one of the factors changes, Element recalculates the ventilation (to prevent changing the ventilation too frequently any change must be larger than a user-defined amount). -
Page 57: Configuring Ventilation By Weight
• When using cycle fans, each level has minimum and maximum on times, which determine the minimum and maximum CFM. If the ventilation doesn't provide enough air for the pigs (based on their numbers and weight) Element sends an alarm. You will need to redefine the minimum level. - Page 58 Warm Min: Define the amount of air provided when the outside temperature reaches the Cold Outside Temperature defined in Set. o Maximum: Set the controller's maximum ventilation level starting at that day. Ventilation is never higher than this level. © Munters AB, 2018...
-
Page 59: Ventilation By Weight Alarm
Element's algorithm (taking into account the weight and number of animals), Element sends an alarm "Insufficient Air Supply". Element generates this alarm if the required amount of air is greater than the maximum amount supplied plus the minimum air change (defined in... -
Page 60: Inlet And Curtain Ventilation
Defining the curtains/inlets control method. • NOTE When Element determines that more ventilation is required, it opens the inlets before increasing the actual ventilation. This is done to prevent excess pressure from building up when the ventilation increases. 12.1 Calibrating the Opening/Closing... -
Page 61: Using Time
After the potentiometer calibration finishes, Element automatically calculates the opening and • closing times and enters these numbers into the Inlet & Curtain Setup screen. In the event that the potentiometers fail for any reason, Element will automatically switch to • using the time to control the opening and closing. -
Page 62: Control Method
ONTROL Position control means that the inlets and curtains open to a certain fixed position, based on the ventilation requirements. Element allows configuring two positions. 1. Go to System > Installation > Inlet & Curtain Setup > Set. Go to System > Levels of Ventilation > Inlet & Curtain Levels > Set. -
Page 63: Pressure Control
NOTE When fans are working in cycles, Element does all calculations based on the cumulative times of the On Cycle. As an option, Element can send an alarm if the static pressure is too high or too low. Temperature plays no part in this process. - Page 64 NOTE The number defined is the number used in making all calculations. o Low Pressure Alarm: When static pressure is below this level, Element sends an alarm. o High Pressure Alarm: When static pressure is above this level, Element sends an alarm.
-
Page 65: Temperature Control
Max Compensation Opening: This parameter defines the maximum possible opening. Even if the calculated compensation is greater than this amount, the inlets will not open more than this amount. © Munters AB, 2018... - Page 66 3. Go to System > Levels of Ventilation > Inlet & Curtain Levels and define the opening per levels. The controller will increase the opening according to the temperature. © Munters AB, 2018...
-
Page 67: Cooling Functions
Configuring the Cool • 13.1 Cooling Principles Element supports controlling up to two cooling devices (foggers or cooling pads). The devices can run separately or together. To avoid causing the animals undo heat stress during periods of high relative humidity, Element employs... - Page 68 Setting this parameter to 0 or 100 disables the sensor input to this function. If the sensor sends invalid readings, Element will ignore the Humidity settings. In a situation where there are multiple data lines for a single day and the humidity level rises to the temperature setting (plus differential), cooling stops entirely.
-
Page 69: Heating Functions
Figure 35: On Temperature above the Target 14.2 Standard (On/Off) Heating Wire heaters to the relays as shown in Figure 7, page 21. Define Centigrade or Fahrenheit in Measurement System. 1. Go to Control > Heaters. © Munters AB, 2018... -
Page 70: Analog Controlled Heating
Wire heaters to the relays as shown in Figure 7, page 21. Define Centigrade or Fahrenheit in Measurement System. Enable at least one analog output as a heater. 1. Go to Control > Heaters. © Munters AB, 2018... - Page 71 NOTE On Temp Diff and Off Temp Diff is calculated by average or some sensors of temperature depends on definition in Temperature Definition Tables for each device. 3. If required, go to Control > Heaters > Set. © Munters AB, 2018...
- Page 72 Range: [0-999], default 15. Note that in Variable Heating, the output decreases in a curve as the temperature approaches the Off Temperature (Figure 37). Figure 37: Variable Heating: Curve • © Munters AB, 2018...
-
Page 73: Calibration
• o Temperature sensors: 5.0 to 5.0C°/9.0 to 9.0 F° o Humidity sensor: ±10 o Default: 0 Value: Read only. Displays each sensor's current value • A/D: Read only. Displays each sensor's current A/D value • © Munters AB, 2018... -
Page 74: Calibrating The Water Meter
The water system operates on a pulse counting system. In this screen, specify how much water flows per pulse. 1. Go to Calibration > Water. 2. Specify the flow rate. o Range: 0 – 100 liters per pulse. Default: 0 © Munters AB, 2018... -
Page 75: Alarms
When certain climatic and feed conditions in the barn do not meet user defined specifications, Element triggers an alarm, enabling the user to deal with the problem in real time. Element records all alarms. Events are changes in the Elements settings. Element records all events. -
Page 76: Alarm Reset
Temperature Sensor Alarms: Low Temperature Alarm Difference: Element sends an alarm when the sensor temperature goes below the low temperature set point (target temperature minus this number). Default: 0 degrees. Range 0 – 10.0 degrees. High Temperature Alarm Difference: Element sends an alarm when the sensor temperature goes above the high temperature set point (target temperature plus this number). - Page 77 2. Enable Alarm Reset. © Munters AB, 2018...
-
Page 78: Monitoring Functions
Go to this screen to view the last 999 alarms. Alarms history can display the following alarms. Unknown Alarm • Low /High Temperature • Sensor # Low/High • Temperature • High/Low Pressure • Water Overflow • Water Shortage • Outside Temperature Failure • Temperature Sensor # Failure • Humidity Sensor Failure • © Munters AB, 2018... -
Page 79: Viewing The Event History
The Current Sense function monitors the current supply, recording the input and sending alarms when the current, going to a specific device that is wired via the current sensor, is too high or too low. Using the function helps prevent excess or insufficient current from damaging motors wired to Element relays. ... - Page 80 Stop Motor Delay: Amount of time that needs to pass before shutting down a motor. This parameter prevents shutting down a motor un-necessarily. NOTE Element sends an alarm if a motor shuts down even though the current is no longer monitored. © Munters AB, 2018...
-
Page 81: Warranty
12 months of the delivery of the defective product. Munters has thirty days from the date of receipt in which to take action, and has the right to examine the product at the customer’s premises or at its own plant (carriage cost to be borne by the customer). - Page 82 The use of non-original spare parts or incorrect assembly exonerates the manufacturer from all liability. Requests for technical assistance and spare parts can be made directly to the nearest Munters office. A full list of contact details can be found on the back page of this manual.
- Page 83 Munters Brasil Industria e Comercio Ltda, Phone +55 41 3317 5050, Canada Munters Corporation Lansing, Phone +1 517 676 7070, China Munters Air Treatment Equipment (Beijing) Co. Ltd, Phone +86 10 80 481 121, Denmark Munters A/S, Phone +45 9862 3311, India...
Need help?
Do you have a question about the Element and is the answer not in the manual?
Questions and answers