ITT Goulds Pumps HSUL Installation, Operation And Maintenance Manual
Hide thumbs
Also See for Goulds Pumps HSUL:
Table of Contents
Advertisement
Quick Links
Advertisement
Table of Contents

Related Manuals for ITT Goulds Pumps HSUL


Summary of Contents for ITT Goulds Pumps HSUL
- Page 1 Installation, Operation, and Maintenance Manual HSUL...
-
Page 3: Table Of Contents
Table of Contents Table of Contents 1 Introduction................................ 2 1.1 Important Safety Notice..........................2 1.2 Safety warnings............................2 1.3 Safety ................................ 3 1.4 General precautions ..........................4 1.5 ATEX Considerations and Intended Use....................7 1.6 Parts ................................9 2 Transportation and Storage..........................10 2.1 Receive the unit............................ -
Page 4: Introduction
ITT Goulds pumps will provide safe, trouble-free service when properly installed, maintained, and operat- Safe installation, operation, and maintenance of ITT Goulds Pumps equipment are an essential end user responsibility. This Pump Safety Manual identifies specific safety risks that must be considered at all times during product life. -
Page 5: Safety
Trapped liquid can rapidly expand and result in a violent explosion and injury. ITT Goulds Pumps will not accept responsibility for physical injury, damage, or delays caused by a failure to observe the instructions for installation, operation, and maintenance contained in this Pump Safety Manual or the current IOM available at http://www.gouldspumps.com/literature. -
Page 6: General Precautions
Personal injuries will result if procedures outlined in this manual are not followed. ITT Goulds Pumps will not accept responsibility for physical injury, damage or delays caused by a failure to observe the instructions in this manual and the IOM provided with your equip- ment. - Page 7 1.4 General precautions WARNING DO NOT change service application without approval of an authorized ITT Goulds Pumps representative. WARNING Safety Apparel: • Insulated work gloves when handling hot bearings or using bearing heater • Heavy work gloves when handling parts with sharp edges, especially impellers •...
- Page 8 1.4 General precautions WARNING The impeller clearance setting procedure must be followed. Improperly setting the clearance or not following any of the proper procedures can result in sparks, unexpected heat generation and equipment damage. WARNING If using a cartridge mechanical seal, the centering clips must be installed and set screws loosened prior to setting impeller clearance.
-
Page 9: Atex Considerations And Intended Use
1.5 ATEX Considerations and Intended Use WARNING Lock out driver power to prevent accidental startup and physical injury. CAUTION Allow all system and pump components to cool before handling them to pre- vent physical injury. CAUTION If pump is a Model NM3171, NM3196, 3198, 3298, V3298, SP3298, 4150, 4550, or 3107, there may be a risk of static electric discharge from plastic parts that are not properly grounded. - Page 10 Maintenance manual (IOM) can cause serious personal injury or damage to the equipment. This in- cludes any modification to the equipment or use of parts not provided by ITT Goulds Pumps. If there is any question regarding the intended use of the equipment, please contact an ITT Goulds representative before proceeding.
-
Page 11: Parts
The code classification marked on the equipment must be in accordance with the specified area where the equipment will be installed. If it is not, do not operate the equipment and contact your ITT Goulds Pumps sales representative before proceeding. -
Page 12: Transportation And Storage
Dispose of all packing materials in accordance with local regulations. Inspect the unit to determine if any parts have been damaged or are missing. Contact your ITT representative if anything is out of order. Pump should be placed in upright position only. -
Page 13: Pump Storage Requirements
2.4 Pump storage requirements Examples Figure 2: Example of proper lifting method using lifting lugs 2.4 Pump storage requirements Requirements Submersible units require proper preparation for storage and regular maintenance during storage. The unit is considered in storage when it has been delivered to the job site and is awaiting installation. For specific requirements for storing motors, gearboxes, engines, panels, sealing plans and other auxilia- ries, contact the equipment manufacturer. -
Page 14: Preservation And Storage
15 minutes every two weeks. 2.5 Preservation and Storage ITT Goulds Pump Division's normal domestic shipping and storage preparation is suitable for protecting the pump during shipment in covered trucks. Although this is a submersible pump, storage in a clean, dry area will help preserve the paint and prevent corrosion. -
Page 15: Installation
NOTICE: The motor is rated for full horsepower with liquid temperatures of 104°F (40°C) or lower, unless noted otherwise on nameplate or ITT documentation. 3.4 Install the pump Make sure the lifting device is securely fastened to the motor lugs or hooks so the unit will not be dropped when it is lowered into the sump. -
Page 16: Install The Guide Bracket / Pivot Bracket Assembly
3.5 Slide rail system (optional) Position item #787G, sump flange adapter, as shown in section Y-Y and secure to base upright us- ing items #372K. Apply gasket adhesive to item #360W and place in section Y-Y and secure to base upright. Insert short-threaded end of stubs, items #787U, through base uprights and into the top two holes of the sump flange adapter, item #787G. -
Page 17: Install The Slide Rail
3.5 Slide rail system (optional) Remove items #371G and #357A and position lift cable loop between lifting brackets. Apply Loctite 271 and reinsert item #371G, hex head cap screw, through cable and lifting brackets and thread heavy hex nut, item #357A, and item #415A, jam nut, onto item #371G. Check cable clamps.. 3.5.4 Install the slide rail Refer to drawing B1-445153SLR and B2-445153SLR With anchor bolts in position, lower the base, item #787A, onto a flat, clean foundation and tighten... - Page 18 3.5 Slide rail system (optional) Figure 3: Slide rail system (optional) HSUL Installation, Operation, and Maintenance Manual...
- Page 19 3.5 Slide rail system (optional) Figure 4: Slide rail system (optional) NOTICE: Pump shown is a JCU, not an HSUL. For illustrative purposes only. HSUL Installation, Operation, and Maintenance Manual...
-
Page 20: Commissioning, Startup, Operation, And Shutdown
4 Commissioning, Startup, Operation, and Shutdown 4 Commissioning, Startup, Operation, and Shutdown 4.1 Start the pump The most important concern is the prevention of motor overloading. Refer to the motor nameplate for full load ampere rating of the motor. Install an ammeter on the motor leads and check the motor draw immediately after the unit is start- NOTICE: A lower than expected current draw with a 3-phase motor may be an indication of incorrect ro- tation. -
Page 21: Maintenance
5 Maintenance 5 Maintenance 5.1 Disassembly 5.1.1 Disassemble the pump Disconnect all electrical service. Mark leads for reassembly. Remove fasteners which secure casing (100) to motor adapter (340) and separate the parts. Remove impeller cap screw (370C) and impeller washer (528J). Impeller is keyed to shaft. Carefully slide impeller off shaft. -
Page 22: Pre-Assembly
5.2 Pre-assembly Item Qty / Pump Part Impeller Gasket Casing Supports Motor Adapter Stud Casing Gasket *1,*2 HH Cap Screw, Impeller 370C *1,*2 Washer, Impeller 528J 9700 Motor 5.2 Pre-assembly 5.2.1 Pre-assembly inspections Guidelines Before you assemble the pump parts, make sure you follow these guidelines: •... -
Page 23: Reassembly
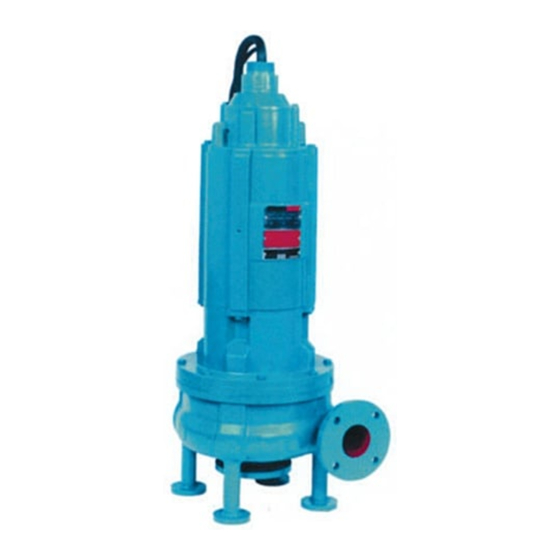
5.3 Reassembly Impeller replacement Inspect impeller vane edges for excessive cracks, pitting or corrosion damage. Replace impeller if exces- sively worn or defective. Gaskets, O-rings, and seats replacement WARNING: Risk of death or serious injury. Leaking fluid can cause fire and/or burns. Replace all gaskets and O-rings at each overhaul or disassembly. - Page 24 5.3 Reassembly NOTICE: Refer to 5.1.1 Disassemble the pump on page 19 for parts description. Figure 7: HSUL pump HSUL Installation, Operation, and Maintenance Manual...
-
Page 25: Troubleshooting
6 Troubleshooting 6 Troubleshooting 6.1 Troubleshooting Symptom Cause Remedy Insufficient or no dis- Speed too low due to low voltage Verify voltage is within rated range charge System head too high Verify discharge pressure Insufficient NPSH or submergence Verify liquid level is above minimum required Worn pump parts Check parts for wear Incorrect motor rotation... - Page 26 Visit our website for the latest version of this document and more information: http://www.gouldspumps.com Goulds Pumps Inc. 240 Fall Street Seneca Falls, NY 13148 Form IOM.HSUL.en-US.2021-09 ©2021 ITT Corporation The original instruction is in English. All non-English instructions are translations of the original instruction.
Need help?
Do you have a question about the Goulds Pumps HSUL and is the answer not in the manual?
Questions and answers