Ruckus Wireless ZoneFlex 7055 Quick Setup Manual
Dual-band multimedia wi-fi wall switch
Hide thumbs
Also See for ZoneFlex 7055:
- User manual (187 pages) ,
- User manual (193 pages) ,
- Quick setup manual (2 pages)
Advertisement
Quick Links
ZoneFlex 7055
Dual-Band Multimedia Wi-Fi
Wall Switch
Quick Setup Guide
This Quick Setup Guide provides step-by-step instructions
on how to set up your Ruckus Wireless ZoneFlex 7055
Multimedia Wi-Fi Wall Switch. After completing the steps
described in this Guide, you will be able to access the Wi-Fi
Wall Switch and begin providing wired and wireless network
access to users.
B
Y
B
EFORE
OU
EGIN
Before deploying Ruckus Wireless products, please check for
the latest software and the release documentation.
•
Release Notes and User Guides are available at
http://support.ruckuswireless.com/documents
•
Software Upgrades are available at
http://support.ruckuswireless.com/software
•
Open Source information is available at
http://opensource.ruckuswireless.com/
•
Product Warranty/Software License Agreement:
http://support.ruckuswireless.com/
P
C
ACKAGE
ONTENTS
•
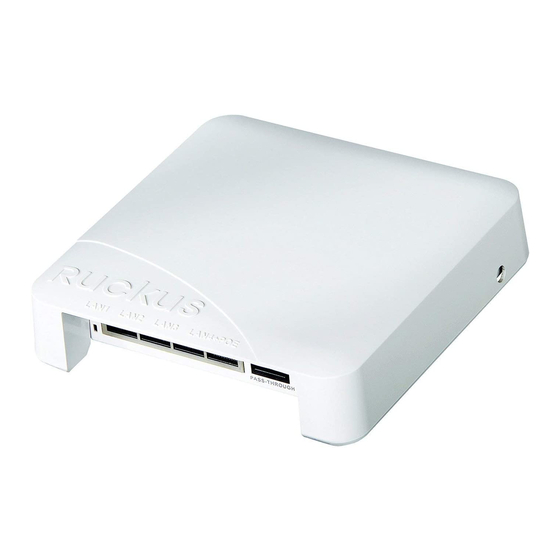
ZoneFlex 7055 Wi-Fi Wall Switch (Access Point)
•
Mounting bracket
•
(2) Low-profile Phillips head mounting screws
•
(2) Torx bracket screws
•
Regulatory flyer
•
This Quick Setup Guide
S
R
ETUP
EQUIREMENTS
•
A Phillips screwdriver
•
A T10 Torx screwdriver
•
A notebook with an Ethernet port and a wireless card.
•
A standard US or EU-style wall outlet box, with an Ethernet
cable run through the wall from your LAN to the outlet box.
•
One of the following:
•
An IEEE 802.3af/at-compliant PoE switch.
•
An IEEE 802.3af/at-compliant PoE injector.
•
An optional DC power adapter (Ruckus part #902-
0170-XX10, sold separately)
\
WARNING!
DO NOT connect a PoE injector to any of the four front
ports, as this can seriously damage the device. PoE in
power supply should only be connected to the
LAN/Uplink
IMPORTANT!
If the AP is deployed with ZoneDirector, follow the
ZoneDirector Quick Setup Guide, and connect the AP to
your Ethernet network.
.
.
.
S
1: P
TEP
S
ETUP
NOTE:
The following instructions assume Windows 7 as the
operating system. Procedures for other OS's are similar.
1
On your Windows 7 computer, open the Network Con-
nections (or Network and Dial-up Connections) control
panel:
Start > Control Panel > Network and Sharing Cen-
ter > Change Adapter Settings
2
When the Network Connections window appears, right-
click the icon for
select
Properties
When the Local Area Connection Properties dialog box
appears, select
IPv4)
from the scrolling list, and then click
The TCP/IP Properties dialog box appears.
Published November 2012, Part Number 800-70432-001
PoE In
port on the rear of the device.
Y
C
AP
REPARE
OUR
OMPUTER FOR
Local Area Connection
, and then
.
Internet Protocol Version 4 (TCP/
Properties
Copyright © 2012 Ruckus Wireless, Inc.
IMPORTANT!
Write down all of the currently active settings so you can
restore your computer to its original configuration later
(when this process is complete).
3
Select
Use the following IP address
already selected), and then make the following entries:
•
IP address
: 192.168.0.22 (or any address in the
192.168.0.x network--other than 192.168.0.1, which is
in use by the AP)
Subnet mask
•
: 255.255.255.0
Default gateway
•
: 192.168.0.1
Leave the DNS server fields empty.
OK
4
Click
to save your changes, and exit the TCP/IP Prop-
erties dialog box, and the Local Area Connection Proper-
ties dialog box. Your changes are put into effect
immediately.
S
2: C
TEP
ONNECT THE
1
Remove the AP from its packaging and place it near your
computer.
2
Connect one end of an Ethernet cable to the
LAN 5/Uplink
port on the rear of the AP, and connect
the other end to a PoE switch or the
the PoE injector.
•
If PoE power is not available, the AP can be powered
using an optional DC power adapter (Ruckus part
#902-0170-XX10, sold separately)
3
Using another Ethernet cable, connect one end to your
computer's network port, and connect the other end to
another port on the PoE switch or to the
work
port on the PoE injector.
4
Provide power to the PoE injector/switch.
5
Verify that the
PWR
LED is steady green.
NOTE:
If PoE is not available, the 7055 can be powered by
Ruckus Wireless power adapter (part number 902-0170-
xx10).
S
3: L
I
TEP
OG
NTO THE
1
Open a Web browser window. and enter this URL to con-
nect to the AP:
https://192.168.0.1
.
option (if it is not
AP
Y
C
TO
OUR
OMPUTER
PoE In
Power Out
port on
Data In/Net-
AP
Advertisement

Related Manuals for Ruckus Wireless ZoneFlex 7055


Summary of Contents for Ruckus Wireless ZoneFlex 7055
- Page 1 Ethernet network. This Quick Setup Guide provides step-by-step instructions Leave the DNS server fields empty. on how to set up your Ruckus Wireless ZoneFlex 7055 Click to save your changes, and exit the TCP/IP Prop- Multimedia Wi-Fi Wall Switch. After completing the steps...
- Page 2 When the Ruckus Wireless Admin login page appears, NOTE: is mounted. Complete any verification or troubleshooting enter the following: The ZoneFlex 7055 comes with a bracket for a single 1- that requires visibility of the LEDs before mounting. • Username : super gang electrical outlet box.
Need help?
Do you have a question about the ZoneFlex 7055 and is the answer not in the manual?
Questions and answers