Chapters
Table of Contents

Subscribe to Our Youtube Channel
Related Manuals for LIVARNO LUX 114388


Summary of Contents for LIVARNO LUX 114388
- Page 1 LED LIGHTSTRIP KIT LED LIGHTSTRIP KIT Operation and Safety Notes SÚPRAVA LED SVETELNÝCH LÍŠT Pokyny pre obsluhu a bezpečnostné pokyny LED-LICHTLEISTEN-SET Bedienungs- und Sicherheitshinweise IAN 114388...
- Page 2 Operation and Safety Notes Page Pokyny pre obsluhu a bezpečnostné pokyny Strana DE / AT / CH Bedienungs- und Sicherheitshinweise Seite...
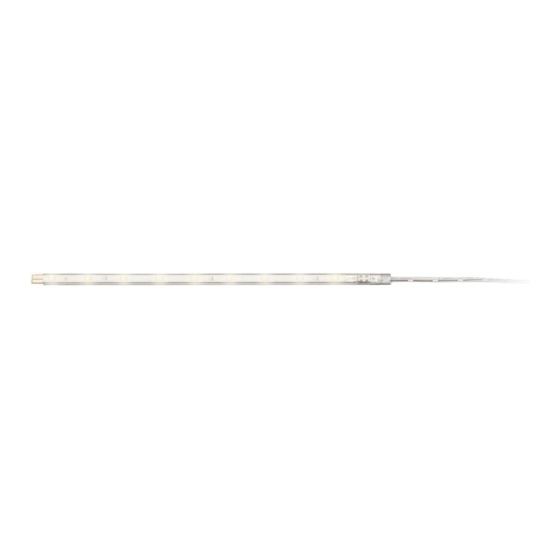
- Page 4 ca./approx. 20 cm MAX.
-
Page 5: Table Of Contents
Introduction Intended use ....Page 6 Description of parts ..Page 6 Technical details ....Page 7 Included items ....Page 7 Safety information ....Page 8 Safety advice for installation ..Page 11 Installation ....Page 12 Mounting the product on a cupboard ....Page 13 Mounting the product on a wall ......Page 13 Operation ....Page 14... -
Page 6: Introduction
LED lightstrip kit Introduction Intended use This product is suitable for use in- doors. This product is intended for use in private, domestic enviroment only and not for commercial pur- poses. Other uses or modification of the product shall be considered as improper use and could lead to injury or damage. -
Page 7: Technical Details
Bulbs per strip: 9 x 3 V 20 mA, 0.06 W (per LED) Note: the bulbs cannot be replaced Protection class: LED light strip (Model No. 114388-15-01) TÜV / GS tested. Mains adapter: Nom. voltage, primary: 100–240 V∼, 50–60 Hz Nom. voltage,... -
Page 8: Safety Information
1 End cap 1 Operating instructions Safety information In the case of damage resulting from non-compliance with these operating instructions the guarantee claim becomes invalid! No liability is accepted for consequential dam- age! In the case of material damage or personal injury caused by incor- rect handling or non-compliance with the safety instructions, no liability is accepted! - Page 9 physical, sensory or mental capa- bilities or lack of experience and knowledge if they have been given supervision or instruction concerning use of the appliance in a safe way and understand the hazards involved. Children shall not play with the appliance. Cleaning and user maintenance shall not be made by children without supervision.
- Page 10 the light fitting while it is still in the packaging or rolled up. This lamp is only intended for use indoors. Avoid the danger of death from electric shock! Before use, ensure that the mains voltage available is the same as the required operating voltage for the device (100–240 V∼).
-
Page 11: Safety Advice For Installation
Always remove the mains plug from the socket before installing, dismantling or cleaning. Never touch the mains plug or the product with moist or wet hands. Only connect the light strip to supply adaptor. Use the lighting product with only the components described in these operating instructions. -
Page 12: Installation
surfaces officially classified as being of “normal flammability”. CAUTION! RISK OF ELECTRIC SHOCK! Ensure that you do not strike any elec- trical cables, gas or water pipes in the vicinity of where you are drilling. If necessary, check the area using a suitable detector before you drill. -
Page 13: Mounting The Product On A Cupboard
Mounting the product on a cupboard Note: Thoroughly clean the surface on to which you intend to install the product. The surface must be clean, dry and free of grease. Otherwise the self-adhesive foil may not stick properly. 1. Using a pencil, mark the position on the wall on to which you intend to attach the LED light strip... -
Page 14: Operation
2. Insert the dowels into the drilled holes (Fig. E). 3. Fix the fastening clips to the wall with the screws 4. Connect the LED light strip to the mains adapter (Fig. F) or connect the LED light strip to the connection lead connect it to an additional light (Fig. -
Page 15: Disposal
Disposal The packaging is made entirely of recyclable materials, which you may dispose of at local recycling facilities. Contact your local refuse disposal authority for more details of how to dispose of your worn-out product. To help protect the envi- ronment, please dispose of the product properly when it has reached the... - Page 16 materials or manufacture within 3 years from the date of purchase, we will repair or replace it – at our choice – free of charge to you. The warranty period begins on the date of purchase. Please keep the original sales receipt in a safe loca- tion.
- Page 17 Úvod Používanie v súlade s určeným účelom ..Strana 18 Popis častí ....Strana 18 Technické údaje ..Strana 18 Obsah dodávky ..Strana 19 Bezpečnostné upozornenia ..Strana 20 Bezpečnostné upozornenia týkajúce sa montáže ....Strana 24 Montáž ..... Strana 24 Montáž...
-
Page 18: Používanie V Súlade S Určeným Účelom
Súprava LED svetelných líšt Úvod Používanie v súlade s určeným účelom Tento výrobok je určený na prevádz- kovanie vo vnútorných priestoroch. Výrobok je určený len na používanie v súkromných domácnostiach, nie na komerčné využitie. Iné používanie výrobku alebo zmeny na výrobku nie sú... -
Page 19: Obsah Dodávky
0,06 W (na LED) Poznámka: Osvetľovacie prostriedky nie je možné vymeniť. Trieda ochrany: Svetelná lišta s LED diódami (model č. 114388-15-01) s certifikátom TÜV / GS. Sieťový zdroj: Sieťové napätie primárne: 100–240 V∼, 50 - 60 Hz Sieťové napätie sekundárne:... -
Page 20: Bezpečnostné Upozornenia
6 obojstranných lepiacích fólií 1 koncový uzáver 1 návod na obsluhu Bezpečnostné upozornenia V prípade škôd, ktoré vzniknú nedodržiavaním tohto návodu na obsluhu, zaniká garančný nárok! Pri následných škodách nepreberá výrobca ručenie! Pri vecných ško- dách alebo poraneniach osôb, ktoré boli zapríčinené... - Page 21 so zníženými psychickými, sen- zorickými alebo duševnými schopnosťami alebo s nedostat- kom skúseností a vedomostí, ak sú pod dozorom, alebo ak boli poučené ohľadom bezpečného používania prístroja a ak poro- zumeli nebezpečenstvám spo- jeným s jeho používaním. Deti sa s prístrojom nesmú hrať. Čis- tenie a údržbu prístroja nesmú...
- Page 22 POZOR! NEBEZPEČEN- STVO PREHRIATIA! Osvet- ľovací výrobok neprevádzkujte v obale ani v nerozvinutom stave. Toto svietidlo je vhodné výlučne na používanie vo vnú- torných priestoroch. Zabráňte nebezpe- čenstvu ohrozenia života v dôsledku zásahu elektrickým prúdom! Pred použitím sa ubezpečte, že sa sieťové napätie v zásuvke zhoduje s potrebným prevádz- kovým napätím prístroja (100–240 V∼).
- Page 23 Výrobok chráňte pred ostrými hranami, mechanickým zaťaže- ním a horúcimi povrchmi. Neupevňujte produkt pomocou ostrých svoriek alebo klincov. Pred montážou, demontážou alebo čistením vždy vytiahnite zástrčku zo zásuvky. Sieťovej zástrčky ani výrobku sa nikdy nedotýkajte mokrými rukami. Zapojte LED svetelnú lištu iba na priložený...
-
Page 24: Bezpečnostné Upozornenia Týkajúce Sa Montáže
Bezpečnostné upozornenia týkajúce sa montáže Výrobok možno pomocou prilo- ženého upevňovacieho materiálu pripevniť na všetky bežne zá- palné povrchy. POZOR! NEBEZPEČEN- STVO ZÁSAHU ELEKTRIC- KÝM PRÚDOM! Uistite sa, že pri vŕtaní nenarazíte na roz- vody elektrického prúdu, plynu alebo vody. V prípade potreby vykonajte pred vŕtaním kontrolu pomocou detektora rozvodov. -
Page 25: Montáž Skrinky
Montáž skrinky Upozornenie: Plochu, na ktorú chcete výrobok namontovať, dôkladne očistite. Plocha musí byť čistá, suchá a nemastná. V opačnom prípade môže byť priliehavosť lepiacej fólie obmedzená. 1. Ceruzkou označte miesto na stene, na ktorom chcete upevniť svetelnú lištu s LED-diódami V prípade potreby použite vodováhu. -
Page 26: Používanie
2. Umiestnite hmoždinky navŕtaných otvorov (obr. E). 3. Upevniťe upevňovacie svorky pomocou skrutiek na stene. 4. Spojte svetelnú lištu s LED-dió- dami so sieťovým adaptérom (obr. F) alebo spojte sve- telnú lištu s LED-diódami spojovacím káblom , aby ste zapojili dodatočné svietidlo (obr. -
Page 27: Likvidácia
Likvidácia Obal sa skladá výhradne z materiálov neškodiacich životnému prostrediu. Zlik- vidujte ich v miestnych recyklačných nádobách. O možnostiach likvidácie opotrebo- vaného výrobku sa dozviete na Vašej správe obce alebo mesta. Ak výrobok doslúžil, v záujme ochrany životného prostredia ho neodhoďte do domového odpadu, ale odovzdajte na odbornú... - Page 28 plynúť dátumom kúpy. Starostlivo si prosím uschovajte originálny po- kladničný lístok. Tento doklad je potrebný ako dôkaz o kúpe. Ak sa v rámci 3 rokov od dátumu nákupu tohto zariadenia vyskytne chyba materiálu alebo výrobná chyba, zariadenie Vám bezplatne opravíme alebo vymeníme – podľa nášho výberu.
- Page 29 Einleitung Bestimmungsgemäße Verwendung ....Seite 30 Teilebeschreibung ..Seite 30 Technische Daten ..Seite 31 Lieferumfang ....Seite 31 Sicherheits- hinweise .....Seite 32 Sicherheits hinweise zur Montage .....Seite 36 Montage Schrankmontage ...Seite 37 Wandmontage ....Seite 38 Anwendung ....Seite 38 Reinigung und Pflege ....Seite 39 Entsorgung ....Seite 39 Garantie...
-
Page 30: Einleitung
LED-Lichtleisten-Set Einleitung Bestimmungsgemäße Verwendung Dieses Produkt ist für den Betrieb im Innenbereich geeignet. Das Produkt ist nur für den Einsatz in privaten Haus halten und nicht für den kom- merziellen Gebrauch vorgesehen. Andere Verwendungen oder Verän- derungen des Produkts gelten als nicht bestimmungsgemäß... -
Page 31: Technische Daten
Lichtleiste: 9 x 3 V 20 mA, 0,06 W (per LED) Hinweis: Leuchtmittel können nicht ausgetauscht werden Schutzklasse: LED-Lichtleiste (Modell-Nr. 114388- 15-01) TÜV / GS geprüft. Netzteil: Nennspannung primär: 100–240 V∼, 50–60 Hz Nennspannung sekundär: 12 V , 0,25 A, Schutzklasse: Netzteil (Modell-Nr. -
Page 32: Sicherheits- Hinweise
6 Schrauben 6 doppelseitige Klebefolien 1 Endkappe 1 Bedienungsanleitung Sicherheits- hinweise Bei Schäden, die durch Nichtbe- achtung dieser Bedienungsanleitung verursacht werden, erlischt der Garantieanspruch! Für Folgeschäden wird keine Haftung übernommen! Bei Sach- oder Personenschäden, die durch unsachgemäße Hand- habung oder Nichtbeachtung der Sicherheitshinweise verursacht werden, wird keine Haftung über- nommen! - Page 33 Dieses Gerät kann von Kindern ab 8 Jahren und darüber sowie von Personen mit verringerten physischen, sensorischen oder mentalen Fähigkeiten oder Mangel an Erfahrung und Wis- sen benutzt werden, wenn sie beaufsichtigt oder bezüglich des sicheren Gebrauchs des Gerätes unterwiesen wurden und die daraus resultierenden Gefahren verstehen.
- Page 34 Verpackung auf, um ungewollte Beschädigungen zu vermeiden. Stellen Sie sicher, dass der Leuchtartikel so verlegt ist, dass niemand darüber laufen bzw. stolpern kann. VORSICHT! ÜBERHIT- ZUNGSGEFAHR! Betreiben Sie den Leuchtartikel nicht in der Verpackung und nicht im aufgerollten Zustand. Diese Leuchte ist aus- schließlich für den Be- trieb im Innenbereich geeignet.
- Page 35 gewartet werden können. Die Leuchtmittel können nicht aus- getauscht werden. Öffnen Sie niemals eines der elektrischen Betriebsmittel oder stecken irgendwelche Gegen- stände in dieselben. Schützen Sie das Produkt vor scharfen Kanten, mechanischen Belastungen und heißen Ober- flächen. Nicht mit scharfen Klammern oder Nägeln befestigen.
- Page 36 das Netzteil in der Steckdose befindet. Zum vollständigen Ausschalten entfernen Sie das Netzteil aus der Steckdose. Sicherheitshinweise zur Montage Das Produkt kann auf allen normal entflammbaren Ober- flächen mit dem beigefügten Befestigungsmaterial befestigt werden. VORSICHT! STROM- SCHLAGGEFAHR! Stellen Sie sicher, dass Sie nicht auf Strom-, Gas- oder Wasserleitun- gen stoßen, die sich an der Bohrstelle befinden.
-
Page 37: Montage
Montage Die LED-Lichtleiste kann mit Ver- bindungskabel (Abb. B) oder ohne Verbindungskabel (Abb. C) angeschlossen werden. Schrankmontage Hinweis: Reinigen Sie gründlich die Fläche, auf der Sie das Produkt montieren wollen. Die Fläche muss sauber, fettfrei und trocken sein. Andernfalls kann die Haftbarkeit der Klebefolie eingeschränkt sein. -
Page 38: Wandmontage
Wandmontage 1. Bohren Sie die Befestigungslö- cher (Abb. E). VORSICHT! Achten Sie darauf, dass Sie keine Leitungen in der Wand beschädigen. 2. Führen Sie die Dübel in die Bohrlöcher ein (Abb. E). 3. Fixieren Sie die Befestigungs- clips mittels der Schrauben an der Wand. -
Page 39: Reinigung Und Pflege
Reinigung und Pflege VORSICHT! STROM- SCHLAGGEFAHR! Ziehen Sie zuerst den Netzstecker aus der Steckdose. Benutzen Sie keine Lösungsmittel, Benzin o.ä. Das Gerät würde hierbei Schaden nehmen. Verwenden Sie zur Reinigung nur ein trockenes, fusselfreies Tuch. Entsorgung Die Verpackung besteht aus umweltfreundlichen Materialien. -
Page 40: Garantie
Garantie Das Produkt wurde nach strengen Qualitätsrichtlinien sorgfältig produ- ziert und vor Anlieferung gewissen- haft geprüft. Im Falle von Mängeln dieses Produkts stehen Ihnen gegen den Verkäufer des Produkts gesetz- liche Rechte zu. Diese gesetzlichen Rechte werden durch unsere im Fol- genden dargestellte Garantie nicht eingeschränkt. - Page 41 Teilen, z. B. Schalter, Akkus oder die aus Glas gefertigt sind. DE/AT/CH...
- Page 42 OWIM GmbH & Co. KG Stiftsbergstraße 1 D-74167 Neckarsulm Model-No.: 114388-15-01 Version: 07 / 2015 Last Information Update Stav informácií · Stand der Informationen: 06 / 2015 · Ident.-No.: 114388-15-01062015-SK IAN 114388...
Need help?
Do you have a question about the 114388 and is the answer not in the manual?
Questions and answers