
Subscribe to Our Youtube Channel
Related Manuals for Teknik 5420277


Summary of Contents for Teknik 5420277
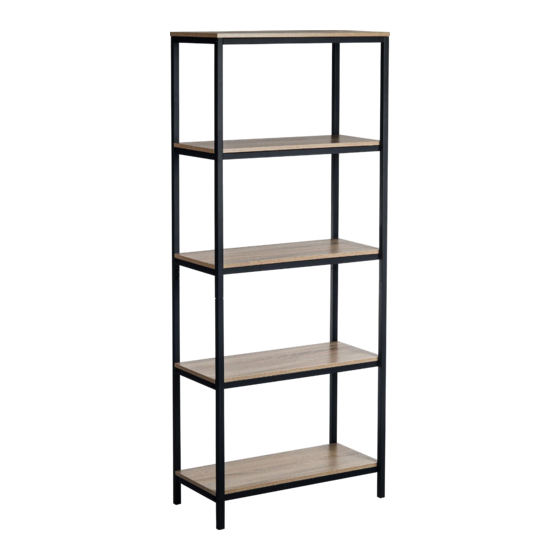
- Page 1 Teknik www.teknikoffice.co.uk Show everyone how smart you are. Industrial Style 4 Shelf Bookcase Model 5420277 NOTE: THIS INSTRUCTION BOOKLET CONTAINS IMPORTANT SAFETY INFORMATION. PLEASE READ AND KEEP FOR FUTURE REFERENCE.
- Page 2 Table of Contents Assembly Tools Required Part Identifi cation No. 2 Phillips Screwdriver Tip Shown Actual Size Hardware Identifi cation Assembly Steps Rubber Mallet Electric drill with 1/4" bit (ONLY in indicated step) Safety Page 2...
-
Page 3: Part Identification
Now you know Part Identifi cation our ABCs. å While not all parts are labeled, some of the parts will have a label or an inked letter on the edge to help distinguish similar parts from each other. Use this part identifi cation to help identify similar parts. TOP (1) UPPER SHELF (1) SHELF (3) -
Page 4: Hardware Identification
Hardware Identifi cation å Screws are shown actual size. You may receive extra hardware with your unit. 1-3/8" ALLEN SCREW - 20 1/2" ALLEN SCREW - 8 1-1/8" SCREW - 20 ALLEN WRENCH - 1 FURNITURE TIPPING RESTRAINT KIT - 1 Page 4... - Page 5 Step 1 Assemble your unit on a carpeted fl oor or on the empty carton to avoid scratching your unit or the fl oor. å NOTE: You should start each SCREW a few turns before completely tightening any of them. å...
- Page 6 Step Step 2 NOTE: You should start each SCREW a few turns before completely tightening any of them. å Fasten the ENDS (D and E) to the SHELF SUPPORTS (F). Use twenty 1-3/8" ALLEN SCREWS (1) and the å ALLEN WRENCH (8). NOTE: Be sure to square up the SHELF SUPPORTS (F) to the ENDS (D and E) before you completely tighten å...
- Page 7 Step Step 3 NOTE: You should start each SCREW a few turns before completely tightening any of them. å Fasten the TOP (A) and SHELVES (B and C) to the ENDS (D and E). Use twenty 1-1/8" SCREWS (2). å NOTE: The TOP (A) is larger than the SHELVES (B and C).
- Page 8 Step 4 Carefully stand your unit upright. å We recommend using the FURNITURE TIPPING RESTRAINT KIT (99) for added stability. Fasten a bracket to the back å edge of the TOP (A) using the 5/8" screw as shown. Place your unit in its fi nal location against a wall. å...
- Page 9 WARNING Please use your furniture correctly and safely. Improper use can cause safety hazards, or damage to your furniture or household items. Carefully read the following chart. Look out for: What can happen: How to avoid the problem: • Overloaded shelves. •...
Need help?
Do you have a question about the 5420277 and is the answer not in the manual?
Questions and answers