Table of Contents
Advertisement
Quick Links
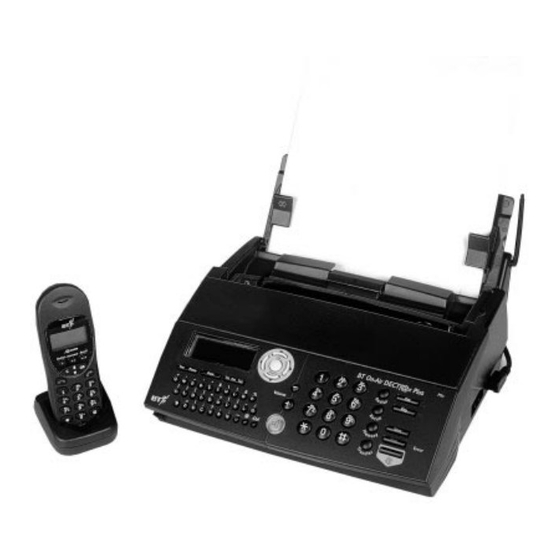
BT On-Air DECTf@x Plus
F@x machine and digital telephone system
User guide
This equipment is not designed for making emergency telephone calls when the power fails.
Alternative arrangements should be made for access to emergency services.
This product is intended for connection to analogue public switched telephone networks
and private switchboards in the United Kingdom.
Advertisement
Table of Contents

Subscribe to Our Youtube Channel
Related Manuals for BT On-Air DECTf@x Plus F@x machine and digital telephone system


Summary of Contents for BT On-Air DECTf@x Plus F@x machine and digital telephone system
-
Page 1: User Guide
BT On-Air DECTf@x Plus F@x machine and digital telephone system User guide This equipment is not designed for making emergency telephone calls when the power fails. Alternative arrangements should be made for access to emergency services. This product is intended for connection to analogue public switched telephone networks... - Page 2 This equipment is not designed for making telephone calls when the power fails. Alternative arrangements should be made for access to emergency services. Open this page for an ‘At a glance’ guide to your On-Air DECTf@x Plus...
-
Page 4: At A Glance
Redial button. Lets you redial up to 20 of the last numbers called. Intercom Intercom. Enables internal calls and call transfer between handsets. Recall Recall. For use with Switchboards and BT Select Services. - 1 - Intercom Recall Handset display icons... - Page 5 ‘ “ & < > Ctrl BT On-Air DECTf@x Plus Redial button Automatic redial of the last number dialled. Recall button Inserts a pause within a telephone number when dialling an external line through an internal switchboard, used for intercom and call transfer functions.
-
Page 7: Table Of Contents
In this guide At a glance Introduction Setting up Using your fax machine Using your handset Using the answering machine Using Internet functions Using mailboxes Using additional handsets Additional features Help Technical information Technical specification Index Hints and tips boxes In this user guide, we’ve included helpful tips and... -
Page 8: Introduction
• Radio module • DECT handset • Handset charger * The print ribbon supplied with your BT On-Air DECTf@x Plus is only a ‘starter ribbon’ and has a print life of about 25 pages. Standard ribbons have a print life of up to 230 pages. -
Page 9: Setting Up
Clip the top part into place by pulling the module up and towards the machine. Follow these steps to get your BT On-Air DECTf@x Connect the cable to the socket on the side of the machine. -
Page 10: Charging The Handset
Turn your machine upside down. Connect the power supply cable (1) to the socket (2). Insert the power supply cord (3) to the guide groove (4). Turn your machine back over. Connect the mains plug to a wall socket. When the mains power is switched on the display shows CHECK DATE to prompt you to set the correct date and time. - Page 11 Eventually they will need to be replaced. New batteries can be obtained from any BT Shop or from the helpline on 0845 601 2476. Slide off the battery cover and install the battery.
- Page 12 To print out a list of all the functions of the On- Air DECTf@x Plus, which allows you to see them at a glance, along with the function codes to carry them out, see ‘Printing out the functions list’ on page 45. There are a number of buttons which are used to access the functions of your On-Air DECTf@x Plus:...
- Page 13 OK/Menu Connecting to a switchboard Your BT On-Air DECTf@x Plus has been preset to work on a direct exchange line (PSTN). You will not normally need to alter this setting unless you will be connecting the machine to a switchboard, or PABX.
-
Page 14: Ring Settings
, the display shows WITHOUT Press OK/Menu and WITH. Move the cursor to WITH and press to confirm the entry. The display shows ENTER PREFIX. Enter the required prefix and press to confirm the entry. The display shows NUMBER LENGTH. This allows you to set the minimum length of numbers which require the prefix and will prevent the prefix being dialled when calling internal numbers. -
Page 15: Setting The Receive Mode
Tel/Fax mode When set to mode, the display shows: Tel/Fax Your BT On-Air DECTf@x Plus will automatically answer calls, without ringing, and determine whether an incoming call is a fax or a phone call. After answering, if fax tones are not detected, the base station and your handset(s) will ring. -
Page 16: Using Your Fax Machine
Using your fax machine Sending a fax WARNING Do not put paper into the machine if: - it has paper clips, staples or any metal attachment - it is wet with ink, paste or correcting fluid - it is too thick or too thin and flimsy... - Page 17 Using your fax machine . The display shows MEM PG 1, Press Start then CALLED NUMBER and begins to send the document. If the number dialled is engaged, your On-Air DECTf@x Plus will automatically redial the number, after a few minutes. You can redial the...
- Page 18 The display gives you two further options when you have chosen MEMORY or TYPE button. The MESSAGE: WITH HEADER PG Using your fax machine without entering a time. to confirm your selection. The document is sent with a fax header sheet which shows your name, the number you are sending to and the number of pages.
-
Page 19: Call Back
Using your fax machine This will be printed as a message on the header page and can be up to 800 characters. WITHOUT PAGE The document is sent without a header sheet. Press OK/Menu to confirm your selection. If you selected MEMORY or PAPER FEEDER, the display will now show NB PAGES. - Page 20 . Select ECONOMY. You can Press OK/Menu toggle between ECONOMY and NORMAL using buttons. 3 Press OK/Menu to confirm the setting and the stored faxes are printed in reduced size. Using your fax machine button. The stored then . The display...
-
Page 21: Fax Memory Full
Using your fax machine If you have created any mailboxes, before printing you will be asked to enter a mailbox number. Enter the mailbox number you want to print from, or enter 0 to print from the main memory. Press... - Page 22 Press • OK/Menu To edit entries in the directory To edit an entry press . The display shows 13 MODIFY. then Using your fax machine . The fax will automatically be button. then then then Start then...
- Page 23 Using your fax machine . The display shows MODIFY Press OK/Menu and the first name in the directory. Use the buttons to scroll through the entries until you reach the name you want to alter. Press OK/Menu then use the button to delete letters.
- Page 24 OK/Menu Using your fax machine to mofify another entry or then OK/Menu . The display shows CANCEL to delete it, then...
-
Page 25: Activity Reports
Using your fax machine Send reports You can set your On-Air DECTf@x Plus to print out a report of your fax transmissions. There are three settings: Report setting What is printed ALWAYS a report is printed after every fax no report will be printed (this is the default setting). - Page 26 For immediate polling press Your On-Air DECTf@x Plus calls the other machine. Using your fax machine . The display shows DOC TO BE then then . The display . The display shows CALLED button.
- Page 27 Using your fax machine To set your machine to poll at a specified time, press OK/Menu and press OK/Menu to confirm The display will show the time and fax number of the next job to be sent. Timed jobs You can set your On-Air DECTf@x Plus to manage timed jobs like delayed send, broadcasting and polling.
- Page 28 844 PRINT DOC. then . The Press OK/Menu jobs. Use the jobs and press Using your fax machine buttons to scroll through to select the job to OK/Menu button to confirm the changes. then then then . The...
-
Page 29: Using Your Handset
Using your handset IMPORTANT In order to use your On-Air DECTf@x Plus handset the radio module must be connected to the base unit and the base unit must be connected to both the telephone line and power socket (see steps 1 & 2 of ‘Setting up ’... -
Page 30: Answering Mode
If you hear fax tones when you answer the handset pressing then will automatically transfer the signal to the fax machine. button. Answering mode You can set the handset to automatically answer and finish calls when you remove and replace the handset in the charger. -
Page 31: Ring Melody And Volume
Using your handset Press to confirm your choice. The handset beeps. Earpiece volume To adjust the volume in the earpiece During a phone conversation, press increase the volume and Secrecy While making a call you can stop the other person hearing you talk to someone in the same room as you. -
Page 32: Using The Handset Directory
To adjust the ring volume Your On-Air DECTf@x Plus handset has four ring volume settings. Press then Use the and the buttons to choose the volume setting you want. Press to confirm your choice. To switch off the ring tone Press then By pressing the... - Page 33 Using your handset To change a stored number Press the or the Enter the two-digit memory number or scroll through the stored numbers until you reach the phone number you require. Press when you have the number displayed then use Enter the new phone number.
-
Page 34: Keypad Tones
Use the buttons to scroll through the telephone numbers until you see the one you want. (Names will not be displayed at the handset). Press the button and the number will green dial automatically. Keypad tones The handset is preset to have no keypad tones. You can switch on and adjust the volume of the tones. -
Page 35: Using The Answering Machine
The answering machine is now switched off. Recording your outgoing message Your BT On-Air DECTf@x Plus is supplied with a pre-recorded outgoing message. You can replace it with your own message if you wish. - Page 36 To record an outgoing message for Answer and record mode This message can be up to 20 seconds long. At the base station - Press OK/Menu . The display shows 41 RECORD OGM. then . The display shows 411 OGM. Press OK/Menu Press...
-
Page 37: Listening To Your Messages
Using the answering machine Listening to your messages If you have received any messages the light will light up and the display will show the total number of messages received. If you have received new messages the flash. You can listen to your messages either at the base station or through your handset. -
Page 38: Recording A Memo Message
At the handset To listen to your messages Press , then . Your messages are played • back to you. When all your messages have been played the machine beeps twice. See also ‘Operating the answering machine from the handset’ on page 38. Intercom If you have not received any messages the machine beeps. -
Page 39: Operating The Answering Machine From The Handset
Using the answering machine Press the button on the handset to stop recording. Press at the base station to return to Stop standby. The light will flash and the PLAY display will show that a new message has been recorded. if you have created any mailboxes, you will Note: be asked to enter a mailbox number before... -
Page 40: Using Internet Functions
Using Internet functions The Internet functions allow you to send faxes to an E-Mail address, send E-Mails to an E-Mail address and to send voice-mails to an E-Mail address. You can also download web pages from the Internet. E-Mail Your machine includes a pre-programmed, free, talk 21 email account which is ready to use (you just pay the cost of a local call each time you use it). - Page 41 Using Internet functions Press the button to delete the existing entry and then enter your new password. The password will be visible as you enter it, so Note: you can check that it is correct before you confirm the entry. Once it has been confirmed, it will be displayed as a row of ****** to prevent unauthorised persons reading it.
- Page 42 2. For E-Mail Shown on the display as EMAIL PASSWORD E-mail password • E-MAILADDR E-mail address • EMAIL ID E-mail identifier • SMTP SMTP server address • POP3 POP3 server address • If your E-mail identifier is not given, then you can assume it is the same as the first part of your email address up to, but not including, the @ symbol.
- Page 43 Using Internet functions Disabling Internet functions If you do not wish to use the Internet functions: Press then OK/Menu buttons to select NO ACCESS Use the and press to confirm. OK/Menu Sending/Receiving via the Internet Connecting to the Internet When your fax connects to the Internet, it: sends all the Internet-faxes lined up for •...
- Page 44 Press the button. Sending E-mail to an E-Mail address You can send a message entered on the keyboard to an electronic mailbox: Press the button or OK/Menu then OK/Menu Enter the E-mail address and press to confirm. to enter a space when typing text, use the Note: key or the keys together.
-
Page 45: Standard Settings
Using Internet functions your fax cannot process files other than faxes Note: (e. g. word processing files, CAD files, etc.). You can keep these documents in your Internet mailbox for use by your computer (see ‘Settings, mail switch (Menu 96)). PRINTING E-MAILS AND FAXES RECEIVED VIA THE INTERNET To print your faxes or E-mail messages, use the... - Page 46 E-Mail account supplied Note: with your BT On-Air DECTf@x Plus and you want to access the account using a PC, you will need to know your E-Mail password. Contact the helpdesk for this information.
- Page 47 RELAY (MENU 98) If you want to automatically transfer all received messages (faxes, E-mail messages or voice messages) to another telephone and/or fax machine, or to an E-Mail address: Note: PROVIDER selected. If you choose DISTINCT PC MB: enter the...
- Page 48 Press then then OK/Menu Press the buttons to scroll through the options (ON, OFF or SETUP). Select an option and press OK/Menu If you choose ON, press the • to scroll through the options (RELAY ON or RELAY ON @). Select an option and press OK/Menu - If you choose RELAY ON, all your messages are transferred to a telephone/fax:...
- Page 49 Adding a Web site to the directory Press then then OK/Menu . The display shows NAME. OK/Menu Enter the Web site name (e.g. BT) and press to confirm. The display shows WEB OK/Menu ADDRESS. then...
- Page 50 Type the Web site address, e.g.: www.bt.com (you don’t normally need to type the “http://”) and press OK/Menu The display shows MANUAL ACCESS and AUTO ACCESS. You can now choose to print out the Web page: • on request - select MANUAL ACCESS.
- Page 51 Using Internet functions Edit the name and press confirm, the display shows WEB ADDRESS. Edit the address and press confirm, the display shows MANUAL ACCESS and AUTO ACCESS. Select either manual or auto and press to confirm. OK/Menu If you choose AUTO you will now be able to edit the days and then time for auto retrieval.
- Page 52 Use the buttons to scroll to the next name you want and press OK/Menu confirm. Repeat the procedure for all the other names (up to 10). When you have selected the last name, press again. The display shows DAYS and OK/Menu MTWTFSS.
- Page 53 Using Internet functions Manually entering the address Press the button, the display shows ADDRESS. Type in the Web site address (e.g. www.bt.com) and press the confirm. Your fax automatically retrieves and prints out the relevant Web page. button to...
-
Page 54: Using Mailboxes
Using mailboxes This facility allows up to five people to have their own individual addresses at which they can receive fax or voice messages. To create a mailbox Press then then OK/Menu shows 71 CREATE. Press . Enter a mailbox number OK/Menu between 1 and 5. - Page 55 Using mailboxes , the display shows HANDSET Press OK/Menu NUMBER and 0. Enter the number of the handset (this is shown in the handset display) or leave it at 0 if you don’t want a dedicated handset. To delete a mailbox Press then OK/Menu...
- Page 56 To send protected messages to a remote fax mailbox You will only be able to send protected documents to a fax that has similar security functions, for example, another BT DECTfax. Press then then OK/Menu shows 73 TX MAILBOX.
-
Page 57: Using Additional Handsets
Using additional handsets Multiple registration You can use up to 4 handsets with your On-Air DECTf@x Plus base station. A handset can be registered with up to 4 DECT base stations. For each handset to interact with the base station, they must be registered with it. Your handset is pre-registered with the base station as handset number Once you have more than one handset... - Page 58 The customised method Use this method if you: Have set the base station handset security code to a number other than 0000. Want to register a handset to more than one base station. Want to allocate a handset with a handset number other than the next sequential one.
-
Page 59: Transferring Calls
Using additional handsets To prioritise a base station You can set a handset to give priority to a particular base station, so that it will always link up to that base station first if it is in range. Press then 7 on the handset, then use buttons to select the base station number you want to prioritise. -
Page 60: Paging A Handset
Press the button. green At the other handset - press the to connect the internal call. The two handsets can now talk to each other while the external caller is on hold. At the first handset - press the end the internal call. Your external caller is then transferred to the other handset. -
Page 61: Additional Features
OK/Menu Remote access of your fax machine You can retrieve faxes from your On-Air DECTf@x Plus from another fax machine. From another fax machine dial your phone number. Press the Enter your four-digit security code. Any voice messages you have will be played, followed by a series of beeps. - Page 62 Remote access of your answering machine You can access your voice messages stored in your On-Air DECTf@x Plus from another telephone. From another telephone dial your number. Press the button during the announcement. Enter your four-digit security code. Your voice messages are played back to you, followed by a series of beeps.
-
Page 63: Printing Out Settings
Additional features Printing the fax directory This allows you to print out the names and numbers stored in the fax directory. Press then OK/Menu shows 12 PRINT. Press . The fax directory will print OK/Menu out in alphabetical order. Printing out settings This shows you the configuration of the machine’s operating mode at any given point Press... -
Page 64: Caller Display
To cancel the alarm Press then then OK/Menu shows 81 ALARM. Press . Press the OK/Menu down to STOP. Press to deactivate the alarm. OK/Menu Ink gauge To see how much print ribbon there is left Press then then OK/Menu shows 59 RIBBON GAUGE. - Page 65 Additional features If a new call is from the same number as an earlier call only the later call details will be stored. Number Withheld, Number Unavailable, Operator and International calls will not be stored. The list of stored call details can be reviewed from the base station and from the handset.
- Page 66 Putting the privileged access function into service Press then then OK/Menu Choose WITH using the Press to confirm, OK/Menu • When the privileged access function is in service, the blinks. Privileged calls Only those privileged callers having your privileged access code will be able to call you. To do so, they should proceed as follows: Dial your number.
-
Page 67: Help
Help If you have any problems using your DECTfax, this section will give you the most common, easy-to-follow solutions. Replacing the print ribbon and smartcard The print ribbon and the smartcard work together, and the fax will not work without the smartcard. - Page 68 If the smartcard is not installed or not properly installed, the unit displays : The smartcard monitors how much print ribbon is being used, and is always supplied with new print ribbons. The fax machine will not work unless the smartcard is installed. Help MISSING GAUGE.
- Page 69 Help Fax Problem Blank unit display. The unit does not answer incoming calls after several rings. Blank photocopies. The telephone exchange does not recognise the number dialled. The terminal does not ring. The telephone does not work. One or more vertical black lines on documents copied locally or sent.
- Page 70 • Match the handset on a base station Chapter: ‘To register a handset’. Customer Helpline If you have any problems with your DECTfax, call the BT Helpline on 0845 603 1066. Print ribbons To obtain new print ribbons call 0800 590009. Help...
-
Page 71: Transmission Report Codes
Memory full: fax could not be received. Print out faxes stored in the memory BT sponsors two schemes which you can join if you are bothered by unwanted faxes and phone calls. Fax preference scheme BT is a sponsor of Fax Preference Service (FPS) - a scheme to enable customers to reduce unwanted faxes. -
Page 72: Technical Information
REN’s add up to no more than 4. On-Air DECTf@x Plus has a REN of 1. Any telephone provided by BT may be assumed to have a REN of 1 unless otherwise stated on the base. Even where the number of telephones has been limited, there is no guarantee that the different types of telephone on the same line will ring. -
Page 73: Technical Specification
Technical specification On-Air DECTf@x Plus Type/compatibility Applicable network Transmission Speed Communications Coding scheme Horizontal resolution Vertical resolution Halftone transmission Document size Document feeder capacity Recording paper Paper holder capacity Effective scan width Weight Display Dimensions Power Operating conditions Desktop ITU-T G3 transceiver PSTN and PBX 14400/12000/9600/7200/4800/2400 Automatic fall back Half duplex... -
Page 74: Index
Index Activity reports Additional handsets Alarm setting cancelling Answering machine answer mode answer delay from handset on/off remote access Answer only mode Base station priority Battery low Broadcasting Call back Call timer Call transfer Caller Display Charging the handset Copying documents Customising Date and time Delayed send... - Page 75 Index creating deleting faxing to messages in polling from remote access sending protected messages Mains power Memo messages Memory storing numbers dialling from edit delete Messages deleting playing protecting skip through Monitoring a call Name, entering Network settings Paging a handset Paper inserting thickness...
-
Page 76: Declaration Of Conformity
Declaration of Conformity BT On-Air DECTf@x Plus This equipment complies with the Requirements of the Radio Equipment and Telecommunications Terminal Equipment Directive, 1999/5/EC. In demonstration of conformance with the Essential Requirements for Safety and Electro-Magnetic Compatibility covered by the above directive, the product meets... - Page 77 Offices in Europe, North America, Japan and Asia Pacific. The telecommunications services described in this publication are subject to availability and may be modified from time to time. Services and equipment are provided subject to British Telecommunications plc’s respective standard conditions of contract. Nothing in this publication forms any part of any contract.
Need help?
Do you have a question about the On-Air DECTf@x Plus F@x machine and digital telephone system and is the answer not in the manual?
Questions and answers