Table of Contents
Advertisement
Quick Links
DO
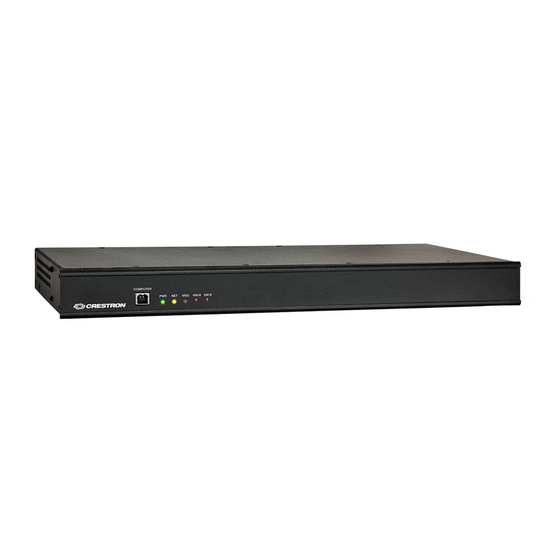
ZUM-FLOOR-HUB
Zūm™ Floor Hub
DO
Install the Device
The ZUM-FLOOR-HUB can be mounted into a rack or placed onto a flat surface.
Mounting into a Rack
The ZUM-FLOOR-HUB occupies 1U of rack space. Using a #1 or #2 Phillips screwdriver, attach
the two included rack ears to the device. Then, mount the device into the rack using four mounting
screws (not included).
Placing onto a Flat Surface
When placing the device onto a flat surface or stacking it with other equipment, attach the included
feet near the corners on the underside of the device.
DO
Connect the Device
Hardware Hookup
Make the necessary connections as called out in the diagram in the right column. Connect power
last.
When making connections to the ZUM-FLOOR-HUB, note the following:
• Use Crestron
power supplies for Crestron equipment.
®
• The included cable(s) cannot be extended.
NOTE:
Ensure the unit is properly grounded by connecting the chassis ground lug to an earth
ground (building steel).
NOTE:
The ZUM-FLOOR-HUB can be powered by the 4-position terminal block connector labeled
NET or with the (included) 24 Vdc power pack.
GUIDE
DO
Check the Box
QTY PRODUCT
2
Bracket, Rack Ear, 1U
1
Cable, USB 2.0, A - B, 6' (1.83 m)
1
Connector, 4-Pin
4
Foot, 0.5" x 0.5" x 0.23", Adhesive
1
Power Cord, 5' 10" (1.78 m)
1
Power Pack, 24 Vdc, 2.5 A, 100-240 Vac
Connect the Control Subnet
The ZUM-FLOOR-HUB has a dedicated Control Subnet that is used for communication between
the control system and Crestron Ethernet devices. This subnet allows for dedicated communication
between the control system and Crestron Ethernet devices without interferences from other network
traffic on the LAN.
NOTE:
Do not connect the CONTROL SUBNET port to the LAN. The CONTROL SUBNET port must
be connected only to Crestron Ethernet devices.
For details on using the Control Subnet, refer to Doc. 7150 at www.crestron.com/manuals.
To storage devices
SD compatible
DO
Configure the ZUM-FLOOR-HUB
The ZUM-FLOOR-HUB is configured using the web interface. Connect to the device using the device
hostname. The hostname is comprised of "ZUM-FL-" and the last 8 digits of the MAC address
(e.g., ZUM-FL-7F8764BF). The New User Registration screen is displayed during the first connection.
Enter the Username, Password, Firstname, Lastname, and Email Address, and then tap Submit.
COLOR
PART NUM.
2032122
2014966
2003576
Black
2002389
2042043
2045873
CONTROL SUBNET:
USB:
10/100/1000BASE-T
Ethernet to control subnet
To Cresnet
MEMORY
MAC ID LABEL
CONTROL
LAN
SUBNET
NET
USB
24 Y Z G
CONTACTS DOWN
24W MAX. CLASS 2
MEMORY:
LAN:
24V DC, 2.0 A:
10/100/1000BASE-T
From included
card slot
Ethernet to LAN
power pack
NET:
®
devices
SERIAL LABEL
G
— ---
24V
2.0A
Ground
Advertisement
Table of Contents

Related Manuals for Crestron ZUM-FLOOR-HUB


Summary of Contents for Crestron ZUM-FLOOR-HUB
- Page 1 Mounting into a Rack Connect the Control Subnet The ZUM-FLOOR-HUB occupies 1U of rack space. Using a #1 or #2 Phillips screwdriver, attach the two included rack ears to the device. Then, mount the device into the rack using four mounting The ZUM-FLOOR-HUB has a dedicated Control Subnet that is used for communication between screws (not included).
- Page 2 • Reorient or relocate the receiving antenna. may be used in this document to refer to either the entities claiming the marks and names or their products. Crestron disclaims any proprietary interest in the marks and names of others. Crestron is not responsible for errors in typography or photography.
Need help?
Do you have a question about the ZUM-FLOOR-HUB and is the answer not in the manual?
Questions and answers