Sign In
Upload
Download
Table of Contents
Contents
Add to my manuals
Delete from my manuals
Share
URL of this page:
HTML Link:
Bookmark this page
Add
Manual will be automatically added to "My Manuals"
Print this page
×
Bookmark added
×
Added to my manuals
Manuals
Brands
Crestron Manuals
Switch
DM NVX Director DM-NVX-DIR-80
Product manual
Crestron DM-NVX-DIR-80 Product Manual
Hide thumbs
Also See for DM-NVX-DIR-80
:
Product manual
(116 pages)
1
2
Table Of Contents
3
4
5
6
7
8
9
10
11
12
13
14
15
16
17
18
19
20
21
22
23
24
25
26
27
28
29
30
31
32
33
34
35
36
37
38
39
40
41
42
43
44
45
46
47
48
49
50
51
52
53
54
55
56
57
58
59
60
61
62
63
64
65
66
67
68
69
70
71
72
73
74
75
76
77
78
79
80
81
82
83
84
85
86
87
88
89
90
91
92
93
94
95
96
97
98
99
100
101
102
103
104
105
106
107
108
109
110
111
112
113
114
115
116
117
118
page
of
118
Go
/
118
Contents
Table of Contents
Troubleshooting
Bookmarks
Table of Contents
Table of Contents
Overview
Features
Simple and Flexible Configuration
Web-Based Setup and Control
Interdomain Routing (DM-NVX-DIR-160 and DM-NVX-DIR-ENT Only)
Multicast Address Control
Credential Management of DM NVX Endpoints
Multiple Control System Support (DM-NVX-DIR-160 and DM-NVX-DIR-ENT Only)
Copper or Fiber Ethernet Connectivity (DM-NVX-DIR-ENT Only)
Redundant Power Supplies (DM-NVX-DIR-ENT Only)
Physical Description
DM-NVX-DIR-80 and DM-NVX-DIR-160
DM-Nvx-Dir-Ent
Specifications
Installation
Configuration
Accessing the Web Interface
Navigating the Web Interface
Saving Configuration Changes
Viewing Status Information
Configuring Network Settings
Configuring Device Settings
Firmware
Auto-Discovery
Display
Control System
Application Management
Using the Dashboard
Adding a Domain
Entering Domain Identification and Multicast Information
Assigning Endpoints to a Domain
Saving a New Domain
Global Domain Routing
Modifying a Domain
Domain Routing
Domain Endpoint Map
Domain Control System
Management
Updating Firmware
Updating Firmware from Release 2.0 to Release 4.0
Updating Firmware from Release 4.0 to a Later Maintenance Release
Restoring Factory Default Settings
Rebooting the Device
Restarting Applications
Uploading a Configuration File
Downloading a Configuration File
Downloading Message Logs
Troubleshooting
Resources
Related Documentation
Crestron Support and Training
Programmer and Developer Resources
Product Certificates
Advertisement
Quick Links
Download this manual
DM NVX Director® Network AV
Switching Appliances
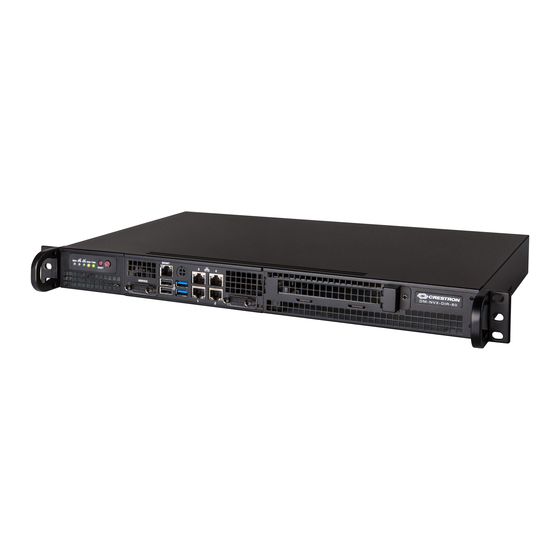
DM-NVX-DIR-80
DM-NVX-DIR-160
DM-NVX-DIR-ENT
Product Manual
Crestron Electronics, Inc.
Table of
Contents
Previous
Page
Next
Page
1
2
3
4
5
Advertisement
Table of Contents
Need help?
Do you have a question about the DM-NVX-DIR-80 and is the answer not in the manual?
Ask a question
Questions and answers
Subscribe to Our Youtube Channel
Related Manuals for Crestron DM-NVX-DIR-80
Switch Crestron DM NVX Director DM-NVX-DIR Series Product Manual
Virtual switching appliances (116 pages)
Switch Crestron DM NVX Series Design Manual
(42 pages)
Switch Crestron DM NVX Series Product Manual
Network av encoders/decoders (90 pages)
Switch Crestron DM-NVX-DIR-ENT Product Manual
(118 pages)
Switch Crestron DM-MD8X8 Operation Manual
Digitalmedia (196 pages)
Switch Crestron 8x8 DigitalMedia DM-MD8X8 Operation Manual
8x8 digitalmedia switcher (112 pages)
Switch Crestron DigitalMedia DM-MD64X64 Operations & Installation Manual
Digitalmedia switchers (84 pages)
Switch Crestron DigitalMedia DM-MD64X64 Supplemental Manual
(44 pages)
Switch Crestron DigitalMedia DM-MD64X64 Operations & Installation Manual
(60 pages)
Switch Crestron DigitalMedia DM-MD6X1 Operation Manual
6x1 digitalmedia switcher (44 pages)
Switch Crestron DM-MD8X1-4K-C Supplemental Manual
4k scaling auto-switcher (20 pages)
Switch Crestron DigitalMedia DM-MD32X32 Operation Manual
Digitalmedia (196 pages)
Switch Crestron DigitalMedia DM-MD8X8-CPU3 Product Manual
(80 pages)
Switch Crestron DigitalMedia DM-MD8X8-CPU3 Quick Start Manual
(9 pages)
Switch Crestron DM Lite HD(I)-MD Series Supplemental Manual
Auto-switchers and extenders (40 pages)
Switch Crestron DM-XIO-DIR-ENT Product Manual
Virtual switching appliances (116 pages)
This manual is also suitable for:
Dm-nvx-dir-160
Dm-nvx-dir-ent
Table of Contents
Print
Rename the bookmark
Delete bookmark?
Delete from my manuals?
Login
Sign In
OR
Sign in with Facebook
Sign in with Google
Upload manual
Upload from disk
Upload from URL


Need help?
Do you have a question about the DM-NVX-DIR-80 and is the answer not in the manual?
Questions and answers