Advertisement
Quick Links
C R A F T S M E N ,
I N C .
Assembly Instructions
Model 1536
Cuisine Island
GENERAL:
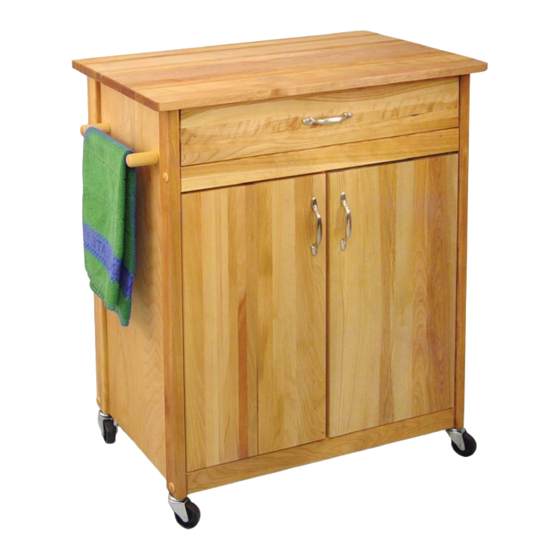
1. You have purchased model 1536. Overall dimensions of an assembled unit is
31 1/2" x 17 1/2" x 34 1/2" height. This cart is made of the finest Northeastern Hardwood and
matching veneer.
2. Should you need assistance or need to replace a damaged or missing part, DO NOT
RETURN THE UNIT TO THE STORE where you purchased it, simply give us a call and we'll
send you the prepaid part via UPS usually that same day!
3. Read the assembly instructions and the enclosed brochure before beginning assembly.
Assembly is very easy if you read and follow the instructions step by step.
4. The only tools needed are a hammer, a small and a medium Phillips head screwdriver and
medium flat blade screwdriver. A pencil is also needed. A power screwdriver will speed
assembly, but is not required. Place a few drops of vegetable oil on the threads of wood screws
before screwing into hardwood parts.
Advertisement

Subscribe to Our Youtube Channel
Summary of Contents for CATSKILL Cuisine Island 1536
- Page 1 C R A F T S M E N , I N C . Assembly Instructions Model 1536 Cuisine Island GENERAL: 1. You have purchased model 1536. Overall dimensions of an assembled unit is 31 1/2” x 17 1/2” x 34 1/2” height. This cart is made of the finest Northeastern Hardwood and matching veneer.
- Page 2 CABINET PARTS Drawer Bottom (1) Handle Side Panel (1) Plain Side Panel (1) Back Panel (1) Left Door (1) Right Door (1) Table Top (1) Drawer Front (1) EDGE BANDING GOES OUT Drawer Dowel (1) Door Spacer (1) 13 3/8” 13 13/16”...
- Page 3 HARDWARE 1 3/4” Phillips Flat Head Bolt (8) Cam Posts (2) Nickel Handle (3) 1 1/4” Phillips Flat Head #8 Screw (14) 1” Truss Head Machine Screw (6) Cam (2) 5/8 Wooden Disk (2) Caster Socket (4) 5/8” Pan Head Screw (2) 5/8”...
- Page 4 STEP 1 4 Used in this step Attach a table top stick to the 1 1/4” Phillips Flat Head #8 Screw (12) top of each side panel using 1 1/4” #8screws. The countersunk holes (reamed out) in the stick are positioned as in illustration 1.
- Page 5 STEP 3 Invert table top on a smooth flat surface and make a large (X) mark over each of the pilot holes in the bottom. Make marks about 1 1/2” long. These marks will help you align the cabinet with the pilot holes in step 4. NOTE: Use holes circled on illustration.
- Page 6 STEP 5 A. Attach the drawer back to the drawer sides with four 1 1/4” #8 screws. Make sure parts are aligned as in illustration 5A. B. Insert drawer bottom into the slots in the drawer sides, best side to inside of drawer. Slide down until seated in the slot in the drawer back.
- Page 7 STEP 6 Take drawer, insert the drawer dowel thru the hole in the drawer back, invert drawer and place in cabinet cavity. Insert/turn drawer dowel into the 1/2” dia. hole in the back panel. ILLUSTRATION 6 STEP 7 Take the 2 front braces and tap/insert one 3/4” steel pin into each end of both braces until seated.
- Page 8 STEP 8 A. Take the top front brace ( with magnet block ), insert the pins in the brace ends into the slots on the inside of the front legs and slide down until the brace rests on the bottom of the drawer front. The pin holes for the door pins will be up.
- Page 9 STEP 9 Attach handle/towel bar to side panel with 1 1/4” #8 screws from inside side panel. 2 Used in this step 1 1/4” Phillips Flat Head #8 Screw (12) ILLUSTRATION 9 STEP 10 A. Tap/insert ONE 1 1/2” pin into each end of both doors.
- Page 10 STEP 11 A. Install doors by inserting pins in the door tops into the holes in the long edge top front brace. B. Place one washer on each of the door pins in the door bottoms. C. Take the bottom front brace, align pins in door bottoms with holes along top long edge of brace...
- Page 11 STEP 13 A. Insert and tap caster sockets with hammer until the teeth grab the wood. DON’T POUND SOCKET FLAT OR CASTER SHFT WILL NOT ENTER. B. Insert casters and seat by pushing straight downward with heel or your hand, or tap into place with a hammer.
- Page 12 CITY ______________________________________ STATE _________________________ ZIP _______ Catskill Craftsmen, Inc. Please make checks payable to: Catskill Craftsmen Inc. 15 West End Ave. 15 West End Ave. Stamford, NY 12167-1296 Stamford, NY 12167-1296 C R A F T S M E N ,...


Need help?
Do you have a question about the Cuisine Island 1536 and is the answer not in the manual?
Questions and answers