Table of Contents
Advertisement
Quick Links
C R A F T S M E N ,
I N C .
Assembly Instructions
Model 1526
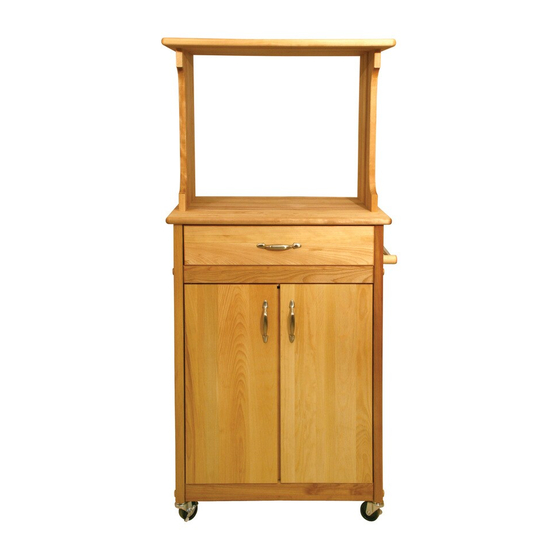
Microwave Space Saver Cart With Drawer
GENERAL:
1. You have purchased model 1526. Overall dimensions of an assembled unit is 24" x 17" x 53"
2. Should you need assistance or need to replace a damaged or missing part, DO NOT
RETURN THE UNIT TO THE STORE where you purchased it, simply give us a call and we'll
send you the prepaid part via UPS usually that same day!
3. Read the assembly instructions and the enclosed brochure before beginning assembly.
Assembly is very easy if you read and follow the instructions step by step.
4. Tools required: Phillips screwdrivers, medium and small; medium flat blade screwdriver and
Advertisement
Chapters
Table of Contents

Subscribe to Our Youtube Channel
Summary of Contents for CATSKILL 1526
- Page 1 Microwave Space Saver Cart With Drawer GENERAL: 1. You have purchased model 1526. Overall dimensions of an assembled unit is 24” x 17” x 53” 2. Should you need assistance or need to replace a damaged or missing part, DO NOT RETURN THE UNIT TO THE STORE where you purchased it, simply give us a call and we’ll...
- Page 2 CABINET PARTS Drawer Side Left (1) Drawer Side Right (1) Table Top Stick (2) Drawer Bottom (1) Not Used Handle Side Panel (1) Plain Side Panel (1) Back Panel (1) 13 3/8” 13 13/16” Left Door (1) Right Door (1) Door Spacer (1) Cabinet Top(1) Middle Shelf (1)
- Page 3 CABINET HARDWARE 1 3/4” Phillips Flat Head Machine Screw (8) Towel Bar Post (2) Cam Posts (2) 3/16” Flat Washer (2) 1 1/4” Phillips Flat Head #8 Screw (14) 10-24 Hex Nut (8) 1” Truss Head Machine Screw (6) 5/8 Wooden Disk (10) 5/8”...
-
Page 4: Bottom
STEP A 1. Attach the Rack Top to the top ends of the Side Panels using 1 1/4” #8 wood screws. MAKE SURE YOU HAVE THE RACK TOP! The only difference between the Rack Top and the Cabinet Top is that the Cabinet Top has 4 small pilot holes on the bottom side plus the 4 throughholes; whereas, the Rack Top only has the 4 through holes. -
Page 5: Left
STEP 1 4 Used in this step Attach a table top stick to the 1 1/4” Phillips Flat Head #8 Screw (12) top of each side panel using 1 1/4” #8screws. The countersunk holes (reamed out) in the stick are positioned as in illustration 1. -
Page 6: Long 3/16" Dia. Steel
STEP 4 A. Turn the side/back assembly ( from step 2 ) upside down ( invert ) on top of the inverted table top. B. Drop two 1 1/4” # 8 screws into the holes in each of the table top sticks. C. -
Page 7: Drawer
STEP 5 A. Attach the drawer back to the drawer sides with four 1 1/4” #8 screws. Make sure parts are aligned as in illustration 5A. B. Insert drawer bottom into the slots in the drawer sides, best side to inside of drawer. Slide down until seated in the slot in the drawer back. - Page 8 STEP 6 Take drawer, insert the drawer dowel thru the hole in the drawer back, invert drawer and place in cabinet cavity. Insert/turn drawer dowel into the 1/2” dia. hole in the back panel. ILLUSTRATION 6 STEP 7 Take the 2 front braces and tap/insert one 3/4” steel pin into each end of both braces until seated.
-
Page 9: Magnet
STEP 8 A. Take the top front brace ( with magnet block ), insert the pins in the brace ends into the slots on the inside of the front legs and slide down until the brace rests on the bottom of the drawer front. The pin holes for the door pins will be up. - Page 10 STEP 9 Attach handle/towel bar to side panel with 1 1/4” #8 screws from inside side 2 Used in this step 1 1/4” Phillips Flat Head #8 Screw (12) ILLUSTRATION 9 STEP 10 A. Tap/insert ONE 1 1/2” pin into each end of both doors. DON’T OVERDRIVE PINS! Pins should stick up about 1/2”...
-
Page 11: Wooden
STEP 11 A. Install doors by inserting pins in the door tops into the holes in the long edge top front brace. B. Place one washer on each of the door pins in the door bottoms. C. Take the bottom front brace, align pins in door bottoms with holes along top long edge of brace... -
Page 12: Middle
STEP 13 A. Insert and tap caster sockets with hammer until the teeth grab the wood. DON’T POUND SOCKET FLAT OR CASTER SHAFT WILL NOT ENTER. B. Insert casters and seat by pushing straight downward with heel or your hand, or tap into place with a hammer. - Page 13 CITY ______________________________________ STATE _________________________ ZIP _______ Catskill Craftsmen, Inc. Please make checks payable to: Catskill Craftsmen Inc. 15 West End Ave. 15 West End Ave. Stamford, NY 12167-1296 Stamford, NY 12167-1296 C R A F T S M E N ,...


Need help?
Do you have a question about the 1526 and is the answer not in the manual?
Questions and answers