Advertisement
Quick Links
Assembly Instructions
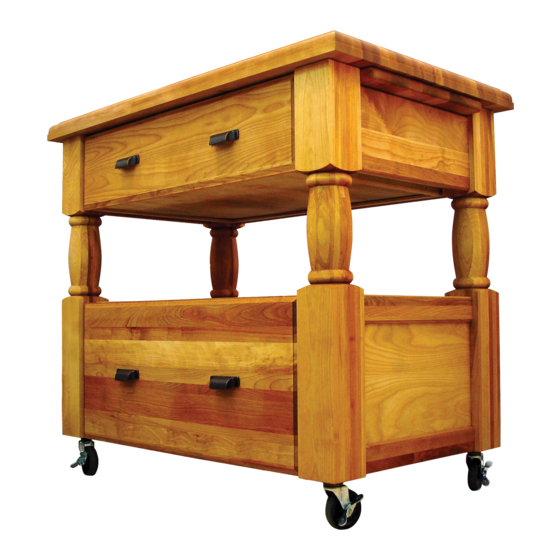
Model 1429
The Europa WorkCenter
GENERAL:
1. You have purchased model 1429.
2. Should you need assistance or need to replace a damaged or missing part simply give us a call M-F at
607-652-7321 from 7:30 am - 4:30 pm EST and we'll send you the prepaid part via UPS usually that same day!
You may also email us info@catskillcraftsmen.com.
3. Read the assembly instructions and the enclosed brochure before beginning assembly. Assembly is easy if
you read and follow the instructions step by step. See our website for assembly tips and videos: www.catskill-
craftsmen.com
4. The only tools needed are a hammer and a screwdriver. A power screwdriver is recommended. Where pos-
sible we have packaged some of the screws in seperate labeled packages. A friend is recommended to assist
with the assembly. Some parts are large and awkward to hold in place.
5. Glides are sometimes pre-packed with screws. There are not used.
6. Instructions (left/right, top/bottom) are given as you face an assembled unit.
Advertisement

Subscribe to Our Youtube Channel
Related Manuals for CATSKILL 1429


Summary of Contents for CATSKILL 1429
- Page 1 You may also email us info@catskillcraftsmen.com. 3. Read the assembly instructions and the enclosed brochure before beginning assembly. Assembly is easy if you read and follow the instructions step by step. See our website for assembly tips and videos: www.catskill- craftsmen.com 4.
-
Page 2: Cabinet Parts
CABINET PARTS (2) Cutting Board 18” x 14-3/4” x 7/8” (1) Table Top - 40” x 24” x 2” PN: CB1429 PN: TT1429 (1) Back Panel Insert - 30” x 9-13/16” x 1/4” PN: BPInsert1429 (2) Drawer Bottom - 28-1/8” x 18-1/2” x 5.2mm PN: DrBot1429 (2) Side Panel Insert 15”... - Page 3 (2) Front Left/Back Right 30” x 3-1/2” x 3-1/2” PN: FLBRleg1429 (1) Lower Drawer Front 29-13/16” x 13-3/8” x 3/4” PN: LDF1429 (2) Front Right/Back Left 30” x 3-1/2” x 3-1/2” PN: FRBLleg1429 (1) Lower Drawer Back 29” x 8” x 3/4” (1) Top Back Brace - 30”...
- Page 4 Wooden Cutting Board Stoppers (2) PN: WCBS1429 1 3/4” Phillips Flat Head #8 Screw (8) PN: 1-3/4PFHS#8-1429 3/4” Machine Screw (8) Wheel Insert-1429 (4) PN: 3/4MS-1429 Glide Screws 5/8” Phillips Pan Head #5 Screw (16) PN: 5/8PPHS#5-1429 “L” Bracket Screws 5/8”...
- Page 5 TIPS ON HOW THE BASTION FASTENING SYSTEM WORKS 1. The Bastion fastening system consists of a steel post (threaded on one end with a hole through the shaft on the other end); a Barrel Nut (cylindrical barrel-shaped with threaded Illustration Bas. 1 open end &...
- Page 6 STEP 1 Back Assembly 1 Front Right/Back left Leg, 1 Front Left/Back Right Leg, 1 Top Back Brace, 2 Middle/Bottom Back Brace,1 Back Panel Insert. 1. Tap 3/4” pins into the ends of all the braces. The pin goes into the smaller of the two holes. 2.
- Page 7 STEP 2 Front Assembly 1 Front Right/Back left Leg, 1 Front Left/Back Right Leg, 2 Mid/Top Front Brace 1. Tap 3/4” pins into the ends of all the braces. The pin goes into the smaller of the two holes. 2. Lay the legs on a flat smooth surface so that the holes are oriented as shown in Illustration 2. Put bastion posts in the first and fifth holes fromt he top of the legs.
- Page 8 STEP 3 Main Assembly 1 Assembled Back, 1 Assembled Front, 2 Top Side Braces, 4 Mid/Bot Side Braces, 4 Drawer Glide Supports, 2 Side Panel Inserts 1. Lay assembled back unit on its back and put bastion posts in the centered holes first, fourth, and fifth fromt he top of the legs as shown in Illustration 3.
- Page 9 STEP 4 Main Assembly Part 2 1 Assembled Back, 1 Assembled Front 1. With the back assembly from step 3 in the same position, fit the Assembled Front onto the braces, lining up all the pins and bastion posts with holes. 2.
-
Page 10: Upper Drawer
STEP 5 Drawer Assembly 1 Lower Drawer Front, 1 Upper Drawer Front, 1 Upper Left Drawer Side, 1 Upper Right Drawer Side,1 Lower Left Drawer Side, 1 Lower Right Drawer Side, 1 Lower Drawer Back, 1 Upper Drawer Back,2 Drawer Bottoms, 4 Handles, 8 Machine Screws 1. - Page 11 STEP 6 Top Assembly 1 Table Top, 4 Cutting Board Slats, 4 Cutting Board Rails 1. Lay the Table Top upside-down on a smooth flat surface and attach the Cutting Board Rails & Slats as shown in illustration 8 using 1 3/4” #8 screws. 2.
- Page 12 STEP 7 Finishing Touches 1 Main Assembly, 1 Assembled Upper Drawer, 1 Assembled Lower Drawer, 1 Assembled Top, 1 Middle Shelf 1. Now tap in 1” pins into the middle braces with a hammer and fit the middle shelf on the top of the pins.
- Page 13 STEP 8 Finishing Touches Part 2 1 Main Assembly, 2 Cutting Boards 1. Side the 2 Cutting Boards into the sides to complete the assembly process ILLUSTRATION 8...
- Page 14 Visa and Address _____________________________ Mastercard are accepted online. City ________________________________ State ________________ Zip ___________ Catskill Craftsmen, Inc. Please make checks payable to Catskill Craftsmen Inc. 15 West End Ave. 15 West End Ave., Stamford, NY 12167-1296 Stamford, NY 12167-1296...
Need help?
Do you have a question about the 1429 and is the answer not in the manual?
Questions and answers