Table of Contents
Advertisement
Quick Links
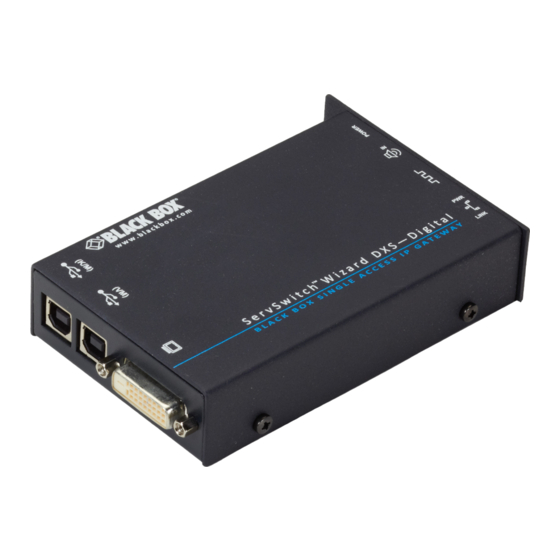
ServSwitch Wizard
A powerful digital KVM-over-IP product
that allows full secure control of a PC from
remote locations.
Order toll-free in the U.S. or for FREE technical support 24/7: Call 877-877-BBOX
Customer
(outside U.S. call 877-877-2269)
Support
www.blackbox.com • info@ blackbox.com
Information
DXS - Digital
™
ACR101A-DVI
Advertisement
Table of Contents

Subscribe to Our Youtube Channel
Related Manuals for Black Box ServSwitch Wizard DXS


Summary of Contents for Black Box ServSwitch Wizard DXS
- Page 1 ACR101A-DVI ServSwitch Wizard DXS - Digital ™ A powerful digital KVM-over-IP product that allows full secure control of a PC from remote locations. Order toll-free in the U.S. or for FREE technical support 24/7: Call 877-877-BBOX Customer (outside U.S. call 877-877-2269) Support www.blackbox.com •...
- Page 2 ™ Trademarks Used in this Manual Black Box and the Double Diamond logo are registered trademarks of BB Technologies, Inc. Any other trademarks mentioned in this manual are acknowledged to be the property of the trademark owners. We‘re here to help! If you have any questions about your application or our products, contact Black Box Tech Support at 877-877-2269 or go to blackbox.com and click on “Talk to Black Box.”...
- Page 3 FCC and IC RFI Statements Radio Frequency Energy A Category 5 (or better) twisted pair cable must be used to connect the Wizard DXS - Digital unit in order to maintain compliance with radio frequency energy emission regulations and ensure a suitably high level of immunity to electromagnetic disturbances. All other interface cables used with this equipment must be shielded in order to maintain compliance with radio frequency energy emission regulations and ensure a suitably high level of immunity to electromagnetic disturbances.
- Page 4 ServSwitch Wizard DXS - Digital ™ Instrucciones de Seguridad (Normas Oficiales Mexicanas Electrical Safety Statement) 1. Todas las instrucciones de seguridad y operación deberán ser leídas antes de que el aparato eléctrico sea operado. 2. Las instrucciones de seguridad y operación deberán ser guardadas para referencia futura. 3.
-
Page 5: Table Of Contents
Table of Contents Contents 1. Specifications ....................................6 2. Introduction ....................................7 3. Installation ....................................10 3.1 Mounting the modules – desk or rack..........................10 3.2 Connections ..................................12 3.2.1 Host computer connections ..........................12 3.2.2 IP network port ..............................14 3.2.3 Power supply connection ............................15 4. -
Page 6: Specifications
ServSwitch Wizard DXS - Digital ™ 1. Specifications Approvals: CE, FCC Hardware Compatibility: All computers with DVI digital video, audio and USB interfaces Software Compatibility: Operates with all known software and operating systems including Windows®, Linux®, Unix®, BSD, all Sun® OS, all Mac® OS, NetWare®, etc. Connectors: Video: DVI-D single link... -
Page 7: Introduction
Drawing upon our long and successful history within the field of remote system control, we have taken our best KVM via IP technology and miniaturized it. The result is the ServSwitch Wizard DXS - Digital, a highly responsive, cost efficient way to control a single system from any remote position - worldwide. - Page 8 DXS - Digital ™ 2.2 ServSwitch Wizard DXS - Digital features The ServSwitch Wizard DXS - Digital unit uses the following connections to provide secure remote access to a host computer. USB link for keyboard and mouse Use this port to link the Wizard DXS - Digital to a USB port on the host computer.
- Page 9 Chapter 2: Overview IP network port This Ethernet port provides the connection to the network. The port is intelligent and can automatically sense whether it is attached to a 10Mb or 100Mb network and whether a cross-over or straight cable is in use.
-
Page 10: Installation
ServSwitch Wizard DXS - Digital ™ 3. Installation 3.1 Mounting the module – desk or rack The module can be situated on a desk or alternatively, for larger installations, mounted within an optional rack mount chassis. 3.1.1 Desk mount Apply the supplied self-adhesive rubber feet to the underside of the module as shown in Figure 3-1: Figure 3-1. - Page 11 Chapter 3: Installation 3.1.2 Rack mount Note: The module switches are not accessible once it is inserted into the rack, therefore, check all settings before insertion. 1 Place the rack securing plate (available as a separate kit) onto the front of the module and secure it with the two countersunk screws.
-
Page 12: Connections
ServSwitch Wizard DXS - Digital ™ 3.2 Connections Installation of the Wizard DXS - Digital involves a number of basic connections to some or all of the following items: • Host computer (below) • IP network port • Power supply 3.2.1 Host computer connections The Wizard DXS - Digital is connected to the host computer using the supplied DVI-D video, USB, audio and power control cables (the latter two connections are optional). - Page 13 Chapter 3: Installation 3.2.1.2 To attach the audio and power control cables 1 [Optional step] Where audio from the host computer is required, connect the supplied 3.5mm jack stereo audio cable between the audio port of the Wizard DXS - Digital and the line output of the host computer. 2 [Optional step] Where a remote power switch is to be used with the host computer, connect the supplied power control cable to the socket labeled on the Wizard DXS - Digital.
-
Page 14: Ip Network Port
ServSwitch Wizard DXS - Digital ™ 3.2.2 IP network port The Wizard DXS - Digital provides an autosensing Ethernet IP port that can operate at 10 or 100Mbps, according to the network speed. The Wizard DXS - Digital is designed to reside easily at any part of your network: •... -
Page 15: Power Supply Connection
Chapter 3: Installation 3.2.3 Power supply connection The Wizard DXS - Digital provides flexibility in the way that it is powered in order to suit your installation requirements. Each Wizard DXS - Digital can be powered: • Via both USB connections from the host computer, or •... -
Page 16: Configuration
ServSwitch Wizard DXS - Digital ™ 4. Configuration 4.1 Connecting to Wizard DXS - Digital Connection to (and configuration of) Wizard DXS - Digital is carried out over a network, using a VNC Viewer program running on a computer or mobile device. VNC Viewers are available for most computers, tablets and smartphones. •... - Page 17 Chapter 4: Configuration 4.1.2 To download a VNC Viewer To download a (free) VNC Viewer for a desktop or notebook computer, visit the download page of the RealVNC website: http://www.realvnc.com/download/viewer To download a VNC Viewer app for a tablet or smartphone, visit the Apple or Android app store, or look at the RealVNC website (www.realvnc.com) for further information.
-
Page 18: Initial Configuration
ServSwitch Wizard DXS - Digital ™ 4.2 Initial configuration To perform the initial configuration, you need to connect the Wizard DXS - Digital to an IP network and use a computer located on the same network to connect to it. 4.2.1 To perform the initial configuration 1 Connect the Wizard DXS - Digital to an IP network where a suitable computer is available on the same subnet (please see the Installation chapter for connection details). - Page 19 Chapter 4: Configuration admin 5 Enter as the Username, leave the password entry blank and click the OK button. You will be prompted to enter a new password before the Viewer window opens: Click the Configure button 6 Click the Configure button to display the Configuration menu: Use the various options (particularly the ‘Unit Configuration’...
-
Page 20: Performing A Flash Upgrade
4.3.1.1 To perform a flash upgrade 1 Download the latest firmware revision for the Wizard DXS - Digital from Black Box and decompress the download file. View the decompressed files and make a note of the name and location of the .bin file that was part of the download file collection. - Page 21 Chapter 4: Configuration 8 The unit is now ready to accept the upgrade files. Open your browser and log into the Wizard DXS - Digital using the IP address that was confirmed in the dialog. Once connected, the unit will offer the following screen: 9 Click the ‘Browse’...
-
Page 22: Operation
ServSwitch Wizard DXS - Digital ™ 5. Operation 5.1 Using the viewer window Connecting to Wizard DXS - Digital Once connected to the Wizard DXS - Digital via the VNC Viewer (please see for details), the viewer window gives you the ability to view and control the Wizard DXS - Digital and its host computer(s). Its operation is almost identical regardless of whether you used the VNC viewer or your Java viewer to display it. -
Page 23: Host Selection
Chapter 5: Operation 5.1.2 When using the viewer window What is the best screen resolution to use? The best resolution for your computer is one that is larger than the screen of the host computer that you are viewing. This will allow you to see everything without scrolling around. -
Page 24: Auto Calibrate
ServSwitch Wizard DXS - Digital ™ 5.4 Auto calibrate Auto calibrate will calibrate the mouse only if relative mouse mode is selected. This detects the mouse motion and will report back that the mouse has been calibrated correctly depending upon the operating system. -
Page 25: Editing The Viewer Window Menu Bar
Chapter 5: Operation 5.7 Editing the viewer window menu bar If required, you can customise the menu bar of the viewer window to ensure that it contains only the necessary options. The menu bar can be edited locally by each user or edited singly by the admin or alternatively, the admin can globally alter the menu bar for all users. -
Page 26: Controls
ServSwitch Wizard DXS - Digital ™ 5.8 Controls When clicked, this button reveals a menu of options concerned with keyboard, video and mouse operation. 5.8.1 Single Mouse Mode This mode is for fast network connections where the cursor response is sufficient to provide instant visual feedback on the remote screen. - Page 27 Chapter 5: Operation 5.8.5 Advanced mouse configuration This dialog allows the mouse acceleration to be configured according to the operating system in use and also permits manual fine tuning for situations where problems are encountered with the Calibrate function. For best results, choose the appropriate Change motion: entry to match the host in use. The available Change Motion schemes are: Constant, XFree86, Windows Pre-XP, Windows XP, Windows XP SP2, OS/2, Solaris, Solaris 9 and Mac OSX.
- Page 28 ServSwitch Wizard DXS - Digital ™ 5.8.7 Keyboard Control This option displays a keyboard control dialog and is useful for sending keyboard combinations (to the host) that are needed regularly or that are trapped by the Wizard DXS - Digital. Click to send Click to send the code...
- Page 29 Chapter 5: Operation 5.8.8 Video settings This option provides a range of options related to the video configuration. Dithering is a technique used by some graphics cards to improve perceived image quality by continuously slightly varying the color of each pixel. This gives the illusion of more shades of color than the display can really reproduce, and smooths the appearance of gradually shaded areas in images.
- Page 30 ServSwitch Wizard DXS - Digital ™ 5.8.9 Sound control This option provides a range of options related to the audio capabilities of the Wizard DXS - Digital. Sample rate Format The number of uLaw - Use when audio samples per transmitted data needs second (in Hz).
- Page 31 Chapter 5: Operation 877-877-2269 | blackbox.com Page 31...
-
Page 32: Virtual Media
ServSwitch Wizard DXS - Digital ™ 5.9 Virtual Media The Virtual Media feature allows you to remotely make files available to a host computer that is linked to the Wizard DXS - Digital. Disk drives, single files or collections of files and folders up to 2GB in size can be mounted via the VNC link, and appear as a read- only disk on the host. - Page 33 Chapter 5: Operation 5.9.1.1 To remotely transfer files from the clipboard 1 On the remote system, log into the Wizard DXS - Digital using the VNC viewer. 2 If not already done, use Windows Explorer to locate and copy the required file(s), or folder(s) to the clipboard. 3 Within the VNC viewer window, click the Controls button and then select the Virtual Media option.
- Page 34 ServSwitch Wizard DXS - Digital ™ 5.9.2 Remotely exporting a disk drive to the host 1 On the remote system, log into the Wizard DXS - Digital using the VNC viewer. 2 Press F8 and then V to display a Virtual Media dialog box: Remote Drive(s) This section lists any located storage devices...
-
Page 35: Resetting The Wizard Dxs - Digital To Factory Default
Chapter 5: Operation 5.10 Resetting the Wizard DXS - Digital to factory default For situations where the IP address or the password has been forgotten, or the Wizard DXS - Digital is being reinstalled, it is possible to reset the unit to its original factory settings. This erases all configuration such as hosts, users and passwords, and restores the default network address. -
Page 36: Appendix A. Vnc Viewer Connection Options
ServSwitch Wizard DXS - Digital ™ Appendix A. VNC viewer connection options Note: If you are using a later version of VNC viewer than that provided with the product originally, some menus may differ slightly from those shown here. When you are connecting to the Wizard DXS - Digital using the VNC viewer, a number of options are available. - Page 37 Appendices A.1 Display Scaling No Scaling No attempt is made to make the screen image fit the viewer window. You may need to scroll horizontally and/or vertically to view all parts of the screen image. Scale to Window Size Adjusts the server screen image to suit the size of the viewer window. Custom Size Adjusts the server screen image according to the Width and Height settings in the adjacent fields.
- Page 38 ServSwitch Wizard DXS - Digital ™ A.2 Inputs Inputs: When set to ‘Enabled’, all primary options below are ticked. The ‘Disabled’ setting unticks all of the primary options (causing ‘view-only mode’ where no control data may be sent to the Wizard DXS - Digital. The ‘Custom’ setting is shown if you choose your own combination of options.
- Page 39 Appendices A.3 Connection The options on this page are not relevant to Wizard DXS - Digital connections and should be left in their default states. A.4 Expert The options within this section work correctly with Wizard DXS - Digital in their default states and should not require alteration except in special circumstances.
-
Page 40: Appendix B. Vnc Viewer Window Options
ServSwitch Wizard DXS - Digital ™ Appendix B. VNC viewer window options Click the VNC icon in the top left corner of the viewer window (or press F8) to display the window options: Standard window control items Full screen Expands the VNC viewer window to fill the whole screen with no visible window edges or toolbar. -
Page 41: Appendix C. Java Viewer Options
Appendices Appendix C. Java viewer options When you are connecting to the Wizard DXS - Digital using the Java viewer, a number of options are available. Click here to access the options There are four options pages: C.1 Encoding and color level Auto select When ticked, this option will examine the speed of your connection to the Wizard DXS - Digital and apply the most suitable encoding method. - Page 42 ServSwitch Wizard DXS - Digital ™ C.3 Security 512 bits (low security) Selects the lowest level of encoding for communications between the browser and the Wizard DXS - Digital. 1024 bits (medium security) Selects the middle level of encoding for communications between the browser and the Wizard DXS - Digital.
-
Page 43: Appendix D. Configuration Menus
Appendices Appendix D. Configuration menus The unit has a main configuration menu through which you can access various sub menus to configure particular items. D.1 To view the main configuration menu 1 Using VNC viewer or a browser, log on as the ‘admin’ user. 2 Click the ‘Configure’... - Page 44 ServSwitch Wizard DXS - Digital ™ D.2 User accounts Up to 16 users can be created by the admin user, each with their password. The admin user can also determine whether the users are allowed access to the power control menu in order to turn servers on and off. To get here 1 Using VNC viewer or a browser, log on as the ‘admin’...
- Page 45 Appendices D.3 Gui edit configuration If required, you can customise the menu bar of the viewer window to ensure that it contains only the necessary options. The menu bar can be edited locally by each user or edited singly by the admin or alternatively, the admin can globally alter the menu bar for all users.
- Page 46 ServSwitch Wizard DXS - Digital ™ D.4 Unit configuration This page provides access to a selection of both basic and advanced settings for the Wizard DXS - Digital. Many of the settings displayed here are also accessible through the on-screen menu. To get here 1 Using VNC viewer or a browser, log on as the ‘admin’...
- Page 47 Appendices Menu Bar Toggle Hot Key Determines the function key that can be used to display/hide the menu bar within the VNC screen. Encryption Three options are available: Always on, prefer off, prefer on. The one to choose depends on the specific details of your installation.
- Page 48 ServSwitch Wizard DXS - Digital ™ D.5 EDID configuration Click this button to display advanced EDID options that do not normally require alteration. This page allows you to edit the contents of the EDID records that are used to inform the computer of the supported video modes.
- Page 49 Appendices 877-877-2269 | blackbox.com Page 49...
- Page 50 ServSwitch Wizard DXS - Digital ™ D.6 Advanced unit configuration Click this button to display advanced options that do not normally require alteration. Force VNC Protocol 3.3 IMPORTANT: The use of this option is not recommended. Protocol 3.3 is a legacy version that does not offer any encryption. Idle Timeout Determines the period of inactivity on a global connection before the user is logged out.
- Page 51 Appendices Mouse Latency Allowance This option is used during calibration to account for latency delays that may be caused as signals pass through a device. During calibration, the Wizard DXS - Digital waits for 40ms after each mouse movement before sampling the next. If a device adds a significant delay to the flow of data, the calibration process can be lengthened or may fail entirely.
- Page 52 ServSwitch Wizard DXS - Digital ™ D.7 Time & date configuration This page allows you to configure all aspects relating to time and date within the unit. Note: The unit has a real-time clock which will maintain the date and time for a few hours without power. To get here 1 Using VNC viewer or a browser, log on as the ‘admin’...
- Page 53 Appendices Timezone specifier Optionally enter a recognised timezone specifier related to the current position of the Wizard DXS - Digital unit. When an NTP server is used, the specifier will be used to provide the correct real time. The timezone specifier takes the following form: std offset dst [offset],start[/time],end[/time] offset specify the standard time zone, such as GMT and 0, or CET and -1, or EST and 5, respectively.
- Page 54 ServSwitch Wizard DXS - Digital ™ D.8 Network configuration (IPV4) IPV6 This page allows you to configure the various aspects of the IP port when it is used in IPV4 mode. For mode, please see the next page. To get here 1 Using VNC viewer or a browser, log on as the ‘admin’...
- Page 55 Appendices IP Network Mask Also often called the subnet-mask, this value is used alongside the IP address to help define a smaller collection (or subnet) of devices on a network. In this way a distinction is made between locally connected devices and ones that are reachable elsewhere, such as on the wider Internet.
- Page 56 ServSwitch Wizard DXS - Digital ™ D.9 Network configuration (IPV6) IPV6 This page allows you to configure the various aspects of the IP port when it is used in mode. For IPV4 mode, please see the previous page. To get here 1 Using VNC viewer or a browser, log on as the ‘admin’...
- Page 57 Appendices Use DHCPv6 When this option is set to Yes, the Wizard DXS - Digital will attempt to locate a DHCPv6 server on the network to derive a unique IPv6 address for itself as well as an address for the IPv6 Gateway. These are not usually granted permanently, but on a ‘lease’ basis for a fixed amount of time or for as long as the Wizard DXS - Digital remains connected and switched on.
- Page 58 ServSwitch Wizard DXS - Digital ™ D.10 Setting IP access control The golden rule with this feature is ‘Include before you exclude’ or to put it another way ‘Arrange allowed addresses in the list before the denied addresses’. This is because the positions of entries in the list are vitally important. Once a range of addresses is denied access, it is not possible to make exceptions for particular addresses within that range.
- Page 59 Appendices D.11 Serial port configuration This page allows you to configure the baud rate of the Wizard DXS - Digital serial port that is used to control power switch devices. A full range of standard baud rates are available. To get here 1 Using VNC viewer or a browser, log on as the ‘admin’...
- Page 60 ServSwitch Wizard DXS - Digital ™ D.12 Host configuration This page provides the opportunity to configure various details for each of the host systems that may be connected to the Wizard DXS - Digital. Each entry can be configured with a name, the permitted users, the hot key combinations required to switch to it and, if required, appropriate power control commands.
- Page 61 Appendices To create a new host entry 1 Click one of the host entries to reveal a Host configuration dialog. Name Enter the name that will be displayed in the viewer window when you click the Host button. Users Select the users that will be permitted to connect to this host. Either enter * to allow all users or a list of users separated by commas.
- Page 62 ServSwitch Wizard DXS - Digital ™ D.13 Power switching configuration Power switch configuration comprises two main steps: • Configure the serial port to the same speed as used by the power switch box(es), using the Serial port OPTIONS configuration menu. •...
- Page 63 Appendices Power control sequences Notes: The settings given below are for a particular type of power switch - other power switches may require different settings. Please refer to your power switch documentation for details about codes required by other power switches. The structure of each power sequence (OFF, ON or Reboot) is as follows: /Pxy=z\0D Where:...
- Page 64 ServSwitch Wizard DXS - Digital ™ D.14 Logging and status This screen provides various details about the user activity on the Wizard DXS - Digital unit. Date and Type of event, user name and access time the method or remote IP address event occurred To get here...
- Page 65 Appendices To copy and paste the log You can copy the information listed within the log and paste it into another application. 1 While viewing the log screen, press Ctrl and C, to copy the data into the clipboard. 2 In a text application (i.e. Word, WordPad, Notepad) press Ctrl and V, or right mouse click and ‘Paste’. Syslog Server IP Address Logging information can optionally be sent, as it occurs, to a separate system using the standard Syslog protocol.
- Page 66 ServSwitch Wizard DXS - Digital ™ D.15 LDAP configuration The Wizard DXS - Digital can optionally use the industry standard LDAP (Lightweight Directory Access Protocol) to allow user authentication to occur in conjunction with an externally held database. This screen allows you to configure details related to the creation of an LDAP link to an external directory service, such as an Active Directory server.
- Page 67 Appendices Admin Password and LDAP Support Even if LDAP authentication is enabled, the ‘admin’ user is still authenticated locally, using the traditional authentication technique of matching to a locally sorted password. Active Directory authentication process Typically, Active Directory deployments are not configured for anonymous binding. Hence, in our implementation of LDAP and Active Directory support for the Wizard DXS - Digital we have opted have a single username and password to bind to the directory and authenticate.
-
Page 68: Appendix E. Networking Issues
ServSwitch Wizard DXS - Digital ™ Appendix E. Networking issues Thanks to its robust security the Wizard DXS - Digital offers you great flexibility in how it integrates into an existing network structure. The Wizard DXS - Digital is designed to reside either on an internal network, behind a firewall/router or alternatively with its own direct Internet connection. -
Page 69: Placing Wizard Dxs - Digital Behind A Router Or Firewall
IMPORTANT: The correct configuration of routers and firewalls requires advanced networking skills and intimate knowledge of the particular network. Black Box cannot provide specific advice on how to configure your network devices and strongly recommend that such tasks are carried out by a qualified professional. - Page 70 ServSwitch Wizard DXS - Digital ™ Addressing When the Wizard DXS - Digital is situated within the local network, you will need to give it an appropriate local IP address and IP network mask. This is achieved most easily using the DHCP server option which will apply these details automatically. If a DHCP server is not available on the network, then these details need to be applied manually in accordance with the network administrator.
- Page 71 Appendices To discover a DHCP-allocated IP address Once a DHCP server has allocated an IP address, you will need to know it in order to access the Wizard DXS - Digital via a network connection. To discover the allocated IP address: 1 Within Network configuration, set the ‘Use DHCP’...
-
Page 72: Placing Wizard Dxs - Digital Alongside The Firewall
ServSwitch Wizard DXS - Digital ™ E.3 Placing Wizard DXS - Digital alongside the firewall Wizard DXS - Digital is built from the ground-up to be secure. It employs a sophisticated 128bit public/private key system that has been rigorously analysed and found to be highly secure. Therefore, you can position the Wizard DXS - Digital alongside the firewall and control a computer that is also IP connected within the local network. - Page 73 Appendices Security can be further improved by using the following suggestions: • Place the Wizard DXS - Digital behind a firewall and use port the numbers to route the VNC network traffic to an internal IP address. • Review the activity log from time to time to check for unauthorized use. •...
-
Page 74: Appendix F. An Introduction To Ipv6
ServSwitch Wizard DXS - Digital ™ Appendix F. An introduction to IPv6 During the initial design of the Internet, 4.3 billion seemed like an impossibly large number of device addresses, possibly more than would ever be needed. It took nearly forty years, but finally the last remaining vacant address blocks within the current Internet Protocol scheme (called IPv4) were assigned in February 2011. - Page 75 Appendices Address allocation Every device attached to an IPv6 network usually has more than one address type. The two most common types are called a link- local address and a global address and these can be assigned in a number of ways. In IPv4, device addresses are most commonly assigned either manually or by using a Dynamic Host Configuration Protocol server (DHCP).
-
Page 76: Appendix G. The Kvmadmin Utility
ServSwitch Wizard DXS - Digital ™ Appendix G. The KVMADMIN utility Particularly useful for complex Wizard DXS - Digital configurations and the control of remote installations, KVMADMIN is a powerful administration tool. KVMADMIN is based upon the established VNC viewer and uses the same security system. Rather than a graphical interface such as the standard viewer, KVMADMIN uses command line control to provide the following administration facilities: •... -
Page 77: Appendix H. Known Working Video Modes
Appendices Appendix H. Known working video modes 640 x 480p at 60Hz 640 x 480p at 67Hz 640 x 480p at 72Hz 640 x 480p at 75Hz 640 x 480p at 85Hz 720 x 400p at 70Hz 800 x 600p at 56Hz 800 x 600p at 60Hz 800 x 600p at 72Hz 800 x 600p at 75Hz... -
Page 78: Appendix I. Hotkey Sequences And Port Direct
ServSwitch Wizard DXS - Digital ™ Appendix I. Hotkey sequences and Port Direct Wizard DXS - Digital allows you to enter commands suitable for any KVM switch in order to choose from up to 128 host systems. These switching commands can take the form of hotkey sequences that emulate standard keypress combinations or, for KVM switches that support the Port Direct format, merely basic port numbers. - Page 79 Appendices Function keys F1 | F2 | F3 | F4 | F5 | F6 | F7 | F8 | F9 | F10 | F11 | F12 Creating macro sequences Hot key macro sequences can be up to 256 characters long. All keys are assumed to be released at the end of a line, however, you can also determine that a key is pressed and released within a sequence.
-
Page 80: Appendix J. End User Licence Agreement
ServSwitch Wizard DXS - Digital ™ Appendix J. End user licence agreement PLEASE READ THIS AGREEMENT CAREFULLY. THIS AGREEMENT CONCERNS ENHANCED VNC VIEWER SOFTWARE (“the SOFTWARE”) FOR USE WITH THE Wizard DXS - Digital PRODUCT (“the PRODUCT”). THE SOFTWARE IS PROVIDED TO ENABLE YOU TO OPERATE THE PRODUCT. - Page 81 Appendices 5. Export Control The United States and other countries control the export of Software and information. You are responsible for compliance with the laws of your local jurisdiction regarding the import, export or re-export of the Software, and agree to comply with such restrictions and not to export or re-export the Software where this is prohibited.
-
Page 82: Appendix K. Safety Information
ServSwitch Wizard DXS - Digital ™ Appendix K. Safety information • For use in dry, oil free indoor environments only. • Warning - live parts contained within power adaptor. • No user serviceable parts within power adaptor - do not dismantle. •... - Page 83 Appendices 877-877-2269 | blackbox.com Page 83...
- Page 84 About Black Box Black Box provides an extensive range of networking and infrastructure products. You’ll find everything from cabinets and racks and power and surge protection products to media converters and Ethernet switches all supported by free, live 24/7 Tech support available in 60 seconds or less.
Need help?
Do you have a question about the ServSwitch Wizard DXS and is the answer not in the manual?
Questions and answers