Advertisement
Quick Links
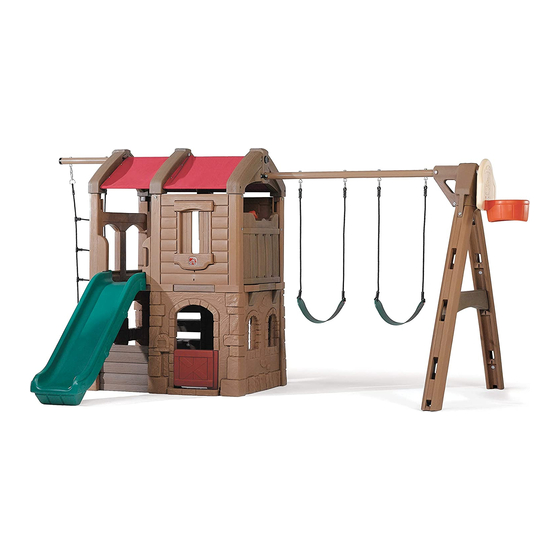
Adventure Lodge
Pavillon «Aventure»
Casita de Campo
The Step2 Company, LLC.
10010 Aurora-Hudson Rd.
Streetsboro, OH 44241 USA
1-800-347-8372
Valid only in U.S.A. and Canada
Numéro disponible uniquement aux États-Unis et au Canada
Número válido solo en EUA y Canadá
(330)656-0440
This product is intended for family domestic outdoor use only by children 3 to 8 years old .
Tools Required: Phillips Screwdriver, Flathead Screwdriver, Hammer, Ratchet, 1/2: Socket, Adjustable Wrench.
We recommend an Electronic Screwdriver.
• Thank you for purchasing a Step2 Product. If you have any questions about this product, please call The Step2
Company toll free at 1-800-347-8372 or contact us via the internet at www.step2.com.
• If you decide to dispose of a Step2 product, disassemble and dispose of it in such a way that no unreasonable
hazards exist. Any disposal practice must be in compliance with all Federal, State/ Provincial, and Local laws and regulations.
Step2's products are recyclable plastic. Refer to the recycling symbol
for appropriate sorting; please recycle.
OBSERVE THE FOLLOWING STATEMENTS AND WARNINGS TO REDUCE THE LIKELIHOOD OF SERIOUS OR
FATAL INJURY.
WARNING:
• Falls onto hard surfaces could result in head or other serious injuries. Never put on concrete, asphalt, wood,
or other hard surfaces. Carpet over hard floors will not prevent injury.
• Instruct children not to use equipment other than intended.
• Instruct children not to attach items to the playground equipment that are not specifically designed for use with
the equipment, such as but not limited to, jump ropes, clothes lines, pet leashes, cables and chains as they may
cause a strangulation hazard.
• Keep canopy away from fire.
WARNING:
CHOKING HAZARD - Small parts. Adult assembly required.
Some of the components of this product are small and may contain sharp points; care should be taken when
unpacking and assembling this product. Adult assembly required.
PLEASE SAVE THIS SHEET FOR FUTURE REFERENCE
Ce produit est destiné uniquement à un usage familial et domestique à l'extérieur par des enfants de 3 ans à 8 ans.
Outils requis: Tournevis Phillips, tournevis à lame plate, marteau, cliquet, clé à douilles et douille de 1,27 cm.
Nous recommandons l'utilisation d'un tournevis électrique.
• Nous vous remercions de l'achat d'un produit Step2. Si vous avez des questions au sujet de ce produit, veuillez
contacter The Step2 Company, sans frais, au 1-800-347-8372 ou sur l'Internet en visitant le site www.step2.com.
• Si vous décidez de mettre un produit Step2 au rebut, démontez-le en prenant les précautions nécessaires pour prévenir
tout danger. Toute mise au rebut doit être effectuée conformément aux réglementations fédérales, nationales/provinciales
et locales. Les produits de Step2 sont en plastique recyclable. Reportez-vous au symbole
chaque pièce pour le numéro de niveau afin d'effectuer le tri approprié; veuillez recycler.
VEUILLEZ APPLIQUER LES MESURES DE SÉCURITÉ ET RESPECTER LES AVERTISSEMENTS SUIVANTS
AFIN DE RÉDUIRE LES RISQUES DE BLESSURES GRAVES VOIRE MORTELLES.
MISE EN GARDE :
• Les chutes sur des surfaces dures peuvent causer des traumatismes crâniens ou d'autres types de blessures
graves. N'installez jamais le produit sur du béton, de l'asphalte, du bois ou sur toute autre surface dure. Une
moquette sur un sol dur peut s'avérer insuffisante pour prévenir les blessures.
• Apprenez aux enfants à servir de l'équipement uniquement aux fins prévues.
• Expliquez aux enfants de ne jamais attacher sur l'équipement de terrain de jeux des objet qui ne sont pas conçus
spécifiquement pour une utilisation avec celui-ci, notamment mais sans s'y limiter, des cordes à sauter, des cordes à linge,
des laisses, des câbles ou des chaînes. De tels objets présentent un risque d'étranglement.
• Gardez à partir du feu.
MISE EN GARDE :
DANGER DE SUFFOCATION - Petites pièces. Assemblage par un adulte requis.
Certaines composantes de ce produit sont petites voire pointues. Veuillez déballer ce produit et l'assembler en prenant
toutes les précautions nécessaires. L'assemblage par un adulte est requis.
PRIÈRE DE GARDER CETTE FEUILLE POUR FUTURE RÉFÉRENCE
Este producto está diseñado para uso familiar en exteriores solamente y para que lo usen niños de 3 a 8 años.
Herramientas requeridas: Destornillador Phillips, destornillador de cabeza plana, martillo, trinquete, casquillo y llave
de cubo de 1,27 cm. Recomendamos un desarmador eléctrico.
™
Adult assembly required
Assemblagée adulte requise
Necesita ser ensamblado por un adulto
STEP2 UK LTD.
Oaks Business Park
Tustin Way, Longridge Road
Preston, PR2-5LX
TEL# 0844 8800 740
Step2 UK website: www.step2uk.com
for the level number located on each part
de recyclage situé sur
• Gracias por adquirir un producto de Step2. Si tuviera alguna pregunta acerca del montaje o del uso de este producto,
por favor llame al teléfono gratuito de la Compañía Step2, 1-800-347-8372 o visite nuestro sitio web www.step2.com.
801300
• Si usted decide desechar un producto de Step2, desármelo y deséchelo de forma que no ocasione riesgos
innecesarios. Cualquier forma de desecho debe cumplir con las leyes y normas federales, estatales/provinciales y locales.
Los productos de Step2 son de plástico reciclable. Consulte el símbolo con el número de nivel de reciclado
de las partes para así clasificarlas y reciclarlas apropiadamente. Por favor recicle el producto.
TENGA EN CUENTA LOS SIGUIENTES ENUNCIADOS Y ADVERTENCIAS PARA REDUCIR LA
PROBABILIDAD DE LESIONES SERIAS O MORTALES.
ADVERTENCIA:
• Las caídas en superficies duras pueden ocasionar lesiones en la cabeza u otras lesiones serias. Nunca lo
coloque sobre concreto, asfalto, madera ni ninguna otra superficie dura. El uso de alfombras sobre superficies duras
no evitará las lesiones.
• Indíqueles a los niños que usen el equipo con el propósito para el que fue diseñado.
• Enséñeles que no coloquen en el equipo de juego artículos que no estén específicamente diseñados para que
se usen con el mismo, tales como cuerdas de saltar, tendederos, correas de animales, cables y cadenas, entre
otros, ya que puede existir el riesgo de estrangulamiento.
• Guarde lejos del fuego.
ADVERTENCIA:
Tenga cuidado cuando desempaque y arme este producto porque algunas piezas son pequeñas y pueden tener
extremos puntiagudos. Requiere ensamblaje adulto.
RETENGA ESTA INFORMACIÓN PARA REFERENCIA FUTURA
INSTALLATION and OPERATION INSTRUCTIONS
This product is designed to create an exciting, fun-filled environment for your children. So that all children
who use this product can play securely, we ask adults who supervise play follow these important guidelines
for the unit's use and care:
INSTALLATION:
1. Create a site free of obstacles that could cause injury. Maintain a minimum distance of 6.5 feet
(2 m) from any structure or obstruction such as a fence, buildings, low hanging branches, tree stumps/roots,
large rocks, bricks, concrete, laundry lines, or overhead wires.
2. Choose a level location for the equipment. This can reduce the likelihood of the play set tipping over and
loose fill surfacing materials washing away during heavy rains.
3. Playground equipment designed for home use SHOULD NOT BE USED indoors where appropriate fall
protection is not available. A fall onto a hard surface can result in serious injury. Use Playground Surfacing Materials
which comply to ASTM 1292 Standards Specification for Impact Attenuation of Surfacing Materials within the Use
Zone of Playground Equipment. Reference table X3.1. To maintain the appropriate level of loose fill material, use
containment, such as digging out around the perimeter and/or lining the perimeter with landscaping edging.
4. Do not install product or surfacing material over concrete, asphalt, packed earth, grass or any other hard surface.
Do not install on carpeted surfaces.
5. Installations of rubber tiles or poured-in-place surfaces (other than loose-fill materials) generally require
a professional and are not "do-it-yourself" projects.
6. Fall Height: 70 inches. See Consumer Information Sheet for Playground Surfacing Materials included in
this Instruction Sheet.
7. Locate bare metal platforms and slides (metal, plastic or otherwise) out of direct sunlight to reduce the
likelihood of serious burns. A slide that faces north will receive the least direct sunlight.
8. Provide enough room so that children can use equipment safely. For example, for structures with multiple
activities, a slide should not exit in front of a swing.
9. Separate active and quiet activities from each other. For example, locate sandboxes away from swings or
use a guardrail barrier to separate the sandbox from the movement of the swings.
10. Check to be sure all connections are tight. DO NOT allow children to play on the product until it is fully assembled.
11. This device must be used only with its anchor stakes in place. Install the stake anchors at a 45º angle to
the ground (as illustrated in step 124, pg. 26) to help prevent the unit from lifting from a wind gust. Drive the
stakes level with the ground or below ground level so that they will not present a hazard for children who run
or play around the unit. For sandy soil or loose soil conditions, all anchoring devices must be placed below
the level of the playing surface to prevent tripping or injury resulting from a fall.
OPERATION INSTRUCTIONS:
1. As with all play equipment, an adult should supervise children's play on this product, instructing children
not to use the equipment in a manner not intended.
2. Adult supervision required. Adults supervising play should make sure children are dressed properly in well-fitting
clothes and shoes. Children should not wear potentially hazardous items such as ponchos, scarves, capes, or
bicycle and sport helmets while playing on equipment.
3. This product was designed to accommodate 4 children or a total weight of 300 lbs at a time. Maximum
weight for Ladder: 75 lbs. Maximum weight per swing: 75 lbs.
4. When temperatures fall below 32F (0C), outdoor use of this product is not recommended. In extreme cold plastic
materials lose their resilience and may become brittle and crack upon impact. Store product in a warmer, protected place.
5. Instruct your child not to walk close to, in front of, behind, or between moving swings.
6. Instruct your child not to twist the swing rope or loop it over the top support bar since this may reduce the
strength of the rope.
7. Children must be instructed to avoid swinging an empty swing seat.
8. Instruct child to sit in the center of the swing seat and remain in the seated position while in use.
9. Never allow children to use the equipment in a manner other than intended.
10. Instruct children not to get off equipment while it is in motion.
C-192077
PELIGRO DE SOFOCACIÓN - Partes pequeñas. Necesita ser ensamblado por un adulto.
en cada una
3/29/10
1
Advertisement

Related Manuals for Step2 Adventure Lodge 801300


Summary of Contents for Step2 Adventure Lodge 801300
- Page 1 Company toll free at 1-800-347-8372 or contact us via the internet at www.step2.com. • If you decide to dispose of a Step2 product, disassemble and dispose of it in such a way that no unreasonable RETENGA ESTA INFORMACIÓN PARA REFERENCIA FUTURA hazards exist.
-
Page 2: Installation
10. Recommandez aux enfants de ne pas descendre de l’équipement lorsque celui-ci est en mouvement. 11. Do not allow children to climb on equipment when it is snow-covered or wet. 11. Ne laissez jamais les enfants grimper sur l’équipement lorsqu’il est couvert de neige ou s’il est mouillé. 12. -
Page 3: Instrucciones De Mantenimiento
7. Los niños deben evitar columpiar un asiento vacío. 8. Enséñeles a los niños que se sienten en el centro del columpio y que permanezcan sentados mientras lo estén usando. 9. Nunca permita que los niños usen el equipo de una manera para la que no fue diseñada. 10. - Page 4 Q. Right Gusset/ Gousset droit / Escuadra derecha A. Roof End Cap (2)/ Embouts du toit (2)/ Cumbrera final (2) R. “A” Frame Brace/ Support d’armature «A»/ Refuerzo del armazón “A” B. Middle End Cap/ Embout central/ Cumbrera central S. Canopy Side Pole (2)/ Mâts latéraux d’auvent (2)/ C.
- Page 5 Tower Assembly (steps 1 - 25)/ Montage de la tour (étapes 1 - 25)/ Ensamblaje de la torre (pasos 1 -25) 3 x 3/4” (1,91 cm) Place the Steering Wheel (Z8) onto the locking tab of the Steering Place the Horn Cap (HH) over the center of the Steering Wheel (Z8) Place the Lower Steering Wheel Wall (E) over the locking tabs Wheel Wall (G) as shown.
- Page 6 Slide the Platform Brace (Z1) into place underneath the Platform Place a screwdriver down through all parts to help align holes Hand thread a 5” bolt, 5/16” Lock Washer and 5/16” Medium as shown. for bolt attachment. Place a Barrel Nut into the designated hole Washer through the Platform Brace (Z1) and Platform (D).
- Page 7 INSIDE OF CLIMBER OUTSIDE OF CLIMBER L’INTÉRIUER DE DU MUR EN DEHORS DE DU MUR DENTRO DE LA PARED FUERA DE LA PARED Place a Barrel Nut into recess. Hand thread a 3-1/2” Bolt, 5/16” Lock Washer and 5/16” Medium Secure with your Allen Wrench and Socket Wrench.
- Page 8 Place a Barrel Nut into the designated hole on Place a screwdriver down through all parts to help align holes for bolt attachment. Slide the Climbing Wall (X) onto the open end of the platform the platform as shown. Hand thread a 3-1/2” bolt, 5/16” Lock Washer and 5/16” Medium Washer into ensuring the 2 locking pegs insert into the Climbing Wall the Barrel Nut then secure with your Allen Wrench and Socket Wrench.
- Page 9 Swing Hook Assembly (steps 26 - 31)/ Montage des crochets de balançoire (étapes 26- 31)/ Ensamblaje del gancho del columpio (pasos 26 -31) DIAGRAM-A/ DIAGRAMME - A/ DIAGRAMA-A Locate the Ladder Pole (M), Swing pole (N), Swing Hooks (FF) Repérez le mât d’échelle (M), le mât de balançoire (N), les crochets de balançoire (FF).
- Page 10 Canopy Assembly (steps 32 - 48)/ Montage de l'auvent (32 - 48)/ Ensamblaje del techo (pasos 32 - 48) Ladder Side Canopy Side 2 x 1 7/8” (4,76 cm) Côté d'échelle Côté auvent Lado de la escalera Lado del techo Remove While holding the Swing Hook (FF) in place, secure and tighten.
- Page 11 Align the Middle End Cap (B) in between the two holes located in Hand thread a 2-1/2” Slotted Truss Head bolt, and 5/16” Lock Washer From the canopy side of the Roof End Cap, first hand thread 4 x the middle of the Rope Ladder Pole and place a Middle Roof Cap through the Canopy Pole (S) and Middle Roof Cap Brace (GG).
- Page 12 Slim Canopy/ Wide Canopy/ Auvent étroit/ Auvent large/ Techo angosto Techo ancho 6 x 3/4” (1,9 cm) Secure the Canopy Side Pole in place. Repeat steps 42 & 43 to the Secure the Slim Canopy to the Roof End Cap with 4 x 3/4” screws. Slide the Wide Canopy (U) onto both Canopy Side Poles.
- Page 13 Canopy & Tower Assembly (steps 49 - 58)/ Montage de l’auvent et de l’ensemble tour (étapes 49 - 58)/ Ensamblaje del techo y la torre (pasos 49 - 58) 51-53 57-58 54-56 INSIDE OF CLIMBER L’INTÉRIUER DE DU MUR DENTRO DE LA PARED Ensure all 3 locking pegs are settled into their designated recess on each side.
- Page 14 Place a Barrel Nut into place. Hand thread a 2” Bolt, 5/16” Lock Washer and Secure with your Allen Wrench and Socket Wrench. Repeat Below the Middle End Cap ends, hand thread together a Barrel 5/16” Medium Washer into the Barrel Nut. steps 54 - 56 to the other side.
- Page 15 2 x 1-7/8” (4,76 cm) Slide an “A” Frame Leg (K) into the right gusset (Q) as shown. Secure the “U” brace with 2 x 1-7/8” screws. Insérez un pied (K) d’armature «A» dans le gousset droit (Q) tel qu’illustré. Fixez le support en «U»...
- Page 16 Slide an “A” Frame Brace (R) into the second hole of the assembly Slide on an “A” Frame Leg (K) onto the other end of the “A” Frame Ensure the “A” Frame Legs align at the gusset. and rotate toward the Right Gusset as shown. Brace and rotate down toward the Right gusset.
- Page 17 5/16” Lock Washer Rondelle de blocage (7,9 cm) Arandela de traba(7,9 cm) Medium Washer Rondelle moyenne (7,9 mm) Arandela mediana (7,9 mm) Start by sliding a barrel nut through the gusset on the inside of the pole. From the other side slide a 5” bolt, 5/16” Lock Washer and 5/16” Tighten with the Allen Wrench (C) provided and a Socket Wrench.
- Page 18 Place 2 Barrel Nuts into the top two holes as shown. Installez 2 écrous à portée cylindrique dans les deux trous du haut tel qu’illustré. Slide the Roof End Cap Bolt Cover (T) into the recess on the Coloque 2 tuercas de cubo en los dos orificios superiores tal y como se Roof End Cap as shown.
- Page 19 Through the open holes on the Canopy/Swing Pole Brace (EE), hand Secure all bolts with your Allen Wrench and Socket Wrench in 5 Bolt location. thread together a Barrel Nut, 2-1/2” bolt, 5/16” Medium Washer and 5/16” loctions. Emplacement des boulons. Lock Washer.
- Page 20 Swing Assembly and Ball Toss assembly (steps 89 - 101)/ Montage de la balançoire et du lance balle (étapes 89-101)/ Ensamblaje de columpios y del conjunto para lanzamiento de pelota (pasos 89 - 101) 3 locations. Place one of the Swing rope ends on the Ensure the Swing Hook is in the closed position.
- Page 21 Hand thread a Barrel Nut and Large Spacer to the bolt. NOTE: Ensure Rotate the Ball Toss Hoop (Z) into the recesses on the Ball Toss the Large Spacer is in between the Gusset and Right Ball Toss Bracket. Backboard (Y) as shown. Vissez à...
- Page 22 Align the holes on the Ball Toss Bracket with the holes on the Gusset From the other side, hand thread a 5” Bolt, 5/16” Medium Secure the Ball Toss assembly with your Allen Wrench and Socket and insert a Barrel Nut on the right side. Washer, 5/16”...
- Page 23 Hand thread a Large Washer and Nylon Lock Nut onto the Rope Slide the Allen Wrench through the eye hook bolt to stabilize and Ladder eye hook bolts. fully tighten with your Socket Wrench. Vissez à la main une petite rondelle et un contre-écrou en nylon dans les Insérez la clé...
- Page 24 Ladder/ Handle/ Anchor Assembly (steps 109- 122)/ Montage de l'échelle de corde (étapes 109 - 122)/ Ensamblaje de l pasos 109 - 122) a escalera/mango/anclajes ( Push the Ladder Brace (Z2) through the opening then insert the Ensure the Locking Pegs are placed into the recess then push down Rotate the Ladder (H) onto the Ladder Brace as shown.
- Page 25 2 x 1 7/8” (4,765 cm) 2 x 3” (7,62 cm) 1 x 1 7/8” (4,76 cm) Locate the recess screw points on each side of the steps. Secure Secure the Lower Steering Wheel Wall with 2 x 1-7/8” screws. Push down on the first ladder step while securing to the Ladder the Ladder to the tower assembly with 2 x 3”...
- Page 26 Adventure Lodge™. We’d appreciate a few minutes of your time to complete a brief survey so we can continue providing you with great products. In appreciation for your feedback, a promotional coupon for your next purchase from www.Step2.com will be provided upon completion.
-
Page 27: Consumer Information Sheet For Playground Surfacing Materials
être une surface acceptable, elle peut rapidement se tasser sous les passages fréquents. The Step2 Company, LLC. Les copeaux de bois ou d’écorce, le sable fin et le gravier rond sont des exemples de surfaces qui amortissent les chocs lorsquíelles Valid only in U.S.A.
Need help?
Do you have a question about the Adventure Lodge 801300 and is the answer not in the manual?
Questions and answers