Table of Contents
Advertisement
For assistance or replacement
parts please contact :
The Step2 Company, LLC.
10010 Aurora-Hudson Rd.
Streetsboro, OH 44241 USA
1-800-347-8372 USA & Canada
Only (330)656-0440
www.step2.com
MANUFACTURING /
C.O.C. DATE CODE FROM CARTON: ______________________________________
SAVE THIS SHEET FOR FUTURE REFERENCE.
MODEL #: ______________________________________________
DATE OF PURCHASE: ______________________________________________
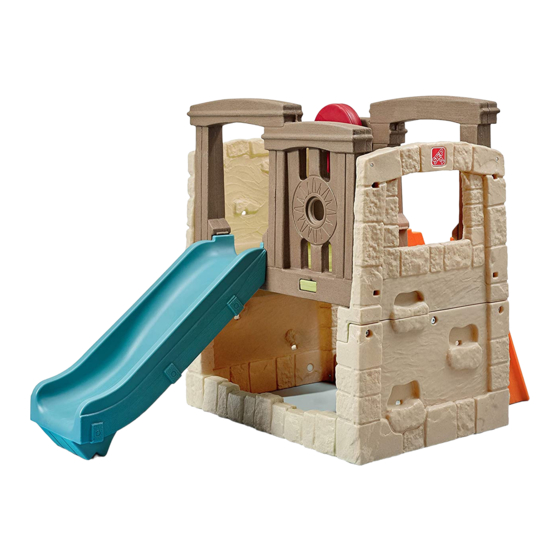
Woodland Climber
8158
™
1
Advertisement
Table of Contents

Related Manuals for Step2 Woodland Climber 8158


Summary of Contents for Step2 Woodland Climber 8158
- Page 1 Woodland Climber ™ 8158 For assistance or replacement parts please contact : The Step2 Company, LLC. 10010 Aurora-Hudson Rd. Streetsboro, OH 44241 USA 1-800-347-8372 USA & Canada Only (330)656-0440 www.step2.com SAVE THIS SHEET FOR FUTURE REFERENCE. MODEL #: ______________________________________________ MANUFACTURING / C.O.C.
-
Page 2: Installation
Use caution not to over-tighten screws or they will not parts please contact : Great Bank Road hold parts together appropriately. Wingates Industrial Estate The Step2 Company, LLC. BOLTON 10010 Aurora-Hudson Rd. BL5 3XU OPERATION INSTRUCTIONS: Streetsboro, OH 44241 USA 1-800-347-8372 USA &... -
Page 3: Instructions D'utilisation
La pose de tuiles en caoutchouc ou de surfaces Thank you for purchasing the Step2® Woodland Climber™. We’d appreciate a few min- coulées sur place (autres que les matériaux meubles) nécessite généralement un utes of your time to complete a brief survey so we can continue providing you professionnel et ne sont pas des projets de bricolage. -
Page 4: Instructions De Mise Au Rebut
5. Proporcione suficiente espacio para que los niños utilicen el equipo de manera INSTRUCTIONS DE MISE AU REBUT: segura. (Por ejemplo: en estructuras con múltiples actividades un tobogán no ha de 1. Démontez afin d’éliminer tout danger déraisonnable. Veuillez recycler dans la mesure du tener salida delante de un columpio). - Page 5 piccoli recinti di sabbia lontano dalle altalene o utilizzare una barriera di protezione INTRUCCIONES PARA LA ELIMINACIÓN: per separare il piccolo recinto di sabbia dai movimenti delle altalene). 1. Desármelo para evitar riesgos innecesarios. Recicle los componentes si tiene la posi 7.
- Page 6 DUTCH BEDIENINGSINSTRUCTIES: NEEM DE VOLGENDE VERKLARINGEN EN WAARSCHUWINGEN IN ACHT OM WAARSCHIJNLIJK ERNSTIG OF FATAAL LETSEL TE VERMINDEREN. 1. Ee n volwassene dient toezicht te houden op spelen op dit product voor kinderen BEWAAR DIT BLAD VOOR TOEKOMSTIGE REFERENTIE. van alle leeftijden. 2.
-
Page 7: Instruções De Funcionamento
PORTUGUESE 8. Para minimizar os riscos de rebarbas, os parafusos foram concebidos para perfurar o plástico e formar as suas próprias roscas. Exerça todo o cuidado para não apertar RESPEITE AS SEGUINTES ADVERTÊNCIAS E AVISOS PARA REDUZIR A PROBABILI- demasiado os parafusos; caso contrário, não conseguirão manter as peças unidas. DADE DE UMA LESÃO GRAVE OU FATAL. - Page 8 POLISH 8. Aby zmniejszyć zagrożenie stwarzane przez opiłki po wierceniu, wkręty zostały zaprojektowane tak, aby przeszywały plastik i same tworzyły gwinty. Nie należy zbyt PRZESTRZEGANIE PONIŻSZYCH ZALECEŃ I OSTRZEŻEŃ ZMNIEJSZY mocno dokręcać wkrętów, gdyż nie będą one złączać części w prawidłowy sposób. PRAWDOPODOBIEŃSTWO ODNIESIENIA POWAŻNYCH LUB ŚMIERTELNYCH OBRAŻEŃ...
- Page 9 H x 2 J x 2 I x 2 6 x 3/4” (1,77 cm) 4 x 3-1/4” (8,26 cm)
- Page 10 Repeat steps 4 & 5 to the other side. Répétez les étapes 4 et 5 sur l’autre côté. Repita los pasos 4 y 5 en el lateral opuesto. 3 x 3/4” (1,77 cm) Ripetere i passi 4 e 5 sull’altro lato. Herhaal stap 4 en 5 aan de andere kant.
- Page 11 Repeat to other side. Répétition à l’autre côté. Repetición al otro lado. Ripetizione all’altro lato. Herhaal aan de overkant. Repetição ao outro lado. Powtarzają do innego strona. 4 x 3-1/4” (8,26 cm)
- Page 12 FRENCH Consumer Information Sheet For Playground Surfacing Materials Fiche d’information du consommateur sur les matériaux de surface des terrains de jeux The Step2 Company, LLC. 10010 Aurora-Hudson Rd. Profondeur minimum des matériaux meubles de surface tassés Streetsboro, OH 44241 USA pouces de (matériaux meubles)
- Page 13 ESPANOL ITALIAN Hoja de información al consumidor sobre Materiales de Superficies Informazioni per il cliente sui materiali delle superfici di gioco. de Juego Profundidad mínima de la superficie amortiguadora Profondità minime superfici “loose fill” compresse Pulgadas de (Superficie amortiguadora) Protege hasta Altura de caída (pies) Pollici Di (materiale “loose-fill”)
- Page 14 DUTCH PORTUGUESE Informatieblad voor de consument voor materialen onder de Ficha de informação para o consumidor para materiais de superfície speeltuinuitrusting para espaços de recreio. Minimale ingedrukte los gestorte oppervlaktediepten Profundidades mínimas de material de superfície de enchimento solto comprimido Inch (los gestort materiaal) beschermt tot...
- Page 15 POLISH Informacje dla klientów na temat podłoży ochronnych na placach zabaw Minimalne głębokości skompresowanych powierzchni sypkich Cale (Materiał sypki) zapewniający ochronę upadku z wysokości (stopy) Rozdrobniona/przetworzona guma Piasek Żwir Mulcz z trocin (bez CCA) Zrębki drzewne Tabela X3.1 Niniejsze informacje pochodzą z publikacji CPSC „Playground Surfacing – Technical In- formation Guide”...
- Page 16 4. Do not allow children to climb and play on the roof of this playhouse. • If you decide to dispose of a Step2 product, disassemble and dispose of it in such a way that no OPERATION INSTRUCTIONS: unreasonable hazards exist. Step2’s products are recyclable plastic. Refer to the recycling symbol the level number located on each part for appropriate sorting;...
-
Page 17: Instrucciones De Instalación Y Funcionamiento
Parts List-A: INSTRUCTIONS D’ENTRETIEN 1. Vérifiez l’état des raccords et des boulons au minimum deux fois par mois pendant la période d’utilisation Liste des pièces détachées-A: de l’équipement, et au début de chaque saison pour vous assurez que rien n’est desserré. Resserrez toute Lista de Partes-A: pièce si nécessaire. - Page 18 1 x 1-1/4” (3,175 cm) 1. Battery Installation A.T o install the Door Bell batteries remove the Battery Door and replace the batteries as shown on the diagram inside the battery compartment. 1. Installation des piles A. Pour installer les piles de la sonnette, retirer le couvercle des piles et remplacer les piles comme illustré...
- Page 19 8. Hand thread the Door Handle onto the screw. 9. While holding the Door handle tighten the screw in place. 10. Place door hinge pin into hole on the base door jam. 8. Vissez à la main la poignée de la porte sur la vis. 9.
- Page 20 4 x 1” (2,54 cm) 4 x 1-1/4” (3,175 cm) 14. Secure each corner with 1 x 1” screw. 15.Secure posts with 2 x 1-1/4” screw as shown. 16.Press firmly to secure the phone latch and hang the phone. 14. Fixez chaque coin avec 1 vis de 2,54 cm. 15.
- Page 21 4) Utiliser le tournevis Phillips pour resserrer la vis. FAIRE ne SERRER pas TROP. • If you decide to dispose of the Step2 Electronic Cordless Phone, disassemble and dispose of it in such a way that no Para instalar o quitar las baterÌas: unreasonable hazards exist.
Need help?
Do you have a question about the Woodland Climber 8158 and is the answer not in the manual?
Questions and answers