
Subscribe to Our Youtube Channel
Related Manuals for ATEQ Hydra Silver


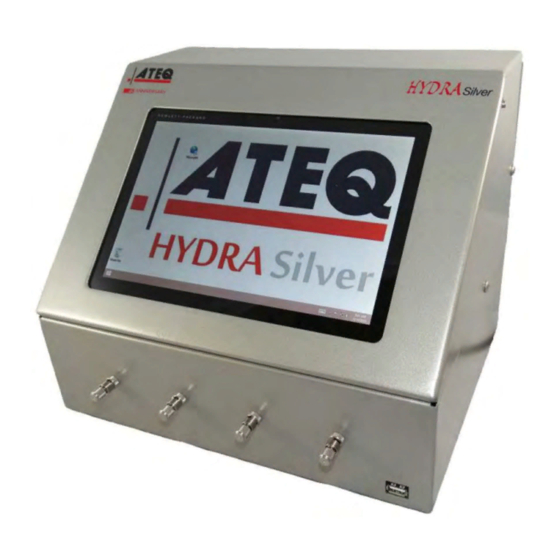
Summary of Contents for ATEQ Hydra Silver
- Page 1 Hydra Silver Four Channel Leak Testing System Owner/Operator Manual Reference: LHYS40101-R00...
- Page 2 Front Inside Cover...
- Page 3 A complete Document Revision History is provided at the end of this Manual (page 176). © 2015 ATEQ Corp. All Rights Reserved. Product Certification & Product Safety Requirements...
- Page 4 WinAteq 300 Software Copyright Information The WinAteq 300 software installed on the instrument(s) described in this Manual is the exclusive property of ATEQ Corp., and may only be used in conjunction with the operation of the instrument(s) described in this Manual.
- Page 5 Foreword PREFACE Dear Customer, You have just purchased an ATEQ instrument, and we thank you for the trust you have placed in our brand. This instrument has been designed to ensure a long and unparalleled life expectancy, and we are convinced that it will give you complete satisfaction during many long years of operation.
- Page 6 Hydra Silver Foreword Owner/Operator Manual This page intentionally left blank. Page 6 / 178 ATEQ Corp. Proprietary Information LHYS40101-R00...
-
Page 7: Table Of Contents
Additional Product Labeling ................16 Symbols used in this Manual .................17 Chapter 2 PRODUCT OVERVIEW ..................19 Hydra Silver Capabilities ................19 Hydra Silver Features ...................19 Hydra Silver Leak Test Measurement Ranges ..........19 Exterior Component Summary ..............20 Chapter 3 PRODUCT SAFETY REQUIREMENTS ........23 Owner Responsibility ..................23 ATEQ USA Safety Support ................23... - Page 8 Hydra Silver Test Area Requirements ............43 Hydra Silver Clean/Dry Air Requirements ............44 Hydra Silver Basic Installation and Initial Startup ..........46 Connecting a Clean/Dry “Test Air” Supply to the Hydra Silver ......50 Chapter 7 INSTRUMENT STARTUP / OPERATIONS / SHUT-OFF ........53 Key Operational Basics about the Hydra Silver Instrument ......53...
- Page 9 Access to this Function Set ................. 125 12.2 “Results” Function Set and User Interface ............ 126 12.3 Test Cycle “Front Panel” ................128 12.4 Test Cycle Controls from the “Results” Function Screen ........ 129 LHYS40101-R00 ATEQ Corp. Proprietary Information Page 9 / 178...
- Page 10 Chapter 18 ACCESSORIES ................... 155 18.1 Calibrated Leak Kit ..................155 18.2 Air Filtration Kit ..................156 Appendix A GLOSSARIES ..................... 157 Glossary of Acronyms: ..................157 Glossary of Terms: ....................157 Page 10 / 178 ATEQ Corp. Proprietary Information LHYS40101-R00...
- Page 11 DIAGNOSTICS & TROUBLESHOOTING ............171 Diagnostic Indicators on the WinAteq 300 “Cycle” Screen......171 Troubleshooting Error Messages ..............172 Long-Term Operational Troubleshooting and Maintenance ......174 Document Revision History ....................176 LHYS40101-R00 ATEQ Corp. Proprietary Information Page 11 / 178...
- Page 12 Hydra Silver Foreword Owner/Operator Manual This page intentionally left blank. Page 12 / 178 ATEQ Corp. Proprietary Information LHYS40101-R00...
-
Page 13: Chapter 1 Introduction
Owner/Operator Manual INTRODUCTION Chapter 1 INTRODUCTION This chapter introduces the Hydra Silver and provides an orientation for this Manual. Scope of this Manual This Manual provides the information and procedures necessary to install, configure, operate, and monitor the ATEQ Hydra Silver. -
Page 14: Product Summary
(I/O) port and an RS-232 port. A variety of front test port fittings are also available. The Hydra Silver allows you to remove one or more test channel modules for service or calibration, and still be able to conduct leak testing with the remaining channels. - Page 15 The on-screen displays offered by the Hydra Silver (some of which are shown below), in conjunction with the 4 input-output channels and dual rear USB ports, result in: a simple process for Production and Test Engineers to install and configure the unit;...
-
Page 16: Product Specifications & Identification Labeling
Owner/Operator Manual Product Specifications & Identification Labeling On the rear of the Hydra Silver case, there are labels identifying the specific unit and providing a summary of its specifications. Below is an example of this type of labeling. Figure 1–3: Product Specifications & ID Labels on the Hydra Silver... -
Page 17: Symbols Used In This Manual
This symbol indicates a reference in this Manual to document(s) that should be read, which may include manuals from OEMs. This symbol is also used to highlight definitions inserted into the text. LHYS40101-R00 ATEQ Corp. Proprietary Information Page 17 / 178... - Page 18 Hydra Silver INTRODUCTION Owner/Operator Manual This page intentionally left blank. Page 18 / 178 ATEQ Corp. Proprietary Information LHYS40101-R00...
-
Page 19: Chapter 2 Product Overview
& USER INTERFACE Chapter 2 PRODUCT OVERVIEW This chapter provides an external overview of the Hydra Silver instrument, including a summary description of each major external component. Hydra Silver Capabilities The ATEQ Hydra Silver is a fully integrated air-to-air leak detection instrument that enables simultaneous or sequential pressure decay leak testing on four completely independent channels. -
Page 20: Exterior Component Summary
As illustrated in Figure 2–1 below, the front of the Hydra Silver casing provides a set of 4 ports for direct hookup to external “test parts”. As illustrated in Figure 2–1 on the next page, the rear of the Hydra Silver casing are 4 corresponding sets of:... - Page 21 “AIR IN” label. Power to the entire Hydra Silver instrument is via an AC Electric Power connector on the rear, to which is connected the AC power cord that is shipped with the instrument.
- Page 22 Hydra Silver PRODUCT OVERVIEW & USER INTERFACE Owner/Operator Manual Figure 2–3: Touchscreen Tablet Computer ON/OFF Button Page 22 / 178 ATEQ Corp. Proprietary Information LHYS40101-R00...
-
Page 23: Chapter 3 Product Safety Requirements
ATEQ instrument in any capacity or via any method. As such, ATEQ, ATEQ USA, or any of ATEQ Corp.’s partners or affiliates will not be held responsible for any accident connected to the improper use of the instrument, to the work bench, or to any other lack of compliance with the safety precautions covered in this Chapter, as well as any general “best practice”... -
Page 24: Electrical Safety
2. To avoid electromagnetic interference, all cable connections to the instrument should be less than two meters in length. Page 24 / 178 ATEQ Corp. Proprietary Information LHYS40101-R00... -
Page 25: Testing Environment And Operational Safety
1. Keep the test area around the instrument as clean as possible. 2. Always immediately clean up any spills or droppings of grease or any other slippery substance on or around the instrument. LHYS40101-R00 ATEQ Corp. Proprietary Information Page 25 / 178... -
Page 26: Hydra Silver Clean/Dry Air Requirements
REQUIREMENTS Owner/Operator Manual Hydra Silver Clean/Dry Air Requirements The presence of dust, oil, humidity, and/or impurities inside any of the Hydra Silver instrument’s Leak Test Channels may cause an inaccurate test result and/or instrument malfunction while testing is be conducted. -
Page 27: Chapter 4 Onboard Computer System Overview
Hydra instrument. Onboard Computer with Touchscreen Monitor Built into the Hydra Silver instrument is a tablet computer that includes a touchscreen monitor. All user access to the onboard computer system is via this touchscreen and through connection to the USB ports (described later in this chapter. -
Page 28: Windows Operating System For Touchscreen Monitor Access
(Windows 8.1 or later). From Windows, the WinAteq 300 software is launched. When the Hydra Silver instrument and its onboard computer is started up, the first “user” screen that displays on the touchscreen monitor is an “ATEQ Windows Desktop”, which includes an “app”... -
Page 29: Recommendations For Using Windows On The Touchscreen
Use that software keyboard as you would any other “on-screen” keyboard. However, if you require using an external physical keyboard (hardware), you can plug a Windows-supported device into one of the USB ports on the Hydra Silver. After Windows finds the appropriate device driver (app), use the external keyboard like you would any other keyboard. -
Page 30: Winateq 300 Software Overview And Major Screen Elements
WinAteq 300 Software Overview and Major Screen Elements The factory installed WinAteq 300 software enables you to configure and control the Hydra Silver instrument, and then to set up, view, and manage leak testing. The WinAteq 300 software has the capability to: setup leak testing “parameter”... - Page 31 Hydra Silver ONBOARD COMPUTER SYSTEM Owner/Operator Manual OVERVIEW Figure 4–3: Major Elements on all WinAteq 300 User Interface Screens LHYS40101-R00 ATEQ Corp. Proprietary Information Page 31 / 178...
-
Page 32: Major Function Sets Available Via The Winateq 300 Software
Owner/Operator Manual Major Function Sets available via the WinAteq 300 Software Every WinAteq 300 user screen on the Hydra Silver displays the below function tabs. Each name represents one “function set”, a set of functions related to one purpose, such as defining and managing “Parameters”, or showing and saving test “Results”. - Page 33 Program assignment. Figure 4–7: “Results” Function Set Sample Screen Display LHYS40101-R00 ATEQ Corp. Proprietary Information Page 33 / 178...
- Page 34 Leak Test Channel over a given time period, and lets the tester run a new leak test cycle on that channel, employing the current leak test Program assignment. Figure 4–9: “Statistics” Function Set Sample Screen Display Page 34 / 178 ATEQ Corp. Proprietary Information LHYS40101-R00...
- Page 35 This function set provides tools for configuring, monitoring, and troubleshooting the operation of each Leak Test Module – the equipment that facilitates each Channel – as well as the Hydra Silver instrument as a whole. Figure 4–11: “General” Function Set Sample Screen Display LHYS40101-R00 ATEQ Corp.
-
Page 36: Optional External Usb Devices For Use With The Computer System
Optional External USB Devices for use with the Computer System There are two USB ports on the rear of the Hydra Silver casing. Listed below are some USB compatible external devices that may be easily incorporated into a Hydra Silver setup: External Hardware Keyboard –... -
Page 37: Chapter 5 Product Technical Description
Channel, an external hard drive or a USB flash drive can be plugged into either of the Hydra Silver’s USB ports then accessed by any of the four Leak Test Channels for the purpose of storing test data from those test channels. -
Page 38: Leak Test Channel Components
Owner/Operator Manual Leak Test Channel Components The functional core of the Hydra Silver is its set of four Leak Test Channels, which each operate independently from the other channels. Inside the Hydra cabinet, each Leak Test Channel is supported by a Leak Test Module assembly that pressurizes a connected test part using the incoming “test air”, then... - Page 39 Hydra Silver PRODUCT TECHNICAL Owner/Operator Manual DESCRIPTION Front of Hydra Silver Cabinet Rear of Hydra Silver Cabinet Figure 5–1: Leak Test Channel Components LHYS40101-R00 ATEQ Corp. Proprietary Information Page 39 / 178...
-
Page 40: Pressure Measurement Methods Supported By The Hydra Silver
The Hydra Silver only tests and measures the pressure in the bell. In the event of a large leak, electronic monitoring of the pressure in the bell will switch the instrument to safety. -
Page 41: Leak Test Cycle Stages For Direct Pressure Decay Measurement
The signal is electronically processed and displayed, the part is then declared as pass or fail. Dump Time Return of the part to atmospheric conditions. Cycle End LHYS40101-R00 ATEQ Corp. Proprietary Information Page 41 / 178... - Page 42 Hydra Silver PRODUCT TECHNICAL DESCRIPTION Owner/Operator Manual This page intentionally left blank. Page 42 / 178 ATEQ Corp. Proprietary Information LHYS40101-R00...
-
Page 43: Chapter 6 Installation Procedures
Hydra Silver instrument, its accessories, and any supporting equipment: 1. The test bench or whatever counter or table will be the location for the Hydra Silver instrument must be a stable structure that can easily support the weight of the instrument itself along with any required accessories and/or supporting equipment. -
Page 44: Hydra Silver Clean/Dry Air Requirements
INSTALLATION PROCEDURES Owner/Operator Manual Hydra Silver Clean/Dry Air Requirements The presence of dust, oil, humidity, and/or impurities inside any of the Hydra Silver instrument’s Leak Test Channels may cause an inaccurate test result and/or instrument malfunction while testing is be conducted. - Page 45 In accordance with ISO standard 8573-1 concerning classes of compressed air for measurement instruments in an industrial environment, ATEQ strongly recommends: (a) The clean/dry air supply that will be connected to the Hydra Silver instrument at the push to connect fitting under “AIR IN” for the purpose of providing “test air pressure”, must comply with these particular standards:...
-
Page 46: Hydra Silver Basic Installation And Initial Startup
Referring to Figure 6–2 (page 47) and Figure 6–3 (page 48), perform the below steps to install the Hydra Silver instrument and then start up the system for the first time: 1. Place the Hydra Silver instrument upon the intended test site platform (bench, table, counter), located so that the site requirements on page 43 are met, and there is no danger of the instrument being knocked off the platform while in use. - Page 47 Hydra Silver Owner/Operator Manual INSTALLATION PROCEDURES Figure 6–2: Basic Installation and Initial Startup LHYS40101-R00 ATEQ Corp. Proprietary Information Page 47 / 178...
- Page 48 [Continued] In cases where the onboard computer appears to not be starting, do the following: (a) On the right side of the Hydra Silver casing, again press then release the built in touchscreen tablet power ON/OFF button [I]. (b) If the screen remains blank, even after 2 minutes, do “(a)” again. If still no change, try holding the button longer before releasing it.
- Page 49 Hydra Silver Owner/Operator Manual INSTALLATION PROCEDURES 7. To manually start up the WinAteq 300 software from the ATEQ Windows “desktop”, perform the following steps: (a) On the touchscreen [J], double-select (tap twice) the WinAteq 300 icon [L]. The WinAteq 300 “start screen” [M] should display (see sample above).
-
Page 50: Connecting A Clean/Dry "Test Air" Supply To The Hydra Silver
Hydra Silver instrument and then verify proper air pressure delivery. To accomplish this, perform the below steps while referring to Figure 6–6 (on page 51). 1. Verify that the Hydra Silver instrument is powered up and the computer system is operating properly by checking the display on the touchscreen monitor [A]. - Page 51 Hydra Silver Owner/Operator Manual INSTALLATION PROCEDURES Figure 6–6: Connecting a Clean/Dry “Test Air” Source LHYS40101-R00 ATEQ Corp. Proprietary Information Page 51 / 178...
- Page 52 When the test cycle has completed on all 4 channels, their data panels [O] should look similar to these samples: Figure 6–7: Sample of Completed Test Cycle “Data Panel” Displays Page 52 / 178 ATEQ Corp. Proprietary Information LHYS40101-R00...
-
Page 53: Chapter 7 Instrument Startup / Operations / Shut-Off
The Hydra Silver instrument contains four separate Leak Test Modules that each operate independently to provide the tester with four distinct Leak Test Channels. Key to the proper operation of the Hydra Silver instrument is the connection of a clean/dry source of compressed “test air”, governed by the REGULATOR knob. -
Page 54: Instrument Power Up And Computer System Startup
Instrument Power Up and Computer System Startup Refer to Figure 7–3 (on page 55) while performing the following steps: 1. On the rear of the Hydra Silver casing, press the AC electric power ON/OFF switch [A] to the “ON” ( ) position, in order to power up the Hydra Silver instrument. - Page 55 Hydra Silver INSTRUMENT START-UP / Owner/Operator Manual OPERATIONS / SHUT-OFF Figure 7–3: Hydra Silver Instrument Power On and Complete Start Up LHYS40101-R00 ATEQ Corp. Proprietary Information Page 55 / 178...
- Page 56 INSTRUMENT START-UP / OPERATIONS / SHUT-OFF Owner/Operator Manual 4. To manually start up the WinAteq 300 software from the ATEQ Windows “desktop”, perform the following steps: (a) On the touchscreen [B], double-select (tap twice) the WinAteq 300 icon [D]. The WinAteq 300 “start screen” [C] should display (see sample above).
-
Page 57: What To Do When The Computer Will Not Power Up
(A standard shutdown will power-off the computer.) In cases where the onboard computer appears to not be starting, do the following: A. On the right side of the Hydra Silver casing, again press then release the built in touchscreen tablet power ON/OFF button. -
Page 58: How To Regulate Test Air Pressure
The incoming test air pressure REGULATOR knob is located on the rear face of the Hydra Silver instrument, near the top and to the right (as you face the rear). The diagram below illustrates which way to turn the knob to raise and lower pressure. -
Page 59: How To Quickly Set A Specific Test Air Pressure
Refer to Chapter 17 as needed. 1. Before proceeding further, cap off the connection port to the Hydra Silver leak test channel for which you will be setting the test pressure. 2. Access the “Parameters” function set screen, then:... - Page 60 The SPECIAL CYCLE tab data display should return to show “None” in the Value field on the “SPECIAL C.” row, as shown in the below example. Your test air pressure is now set. Page 60 / 178 ATEQ Corp. Proprietary Information LHYS40101-R00...
- Page 61 Figure 7–7: Sample Leak Test Results using Pre-Set Test Air Pressure LHYS40101-R00 ATEQ Corp. Proprietary Information Page 61 / 178...
-
Page 62: Leak "Test Cycle" Stages
This stage has no meaning on the Hydra Silver instrument. If you set a “wait time”, it acts as “no activity” time only. Fill Time Pressurization of the test part. At the end of the fill time, the Hydra Silver instrument checks the test pressure. - Page 63 “stages”. Figure 7–8: Running a Test Cycle from the “Graphs” Function Screen Figure 7–9: Program Parameters used in the above Leak Test Cycle Example LHYS40101-R00 ATEQ Corp. Proprietary Information Page 63 / 178...
-
Page 64: Leak "Test Cycle" Status Indicators On Front Panels
(Example: “Pr01”) An “alarm” situation such that YELLOW the test cycle did not complete due to: Leak Test Channel failure; out-of-bounds parameter conditions, and/or Regulator out of adjustment. Page 64 / 178 ATEQ Corp. Proprietary Information LHYS40101-R00... -
Page 65: How To Run And Monitor A "Test Cycle
OPERATIONS / SHUT-OFF How to Run and Monitor a “Test Cycle” Every WinAteq 300 user screen on the Hydra Silver displays the below function tabs. Select the name of the function set you want in order to initiate that function set. - Page 66 6. Use the Front Panel display [B] to monitor the leak test cycle as it runs through the “stages” described on page 62. Figure 7–11: Front Panel “DONE” Display 7. At any time select the icon to discontinue the test cycle. Page 66 / 178 ATEQ Corp. Proprietary Information LHYS40101-R00...
- Page 67 OPERATIONS / SHUT-OFF 8. On the Functions tab, select other function set(s) to view results in other formats. Figure 7–12: Run and Monitor Leak Test Cycles using ONE Leak Test Channel LHYS40101-R00 ATEQ Corp. Proprietary Information Page 67 / 178...
- Page 68 This will configure the “Cycle” function set screen to only run and monitor leak test cycles on a single leak test channel, the one that you specified in the previous step. Figure 7–13: Running Single Leak Test Channel Tests from the “Cycle” Screen Page 68 / 178 ATEQ Corp. Proprietary Information LHYS40101-R00...
- Page 69 This will configure the “Cycle” function set screen to run and monitor leak test cycles on a all leak test channels simultaneously. Figure 7–14: Running Simultaneous Test Cycles on MULTIPLE Leak Test Channels LHYS40101-R00 ATEQ Corp. Proprietary Information Page 69 / 178...
-
Page 70: Instrument Shut Down And Complete Power Off
Hydra Silver unit is powered off and not on use. Such a situation will run down the computer’s batter while the Hydra Silver unit is not in use, which will cause delay when attempting to restart the computer later on. - Page 71 – see the example in Figure 7–16 below. NOTE: The Windows “Start” screen allows for many different screen icon configurations. The screen on your Hydra Silver may look different than the below. Figure 7–16: Example of the Windows “Start” Screen on the Hydra Silver LHYS40101-R00 ATEQ Corp.
- Page 72 Figure 7–18 (page 73). Otherwise repeat (a) and (b) until you get the correct result. Figure 7–17: Hydra Silver Software & Computer Shutdown – Step 3 Page 72 / 178 ATEQ Corp. Proprietary Information...
- Page 73 “Settings” icons [H] should come into view. (b) Select the icon [I] to access the Power pop-up menu. Figure 7–18: Hydra Silver Software & Computer Shutdown – Step 4 LHYS40101-R00 ATEQ Corp. Proprietary Information...
- Page 74 The touchscreen should go completely dark when the computer powers off. Figure 7–19: Hydra Silver Software & Computer Shutdown – Step 5 6. On the rear of the Hydra Silver casing, press the AC electric power ON/OFF switch to the “OFF” ( ) position, in order to power off the Hydra Silver instrument.
-
Page 75: Chapter 8 Test Channel Setup / Test Part Connection
The following functions and procedures must be performed successfully before beginning the procedures described in this Chapter: The Hydra Silver must be pre-installed per the procedures in Chapter 6. This includes connecting a clean/dry test air source to the Hydra Silver. -
Page 76: Configure One Leak Test Program For The Leak Test Channel
[F] to display the Front Panel [G] if it is not already displayed. Use your pointer to drag the Front Panel [G] somewhere below the SPECIAL CYCLE data display, but ensure it does not cover any other displays. Page 76 / 178 ATEQ Corp. Proprietary Information LHYS40101-R00... - Page 77 If you cannot figure out what is preventing a “READY” status, consult the guidelines in Appendix F, and/or contact ATEQ USA Customer Service (page 3). 9. Ensure that the test part connection port for the Leak Test Channel is capped closed.
-
Page 78: Connect A "Test Part" To The Leak Test Channel
2. Connect test part [A] to the selected leak test channel via its connection port [B]. 3. Verify that the clean/dry air source [C] is securely connected to the Hydra Silver via the push to connect fitting [D] on the rear of the instrument. - Page 79 Hydra Silver TEST CHANNEL SETUP / Owner/Operator Manual TEST PART CONNECTION Front of Hydra Silver Cabinet Rear of Hydra Silver Cabinet Figure 8–3: “Test Part” Connection to a Leak Test Channel LHYS40101-R00 ATEQ Corp. Proprietary Information Page 79 / 178...
-
Page 80: Configure & Test Additional Parameter Programs For This Channel
5. On the Program Settings screen section [E], select the “PARAMETERS” tab [D]. Verify that the “TYPE TEST” field is always set to “LEAK”. If it is not, then correct it immediately. Figure 8–4: Configuring an Additional Parameters Program Page 80 / 178 ATEQ Corp. Proprietary Information LHYS40101-R00... - Page 81 If you cannot figure out what is preventing a “READY” status, consult the guidelines in Appendix F, and/or contact ATEQ USA Customer Service (page 3). 9. Perform the following steps to run some “dummy leak tests” on the test part you...
-
Page 82: Saving The Results Of Your Leak Channel Tests
(b) The toolset enables you to control automatic backups and their format. Consult Chapter 12 for instructions and further options. Figure 8–6: Saving Test Results from the “Results” Function Set Screen Page 82 / 178 ATEQ Corp. Proprietary Information LHYS40101-R00... -
Page 83: Saving Your Program-Channel Assignments And Configurations
Program data to the Hydra’s computer, and to restore Program data from previous backups. Consult Chapter 10 for instructions and further options. Figure 8–7: Saving Programs with the “Parameters” Function Set Screen LHYS40101-R00 ATEQ Corp. Proprietary Information Page 83 / 178... -
Page 84: Optional] Connect A Device To The Channel's 16-Pin I/O Port
Each of the four Leak Test Channels has an associated 16-Pin Input/Output (I/O) port on the rear panel of the Hydra Silver. Figure 8–8: 16-Pin I/O Ports (4) on the Rear Panel of the Hydra Silver Types of external devices that can be hooked up to a Leak Test Channel’s 16-Pin I/O port include (but are not limited to): a Programmable Logic Controller (PLC), which can also receive/relay information;... - Page 85 Step 1 above. 3. On the device, perform whatever configuration steps can be done in advance of hookup to the Hydra Silver, based upon the results of Step 1 and Step 2 above. Connection Procedure: Perform the following steps to connect the external device and ready it for use: 1.
-
Page 86: Optional] Connect A Device To The Channel's Rs-232 Port
Each of the four Leak Test Channels has an associated RS-232 port on the rear panel of the Hydra Silver. Figure 8–10: RS-232Ports (4) on the Rear of the Hydra Silver Types of external devices that can be hooked up to a Leak Test Channel’s RS-232 port include (but are not limited to): a Memory Storage Module (some have both RS-232 and 16-Pin I/O ports);... - Page 87 Step 1 above. 3. On the device, perform whatever configuration steps can be done in advance of hookup to the Hydra Silver, based upon the results of Step 1 and Step 2 above. Connection Procedure: Perform the following steps to connect the external device and ready it for use: 1.
-
Page 88: Optional] Re-Test Channel After External Device Installs
B. Saving your Leak Channel Setup Re-Tests and External Device Installs During and after the Program configuration process and Leak Test Channel testing, it is recommended that you make a point of saving your work to an external media. Page 88 / 178 ATEQ Corp. Proprietary Information LHYS40101-R00... - Page 89 Hydra Silver TEST CHANNEL SETUP / Owner/Operator Manual TEST PART CONNECTION Program PR01 Program PR02 Figure 8–12: Screens used to RE-TEST a Leak Test Channel After External Component Installation LHYS40101-R00 ATEQ Corp. Proprietary Information Page 89 / 178...
- Page 90 Hydra Silver TEST CHANNEL SETUP / TEST PART CONNECTION Owner/Operator Manual This page intentionally left blank. Page 90 / 178 ATEQ Corp. Proprietary Information LHYS40101-R00...
-
Page 91: Chapter 9 Leak Test Channel Calibration
“test part”. You can purchase calibrated leak “kits” from ATEQ USA (Chapter 18) or from various other leak measurement tool suppliers, depending upon your testing requirements. -
Page 92: Calibrated Leak Pressure/Leak Rate Specifications
Below is an example of such a table, which in this contains all metric values. The left side of the table lists PRESSURE (which is what the Hydra Silver indicates), and the right side of the table shows LEAK (RATE) TYPES. -
Page 93: Establishing A "Baseline" Between Pressure Drop And Flow Rate
In the example below, the tester has employed a “B” type calibrated leak tool to establish a “baseline” correlation between an 838 Pa pressure drop reading on the Hydra Silver and an actual leak flow rate of 1.6 CCs per minute on any “test part” pressurized at or very close to 23.2 PSI. -
Page 94: Running Tests On A Leak Test Channel Using A Calibrated Leak
This list represents the test pressure(s) you will need to calibrate this channel for. 2. Verify that a clean/dry air source is securely connected to the Hydra Silver via the push to connect fitting on the rear of the instrument. - Page 95 Front Panel after test cycle completion. This is now your “baseline” value for that test pressure. Figure 9–4: Sample Calibrated Leak Test Cycle Results at 23.22 PSI Pressure LHYS40101-R00 ATEQ Corp. Proprietary Information Page 95 / 178...
- Page 96 Hydra Silver LEAK TEST CHANNEL CALIBRATION Owner/Operator Manual This page intentionally left blank. Page 96 / 178 ATEQ Corp. Proprietary Information LHYS40101-R00...
-
Page 97: Chapter 10 Winateq 300 S/W "Parameters" Function Set
Parameters Program (“Pr01”) is displayed, along with all the information tabs pertinent to that Leak Test Module and Program. Figure 10–1: WinAteq 300 “Parameters” Function Set Initial Screen Display LHYS40101-R00 ATEQ Corp. Proprietary Information Page 97 / 178... -
Page 98: Parameters" Function Set And User Interface
(see Figure 10–2 on page 99) in order to: create and update Programs to define the testing parameters for leak tests, assign programs to each of the Leak Test Channels on the Hydra Silver instrument, initiate an actual leak test using the specified Leak Test Channel and Program. - Page 99 From here you can initiate a new leak test using the selected Leak Test Channel and Leak Test Program, and also stop the test prematurely if necessary. Figure 10–2: Major Elements on the WinAteq 300 “Parameters” Function Screen LHYS40101-R00 ATEQ Corp. Proprietary Information Page 99 / 178...
-
Page 100: Leak Test Program Parameters Defined [Basic Settings]
WAITING TIME (WAIT A) The waiting time A is a top cycle parameter. This parameter is not available on the Hydra Silver instrument. FILL TIME (FILL TIME) This is the time allowed for the pressurization of the part to be tested. It must not be too long... - Page 101 The different reject units available are: bar, Pa, Pa/s, kPa, KPa/s, cm3/min. TEST REJECT (REJECT MAX) This function is used to set a limit level below which the part is considered to be bad. LHYS40101-R00 ATEQ Corp. Proprietary Information Page 101 / 178...
- Page 102 (the part is bad but may be reworked to become acceptable). This option is particularly useful in casting, when parts may be treated via impregnation. Page 102 / 178 ATEQ Corp. Proprietary Information LHYS40101-R00...
-
Page 103: Advanced Program Parameters Defined
WINATEQ 300 S/W Owner/Operator Manual “PARAMETERS” FUNCTION SET 10.4 ADVANCED Program PARAMETERS Defined Below are definitions for the more “advanced” Program “PARAMETERS” settings that are editable via the “Parameters” function set screen. LHYS40101-R00 ATEQ Corp. Proprietary Information Page 103 / 178... - Page 104 Hydra Silver WINATEQ 300 S/W “PARAMETERS” FUNCTION SET Owner/Operator Manual Page 104 / 178 ATEQ Corp. Proprietary Information LHYS40101-R00...
- Page 105 Hydra Silver WINATEQ 300 S/W Owner/Operator Manual “PARAMETERS” FUNCTION SET LHYS40101-R00 ATEQ Corp. Proprietary Information Page 105 / 178...
-
Page 106: Creating A Completely New Parameters Program
3. Verify that the currently selected Program on the top display [I] and below [J]. On the screen, the configuration data panels [L]for the newly “assigned” Program should all be displayed as a blank panes. Figure 10–3: Leak Test Channel NEW Parameters Program “Assignment” Page 106 / 178 ATEQ Corp. Proprietary Information LHYS40101-R00... - Page 107 (b) On the “PARAMETERS” tab input area, input new values and edit the “default” values per the field definitions given in section 10.2 of this Chapter (page 98). The new Program configuration is now COMPLETED. Figure 10–4: Leak Test Channel new Program Configuration LHYS40101-R00 ATEQ Corp. Proprietary Information Page 107 / 178...
-
Page 108: Using An Existing Parameters Program To Create A New Program
3. Verify that the currently selected Program on the top display [I] and below [J]. On the screen, the configuration data panels [L]for the newly “assigned” Program should all be displayed as a blank panes. Figure 10–5: Leak Test Channel NEW Parameters Program “Assignment” Page 108 / 178 ATEQ Corp. Proprietary Information LHYS40101-R00... - Page 109 (a) On the Programs list [D], select the existing Program [E] you want to “copy”. (b) Select the [Copy] icon [F] from the Clipboard button set on the toolbar [G]. Figure 10–6: Leak Test Channel existing Program COPY for a new Program LHYS40101-R00 ATEQ Corp. Proprietary Information Page 109 / 178...
- Page 110 SPECIAL CYCLE data fields [N]. The below example shows the same data for “PR02” that was copied from “PR01”. Figure 10–7: Leak Test Channel Program Data COPIED from an existing Program Page 110 / 178 ATEQ Corp. Proprietary Information LHYS40101-R00...
- Page 111 Program (as described in the earlier steps). Once you complete all such edits, the new Program configuration is COMPLETED. Figure 10–8: Leak Test Channel new Program after Copied Data is EDITED LHYS40101-R00 ATEQ Corp. Proprietary Information Page 111 / 178...
-
Page 112: How To Edit Leak Test Program Parameter Values
2. On the numeric keypad that pops-up, type the new value for the numeric field. 3. On the numeric keypad, tap the [ENTER] button to save the new value for the numeric field. Page 112 / 178 ATEQ Corp. Proprietary Information LHYS40101-R00... - Page 113 1. Select the field by tapping within its display row. 2. Tap the down-arrow box (to the right) to display the choices drop-down menu. 3. On the choices drop-down menu, tap the choice you want in order to select it. LHYS40101-R00 ATEQ Corp. Proprietary Information Page 113 / 178...
- Page 114 (After you do this, the [+] box will turn into a [-] box.) 3. To “contract” the field (hide its sub-fields), tap on the [-] box to the left. The display will return to just showing the top-level field name again. Page 114 / 178 ATEQ Corp. Proprietary Information LHYS40101-R00...
-
Page 115: Running A Test Cycle Per The Configured Parameters Program
See later Chapters in the Manual for how to use other function set screens to view and manage test results in various formats (tabular, graphic, statistical, etc). Figure 10–9: Running a Test Cycle LHYS40101-R00 ATEQ Corp. Proprietary Information Page 115 / 178... -
Page 116: Additional Functions Available Via The "Parameters" Toolbar
Erase specific sets of Program data previously set up for this leak test channel. 2. The toolset enables you to perform manual backup of Program data to the Hydra’s computer, and to restore Program data from previous backups. Page 116 / 178 ATEQ Corp. Proprietary Information LHYS40101-R00... -
Page 117: Chapter 11 Winateq 300 S/W "Cycle" Function Set
The last display line indicates the test cycle stage. Below the main test cycle data panel display is a row of test result status lights. Figure 11–1: WinAteq 300 “Cycle” Function Set Initial Screen Display LHYS40101-R00 ATEQ Corp. Proprietary Information Page 117 / 178... -
Page 118: Cycle" Function Set And User Interface
When a Leak Test Channel is highlighted, you can re-run its last test protocol. Highlighted Leak Test Channel’s Status Panel Displays the status of a currently “in-progress” leak test cycle or one last completed. Page 118 / 178 ATEQ Corp. Proprietary Information LHYS40101-R00... - Page 119 When this box is checked, all actions selected via on the Leak Test Control Panel apply to all the Leak Test Channels. Figure 11–2: Major Elements on the WinAteq 300 “Cycle” Function Screen LHYS40101-R00 ATEQ Corp. Proprietary Information Page 119 / 178...
-
Page 120: Test Result Status Lights Below Each Test Cycle Data Panel
Note: When one selects the “stop” icon (white square inside red circle) the test cycle data panel goes “gray” with no data other than the Program name, a “READY” label, and the EOC. Page 120 / 178 ATEQ Corp. Proprietary Information LHYS40101-R00... -
Page 121: Cycle" Screen Display Types
WINATEQ 300 S/W “CYCLE” Owner/Operator Manual FUNCTION SET 11.4 “Cycle” Screen Display Types There screen display type is controlled by what you indicate on the icon. Figure 11–3: “Cycle” Function Screen Display Types LHYS40101-R00 ATEQ Corp. Proprietary Information Page 121 / 178... -
Page 122: Test Cycle "Front Panel
Turn the Front Panel on/off by selecting this toolset icon on the top toolbar: It is recommended that before you start any test cycle, you turn this display “on”. Figure 11–4: Turn “ON” the Front Panel Page 122 / 178 ATEQ Corp. Proprietary Information LHYS40101-R00... -
Page 123: Test Cycle Controls From The "Cycle" Function Screen
5. Once your indicated test cycle(s) have begun, you can follow the progress on the Cycle function displays. When all cycles have completed or cancelled, the last status is displayed on screen. LHYS40101-R00 ATEQ Corp. Proprietary Information Page 123 / 178... - Page 124 Hydra Silver WINATEQ 300 S/W “CYCLE” FUNCTION SET Owner/Operator Manual This page intentionally left blank. Page 124 / 178 ATEQ Corp. Proprietary Information LHYS40101-R00...
-
Page 125: Chapter 12 Winateq 300 S/W "Results" Function Set
In the below example, the tab for the last selected channel is highlighted, and the displayed test results are for that channel. Figure 12–1: WinAteq 300 “Results” Function Set Initial Screen Display LHYS40101-R00 ATEQ Corp. Proprietary Information Page 125 / 178... -
Page 126: Results" Function Set And User Interface
Shows the key parameters and final results for “passed” Leak Tests performed on the indicated Leak Test Channel. Display Row Entries showing Results of “Failed” Tests Shows the key parameters and final results for “failed” Leak Tests performed on the indicated Leak Test Channel. Page 126 / 178 ATEQ Corp. Proprietary Information LHYS40101-R00... - Page 127 From here you can initiate a new leak test using the currently selected Channel with the current settings, and also stop the test prematurely if necessary. Figure 12–2: Major Elements on the WinAteq 300 “Results” Function Screen LHYS40101-R00 ATEQ Corp. Proprietary Information Page 127 / 178...
-
Page 128: Test Cycle "Front Panel
Turn the Front Panel on/off by selecting this toolset icon on the top toolbar: It is recommended that before you start any test cycle, you turn this display “on”. Figure 12–3: Turn “ON” the Front Panel Page 128 / 178 ATEQ Corp. Proprietary Information LHYS40101-R00... -
Page 129: Test Cycle Controls From The "Results" Function Screen
3. Once your test cycle has begun, you can follow the progress on the front panel display if you had selected that option. Otherwise, when the test cycle has completed or cancelled, the last status is displayed as one row on the test cycles listing. LHYS40101-R00 ATEQ Corp. Proprietary Information Page 129 / 178... -
Page 130: Saving The Results Of Your Leak Channel Tests
Erase all the test results currently displayed on this function set screen. 2. The toolset enables you to control automatic backups and their format. The following page provides additional information about this toolset. Page 130 / 178 ATEQ Corp. Proprietary Information LHYS40101-R00... -
Page 131: Automatic Backup Options
Hydra Silver WINATEQ 300 S/W “RESULTS” Owner/Operator Manual FUNCTION SET 12.6 Automatic Backup Options LHYS40101-R00 ATEQ Corp. Proprietary Information Page 131 / 178... - Page 132 Hydra Silver WINATEQ 300 S/W “RESULTS” FUNCTION SET Owner/Operator Manual This page intentionally left blank. Page 132 / 178 ATEQ Corp. Proprietary Information LHYS40101-R00...
-
Page 133: Chapter 13 Winateq 300 S/W "Graphs" Function Set
When the “Graphs” function set screen is initially displayed (see example below), real time pressure and leak measurements are graphed as you watch. Figure 13–1: WinAteq 300 “Graphs” Function Set Initial Screen Display LHYS40101-R00 ATEQ Corp. Proprietary Information Page 133 / 178... -
Page 134: Graphs" Function Set And User Interface
Leak Test Channel Control Panel From here you can initiate a new leak test using the currently selected Channel with the current settings, and also stop the test prematurely if necessary. Page 134 / 178 ATEQ Corp. Proprietary Information LHYS40101-R00... - Page 135 From here you can configure some of the graph conditions and appearance, as well as print, save, and backup graphic content. Figure 13–2: Major Elements on the WinAteq 300 “Graphs” Function Screen LHYS40101-R00 ATEQ Corp. Proprietary Information Page 135 / 178...
-
Page 136: Additional Functions Available Via The "Graphs" Function Set
Hydra Silver WINATEQ 300 S/W “GRAPHS” FUNCTION SET Owner/Operator Manual 13.3 Additional Functions available via the “Graphs” Function Set Page 136 / 178 ATEQ Corp. Proprietary Information LHYS40101-R00... - Page 137 Hydra Silver WINATEQ 300 S/W “GRAPHS” Owner/Operator Manual FUNCTION SET LHYS40101-R00 ATEQ Corp. Proprietary Information Page 137 / 178...
- Page 138 Hydra Silver WINATEQ 300 S/W “GRAPHS” FUNCTION SET Owner/Operator Manual This page intentionally left blank. Page 138 / 178 ATEQ Corp. Proprietary Information LHYS40101-R00...
-
Page 139: Chapter 14 Winateq 300 S/W "Statistics" Function Set
When the “Statistics” function set screen is initially displayed (see example below), numerical statistical information is displayed via the “Counters” tab (see next section). Figure 14–1: WinAteq 300 “Statistics” Function Set Initial Screen Display LHYS40101-R00 ATEQ Corp. Proprietary Information Page 139 / 178... -
Page 140: Statistics" Function Set And User Interface
Programs. Numeric Statistical Summary Report Displays leak test summary results in numeric format for the selected Leak Test Channel -- “E292-010” for example -- and the selected Program. Page 140 / 178 ATEQ Corp. Proprietary Information LHYS40101-R00... - Page 141 From here you can initiate a new leak test using the currently selected Channel with the current settings, and also stop the test prematurely if necessary. Figure 14–2: Major Elements on the WinAteq 300 “Statistics” Function Screen LHYS40101-R00 ATEQ Corp. Proprietary Information Page 141 / 178...
-
Page 142: Statistics" Function Tabs
Hydra Silver WINATEQ 300 S/W “STATISTICS” FUNCTION SET Owner/Operator Manual 14.3 “Statistics” Function TABS Page 142 / 178 ATEQ Corp. Proprietary Information LHYS40101-R00... -
Page 143: Chapter 15 Winateq 300 "Storage" Function Set
Plus you can clean up outdated long term storage files. Figure 15–1: WinAteq 300 “Storage” Function Set Initial Screen Display LHYS40101-R00 ATEQ Corp. Proprietary Information Page 143 / 178... -
Page 144: Storage" Function Set And User Interface
However, access is restricted primarily to folders and files whose data cannot affect the performance of the onboard computer and/or the WinAteq 300 software. Below is an sample display of the “Storage” function screen: Figure 15–2: Sample of the WinAteq 300 “Storage” Function Screen Page 144 / 178 ATEQ Corp. Proprietary Information LHYS40101-R00... -
Page 145: Chapter 16 Winateq 300 S/W "General" Function Set
Select “General” on the function set toolbar. With this screen you can monitor the Hydra’s communications. You can also use it to rename Leak Test Channels. Figure 16–1: WinAteq 300 “General” Function Set Initial Screen Display LHYS40101-R00 ATEQ Corp. Proprietary Information Page 145 / 178... -
Page 146: General" Function Set And User Interface
Failure to follow this policy could result in untrained and/or unauthorized personnel possibly causing data loss and inoperability of the Hydra Silver instrument. Below is an sample display of the “General” function screen: Figure 16–2: Sample of the WinAteq 300 “General”... -
Page 147: Displaying One Leak Test Channel "Device
The “Information” display will then show the device name, and everything displayed on the screen will be for that device (Leak Test Channel). Figure 16–4: Displaying a “Device” (Leak Test Channel) LHYS40101-R00 ATEQ Corp. Proprietary Information Page 147 / 178... -
Page 148: Renaming One Leak Test Channel "Device
2. On the General function set screen, select the icon. The previously selected device will be highlighted, and a virtual numeric keypad will display on the screen (see below). Figure 16–6: Renaming a “Device” (Leak Test Channel) Page 148 / 178 ATEQ Corp. Proprietary Information LHYS40101-R00... - Page 149 (At any time before that, you can cancel any inputs you have already done, by selecting the [ESC] key icon.) The General screen will redisplay with your device name input reflected. Figure 16–7: Renaming a “Device” (Leak Test Channel) from the General Screen LHYS40101-R00 ATEQ Corp. Proprietary Information Page 149 / 178...
- Page 150 Hydra Silver WINATEQ 300 S/W “GENERAL” FUNCTION SET Owner/Operator Manual This page intentionally left blank. Page 150 / 178 ATEQ Corp. Proprietary Information LHYS40101-R00...
-
Page 151: Chapter 17 Special Cycles ("Parameters" Function Set)
17.1 Access “SPECIAL CYCLES” & Prepare for Special Cycle Functions 1. Access the “Parameters” function set screen, then: (a) Select the tab corresponding to the Hydra Silver channel that will be used to conduct the leak test (“E292-0011” in the example); then (b) Select the parameters Program that will be used to drive the leak test (“Pr01”... -
Page 152: Special Cycles Menu
The following list shows all the special cycles which are available via the Special Cycles menu in the WinAteq 300 software. Which special cycle functions are present on your Hydra Silver instrument will depend upon what is checked in the expanded menus, and/or what optional extras were requested at the time of manufacture of your instrument. -
Page 153: Special Cycles Functions
Hydra Silver SPECIAL CYCLES Owner/Operator Manual (“PARAMETERS” FUNCTION SET) 17.3 SPECIAL CYCLES FUNCTIONS LHYS40101-R00 ATEQ Corp. Proprietary Information Page 153 / 178... - Page 154 Hydra Silver SPECIAL CYCLES (“PARAMETERS” FUNCTION SET) Owner/Operator Manual This page intentionally left blank. Page 154 / 178 ATEQ Corp. Proprietary Information LHYS40101-R00...
-
Page 155: Chapter 18 Accessories
Hydra Silver Owner/Operator Manual ACCESSORIES Chapter 18 ACCESSORIES This chapter describes the accessories that are available for use with the Hydra Silver. 18.1 Calibrated Leak Kit This is available directly from ATEQ USA, either via your local agent, or through: http://atequsa.com/product/leaks-and-jets/ Figure 18–1: Calibrated Leak Kit... -
Page 156: Air Filtration Kit
Owner/Operator Manual 18.2 Air Filtration Kit The Hydra Silver uses an SMC 3014A air filter, which takes an SMC 3014x filter refill. These are both available from ATEQ USA via your local agent, or directly from SMC via their web site at: http://www.smcusa.com/top-navigation/cad-models/15732... -
Page 157: Appendix Aglossaries
LCD applications include monitors for computers, televisions, instrument panels, and other devices ranging from aircraft cockpit displays, to every-day consumer devices such as video players, gaming devices, clocks, watches, calculators, and telephones. LHYS40101-R00 ATEQ Corp. Proprietary Information Page 157 / 178... - Page 158 / piezoelectric transducer A device that generates electric current when pressure (or other physical stress) is applied to the device. This type of device is employed on the Hydra Silver to measure air pressure drop during leak testing. transducer A device that converts physical changes (pressure, motion, light, etc) to electricity.
-
Page 159: Appendix B Pressure Measurement Unit Conversion
A unit of pressure measurement defined as 1 Newton per square meter. Named after the French mathematician and inventor Blaise Pascal. Newton (N) The force needed to accelerate one kilogram of mass at the rate of one meter per second per second. LHYS40101-R00 ATEQ Corp. Proprietary Information Page 159 / 178... - Page 160 Hydra Silver APPENDICES Owner/Operator Manual This page intentionally left blank. Page 160 / 178 ATEQ Corp. Proprietary Information LHYS40101-R00...
-
Page 161: Appendix C Circuit Diagram Symbols (Pneumatic And Electrical)
Pneumatic connector (according to option) for the plugging of a supplementary pneumatic supply, used in the event of the test pressure being greater than 8 bar. Ground Connector Connector for the electric connection to the ground. LHYS40101-R00 ATEQ Corp. Proprietary Information Page 161 / 178... - Page 162 Output Connector Connector for a pneumatic output. Input Connector Connector for a pneumatic input. Printer Socket Printer connection socket. Bar Code Reader Socket Bar code reader connection socket. Output Dry contact output. Page 162 / 178 ATEQ Corp. Proprietary Information LHYS40101-R00...
- Page 163 USB flash drive, USB keyboard cable, USB printer cable, other USB device, or to an external computer running Windows. Analog Output Analog output. Analog Input Analogue input for the temperature sensor. LHYS40101-R00 ATEQ Corp. Proprietary Information Page 163 / 178...
- Page 164 Hydra Silver APPENDICES Owner/Operator Manual This page intentionally left blank. Page 164 / 178 ATEQ Corp. Proprietary Information LHYS40101-R00...
-
Page 165: Appendix D Leak Test Module 16-Pin I/O Port Specifications
Appendix D Leak Test Module 16-Pin I/O Port Specifications Use the technical specifications below to connect external devices via this port to one Leak Test Module, and to configure and/or program their use with the Hydra Silver. LHYS40101-R00 ATEQ Corp. Proprietary Information... - Page 166 Hydra Silver APPENDICES Owner/Operator Manual Page 166 / 178 ATEQ Corp. Proprietary Information LHYS40101-R00...
- Page 167 Hydra Silver Owner/Operator Manual APPENDICES LHYS40101-R00 ATEQ Corp. Proprietary Information Page 167 / 178...
- Page 168 Hydra Silver APPENDICES Owner/Operator Manual Page 168 / 178 ATEQ Corp. Proprietary Information LHYS40101-R00...
-
Page 169: Appendix E Leak Test Module Rs-232 Port Specifications
Appendix E Leak Test Module RS-232 Port Specifications Use the technical specifications below to connect external devices via this port to one Leak Test Module, and to configure and/or program their use with the Hydra Silver. This type of hookup is effectively a “null modem cable”. - Page 170 Hydra Silver APPENDICES Owner/Operator Manual This page intentionally left blank. Page 170 / 178 ATEQ Corp. Proprietary Information LHYS40101-R00...
-
Page 171: Appendix Fdiagnostics & Troubleshooting
Test Cycle was able to complete, and the result was a “fail”. Fail2 NOTE: This indicator appears on the WinAteq 300 software’s standard Cycle function set screens, but it is not applicable to the Hydra Silver instrument. Yellow Test Cycle was not able to complete, due to exceeding parameter limits, or due to Leak Test Channel operational failure. -
Page 172: Troubleshooting Error Messages
The following table shows some of the error messages that may display on the Test Cycle Status displays on the “Cycle” screen and other WinAteq 300 software operational screens during Hydra Silver operations, and what usually causes these errors. Table 3: WinAteq 300 Error Messages during Hydra Silver Operations... - Page 173 ATR ERROR ATR fault. Action: check the “ATR” test parameters. DISCONNECTED The link between the Hydra Silver’s Leak Test Module and the onboard computer has been disconnected. Action: shut down, power down, open casing top cover, check connection from Leak Test Module to the onboard computer.
-
Page 174: Long-Term Operational Troubleshooting And Maintenance
If the instrument begins to detect too many bad parts (statistically, more than three consecutively), it is advisable to carry out a check on the entire Hydra Silver unit. The quality of the Hydra Silver instrument’s manufacture and the operational reliability of the Hydra Silver’s Leak Test Modules should be the last problem causes considered. - Page 175 (h) reject level maximum, (i) unit Pa/sec, (j) all functions cancelled. 4. Run two consecutive cycles. The post test time result for the Leak Test Channel should not exceed 4 Pa/sec. LHYS40101-R00 ATEQ Corp. Proprietary Information Page 175 / 178...
-
Page 176: Document Revision History
Manual that you are now reading. Please ensure that this is the latest publication by contacting Customer Service (see back cover) or by visiting our web site: www.atequsa.com Page 176 / 178 ATEQ Corp. Proprietary Information LHYS40101-R00... - Page 177 Back Inside Cover...
- Page 178 Monday 8:00 AM - 5:00 PM Global Web Site: www.ateq.com Tuesday 8:00 AM - 5:00 PM Wednesday 8:00 AM - 5:00 PM Thursday 8:00 AM - 5:00 PM Friday 8:00 AM - 5:00 PM Reference: LHYS40101-R00 ATEQ Corp. Proprietary Information...
Need help?
Do you have a question about the Hydra Silver and is the answer not in the manual?
Questions and answers