
Related Manuals for ATEQ PRIMUS F Series


Summary of Contents for ATEQ PRIMUS F Series
- Page 1 USER MANUAL ATEQ PRIMUS F SERIES F620 / F610 / F670 Version 1.04 (No contractual photos) Reference: RF-28300C-U...
- Page 2 REVISION OF THE PRIMUS F SERIES MANUAL Due to continuing improvements, the information contained in this user manual, the features and design of this device are subject to be changed without prior notice. Date Edition/Revision Reference Chapters updated (week/year) First edition...
- Page 3 Index Preamble / Presentation: Sign (#621) Definition, characteristics and Filtering (#622) measurements principles (#673) Flow level (#624) Front face and interfaces (#676) No negative (#625) Absolute (#626) Installation / Accessories: Display mode function (#627) Pneumatic supply (#677) No dump (#630) Starting up (#678) Buzzer (#639) Fitted Accessories (#682)
- Page 4 Index # 601: Functions management # 681: Test cycle management # 602: Name # 682: Fitted Accessories # 603: Program Sequence # 683: Optional Accessories # 604: Units # 684: Error messages # 605: Automatic connector (option) # 685: ATF # 606: Check test # 686: Cut off # 607: ATR...
- Page 5 Set FILL 600.0 and select the FUNCTIONS menu. Leak UNIT: Test FAIL Ref. FAIL FUNCTIONS More functions… The functions menu is displayed, the validated functions. Enter in the "More functions…" menu. Version 1.04a User guide ATEQ 6th series Page 1/26...
- Page 6 NAME: - - - - - - - - - - More functions… The validated function is now displayed, it remains to be configured. (See sheets corresponding to the functions). Version 1.04a User guide ATEQ 6th series Page 2/26...
- Page 7 Chck+Lrn Cust. Unit ATR Learning > ATR TIME > 0.0 S Cycle Confirm Sd Prt Pass Learn Sd Prt Fail Learn ATR + Custom Learn Check Test Result Volume Comp. Automatique volume Version 1.04a User guide ATEQ 6th series Page 3/26...
- Page 8 > Pts Pa display > No / Yes Rejet Calc > Pa > Pa/s L > ml > mm > Volume Unit > Volume > 0,001 > 9999 Test reject Reference reject Version 1.04a User guide ATEQ 6th series Page 4/26...
- Page 9 > Delete Name Type : burst test Burst test Reset program Coupl. A > 0 to 650 s Coupl. B > 0 to 650 s > Ramp 0 to 650 s Version 1.04a User guide ATEQ 6th series Page 5/26...
- Page 10 Pa pts > PSI > mbar REMP Max REMP Min Consigne REMP SI : cm3 / ml / l > Volume unit SAE : cu in / cu ft Volume pressure Volume Max. Volume Min. Version 1.04a User guide ATEQ 6th series Page 6/26...
- Page 11 > Start > -Fs To +Fs ATR2 Transient > -Fs To +Fs ATR3 % Drift > 0 > 100 Drift 0 > 200 Prefill Type P.Remp Standard Max Prefill Set Prefill Version 1.04a User guide ATEQ 6th series Page 7/26...
- Page 12 Ext. 6 Int. 1 Int. 2 24V outputs > Aux 1 > No / Yes Delay Aux > 0 > 650 s Time Aux1 > 0 > 650 s Aux 2 Version 1.04a User guide ATEQ 6th series Page 8/26...
- Page 13 > Pa > Pts > Psi > Mbar Max Fill Min Fill Set Fill N Tests > Tolerance A > 0 > 100 % Tolerance B > 0 > Tolerance A Version 1.04a User guide ATEQ 6th series Page 9/26...
- Page 14 No / Yes Long beep End of cycle > No / Yes 10 beeps Cut Off > % Cut Off > 0 > 100% > ATF time > 0,1 > 650 S Version 1.04a User guide ATEQ 6th series Page 10/26...
- Page 15 No / Yes Same time for all Delay Ext 0.0 S the programs Time Ext1 0.0 S Ext. 2 Ext. 3 Ext. 4 Ext. 5 Ext. 6 Int. 1 Int. 2 Version 1.04a User guide ATEQ 6th series Page 11/26...
- Page 16 Pass Fail Alarm Pressure Out Buzzer > Pass part > No / Yes Fail part > No / Yes Alarm > No / Yes End of cycle > No / Yes Version 1.04a User guide ATEQ 6th series Page 12/26...
- Page 17 % Drift > 0 > 100 Drift 0 > 200 Prefill Type P.Remp Standard Max Prefill Set Prefill Pre-Fill Pre Dump Instruction Set Prefill Pre-Fill Pre Dump Ballistic Set Prefill Pre-Fill Version 1.04a User guide ATEQ 6th series Page 13/26...
- Page 18 0 > 650 s Aux 2 Aux 3 Aux 4 End Of Cycle > Auto Reset Dump + Reset Fill Time Double Reset Mini-Valve > Diff A-Z > 0 > 650 s Version 1.04a User guide ATEQ 6th series Page 14/26...
- Page 19 No / Yes Long beep End of cycle > No / Yes 10 beeps Cut Off > % Cut Off > 0 > 100% > ATF time > 0,1 > 650 S Version 1.04a User guide ATEQ 6th series Page 15/26...
- Page 20 Pass part > No / Yes 10 beeps Fail part > No / Yes Long beep Alarm > No / Yes Long beep End of cycle > No / Yes 10 beeps Version 1.04a User guide ATEQ 6th series Page 16/26...
- Page 21 Aux 1 > No / Yes Delay Aux > 0 > 650 s Time Aux1 > 0 > 650 s Aux 2 Aux 3 Aux 4 End Of Cycle > Auto Reset Version 1.04a User guide ATEQ 6th series Page 17/26...
- Page 22 Pass part > No / Yes 10 beeps Fail part > No / Yes Long beep Alarm > No / Yes Long beep End of cycle > No / Yes 10 beeps Version 1.04a User guide ATEQ 6th series Page 18/26...
- Page 23 Mode > Continuous Closed only Time Valve Codes Ext. 1 Delay Ext 0.0 S Same time for all the programs Time Ext1 0.0 S Ext. 2 Ext. 3 Ext. 4 Version 1.04a User guide ATEQ 6th series Page 19/26...
- Page 24 Pass part > No / Yes 10 beeps Fail part > No / Yes Long beep Alarm > No / Yes Long beep End of cycle > No / Yes 10 beeps Version 1.04a User guide ATEQ 6th series Page 20/26...
- Page 25 Blow Regulator 1 oo 2 > Max Blow Min Blow Blow Instruction Dump Level Pressure Automatism > > Printer > Print frame > Pressure Prog name Date & Time Lines before Version 1.04a User guide ATEQ 6th series Page 21/26...
- Page 26 Lines before Lines after Inter line Form feed Sending All results Conditions Pass part Test fail Reference fail Alarm Pressure out Reworkable Test check Export > No / Yes Print Parameters Version 1.04a User guide ATEQ 6th series Page 22/26...
- Page 27 In 2 > In 3 > Special Cycles + Sync Test In 4 > In 5 > In 6 > Security > Start Off > No / Yes Password > Unlock Version 1.04a User guide ATEQ 6th series Page 23/26...
- Page 28 Sheet #601u – Functions management Lock Erase Special Cycle Miscellaneous > Smart Key > Menu Special Cycles Special Cycle Available Parameters Program Defined Run Program Last results Version 1.04a User guide ATEQ 6th series Page 24/26...
- Page 29 Out 1 > Out 8 I/O (2) Valves Code (2) Valve counter > Partial Total Partial reset Device Info > Texts Texts version Soft Info Boot Info Settings Info Service Cycles > No / Yes Version 1.04a User guide ATEQ 6th series Page 25/26...
- Page 30 Last Results > lasts results Results reset Statistics > Program Total Pass Test fail Reference fail Reworkable Alarm Print all statistics reset all statistics 1.7. M ENUS Save parameters Restore parameters Version 1.04a User guide ATEQ 6th series Page 26/26...
- Page 31 Copy-Paste Pr:01 BODY Pr:02 LEAK TEST Back to the parameters menu, the program Pr:03 LEAK TEST name appears. Pr:04 ----------------- Pr:05 ----------------- Pr:06 ----------------- Pr:07 ----------------- Version 1.04a User guide ATEQ 6th series Page 1/2...
- Page 32 0.0 s Press. UNIT: bar Max FILL 0.000 Delete name The name and program deletion menu is Reset program displayed. Note: if the program is deleted, the program name is deleted too. Version 1.04a User guide ATEQ 6th series Page 2/2...
- Page 33 ALARM: chains if an alarm is triggered. PRESSURE OUT OF LIMIT: Chains if the pressure is out of the pressure limits. REWORKABLE: chains if reworkable is valid. CALIBRATION: volume calibration check pass or fail. Version 1.04a User guide ATEQ 6th series Page 1/2...
- Page 34 When an active program is sequenced with Pr:02 LEAK TEST Pr:03 LEAK TEST another program, a "+" is displayed next to the Pr:04 ----------------- program number. Pr:05 ----------------- Pr:06 ----------------- Pr:07 ----------------- Version 1.04a User guide ATEQ 6th series Page 2/2...
- Page 35 More functions… special cycle is necessary for this operation (see the special cycle’s sheet). The activation of this unit gives access to another special cycle for checking. Then validate by pressing Version 1.04a User guide ATEQ 6th series Page 1/4...
- Page 36 "Drift Unit": tolerance limit for the calibration NAME: TRIAL drift. Checked using the "CAL Check" special cycle. If this value is exceeded, an alarm is triggered (default value: 20%). "NAME": Naming of the unit. Version 1.04a User guide ATEQ 6th series Page 2/4...
- Page 37 Press the Pr 001 "START CYCLE" key. LEAK TEST 600.0 3.33 mbar TRIAL At the end of the special cycle, the result must 3.00 be pass (OK). TRIAL Pr 01 READY Version 1.04a User guide ATEQ 6th series Page 3/4...
- Page 38 Press the Pr 001 "START CYCLE" key. LEAK TEST 600.0 3.33 mbar TRIAL At the end of the special cycle, the result must 3.00 be pass (OK). TRIAL Pr 01 READY Version 1.04a User guide ATEQ 6th series Page 4/4...
- Page 39 By using the arrows, select "Yes" and validate with the key. COUPL. A 0.0 s COUPL. B 0.0 s Enter the values for the associated parameters: "COUPLING A" and "COUPLING B". Version 1.04a User guide ATEQ 6th series Page 1/1...
- Page 40 More functions… By using the arrows, select "Yes" and validate with the key. Measure - 0.1 Max value : 50.0 % Drift : 20 CheckTime : 5.0 s Enter the parameters values. Version 1.04a User guide ATEQ 6th series Page 1/3...
- Page 41 It's possible to check the recorded parameters Max value : 100.0 by the special cycle by pressing the % Drift : 20 CheckTime : 5.0 s .key just after the special cycle end. Version 1.04a User guide ATEQ 6th series Page 2/3...
- Page 42 Sheet #606u – Calibration check function 0.300 ALARM cm3/mn In case of wrong calibration, an alarm is TEST CHECK DEFAULT triggered. CHECK = 2.5 Pa READY Version 1.04a User guide ATEQ 6th series Page 3/3...
- Page 43 Drift (Drift tolerance on acquisition of the transient, as a % of the Reject level). The “start” value is saved and subtracted from the final result of the tests. Version 1.04a User guide ATEQ 6th series Page 1/6...
- Page 44 It is this transient which will be subtracted from the leak measurement of the following cycles. Through the use of the ATR, the ATEQ instrument is able to differentiate a Pass part from a Fail part without being influenced by the transient effects whilst keeping a short stabilization time.
- Page 45 It is therefore necessary to track its evolution. To avoid having to carry out learning cycles too often, the ATEQ instrument saves the last ten values of parts considered as very good (result close to 0) and recalculates the transient using the average value.
- Page 46 ATR function by program. ATR0 : Yes More functions… By using the arrows, select " Yes " and validate with the key. Start Transient % Drift The parameters are displayed, enter the DRIFT values. Version 1.04a User guide ATEQ 6th series Page 4/6...
- Page 47 FILL / STABILIZATION / TEST et CHECK TEST 1.4 s 600.0 mbar At the end of the special cycle, the result must be pass ( OK ). READY Version 1.04a User guide ATEQ 6th series Page 5/6...
- Page 48 1.4 s ALARM mbar If theATR special cycle is not carried out Do Learning Cycle before, the alarm message " Do Learning Cycle ATR " is triggered. READY Version 1.04a User guide ATEQ 6th series Page 6/6...
- Page 49 When the pressure reaches the instruction the device runs the following step else it still filling until the end of the pre-fill time. Associated parameters to set: Set Pre-Fill (instruction/target value), Pre-FILL (pre-fill time), Pre-DUMP (pre-dump time). Version 1.04a User guide ATEQ 6th series Page 1/4...
- Page 50 PRE-DUMP (pre-dump time). 1.5. P FILL REGULATOR This function applies when two regulators are installed in the instrument allowing the choice of which regulator is to be used for pre-fill (1 or 2). Version 1.04a User guide ATEQ 6th series Page 2/4...
- Page 51 Set FILL (fill pressure instruction). TIME ADJ (extra time for correction). 3. FILL REGULATOR This function provides a choice of which of two regulators to use for the fill (1 or 2). Version 1.04a User guide ATEQ 6th series Page 3/4...
- Page 52 RAMP modes, you have to inform the PRE-FILL 0.0 s PRE DUMP : 0.0 s following parameters: Max PreFIL and Set PreFILL, PRE-FILL and PRE-DUMP times as it displayed. Use the same process for the fill mode. Version 1.04a User guide ATEQ 6th series Page 4/4...
- Page 53 Activate the function or check if it checked. More functions… Press the key, the cursor slide to the right hand. VALVES CODES : Yes More functions… By using the arrows, select "Yes" and validate with the key. Version 1.04a User guide ATEQ 6th series Page 1/4...
- Page 54 OUTPUTS CONFIG./ VALVE C. Ext. CYCLING Int. CYCLING Int. CYCLING CYCLING: the output is activated during the test cycle. CONTINUOUS: the output is continuously activated. PROGRAMMED: the output is activated during a programmed time. Version 1.04a User guide ATEQ 6th series Page 2/4...
- Page 55 By using the arrows, select "Yes" and validate with the key. The validation menu of each output, external and internal is displayed. Activate one or both auxiliary output by validate with "Yes". Version 1.04a User guide ATEQ 6th series Page 3/4...
- Page 56 CONTINUOUS: the output is continuously activated. PROGRAMMED: the output is activated during a programmed time. Note: some auxiliaries outputs can not be available and are attributed for others functions, example: automatic connector, stamping etc. Version 1.04a User guide ATEQ 6th series Page 4/4...
- Page 57 1. RELAY SEQUENCING RELATED TO DIFFERENT END OF CYCLE In order to interface the ATEQ with its environment (PLC, PC …), the following timing charts supply the details of the sequencing of the electrical outputs (relay board on the J3 connector) and pneumatic outputs (automatic connectors), depending on the commands entered on the front panel or through the J3 connector (START, RESET).
- Page 58 This selection can only be modified during the inter cycle period. To return to program 1, when a cycle is not in progress, press any program selection inputs. Version 1.04a User guide ATEQ 6th series Page 2/7...
- Page 59 This selection can only be modified during the inter cycle period. To return to program 1, when a cycle is not in progress, press any program selection inputs. Version 1.04a User guide ATEQ 6th series Page 3/7...
- Page 60 This selection can only be modified during the inter cycle period. To return to program 1, when a cycle is not in progress, press any program selection inputs. Version 1.04a User guide ATEQ 6th series Page 4/7...
- Page 61 PRESSURE t mini START t mini Reset program t mini number Active automatic B time Connector A Inactive Active automatic B time Connector B Inactive Fail part End of cycle Version 1.04a User guide ATEQ 6th series Page 5/7...
- Page 62 The active program is the one selected before starting up. It remains active even if the program inputs on the connector are no longer activated. This selection can only be modified during the inter cycle period. Version 1.04a User guide ATEQ 6th series Page 6/7...
- Page 63 By using the arrows, select "Yes" and validate with the key. AUTO RESET DUMP + RESET FILL TIME Then select the end of cycle mode you want DERIVE (validate with "Yes"). Version 1.04a User guide ATEQ 6th series Page 7/7...
- Page 64 ) and has a base time of 0.01s instead of 0.1 s. The programming of an ATEQ with a mini valve is identical to the programming of the standard ATEQ. Parameter to be set is: A-Z Diff (differential Auto Zero). This time can be reduced as long as the obtained values are stable and repeatable.
- Page 65 Activate the function or check if it checked. More functions… Press the key, the cursor slide to the right hand. REWORK LIMIT : Yes More functions… By using the arrows, select "Yes" and validate with the key. Version 1.04a User guide ATEQ 6th series Page 1/2...
- Page 66 Remind: if the Reference value is set to 0, it assumes the same value as the Test with the opposite sign. 100.0 REWORKABLE mbar When the part is "Reworkable", the display is like the following one. READY Version 1.04a User guide ATEQ 6th series Page 2/2...
- Page 67 Pressure If the part is leaking, the final volume will be LARGE LEAK greater so the final pressure will be lower. Internal fill Transfer Time volume V1 for the ATEQ instrument Version 1.04a User guide ATEQ 6th series Page 1/8...
- Page 68 Sheet #613u – Sealed components Test modes The ATEQ dedicated for sealed components can carry out the following tests: 1. large leak test only, 2. large leak test followed by a finer leak test at a smaller pressure. These two modes can be programmed from the instrument's front panel and are called:...
- Page 69 Learning cycles for pass parts and parts with a large leak are accessed through the main menu under special cycles. Test cycles cannot be carried out unless learning cycles have previously been carried out. Version 1.04a User guide ATEQ 6th series Page 3/8...
- Page 70 2.2. S EALED COMPONENTS Reverses quick sealed components. 1) Filling of the test part. F5 valve 2) Transfer of the test part to the volume. FILL TEST DUMP Pressurization AUX1 Volume Version 1.04a User guide ATEQ 6th series Page 4/8...
- Page 71 2) Insulation of the test part. TEST 3) Dumping of the volume and the pressurization volume. 4) Stop dump (volumes). 5) Transfer from the test part to the volumes. DUMP Pressurization AUX1 Volume Version 1.04a User guide ATEQ 6th series Page 5/8...
- Page 72 " Transfer time " that you have to inform (the FILL TIME 1.0 s STAB TIME : 2.0 s transfer parameter can't be less than 0.5s). TEST TIME : 1.5 s DUMP TIME : 0.5 s Version 1.04a User guide ATEQ 6th series Page 6/8...
- Page 73 The learning cycle is running with the following steps: VOLUME FILL , VOLUME TRANSFERT and TEST . Pr 01 1.4 s 100.0 mbar The final result must be Pass ( OK ). Pr 01 0.0 s Version 1.04a User guide ATEQ 6th series Page 7/8...
- Page 74 ALARM mbar If the sealed part special cycle is no carried Do Learning Cycle out before, the alarm message SEALED PART " Do Learning Cycle " is displayed. Pr 01 READY Version 1.04a User guide ATEQ 6th series Page 8/8...
- Page 75 This function cannot be enabled in addition to the following functions: ATR; Operator Test; Burst Test; Temperature Correction; Blockage Test). During the CAL learning cycle CAL, this function is not activated. Version 1.04a User guide ATEQ 6th series Page 1/2...
- Page 76 By using the arrows, select "Yes" and validate with the key. Tolerance A 000 % Tolerance B 000 % Adjust the tolerances values A and B as a percent of the reject value. Version 1.04a User guide ATEQ 6th series Page 2/2...
- Page 77 : Pa This parameter is also available in the Volume UNIT : cm3 VOLUME 14.91 program parameters under the name Ref. VOL. 15.00 "Ref. VOL.". Test FAIL 0.298 Ref. FAIL 0.000 FUNCTION Version 1.04a User guide ATEQ 6th series Page 1/1...
- Page 78 TEST FAIL = bad part on the test, ALARM : No PRESSURE OUT : No REF FAIL = bad part on the reference, ALARM = alarm triggered, P OUT OF LIMITS = pressure error. Version 1.04a User guide ATEQ 6th series Page 1/1...
- Page 79 TEMP.CORR. 1 : Yes More functions… By using the arrows, select "Yes" and validate with the key. CORRECTION : 100 % TEST TIME : 0.0 s OFFSET Then adjust the parameters. Version 1.00a User guide ATEQ 6th series Page 1/1...
- Page 80 Activate the function or check if it checked. More functions… Press the key, the cursor slide to the right hand. PEAK HOLD : Yes More functions… By using the arrows, select "Yes" and validate with the key. Version 1.04a User guide ATEQ 6th series Page 1/1...
- Page 81 "Yes" and validate with the key. The "Sign" function when validated, changes the leak value sign. Example: if the result is -004 Pa, the display will be 004 Pa and vice versa. Version 1.04a User guide ATEQ 6th series Page 1/1...
- Page 82 More functions… By using the arrows, select "Yes" and validate with the key. FILTER 2.0 s Adjust the Filter (time) parameter. FILTER time: maximum duration of the averaging of the measured result. Version 1.04a User guide ATEQ 6th series Page 1/1...
- Page 83 PRESS = 600 mbar the stop is automatic. SET PRESS LIMITS? For others special cycles, see the sheet corresponding to the function. REGULATOR ADJ Pr 001 The screen display the current program. LEAK TEST Version 1.04a User guide ATEQ 6th series Page 1/2...
- Page 84 This should be performed after each start-up of the instrument, or after a long period with no test cycles. Cycle to estimate the volume of the test circuit. Flow units Volume compute: only. Version 1.04a User guide ATEQ 6th series Page 2/2...
- Page 85 Then the "Min Fail" parameter appears. Max FIL Min FILL Set FILL LeakUnit : Max FAIL Min FAIL As the "Flow Level" function is activated, the FUNCTIONS "Reference Fail" parameter disappears. Version 1.04a User guide ATEQ 6th series Page 1/1...
- Page 86 The "No Negative" function, when validated, displays the value 0 is the result is negative. Example : if the measurement result is -014 Pa, then the display will be 000 Pa. Version 1.04a User guide ATEQ 6th series Page 1/1...
- Page 87 "Yes" and validate with the key. The "Absolute" function, when validated, displays the absolute value of the result. Example : if the measurement result is -014 Pa, then the display will be 014 Pa. Version 1.04a User guide ATEQ 6th series Page 1/1...
- Page 88 "Yes" and validate with the key. Select the preferred format. MODE AF: XX.XX STANDARD + de fonctions… XXXX XXX.X XX.XX X.XXX In the "Standard" mode, the instrument displays the result with the most optimized format. Version 1.04a User guide ATEQ 6th series Page 1/1...
- Page 89 Important information! If the function is cancelled or deleted, the dump parameter in the program will have the value 0 (zero). It will be the set with the new value Version 1.04a Guide d’utilisation ATEQ Série 5000 Page 1/1...
- Page 90 To run a special cycle, select it in the Special Cycles menu, then press the button. To stop it, press the button. In some cycles the stop is automatic. Version 1.04a User guide ATEQ 6th series Page 1/5...
- Page 91 The service special cycles appears in this AUTO TEST Regulator adjust menu. Infinite Fill Select the service special cycle you want and Piezo auto zero press the "START CYCLE" to run. Version 1.04a User guide ATEQ 6th series Page 2/5...
- Page 92 LEAK TEST The device carries out an infinite fill and displays the current pressure. FILL 600.0 The sensor calibration is possible. Stop the special cycle by pressing the RESET key. mbar Version 1.04a User guide ATEQ 6th series Page 3/5...
- Page 93 The device carries out a dump, checks if the pressure is 0 then carries out a test and TEST displays the measured pressure. The verification of the sensor can start. Stop the special cycle by pressing the RESET Version 1.04a User guide ATEQ 6th series Page 4/5...
- Page 94 The cycle stops automatically, if the valve is functioning properly, the instrument displays 600.0 "TEST = PASS". mbar If the valve is leaking or with a fault, the AUTO-TEST following message appears: LEAK FAULT READY TEST = FAIL Version 1.04a User guide ATEQ 6th series Page 5/5...
- Page 95 "Date & Time" menu and validate with the key. YEAR 2013 Then by using the arrows, MONTH HOUR select the date and time parameter to MINUTE SECOND configure and validate with the key. Version 1.04a User guide ATEQ 6th series Page 1/1...
- Page 96 USB: save of the results file in a memory USB key connected to the device (USB port). In the "USB" mode, if no USB memory key is connected to the device; all the results will be lost. Version 1.04a User guide ATEQ 6th series Page 1/1...
- Page 97 Select "Yes" and then validate with the key. Note: Several options can be checked. Uncheck all options if you do not want the buzzer to sound. Version 1.04a User guide ATEQ 6th series Page 1/1...
- Page 98 English By using the arrows, select French the language you want and validate with the key. LANGUAGE : French PNEUMATIQUE AUTOMATISME The menus are displayed with the selected SECURITE language. DIVERS Version 1.04a User guide ATEQ 6th series Page 1/1...
- Page 99 ELEC. REG: none REGUL. CTRL. AUTO PERM. REG. PIEZO AUTO AZ : Then validate with the key. AZ SHORT Press UNIT BLOW MODE DUMP LEVEL Version 1.04a User guide ATEQ 6th series Page 1/1...
- Page 100 When the instrument is configured on AUTO it constantly attempts to resume operation. A prolonged operation of the regulator in this mode and without compressed air could cause heating up and premature wear. ATEQ strongly suggests leaving the setting to External except in particular circumstances. 1. PROCEDURE...
- Page 101 AUTO: constantly attempts resuming regulator REGUL. CTRL. AUTO PERM. REG. linearization. PIEZO AUTO AZ : AZ SHORT External: Await a reset to resume (factory Press UNIT setting). BLOW MODE DUMP LEVEL Version 1.04a User guide ATEQ 6th series Page 2/2...
- Page 102 ELEC. REG: 10000 hPa REGUL. CTRL. AUTO By using the arrows, select PERM. REG. PIEZO AUTO AZ : AZ SHORT Press UNIT "Yes" and validate with the key. BLOW MODE DUMP LEVEL Version 1.04a User guide ATEQ 6th series Page 1/1...
- Page 103 "Yes" and validate with the key. BLOW MODE DUMP LEVEL N. OF MINUTES N. OF CYCLES Then select the counter you want: "N. OF MINUTES" or "N. OF CYCLES" and configure the value. Version 1.04a User guide ATEQ 6th series Page 1/2...
- Page 104 Sheet #648u – Piezo auto zero ELEC. REG: 10000 hPa REGUL. CTRL. AUTO PERM. REG. PIEZO AUTO AZ : Then validate with the key. AZ SHORT Press UNIT BLOW MODE DUMP LEVEL Version 1.04a User guide ATEQ 6th series Page 2/2...
- Page 105 PERM. REG. PIEZO AUTO AZ : AZ SHORT Press UNIT "Yes" and validate with the key. BLOW MODE DUMP LEVEL AZ SHORT 0.2 s Then configure the AZ short time. Version 1.04a User guide ATEQ 6th series Page 1/2...
- Page 106 Sheet #649u – Auto zero short ELEC. REG: 10000 hPa REGUL. CTRL. AUTO PERM. REG. PIEZO AUTO AZ : Then validate by pressing the key. AZ SHORT Press UNIT BLOW MODE DUMP LEVEL Version 1.04a User guide ATEQ 6th series Page 2/2...
- Page 107 PERM. REG. PIEZO AUTO AZ : AZ SHORT Press UNIT "Yes" and validate with the key. BLOW MODE DUMP LEVEL PRESSURE 0.000 Then configure the minimum dump level pressure. Version 1.04a User guide ATEQ 6th series Page 1/1...
- Page 108 When the option is activated, the RS232 broadcast the test results after each cycle. Modbus: Configure the Modbus link (option) if installed. The frames parameters, RS parameters (speed, serial port) have to be set. Version 1.00a User guide ATEQ 6th series Page 1/8...
- Page 109 R FAIL ALARM R. FAIL (nb of fail reference parts), PRESSURE OUT REWORKABLE ALARM (nb of alarm triggered), CALIBRATION PRESS OUT (nb of incorrect pressure), REWORKABLE (nb of recoverable parts), CALIBRATION. Version 1.00a User guide ATEQ 6th series Page 2/8...
- Page 110 Frames for BLOCKAGE test: <03>:P MODE Pass part frame P mode: <03>:02/05/2013 15:17:13 <03>: 0.199 bar:(OK): 0.199 bar <03>:P MODE Fail part frame P mode: <03>:02/05/2013 15:20:07 <03>: 0.110 bar:(TD): 0.110 bar Version 1.00a User guide ATEQ 6th series Page 3/8...
- Page 111 <03>:08/08/2013 08:44:58 <03>: 0.037 bar:(TD): 780.1 cm3 <03>:VOL <03>:08/08/2013 08:46:41 <03>: 0.037 bar:(RD): 780.1 cm3 <03>:VOL Alarm frame: <03>:08/08/2013 08:52:59 <03>: 0.551 bar:(AL):PRESSURE HIGH <03>:VOL <03>:09/08/2013 12:00:41 <03>: 0.600 bar:(AL):PRESSURE LOW Version 1.00a User guide ATEQ 6th series Page 4/8...
- Page 112 Burst frame = OK : <06>:14/02/2014 10:46:57 <06>: 0.488 bar:(OK):BURST <06>:14/02/2014 10:45:39 <06>: 0.603 bar:(TD): Toutes les trames sont exploitées en connectant un micro ordinateur sur la ligne RS232 de l'appareil. Version 1.00a User guide ATEQ 6th series Page 5/8...
- Page 113 6D 62 20 30 55 52 45 20 4C 31 2F 32 30 30 32 3A 090D 53 54 4C 29 61 72 2E 34 4F 57 30 36 31 36 Version 1.00a User guide ATEQ 6th series Page 6/8...
- Page 114 8) Alarm Message. 3) Test result message. 8') Bar Code (option: depends of the device version). 4) Numerical Test Value. 9) Date. 5) Test unit. 10) Time. 6) Numerical pressure value. Version 1.00a User guide ATEQ 6th series Page 7/8...
- Page 115 Set FILL : 500.0 Max FILL : 960.0 Test FAIL : 100 Min FILL : 600.0 Ref. FAIL : 000 Set FILL : 800.0 Test FAIL : 000 Ref. FAIL : 000 Version 1.00a User guide ATEQ 6th series Page 8/8...
- Page 116 PASSWORD : UNLOCK password and set it. START OFF Follow instructions gives by the device. Note: in case of PASSWORD mode choice, the parameters access with an USB stick (see above) runs too. Version 1.04a User guide ATEQ 6th series Page 1/2...
- Page 117 For the "START OFF" menu, by using the arrows, select the "START OFF" menu and validate with the ACCESS NONE START OFF key. By using the arrows, select "Yes" and validate with the key. Version 1.04a User guide ATEQ 6th series Page 2/2...
- Page 118 CYCLING By using the arrows, select AUX 2 CYCLING AUX 3 CYCLING AUX 4 CYCLING the input to change and the outputs mode and OUTPUT : STANDARD validate with the key. Version 1.04a User guide ATEQ 6th series Page 1/4...
- Page 119 For the outputs connecting, see the sheets "Electrics connectors", 692/1 for the F610, 692/2 for the F620 and 692/7 for the F670. Do the same for the others outputs codes. Version 1.04a User guide ATEQ 6th series Page 2/4...
- Page 120 These functions are all the special cycles available in the instrument. 6 additional inputs are available on the "Outputs codes" board. These inputs are the same as the board shows above, only the program selection is not available. Version 1.04a User guide ATEQ 6th series Page 3/4...
- Page 121 Piezo auto zero VOL AUTO with the key. SYNC. TEST Do the same for the others inputs codes. Note: the program selection is not possible with the valves codes. Version 1.04a User guide ATEQ 6th series Page 4/4...
- Page 122 This option activates the pilot of an external dump valve (such as ATEQ leak tight 3/2 valve). This option requires an external electrical or pneumatic pilot (contact ATEQ to add the option).
- Page 123 Date & Time OUTPUTS CONFIG. select the "INPUTS CONFIG" menu and INPUTS CONFIG. validate with the key. By using the arrows, select VALVES CODES the I/O menu and validate with the key. Version 1.04a User guide ATEQ 6th series Page 1/2...
- Page 124 By using the arrows, select Regul. 2 adjust Regul. 1 adjust Infinite Fill the function to assign to the input and validate Piezo auto zero VOL AUTO with the key. SYNC. TEST Version 1.04a User guide ATEQ 6th series Page 2/2...
- Page 125 This Partial Reset counter can be reset by the user Total: total number of cycles the valve has performed. This counter is managed by ATEQ Company; it is reset once a complete service is carried out on the valves. Partial...
- Page 126 DAC REG1 : 00 DAC REG2 : 00 This is an instruction sent to the electronic DAC PRESS : 00 DAC DIFF : 00 regulators. DAC PRESS and DAC DIFF: Version 1.04a User guide ATEQ 6th series Page 1/2...
- Page 127 :EXT 2 arrows select the output to OUT3 :EXT 3 OUT4 :EXT 4 OUT5 :EXT 5 OUT6 :EXT 6 activate and then press the key. OUT7 :INT 1 OUT8 :INT 2 Version 1.04a User guide ATEQ 6th series Page 2/2...
-
Page 128: System Information
Boot Infos: this menu displays the version of the boot software of each components. LEAK PRESSURE PRESSURE 2 : ABSENT Settings Infos: this menu display the PATM/TEMP : ABSENT components built in the device. LINE PRESS Version 1.04a User guide ATEQ 6th series Page 1/2... - Page 129 ATEQ Company services. The calibration dates are displayed to inform the customer. We strongly recommend to send the instrument back to ATEQ once a year for re-calibration Version 1.04a User guide ATEQ 6th series Page 2/2...
- Page 130 The device confirms the deletion of all the RESET IN PROGRESS… parameters of the programs. Copy-Paste Pr:01 ----------------- Pr:02 ----------------- Pr:03 ----------------- The programs are empty. Pr:04 ----------------- Pr:05 ----------------- Pr:06 ----------------- Pr:07 ----------------- Version 1.04a User guide ATEQ 6th series Page 1/1...
- Page 131 - 100 kPa to + 400 kPa. 50 kPa to 900 kPa. 20 kPa to 200 kPa. - 100 kPa to + 1000 kPa. For other pressure ranges please contact ATEQ. Version 1.04a User guide ATEQ 6th series Page 1/7...
- Page 132 Indirect measurement, Sealed component measurement. These three principles concern measurements carried out under pressure and under vacuum. The configuration is determined by the application, and must be determined before ordering the instrument. Version 1.04a User guide ATEQ 6th series Page 2/7...
- Page 133 The first and the third measurements may be carried out in comparison with a reference, without reference or in central zero. Three kinds of sealed components are available, see sheet #613. Version 1.04a User guide ATEQ 6th series Page 3/7...
- Page 134 TEST PART the ambient temperature. The central zero tests offer a considerable time gain (two parts tested simultaneously). Version 1.04a User guide ATEQ 6th series Page 4/7...
- Page 135 Pressurization of the test and reference parts. At the end of the fill time, Fill time the ATEQ instrument checks the test pressure against the pressure thresholds. If this is not correct, it will signal a test pressure fault. The test and reference parts are completely cut off from the air supply, but are pressurized to the test pressure.
- Page 136 This type of test means that the operator can carry out operations on the part while under test, then to confirm this operation using a "START" key if the operator test is good, or "RESET" key if the test is fail. Version 1.04a User guide ATEQ 6th series Page 6/7...
- Page 137 P1 V1 = P2 (V1 + V2) with V1 internal volume V2 test part volume The internal known volume must be configured in the program parameters. Version 1.04a User guide ATEQ 6th series Page 7/7...
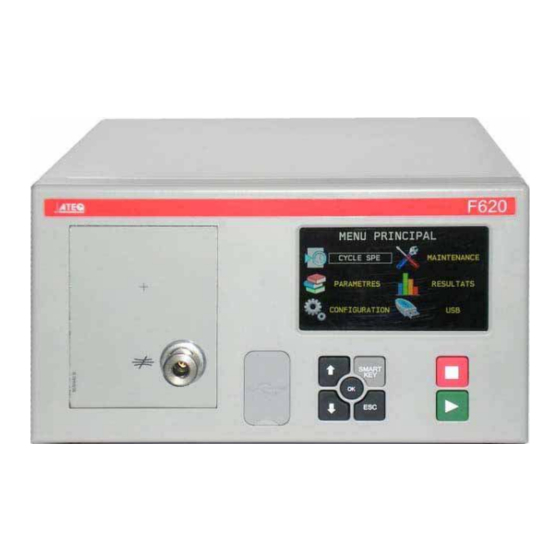
- Page 138 Sheet # 676f – Front panel and interfaces FRONT PANEL AND INTERFACES 1. APPEARANCE OF THE ATEQ FRONT PANEL Display Cycle keys Quick disconnect (option) Navigation keys connector Version 1.04a User guide ATEQ 6th series Page 1/3...
- Page 139 Programmable key by the user's preferences. The functions to assign are: Special cycle menu; Special cycle; Parameters; Program defined; Run program; Last results. See sheet #688 "Smart Key". Version 1.04a User guide ATEQ 6th series Page 2/3...
- Page 140 ATEQ Leak/Flow Calibrator (CDF). As this connector is part of the measurement circuit, all its connections must be air tight. Version 1.04a User guide ATEQ 6th series Page 3/3...
- Page 141 For this purpose we strongly recommend that a suitable airtight filter is installed between the test part and the instrument. This filter can be supplied by ATEQ. The presence of impurities, oil or humidity in the air may cause deterioration which will not be covered by the warranty.
- Page 142 I : ON / O : OFF. For North America, the standard way to power the instrument is to supply 24V to pin 2 or 4 and ground pin 16 of the J3 connector. Version 1.04a User guide ATEQ 6th series Page 1/4...
- Page 143 Please, wait… ATEQ F6 Displays program version Version 01.00 measurement characteristics. -1000 -> 1000 mbar Note: The information given above may vary against the characteristics of the device. Diff Range 500 Pa Version 1.04a User guide ATEQ 6th series Page 2/4...
- Page 144 Remaining time program of the current phase Measurement Test result unit value Green light: Red light: Flashing Red light: Green and red lights: Pass part. Fail Part Alarm Reworkable Part Version 1.04a User guide ATEQ 6th series Page 3/4...
- Page 145 Test in desensitized mode BLOCKAGE DESENSITIZED TEST (DESENSITIZED TEST). OPERATOR Operator test (OPERATOR). . Burst test (BURTS TEST). Volume measurement (VOLUME). For the different tests types, see the sheet #673: "Definition, characteristics measurement principles". Version 1.04a User guide ATEQ 6th series Page 4/4...
- Page 146 DESENSIB. (DESENSIB), OPERATEUR ECLATEMENT test opérateur (OPERATEUR), VOLUME test d'éclatement (ECLATEMENT), mesure de volume (VOLUME). Pour les différents types de tests, voir la fiche #673 : "Définitions, caractéristiques principes de mesures". Version 1.04a Guide d’utilisation ATEQ Série 6 Page 5/5...
- Page 147 Pr 004 key to decrease the program LEAK TEST number. If the selected program is not created, the Pr 009 message "ERROR" is displayed. ERROR Version 1.04a User guide ATEQ 6th series Page 1/1...
- Page 148 If the program is empty, the device will ask the LEAK TEST test type to apply, select it with the BLOCKAGE DESENSITIZED TEST keys. OPERATOR Note: This menu may change following the device options. Version 1.04a User guide ATEQ 6th series Page 1/9...
- Page 149 Do the same process for all the others parameters. Note: the parameters adjust access is only with the USB stick access permission with a lock code "Password" (the padlock may not appear in the bottom bar). Version 1.04a User guide ATEQ 6th series Page 2/9...
- Page 150 If the instrument switches to test too early, the instrument will indicate the presence of a large leak. Version 1.04a User guide ATEQ 6th series Page 3/9...
- Page 151 This function is used to set a maximum limit for the fill pressure. A warning is triggered if this limit is exceeded. When test time is infinite, the maximum fill isn’t monitored. Care should therefore be taken to avoid excess pressure being applied to the part during the test. Version 1.04a User guide ATEQ 6th series Page 4/9...
- Page 152 (for example: if the test reject is 10 Pa, and the reference reject value equal to zero, the program internally set the reference reject to be – 10 Pa). The opposite is not true. Version 1.04a User guide ATEQ 6th series Page 5/9...
- Page 153 Adjust the program number to copy in the COPY : 001 PASTE : ---------- "COPY" line with the keys and then validate with the key (here program number 1). Version 1.04a User guide ATEQ 6th series Page 6/9...
- Page 154 2. In Pr:03 ----------------- this example the program number 2 is an Pr:04 ----------------- Pr:05 ----------------- exact copy of program number 1. Pr:06 ----------------- Pr:07 ----------------- Version 1.04a User guide ATEQ 6th series Page 7/9...
- Page 155 Caution! The program or program name deletion are instantaneous without prior notice. Note: if the "Program" deletion operation is done first, then the "Program name" deletion is done too. Version 1.04a User guide ATEQ 6th series Page 8/9...
- Page 156 Absolute, see sheet #626, Synchro test, see sheet #656, By-pass, see sheet #691, Dislpay Mode, see sheet #627, Buzzer, see sheet #639. Cut Off, see sheet #686, ATF, see sheet #685. Version 1.04a User guide ATEQ 6th series Page 9/9...
- Page 157 : TEST mbar COUPLING, FILL, STABILIZATION, TEST, Pr 01 1.4 s DUMP. 600.0 mbar At the end of the cycle the result is displayed. Result with a Pass part: READY Version 1.04a User guide ATEQ 6th series Page 1/2...
- Page 158 TOPPING A CYCLE Press the RESET key to stop the measurement cycle. The display “READY” Pr 001 indicates that the instrument is ready to perform a new measurement cycle. LEAK TEST Version 1.04a User guide ATEQ 6th series Page 2/2...
- Page 159 The instrument is used sampling laboratory setting: power the instrument with a power cord (instrument with built in power supply). I : ON / O : OFF. The wire is fitted with the device. Version 1.04a User guide ATEQ 6th series Page 1/1...
-
Page 160: Optional Accessories
- 20 kPa (-200 mbar) - 50 kPa 11,3 (-500 mbar) - 75 kPa 14,5 (-750 mbar) - 85 kPa 10,6 15,4 1032 (-850 mbar) - 95 kPa 11,3 15,9 (-950 mbar) Version 1.04a User guide ATEQ 6th series Page 1/6... - Page 161 To check that the leak has not been plugged, attach a piece of flexible tubing to the leak and submerge its extremity in the water to look for bubbles. This test should be performed using a pressure instrument only not vacuum ATEQ instrument. Version 1.04a...
- Page 162 Excel spreadsheet. The CDF60 is fully traceable to international standards and every unit has been calibrated in ATEQ’s state of the art calibration facility and is delivered with a calibration certificate. Version 1.04a User guide ATEQ 6th series Page 3/6...
- Page 163 Sheet #683u –Optional Accessories 3.2. CDF (L FLOW CALIBRATOR The ATEQ leak/Flow calibrator is a multiple range flow meter intended for checking leak testing equipment and particularly ATEQ instruments. 3.3. N EEDLE VALVE Needle valves are used to verify the leakage limits. These valves have an adjustable leak and depending on the model allow adjustments of between a few cm3/h to several l/min.
- Page 164 Sheet #683u –Optional Accessories 5. QUICK CONNECTORS WITH EXPANDABLE JOINTS ATEQ quick connectors designed to be used manually or integrated into the leak tester’s fixture. They connect the leak tester to your part reliably and assure leak tightness. Several connectors may be connected to the same manifold, piloted by an ATEQ, a PLC or manually.
- Page 165 Sheet #683u –Optional Accessories 6. REMOTE CONTROLS The remote control allows remote control and selection of various settings for ATEQ instruments. This remote control is connected to the instrument’s relay board. 6.1. R ESET TART REMOTE Télémécanique 6.2. F FUNCTION...
-
Page 166: Error Messages
Sheet #684u – Error messages ERROR MESSAGES The ATEQ instrument can display error messages if there are operational problems. 1. COMMUNICATION ERRORS At starting of the device, the normal message appears: Check system. Check system. Please, wait… Please, wait… If a detection error of one of the component... - Page 167 Action: decrease the target pressure inside the program or the mechanical regulator (if equipped). Differential transducer error. SENSOR ERROR Action: contact ATEQ service department for repair (probably water or oil in the instrument's test circuit). Pressure in excess of the maximum threshold. PRESSURE TOO HIGH Action: check regulator settings, pressure limits, check whether the right regulator has been selected if there are two.
- Page 168 Sealed component large leak fault. Action: Ensure that there is no leak in the pneumatic test VOLUME > circuit between the ATEQ instrument and the test part (e.g. cut tubing, torn or other cause) and also check that the chamber is airtight.
- Page 169 : Yes More functions… By using the arrows, select "Yes" and validate with the key. ATF TIME 2.0 s Then adjust the “ATF TIME” to enter the absorb time parameter. Version 1.04a User guide ATEQ 5000 series Page 1/1...
- Page 170 By using the arrows, select "Yes" and validate with the key. % CUT OFF Then adjust the “% CUT OFF” parameter that all the measurements under this percent value will be displayed 0. Version 1.04a Guide d’utilisation ATEQ Série 6 Page 1/1...
- Page 171 TEST TIME : 2.0 s DUMP TIME : 0.8 s Press. UNIT: mbar "Leak Unit" parameter and validate with the Max FILL 750.0 Min FILL 450.0 key. Set FILL 600.0 LeakUnit : Version 1.04a User guide ATEQ 6th series Page 1/3...
- Page 172 Ref. FAIL 0.000 FUNCTIONS 600.0 0.450 mbar cm3/mn 1) Start a first cycle with a known pass part 0.186 and take note of the result value. Wait a minute. cm3/mn READY Version 1.04a User guide ATEQ 6th series Page 2/3...
- Page 173 If the option "Pa DISPLAY" is validated by mbar cm3/mn "Yes" in the parameters, the leak result with 0.260 cm3/mn the Pa unit is simultaneously displayed with 44 Pa the flow unit result. PRET Version 1.04a User guide ATEQ 6th series Page 3/3...
- Page 174 Run program: to access directly to the current program parameters (run program). Last results: to access directly to the test results menu. Password: to be allow to type the password for parameters access. Version 1.04a User guide ATEQ 6th series Page 1/1...
- Page 175 LAST RESULTS menu: to display the 6 lasts P001(PB) P001(PB) tests results carried on by the device. P001(PB) Note: these results are lost when the device is P001(PB) P001(PB) powering off. Results Reset Version 1.04a User guide ATEQ 6th series Page 1/2...
- Page 176 Note: this menu appears if the print conditions REWORK are activated in the RS232 menu. ALARM PRINT ALL STATS The "RESET ALL STATS" menu resets all the RESET ALL STATS statistics of all the programs. Version 1.04a User guide ATEQ 6th series Page 2/2...
- Page 177 Parameters Save Configuration Save Select the menu with the keys and validate with the key. The device confirms the cloning. PARAMETERS SAVING The saving may take several seconds. IN PROGRESS… Version 1.04a User guide ATEQ 6th series Page 1/1...
- Page 178 Then adjust the pre-fill and fill values in the program parameters. Note: adjust the pre-dump time parameter to 0 seconds for not dumping the part between the pre-fill and the fill. Version 1.04a User guide ATEQ 6th series Page 1/1...
- Page 179 Do not plug two USB components together! 2. LOWER SIDE CONNECTORS Example of lower side face: Note: following the versions and the purchase options, the customer device may be different from the example shown above. Version 1.04a User guide ATEQ 6th series Page 1/7...
- Page 180 Not used Pin 9 Not used 3.2.1. 1) Examples of RS232 cables 9 pin SubD 25 pin SubD 9 pin SubD 9 pin SubD ATEQ User ATEQ User connector connector connector connector Version 1.04a User guide ATEQ 6th series Page 2/7...
- Page 181 EVICENET ROFINET OR THERNET ONNECTORS OPTION 3.3.1. Devicenet Input (option) To connect to others ATEQ devices (M12 male connector). 3.3.2. J2 Devicenet output (option) To connect to others ATEQ devices (M12 female connector). 3.3.3. Wiring Devicenet Pin 1 Drain Pin 3...
- Page 182 Input 4 (NPN or PNP)* Pin 14 Ground Analogue outputs Pin 15 Input 5 (NPN or PNP)* Pin 16 Ground * Inputs NPN or PNP following the strap position on the board. Version 1.04a User guide ATEQ 6th series Page 4/7...
- Page 183 J3 connector too. Customer (Pr 8 + 1) + 24 V DC (Programmable input) Common Good part INPUTS Test fail part NPN MODE Reference fail part Alarm End of cycle Ground Version 1.04a User guide ATEQ 6th series Page 5/7...
- Page 184 (Pr 8 + 1) (Programmable input) Common 0,2 A Good part 0,3 A Max Test fail part with ATEQ 24 V DC Reference fail part Alarm 0,2 A End of cycle Ground Version 1.04a User guide ATEQ 6th series Page 6/7...
- Page 185 (input 8) (input 9) 17 à 32 33 à 64 65 à 128 With x who takes the 0 or 1 value in function of the program number to be called. Version 1.04a User guide ATEQ 6th series Page 7/7...
- Page 186 Do not plug two USB components together! 2. REAR SIDE CONNECTORS Example of rear face: Note: following the versions and the purchase options, the customer device may be different from the example shown above. Version 1.04a User guide ATEQ 6th series Page 1/8...
- Page 187 See the paragraph 2.3 "Connector I/O all or nothing". 2.1.3. Power supply with 100 / 240 V AC and On/Off switch (option) Supply the ATEQ F620 with the built in power supply, with a voltage between 100 and 240 V AC.
- Page 188 Pin 7 control signal) Pin 2 Not used Pin 5 DGND (logic ground) Pin 8 Data Line B Pin 3 Data Line A Pin 6 VP (supply) Pin 9 Not used Version 1.04a User guide ATEQ 6th series Page 3/8...
- Page 189 2.3. C ONNECTOR EVICENET INPUT OR ANALOG OUTPUTS OPTION 2.3.1. Devicenet Input (option) To connect to others ATEQ devices (M12 male connector). 2.3.2. J2 Devicenet output (option) To connect to others ATEQ devices (M12 female connector). 2.3.3. Wiring Devicenet Pin 1...
- Page 190 J3 connector too. (Pr 8 + 1) + 24 V DC (Programmable input) Common Good part INPUTS Test fail part NPN MODE Reference fail part Alarm End of cycle Ground Version 1.04a User guide ATEQ 6th series Page 5/8...
- Page 191 (Pr 8 + 1) (Programmable input) Common 0,2 A Good part 0,3 A Max Test fail part with ATEQ 24 V DC Reference fail part Alarm 0,2 A End of cycle Ground Version 1.04a User guide ATEQ 6th series Page 6/8...
- Page 192 (input 8) (input 9) 17 à 32 33 à 64 65 à 128 With x who takes the 0 or 1 value in function of the program number to be called. Version 1.04a User guide ATEQ 6th series Page 7/8...
- Page 193 Input 5 (NPN or PNP)* Pin 16 Ground * Inputs NPN or PNP following the strap position on the board. 2.7.1. Rear face USB (option) The additional USB connector allows plugging the remote control. Version 1.04a User guide ATEQ 6th series Page 8/8...
- Page 194 Do not plug two USB components together! 2. REAR SIDE CONNECTORS Example of rear face: Note: following the versions and the purchase options, the customer device may be different from the example shown above. Version 1.04a User guide ATEQ 6th series Page 1/7...
- Page 195 100 / 240 V AC OWER SUPPLY WITH FF SWITCH OPTION Supply the ATEQ F620 with the built in power supply, with a voltage between 100 and 240 V AC. I: ON / O: OFF. 2.2. J1 RS232 C ONNECTOR PRINTER RS232: SubD 9 points male connector.
- Page 196 EVICENET ROFINET OR THERNET ONNECTORS OPTION 2.3.1. Devicenet Input (option) To connect to others ATEQ devices (M12 male connector). 2.3.2. J2 Devicenet output (option) To connect to others ATEQ devices (M12 female connector). 2.3.3. Wiring Devicenet Pin 1 Drain Pin 3...
- Page 197 200mA Max Output 5 End of cycle Output 5 End of cycle The compact mode is a software function which is activated in the CONFIGURATION/ AUTOMATISM / CHANGE I/O / OUTPUT menu. Version 1.04a User guide ATEQ 6th series Page 4/7...
- Page 198 J3 connector too. Customer (Pr 8 + 1) + 24 V DC (Programmable input) Common Good part INPUTS Test fail part NPN MODE Reference fail part Alarm End of cycle Ground Version 1.04a User guide ATEQ 6th series Page 5/7...
- Page 199 (Pr 8 + 1) (Programmable input) Common 0,2 A Good part 0,3 A Max Test fail part with ATEQ 24 V DC Reference fail part Alarm 0,2 A End of cycle Ground Version 1.04a User guide ATEQ 6th series Page 6/7...
- Page 200 (input 8) (input 9) 17 à 32 33 à 64 65 à 128 With x who takes the 0 or 1 value in function of the program number to be called. Version 1.04a User guide ATEQ 6th series Page 7/7...
- Page 201 The pneumatics connectors are located on the rear side. 1. PNEUMATICS TEST OUTPUTS These outputs enable parts to be connected (test, reference). The pressurization output is used for the addition of ATEQ accessories (Y valve). Inputs / Outputs on the rear side of the F620: < Exhaust Output Reference Output R >...
- Page 202 The air must be clean and dry. The supply pressure must always be between 4 and 8 bar (400 kPa and 800 kPa). See sheet 677 "Pneumatic supply". Version 1.04a User guide ATEQ 6th series Page 2/2...
- Page 203 PIEZO AUTO AZ : the default pressure unit you want and AZ SHORT Press UNIT mbar validate with the key. BLOW MODE DUMP LEVEL Note: this unit can be modified in the parameters menu. Version 1.04a User guide ATEQ 6th series Page 1/1...
- Page 204 Supervision: in this mode, the device switch automatically in supervision mode when his plugged to a PC fitted with ATEQ proprietary software, through USB connection. Version 1.04a User guide ATEQ 6th series Page 1/5...
- Page 205 R FAIL ALARM R. FAIL (nb of fail reference parts), PRESSURE OUT REWORKABLE ALARM (nb of alarm triggered), CALIBRATION PRESS OUT (nb of incorrect pressure), REWORKABLE (nb of recoverable parts), CALIBRATION. Version 1.04a User guide ATEQ 6th series Page 2/5...
- Page 206 Exports examples: (the following example is from a F5 version v1.18p device). The character " " represents a tab HT (09h). The character " " represents a space (20h). The character " " represents a carriage return CR (0Dh). Version 1.04a User guide ATEQ 6th series Page 3/5...
- Page 207 4F 57 30 36 31 36 1.1.2. Print parameters Print Frame Sending Cond. Print parameters: by pressing this button, the Export Print parameters program test parameters are printed or sent immediately. Version 1.04a User guide ATEQ 6th series Page 4/5...
- Page 208 Set FILL : 500.0 Max FILL : 960.0 Test FAIL : 100 Min FILL : 600.0 Ref. FAIL : 000 Set FILL : 800.0 Test FAIL : 000 Ref. FAIL : 000 Version 1.04a User guide ATEQ 6th series Page 5/5...
- Page 209 This is to check the communication between the various built in components through the CAN network (Controller Area Network). If the network has a defect, restart the device. If the issue persists, contact the ATEQ After Sales Service. 1. PROCEDURE...
- Page 210 The burst test runs currently only with volumes with a few tens cm Example: The above burst test is configured with: Ramp with 6 steps. Rise time: 4 seconds. Step Time: 2 seconds. Version 1.04a User guide ATEQ 6th series Page 1/4...
- Page 211 This function is used to set a maximum limit for the fill pressure. A warning is triggered if this limit is exceeded. 1.2.7. Minimum fill This function is used to set a minimum limit for the fill pressure. A warning is triggered if this limit is not reached. Version 1.04a User guide ATEQ 6th series Page 2/4...
- Page 212 This is target pessure, electronic regulator only, to generate the pressure ramps. 1.2.10. Number of steps (N. OF STEPS) This parameter is the number of steps in the burst test ramp (up and level). Version 1.04a User guide ATEQ 6th series Page 3/4...
- Page 213 External dump, see sheet #655, Valves codes and auxiliaries output 24 V, see sheet #609, End of cycle, see sheet #610, Mini valve, see sheet #611, Stamp, see sheet #617, Buzzer, see sheet #639. Version 1.04a User guide ATEQ 6th series Page 4/4...
- Page 214 This document is the exclusive property of ATEQ. It may not be communicated, reproduced or used without prior consent.
Need help?
Do you have a question about the PRIMUS F Series and is the answer not in the manual?
Questions and answers