
Related Manuals for Yetter SCREW ADJUST


Summary of Contents for Yetter SCREW ADJUST
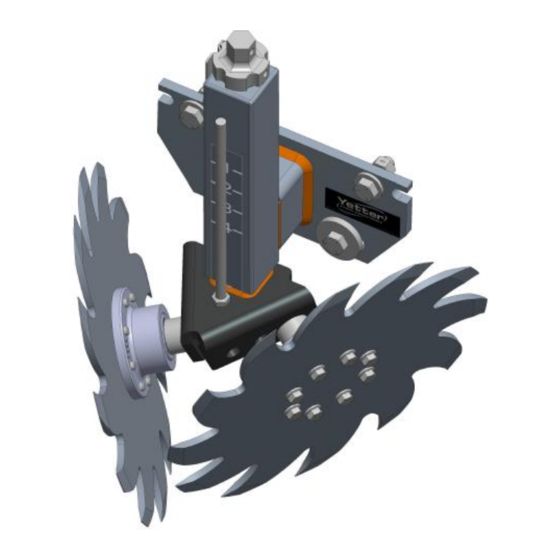
- Page 1 SCREW ADJUST RESIDUE MANAGER OPERATOR’S MANUAL PARTS IDENTIFICATION 2565-729_REV_J • 06/2021 YETTER MANUFACTURING CO. FOUNDED 1930 Colchester, IL 62326-0358 Toll free: 800/447-5777 309/776-3222 (Fax) Website: www.yetterco.com E-mail: info@yetterco.com...
-
Page 2: Forward
WARRANTY Yetter Manufacturing warrants all products manufactured and sold by it against defects in material. This warranty being expressly limited to replacement at the factory of such parts or products as shall appear to be defective after inspection. -
Page 3: Safety Information
SAFETY A brief description of signal words that may be used in this manual: CAUTION: Used as a general reminder of good safety practices or to direct attention to unsafe practices. WARNING: Denotes a specific potential hazard. DANGER: Denotes the most serious specific potential hazard. SAFETY PRECAUTIONS You can make your farm a safer place to live and work if you observe the safety precautions given. -
Page 4: Table Of Contents
TABLE OF CONTENTS Forward…..………………………………………………………….……. 2 Warranty……………………………….…………………………….……..2 Safety Information………………………………………………….……...3 Table of Contents………………………………………………….………4 Bolt Torque………………………………………………………….……...5 Planter Adjustments……………………………………………………….6-8 Installations Instructions..…………….…….……………………….……9-11 Maintenance……………………………………………………………...12-13 Parts Identification………………………………..……………..………14-31... -
Page 5: Bolt Torque
BOLT TORQUE Mounting bolts and hardware Before operating the Residue Manager for the first time, check to be sure that all hardware is tight. Check all hardware again after approximately 50 hours of operation and at the beginning of each planting season. All hardware used on the Residue Manager is Grade 5 unless otherwise noted. - Page 6 IMPORTANT: failure to properly set the planter frame height and levelness can result in less than successful operation of the planter and the Yetter product and may result in damaged equipment. All operators should read and thoroughly understand the instructions given prior to using the Yetter product.
-
Page 7: Planter Adjustments
PLANTER ADJUSTMENT... - Page 8 OPERATION Be sure planter frame is LEVEL and at the height stated in the planter operation manual. The Residue Manager is designed to work in heavy residue situations especially where minimum soil movement is required. Depending on conditions and objectives, the 2967 Residue Manager can be set shallow with the teeth only engaged in the residue so as to clear heavy residue with minimal soil disturbance.
-
Page 9: Installations Instructions
INSTALLATION INSTRUCTIONS STEP 1. Choose the mounting hole in which to attach the R.M. wheels. Attach the R.M. wheels/hub/shield assemblies to the stem adjustment bracket using 5/8” lock washers and hex nuts. Adjust the bearing shield to top dead center, rotate slightly forward. Torque to 150 ft./lbs. - Page 10 INSTALLATION INSTRUCTIONS STEP 2A. Attach the screw adjust residue manager assembly to the planter row unit using 2) ½” x 3-1/2” hex bolts and ½” lock nuts. 2967-053...
- Page 11 INSTALLATION INSTRUCTIONS STEP 2B. Attach the screw adjust residue manager assembly to the planter row unit using 3) ½” x 1-1/2” hex bolts, flat washers and ½” lock nuts. 2967-052 STEP 3. Align the residue wheels to the planter opener blades. The residue manager mount bracket has slotted holes in the faceplate to move the residue manager wheels side to side;...
-
Page 12: Maintenance
STEP 1. Regularly inspect the residue manager for loose or worn bolts. Repair and replace as needed. Use “BLUE” thread lock (removable) if bolts that secure the detent plate become loose from vibration. STEP 2. Lubricate the screw adjust using #2 multi-purpose polyurea grease every 50 hours. Lubrication CAUTION: To help prevent serious injury or death to you or others caused by unexpected movement, service machine on a level surface. - Page 13 Clean machine thoroughly to remove all dirt, debris and crop residue, which would hold moisture and cause rusting. Inspect machine for worn or broken parts. See your Yetter Farm Equipment dealer during the off-season so that parts or service can be acquired when machine is not needed in the field.
-
Page 14: Parts Identification
PARTS IDENTIFICATION 2966-107... - Page 15 PARTS IDENTIFICATION 2966-109...
- Page 16 PARTS IDENTIFICATION 2966-112 NARROW...
- Page 17 PARTS IDENTIFICATION 2966-114 NARROW (LONG ARM)
- Page 18 PARTS IDENTIFICATION 2966-115 (LONG ARM)
- Page 19 PARTS IDENTIFICATION 2966-127 WHITE 8000...
- Page 20 PARTS IDENTIFICATION 2967-052A-ST...
- Page 21 PARTS IDENTIFICATION 2967-053A-ST...
- Page 22 PARTS IDENTIFICATION 2967-054A-BW NARROW ROW...
- Page 23 PARTS IDENTIFICATION 2967-056A NARROW ROW (LONG ARM)
- Page 24 PARTS IDENTIFICATION 2967-057A-ST (LONG ARM)
- Page 25 PARTS IDENTIFICATION 2967-058A-BW WHITE 8000...
- Page 26 PARTS IDENTIFICATION 2966-102 RIGHT HAND SPOKE WHEEL (SHOWN) 2966-103 LEFT HAND SPOKE WHEEL 2966-102-BW RIGHT HAND BEVELED WHEEL (SHOWN) 2966-103-BW LEFT HAND BEVELED WHEEL...
- Page 27 PARTS IDENTIFICATION 2966-102-ST RIGHT HAND SHARK WHEEL (SHOWN) 2966-103-ST LEFT HAND SHARK WHEEL...
- Page 28 PARTS IDENTIFICATION 2966-117 LEFT HAND TAPER TOOTH WHEEL (SHOWN) 2966-116 RIGHT HAND TAPER TOOTH WHEEL...
- Page 29 PARTS IDENTIFICATION 2966-117-BW LEFT HAND BEVELED WHEEL (SHOWN) 2966-116-BW RIGHT HAND TAPER TOOTH WHEEL...
- Page 30 PARTS IDENTIFICATION 2966-116-ST RIGHT HAND SHARK TOOTH WHEEL (SHOWN) 2966-117-ST LEFT HAND SHARK TOOTH WHEEL...
- Page 31 PARTS IDENTIFICATION...
- Page 32 2565-729_REV_J 06/2021...
Need help?
Do you have a question about the SCREW ADJUST and is the answer not in the manual?
Questions and answers